How to make a three-element percussion part in Thorn CM
Sequence a complete percussive line using just one instance of Dmitry Sches’ awesome synth
One of the most powerful instruments in the CM Plugins collection, available with every issue of Computer Music, Thorn CM is a two-oscillator-plus-noise spectral synthesis monster, featuring the incredible Glitch Sequencer for funky step-based modulation of filters, note repeats and more.
Like any synth, Thorn CM spends most of its time generating basses, pads, leads and other melodic parts, but its rich array of waveforms and versatile noise oscillator make it a great candidate for percussion, too. Not only that, but with two multi-stage envelope generators, an arpeggiator and two LFOs onboard, that percussion can even be ‘sequenced’, with playback triggered by a single held note.
In this tutorial, we’ll show you how to put together a glitchy three-element percussion part using just one Thorn CM, comprising a hi-hat line, a bell-like sound and a faux triangle.
It’s worth pointing out that you get even more percussion design potential with the full Thorn, of course, including, most notably, separate routing of each oscillator to either or both of two filters, enabling the frequency content of each layer to be shaped individually.
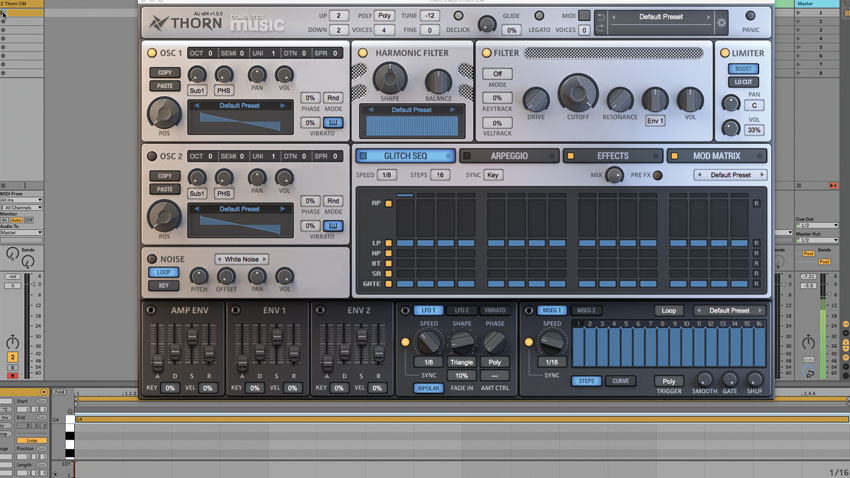
Step 1: Here’s a kick drum, generated by Thorn CM, to which we’ll add a three-layer percussion line, also generated in a single instance of Thorn CM. Start by creating a new MIDI Track, loading Thorn CM onto it, raising the global Volume to 33% and programming a one-bar long C4 note to trigger the synth.
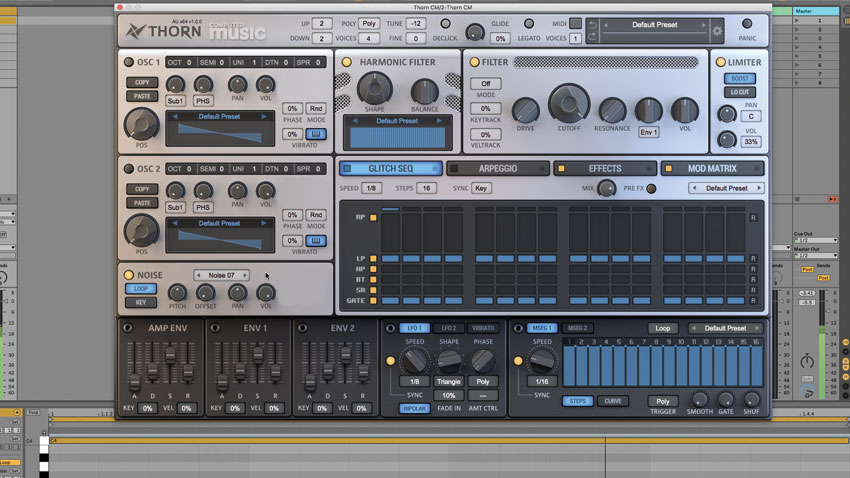
Step 2: First, a 16th-note hi-hat. Thorn CM’s Noise oscillator, with its rich assortment of sampled sources, is ideal. Having muted Osc 1 and turned the Noise oscillator on, audition noise types for something ‘metallic’. Noise 7 fits the bill. Leave Loop active: we need a continuous sound from which to carve a rhythm.
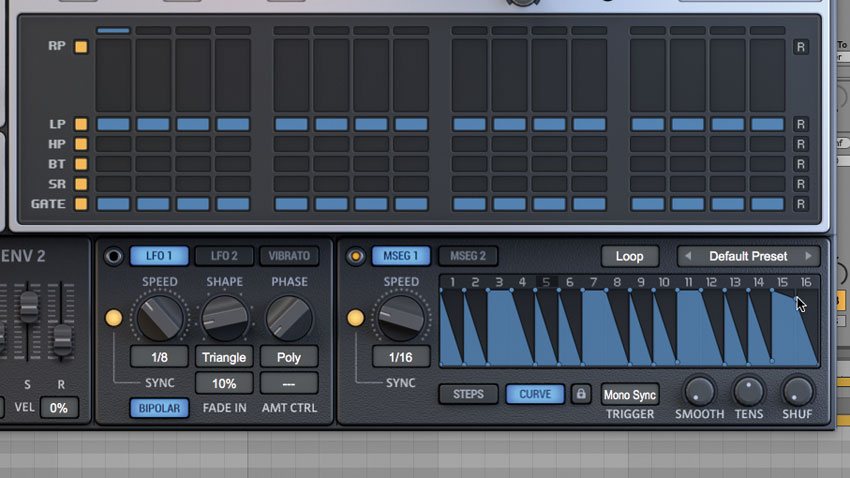
Step 3: Lower the Noise osc’s Volume to 0, and assign Multi-Stage Envelope 1 to modulate it. Set MSEG1’s Trigger to Mono Sync. Switch to Curve mode and draw a 16th-note sequence by right-clicking to add nodes, then dragging the nodes around to shape the envelope. Ensure your sequence is exactly 16 steps long.
Get the MusicRadar Newsletter
Want all the hottest music and gear news, reviews, deals, features and more, direct to your inbox? Sign up here.
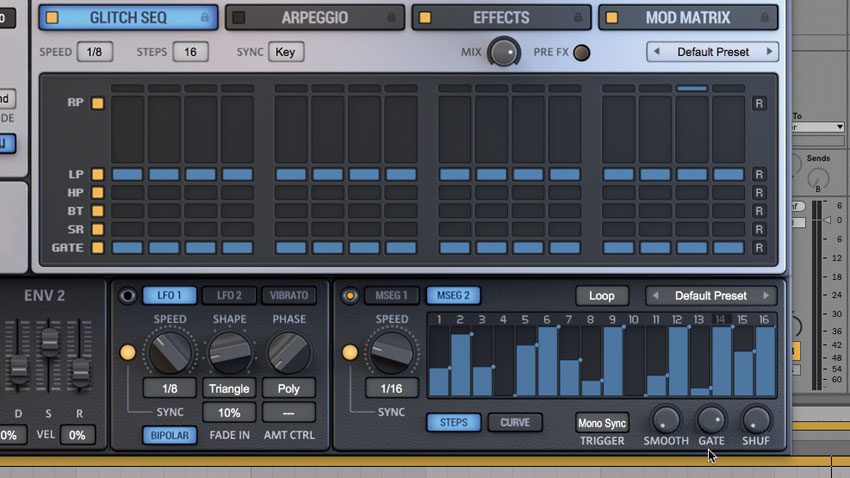
Step 4: Activate Osc 1 and assign MSEG2 to modulate its volume. Program a syncopated rhythm in Steps, then tour the oscillator waveforms and play with Position control, Spectral Effects and MSEG Gate time till you find something you like - we’ve picked Woody Square (Position 86%, Comb 60%, Gate 80%).
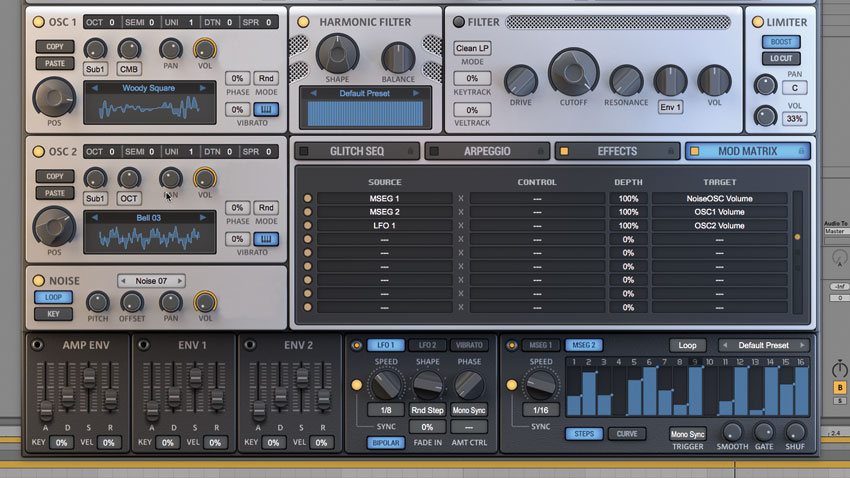
Step 5: For the third layer, assign LFO1 to Osc 2’s fully lowered Volume control. Lower LFO1’s Fade In to 0% and set trigger mode to Mono Sync. Set the waveshape to Random Step and Speed to 1/8 for a randomised eighth-note pattern. Again, explore the oscillator to find a percussive tone you like.
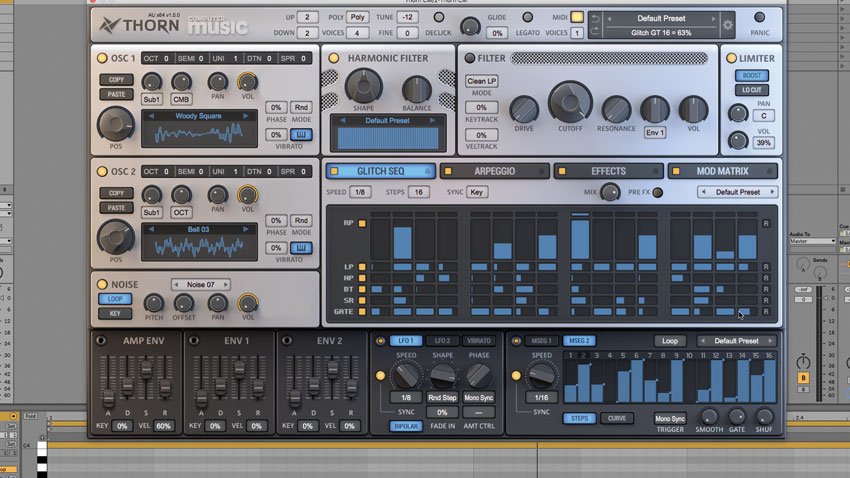
Step 6: Lastly, play with the Glitch Sequencer to modulate repeats, filtering, sample rate, bit depth and gate time; and - with Amp Envelope’s Velocity parameter raised - program the Arpeggiator to control trigger velocity. Don’t touch the Arpeggiator’s Note lane, however, unless you want more melodic percussion.
Computer Music magazine is the world’s best selling publication dedicated solely to making great music with your Mac or PC computer. Each issue it brings its lucky readers the best in cutting-edge tutorials, need-to-know, expert software reviews and even all the tools you actually need to make great music today, courtesy of our legendary CM Plugin Suite.


