How to make a bone guitar nut
Learn how to make your own with our DIY guide

Nuts are not as simple as they appear: each one should be made bespoke for the guitar. A bad or worn-out nut can give you an array of symptoms: poor tuning, action and intonation.
Sometimes, it’s been bad since the day it was made! Bone is a traditional material that machines well and has the great advantage of being porous, meaning tuning lubricant is absorbed permanently. It’s also the right amount of tough and it won’t wear out prematurely from tuning and doing tremolo dive bombs.
You’ll need some specialist files for this job - there’s no way around it - but most of the other tools are commonplace. We regularly use the Stewart Macdonald double-edged gauged nut files. Remember, having the right tools isn’t everything: they still require skilful use. We’ve not yet found a pre-made nut that’s ready to fit with no adjustment. Spend time making yours and you’ll see the benefits of this small, inconspicuous part!
What you need:
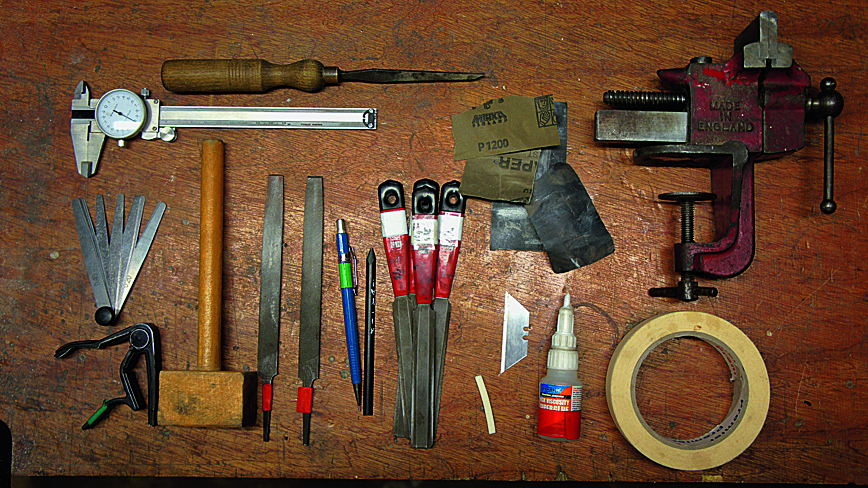
- Stanley blade
- Hammer
- Small chisel
- Calipers
- Bone blank
- Sharp pencil
- Half pencil
- Small flat files
- Small vice
- Nut spacing rule (optional)
- Superglue
- Gauged nut files
- Capo
- Feeler gauges
- Wet/dry paper (240, 400, 800, 1200, 2000 grit)
- Big Bends Nut Sauce
- Masking tape
Step 1
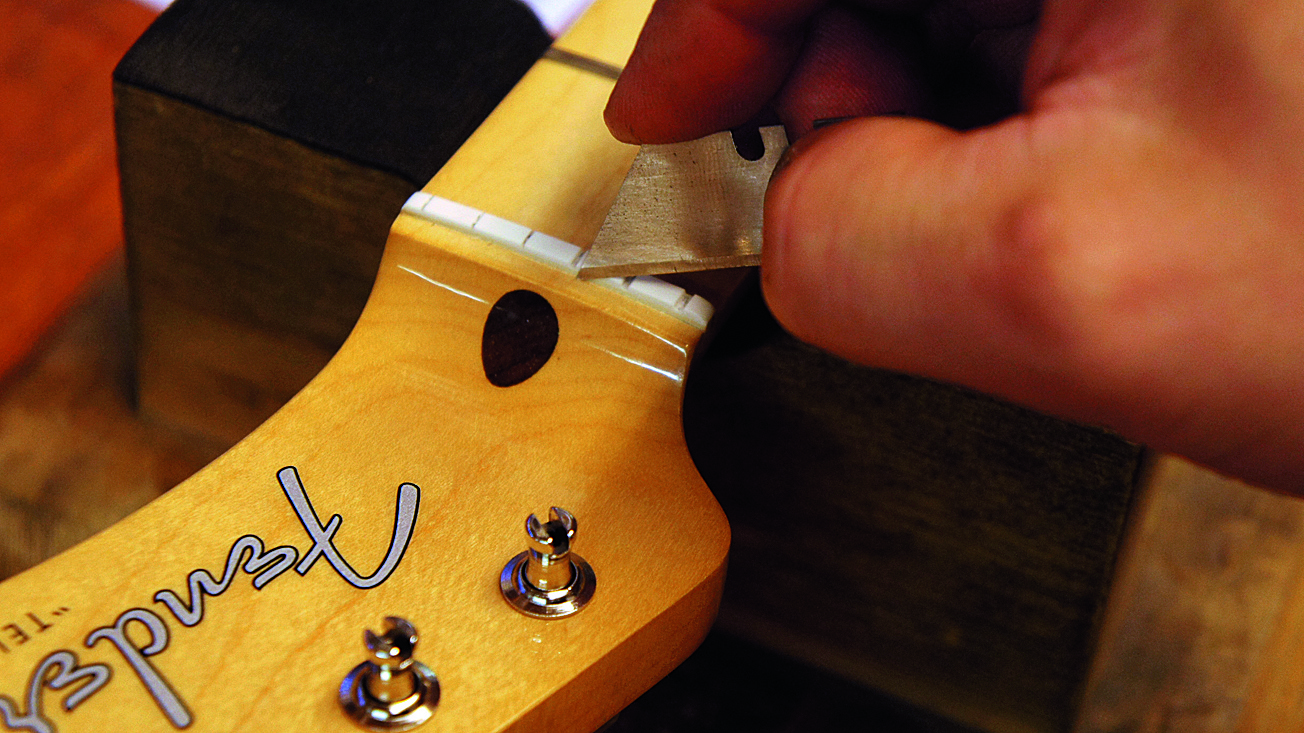
Out with the old: score around every edge of the old nut to cut through the lacquer. Most Fender and Gibson nuts are glued in before the paint job, if you tap out the nut without cleanly cutting the lacquer, you may chip it. Use a brand new Stanley blade.
Step 2
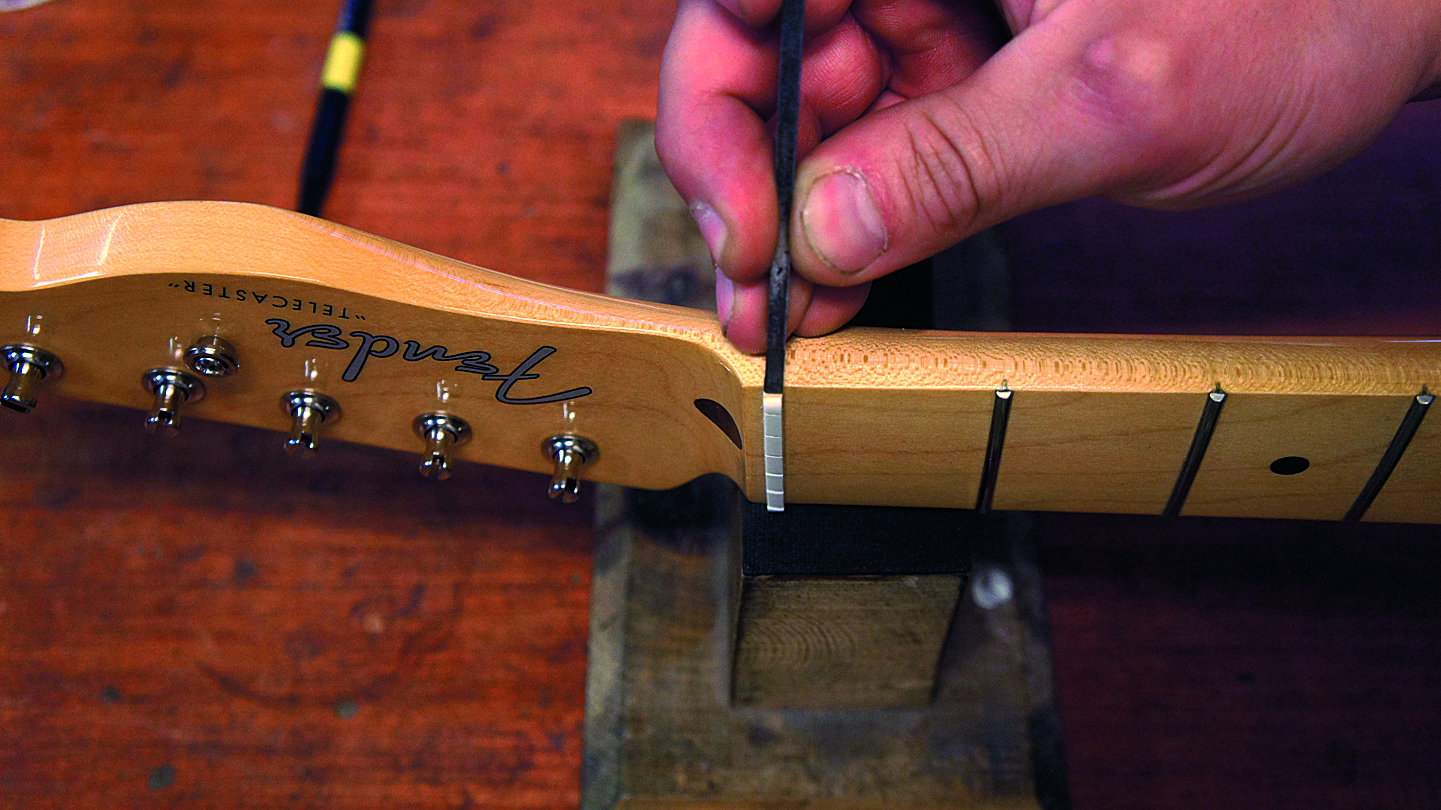
Time to see how well secured this old nut is… Use a thin chisel to drive out the old nut. We’re attacking from the ends with the chisel; it’s angled so the nut will lift up out of the slot it’s in. Tap gently with a light hammer on each end and you should get some movement. Be very careful!
Step 3
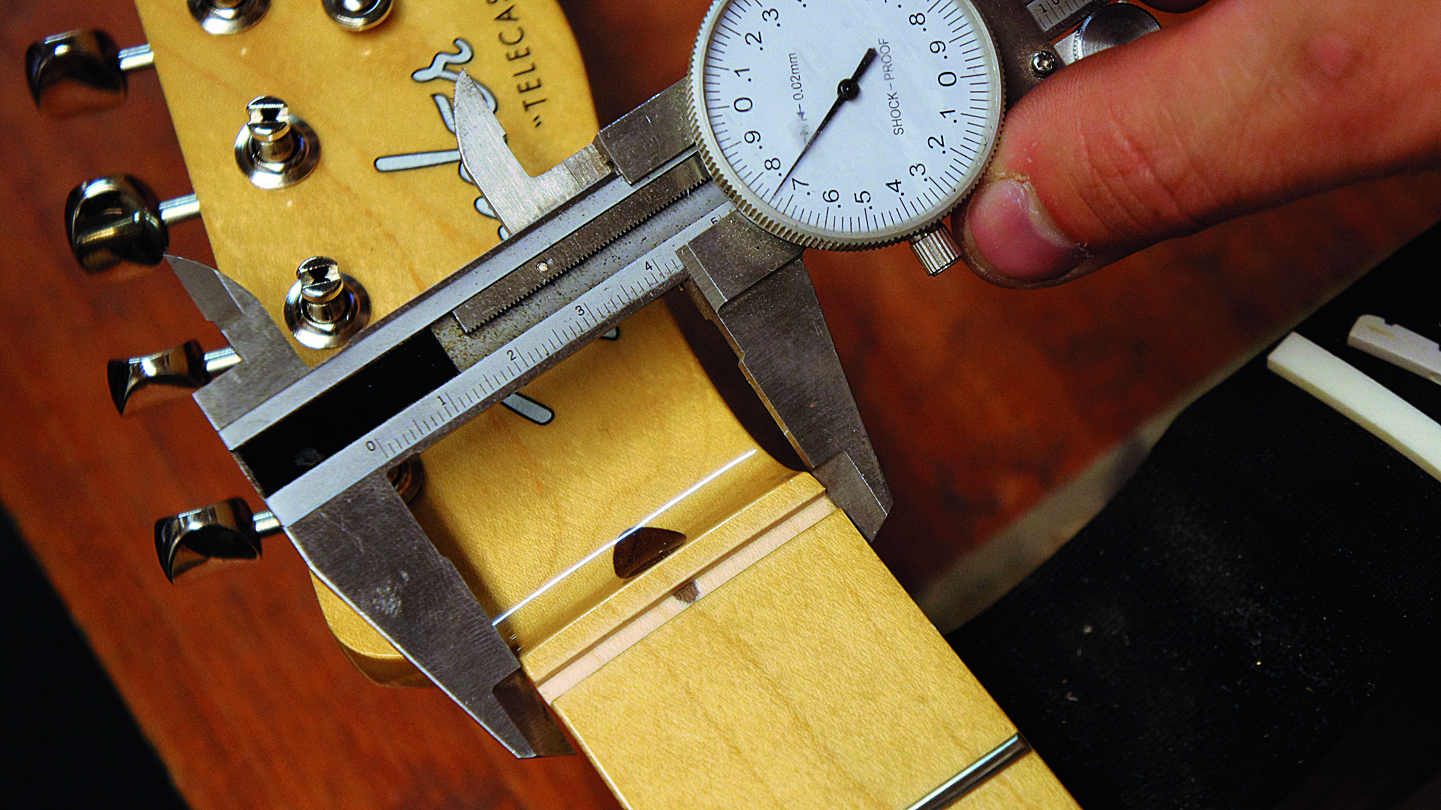
With the nut slot out, you may find some old glue that needs cleaning up. Measure the length and width of the nut. You want to use a piece of bone that’s too tight then sand it back to be a nice, snug fit. Sand the edges of the bone blank to leave a nice finish at the edges of the nut.
Step 4
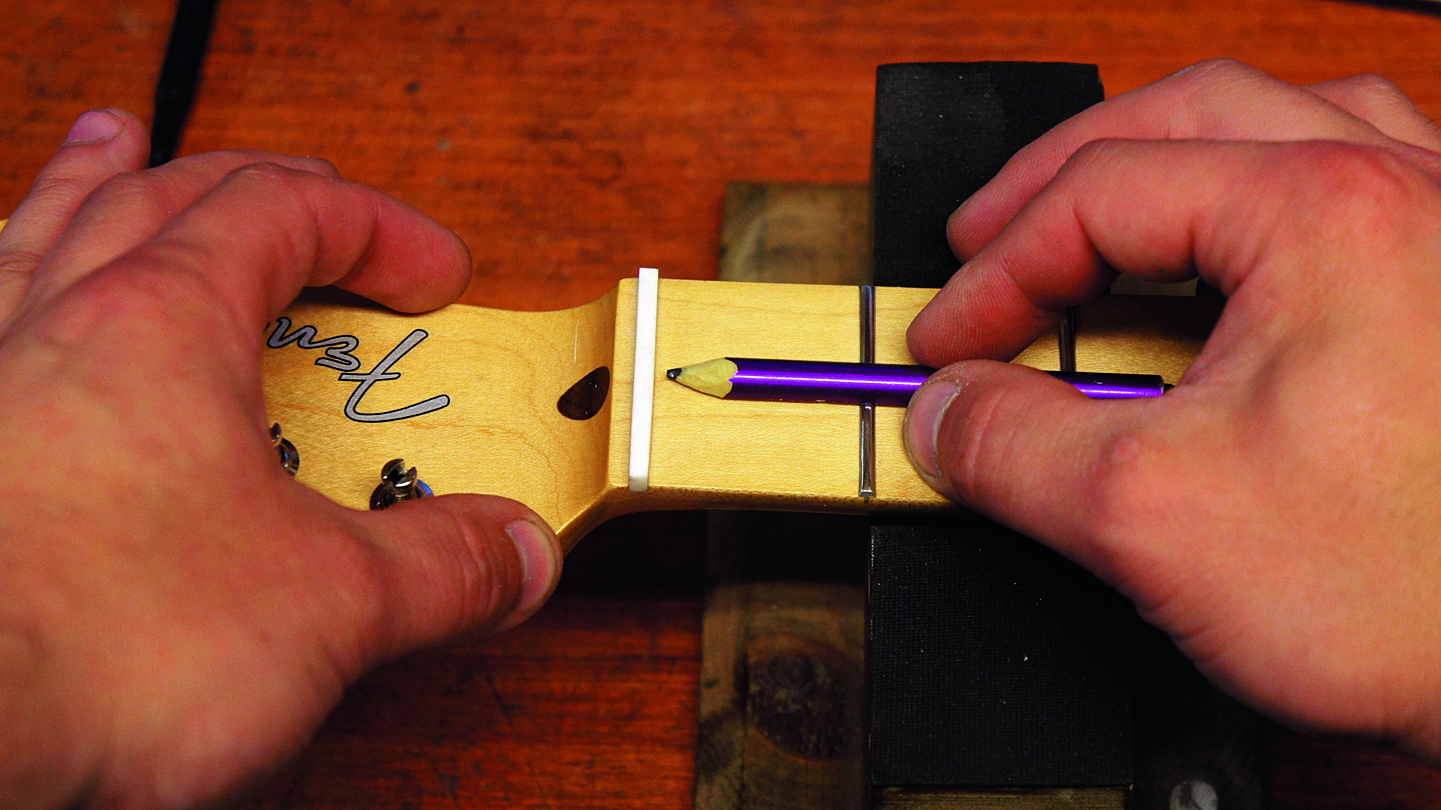
With the nut dry-fitted into its nut slot we’re going to use half a pencil to mark a rough top profile. Use a pencil sanded in half so its cross section is a semicircle. Lay this on the frets and draw up against the nut. This is a rough indication of where the string slots depth will end up.
Get the MusicRadar Newsletter
Want all the hottest music and gear news, reviews, deals, features and more, direct to your inbox? Sign up here.
Step 5
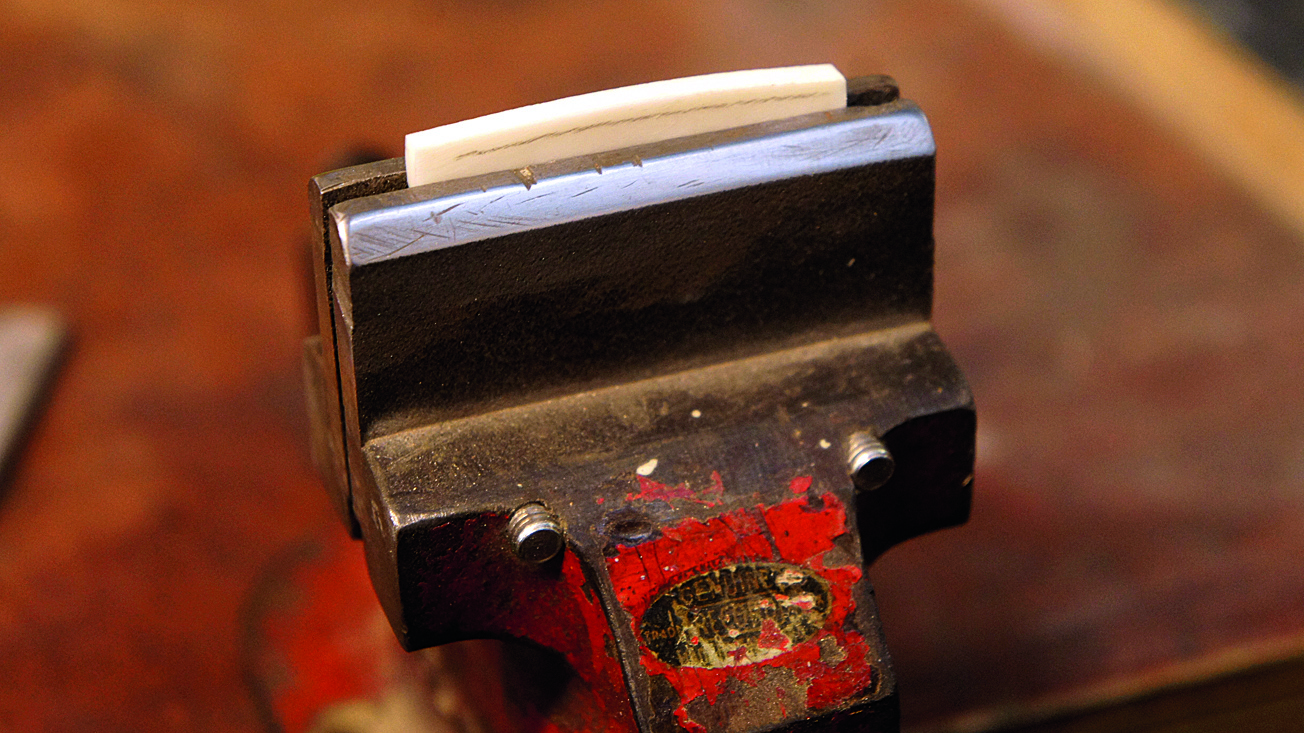
We’ve made this vice specifically as the workshop, it allows great access around the nut with files for shaping purposes. Take off the bulk of the top profile of the nut with a file. You should leave 1.5mm above the sixth string’s pencil line and 1mm above the first’s pencil line as a guide. We like to put a slight round-over on the top too.
Step 6
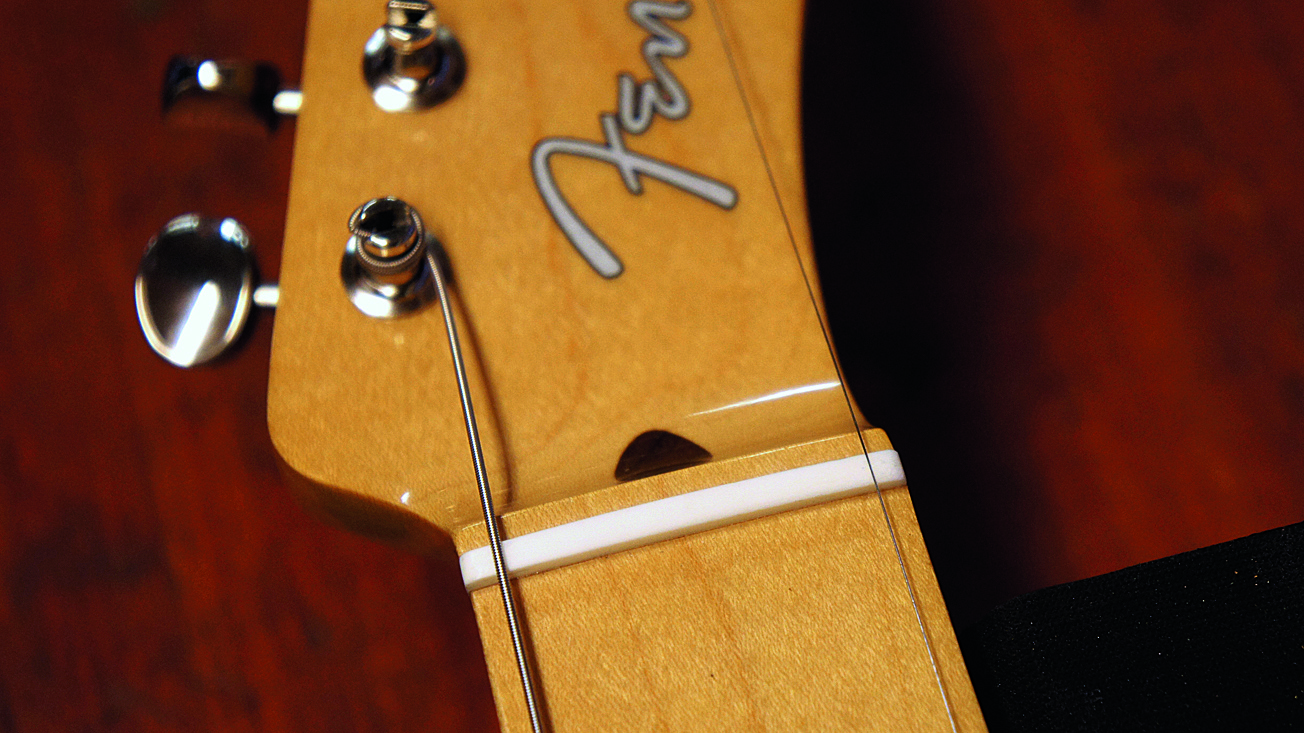
Glue in the nut with two small blobs of superglue only. Install the sixth and first strings only and eyeball their placement; you can play with a wider string spacing. Check that the strings stay on the fretboard properly all the way up the neck, (this can be due to other problems). Mark on your desired placement for the two string slots.
Step 7
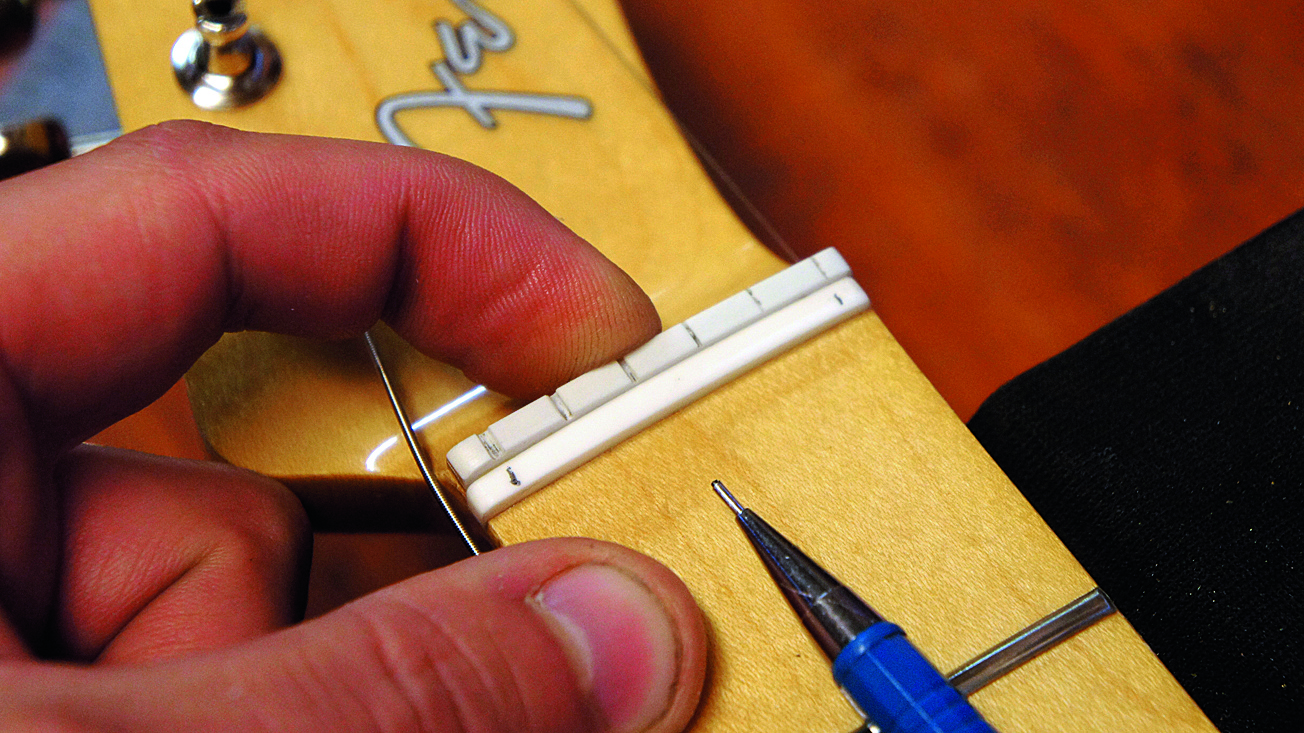
We’re making a direct copy here in spacing terms, so use the old nut as a guide - but a guide only. Never trust that an old nut has equal spacing. Even from a factory there are plenty of terribly spaced nuts! StewMac sell a graduated ‘string spacing rule’ for this purpose, that accounts for the strings getting thicker. Very clever!
Step 8
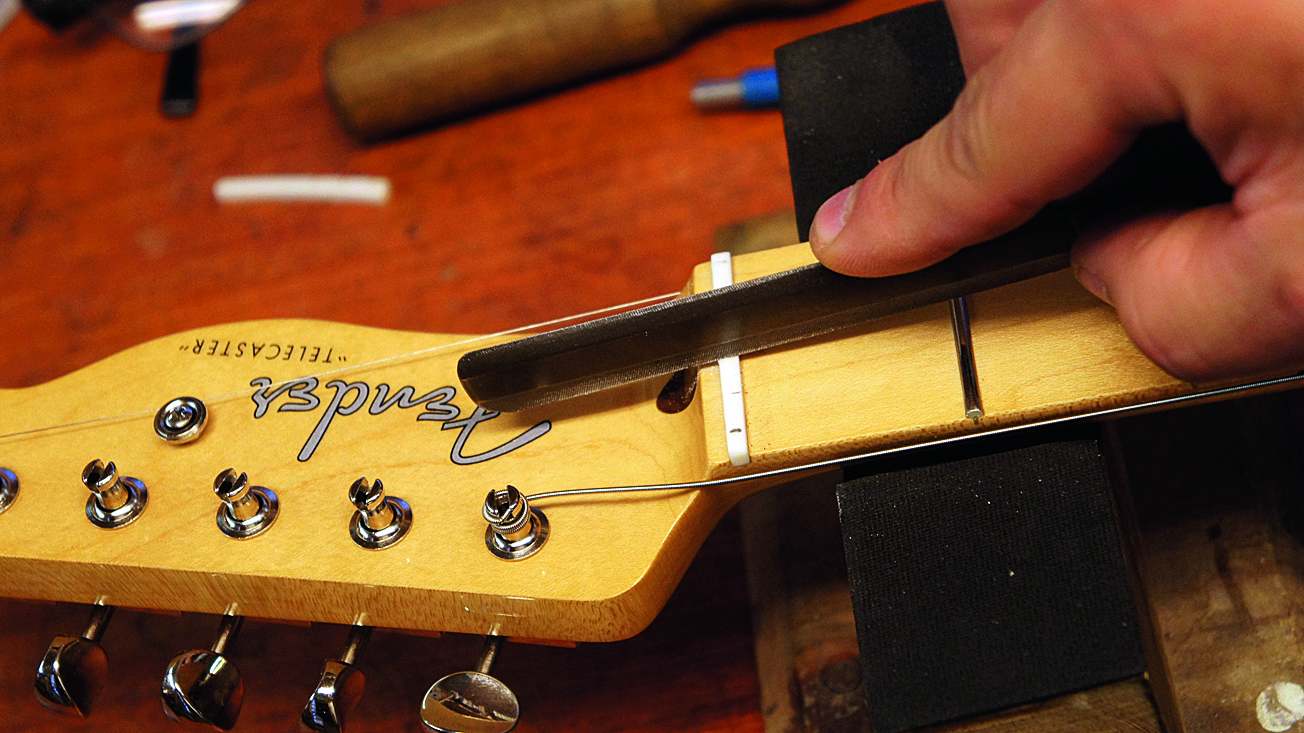
After you’ve very carefully checked spacing, take a nut file and make a nick in the nut top. This will serve as a starting point for our strings. Use your thumbnail as a file guide; you can roll side to side to really fine-tune the location of the cut. A couple of file strokes will do.
Step 9
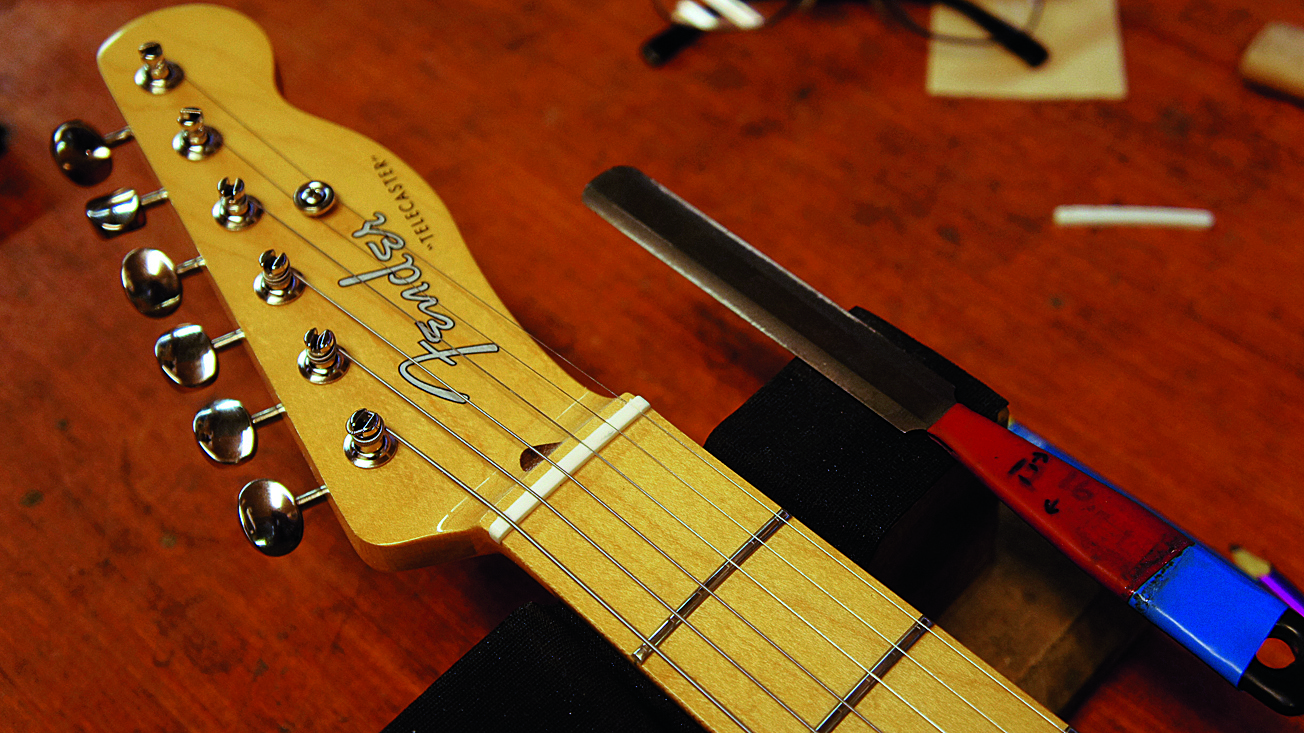
String up your guitar with your desired gauge of string. Tune it too as this presents the right tension for the neck. You cannot cut a nut without being under tension as the neck bows forward slightly under pressure at the nut. We need to account for this bow. Your truss rod must also be set correctly before the next step.
Step 10
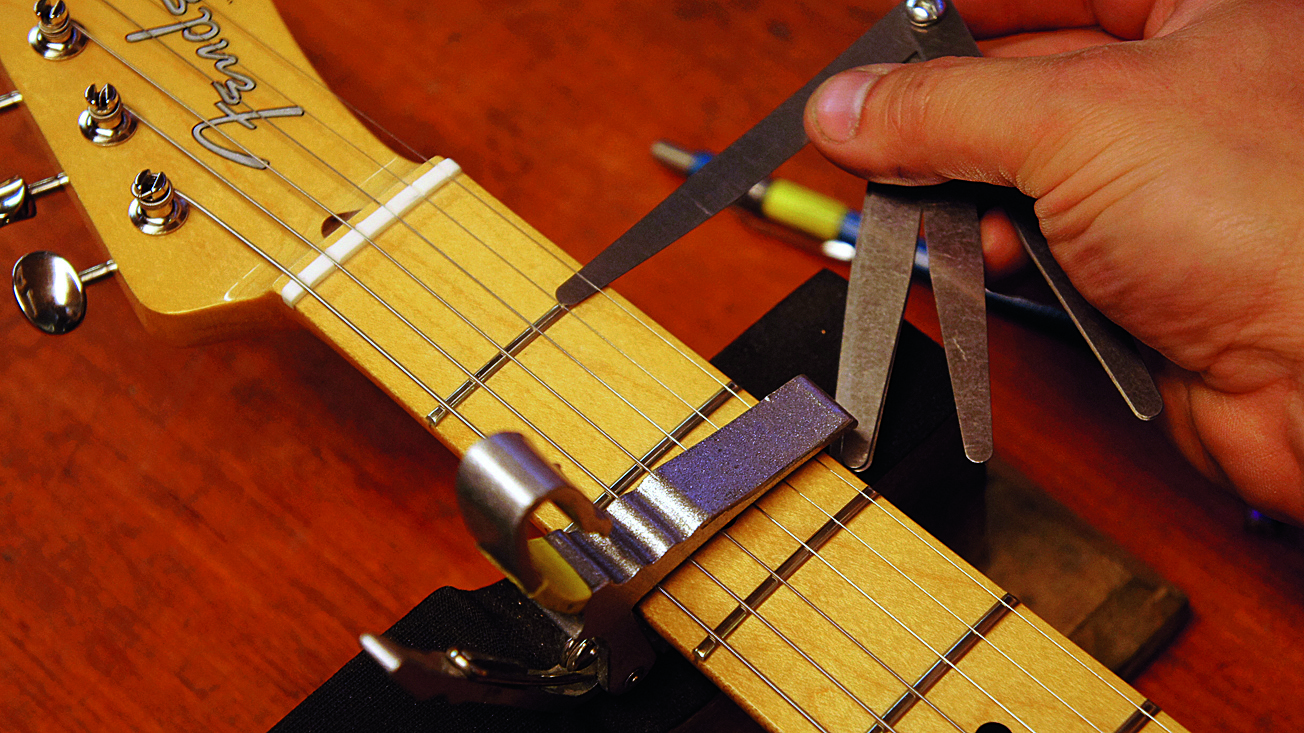
Let’s cut each slot to its final depth. Stick a capo on the 3rd fret, we’ll check the clearance over the 1st fret with a feeler gauge. The clearance should be .004" under the first string graduating to .008" under the sixth string. Cutting the slots too shallow will give you bad playability; cutting too deeply will buzz on the open strings.
Step 11
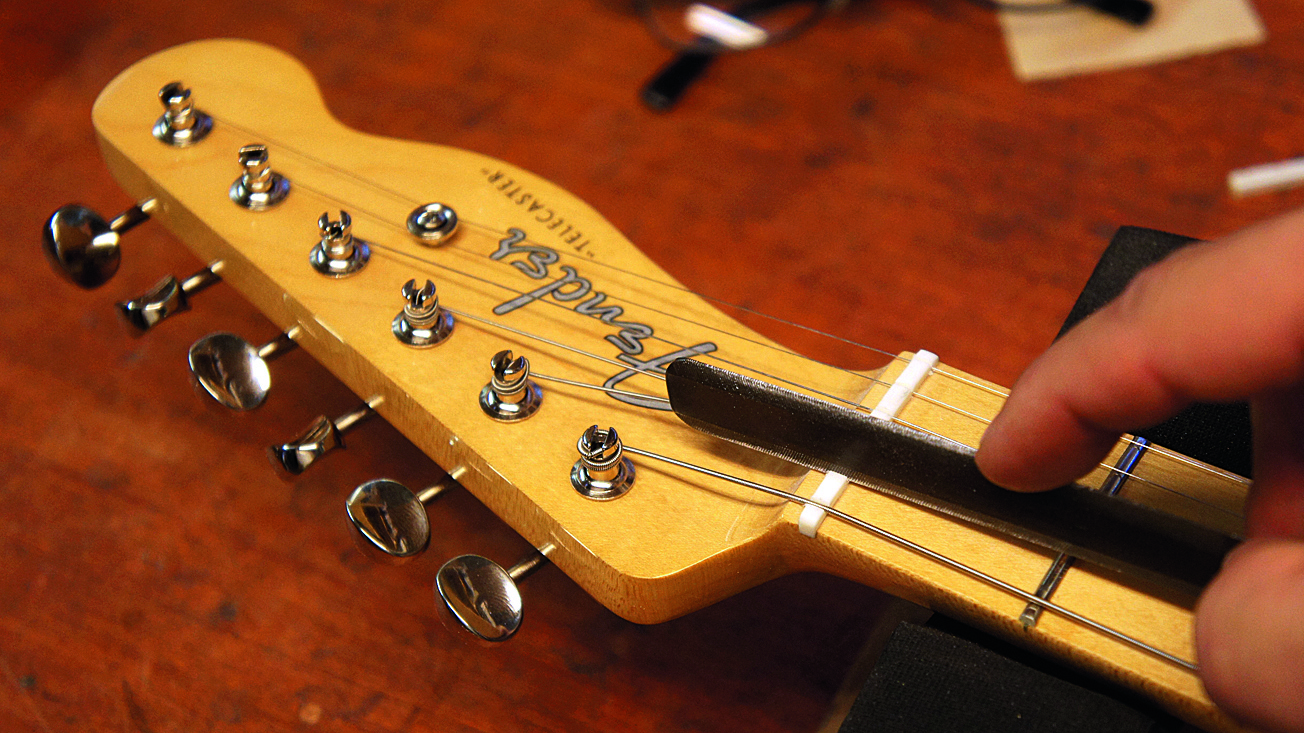
We use gauged, rounded-bottom files for this task; each string needs a different size slot. Use a shallow angle, aiming down to the headstock to ensure that the strings’ contact point is on the fretboard side of the nut. Work slowly and test your progress by re-tuning and checking the clearance with the capo and feeler gauge.
Step 12
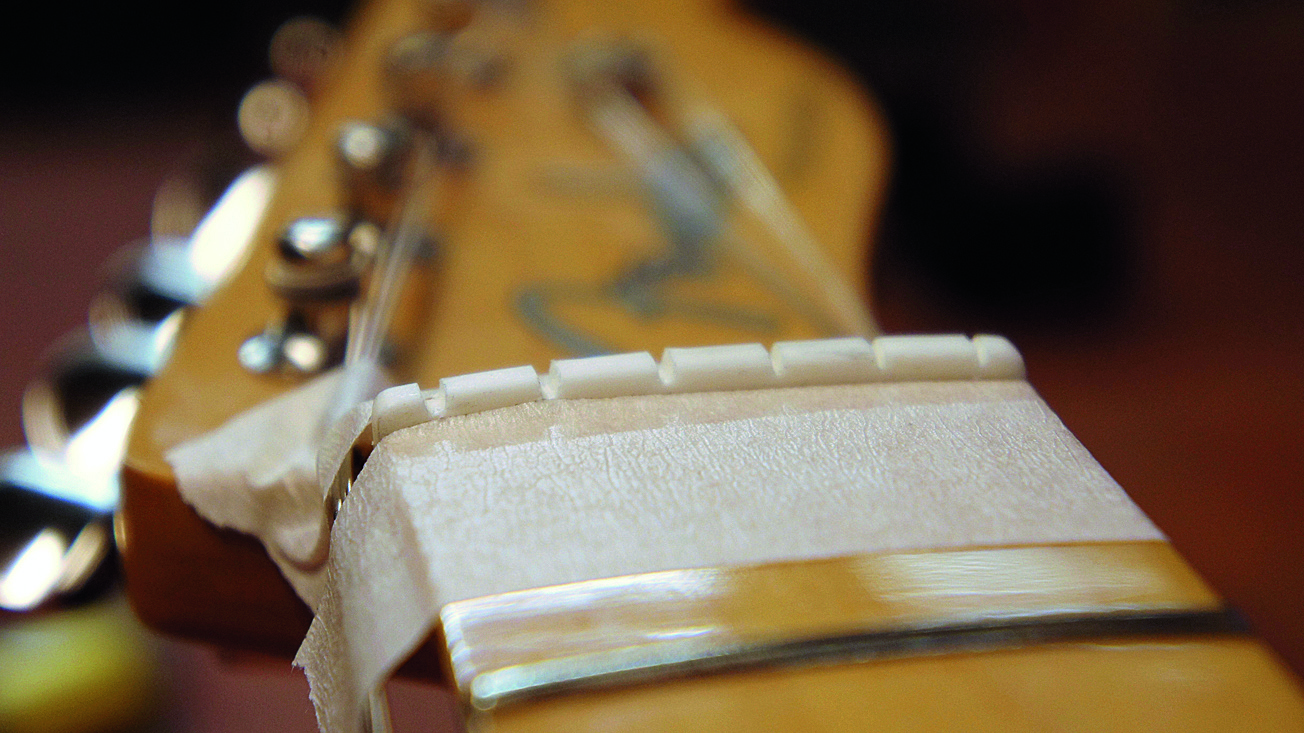
With the slots finished, let’s complete the top profile. Pull the strings out of the way and pop on some masking tape. Sand down with each grit of wet/dry paper ascending in grit number. Erase the previous paper’s scratch marks, all the way up to 200 grit. That’s no longer sanding, that’s polishing!
Jack runs an independent guitar setup and guitar repair service in Manchester, England. He serves the musicians of the Northwest of England, working on electric guitars, bass guitars, acoustic guitars and more. Jack has been writing the Fix Your Guitar column in Total Guitar Magazine since 2017.


