How to get started with Ableton Push 2 and Live 10.1
Use Ableton's hardware and software together to produce music
Ableton’s proprietary Push 2 controller for Live is a brilliant companion device that can speed up your workflow no end. Here's how to get started with it.
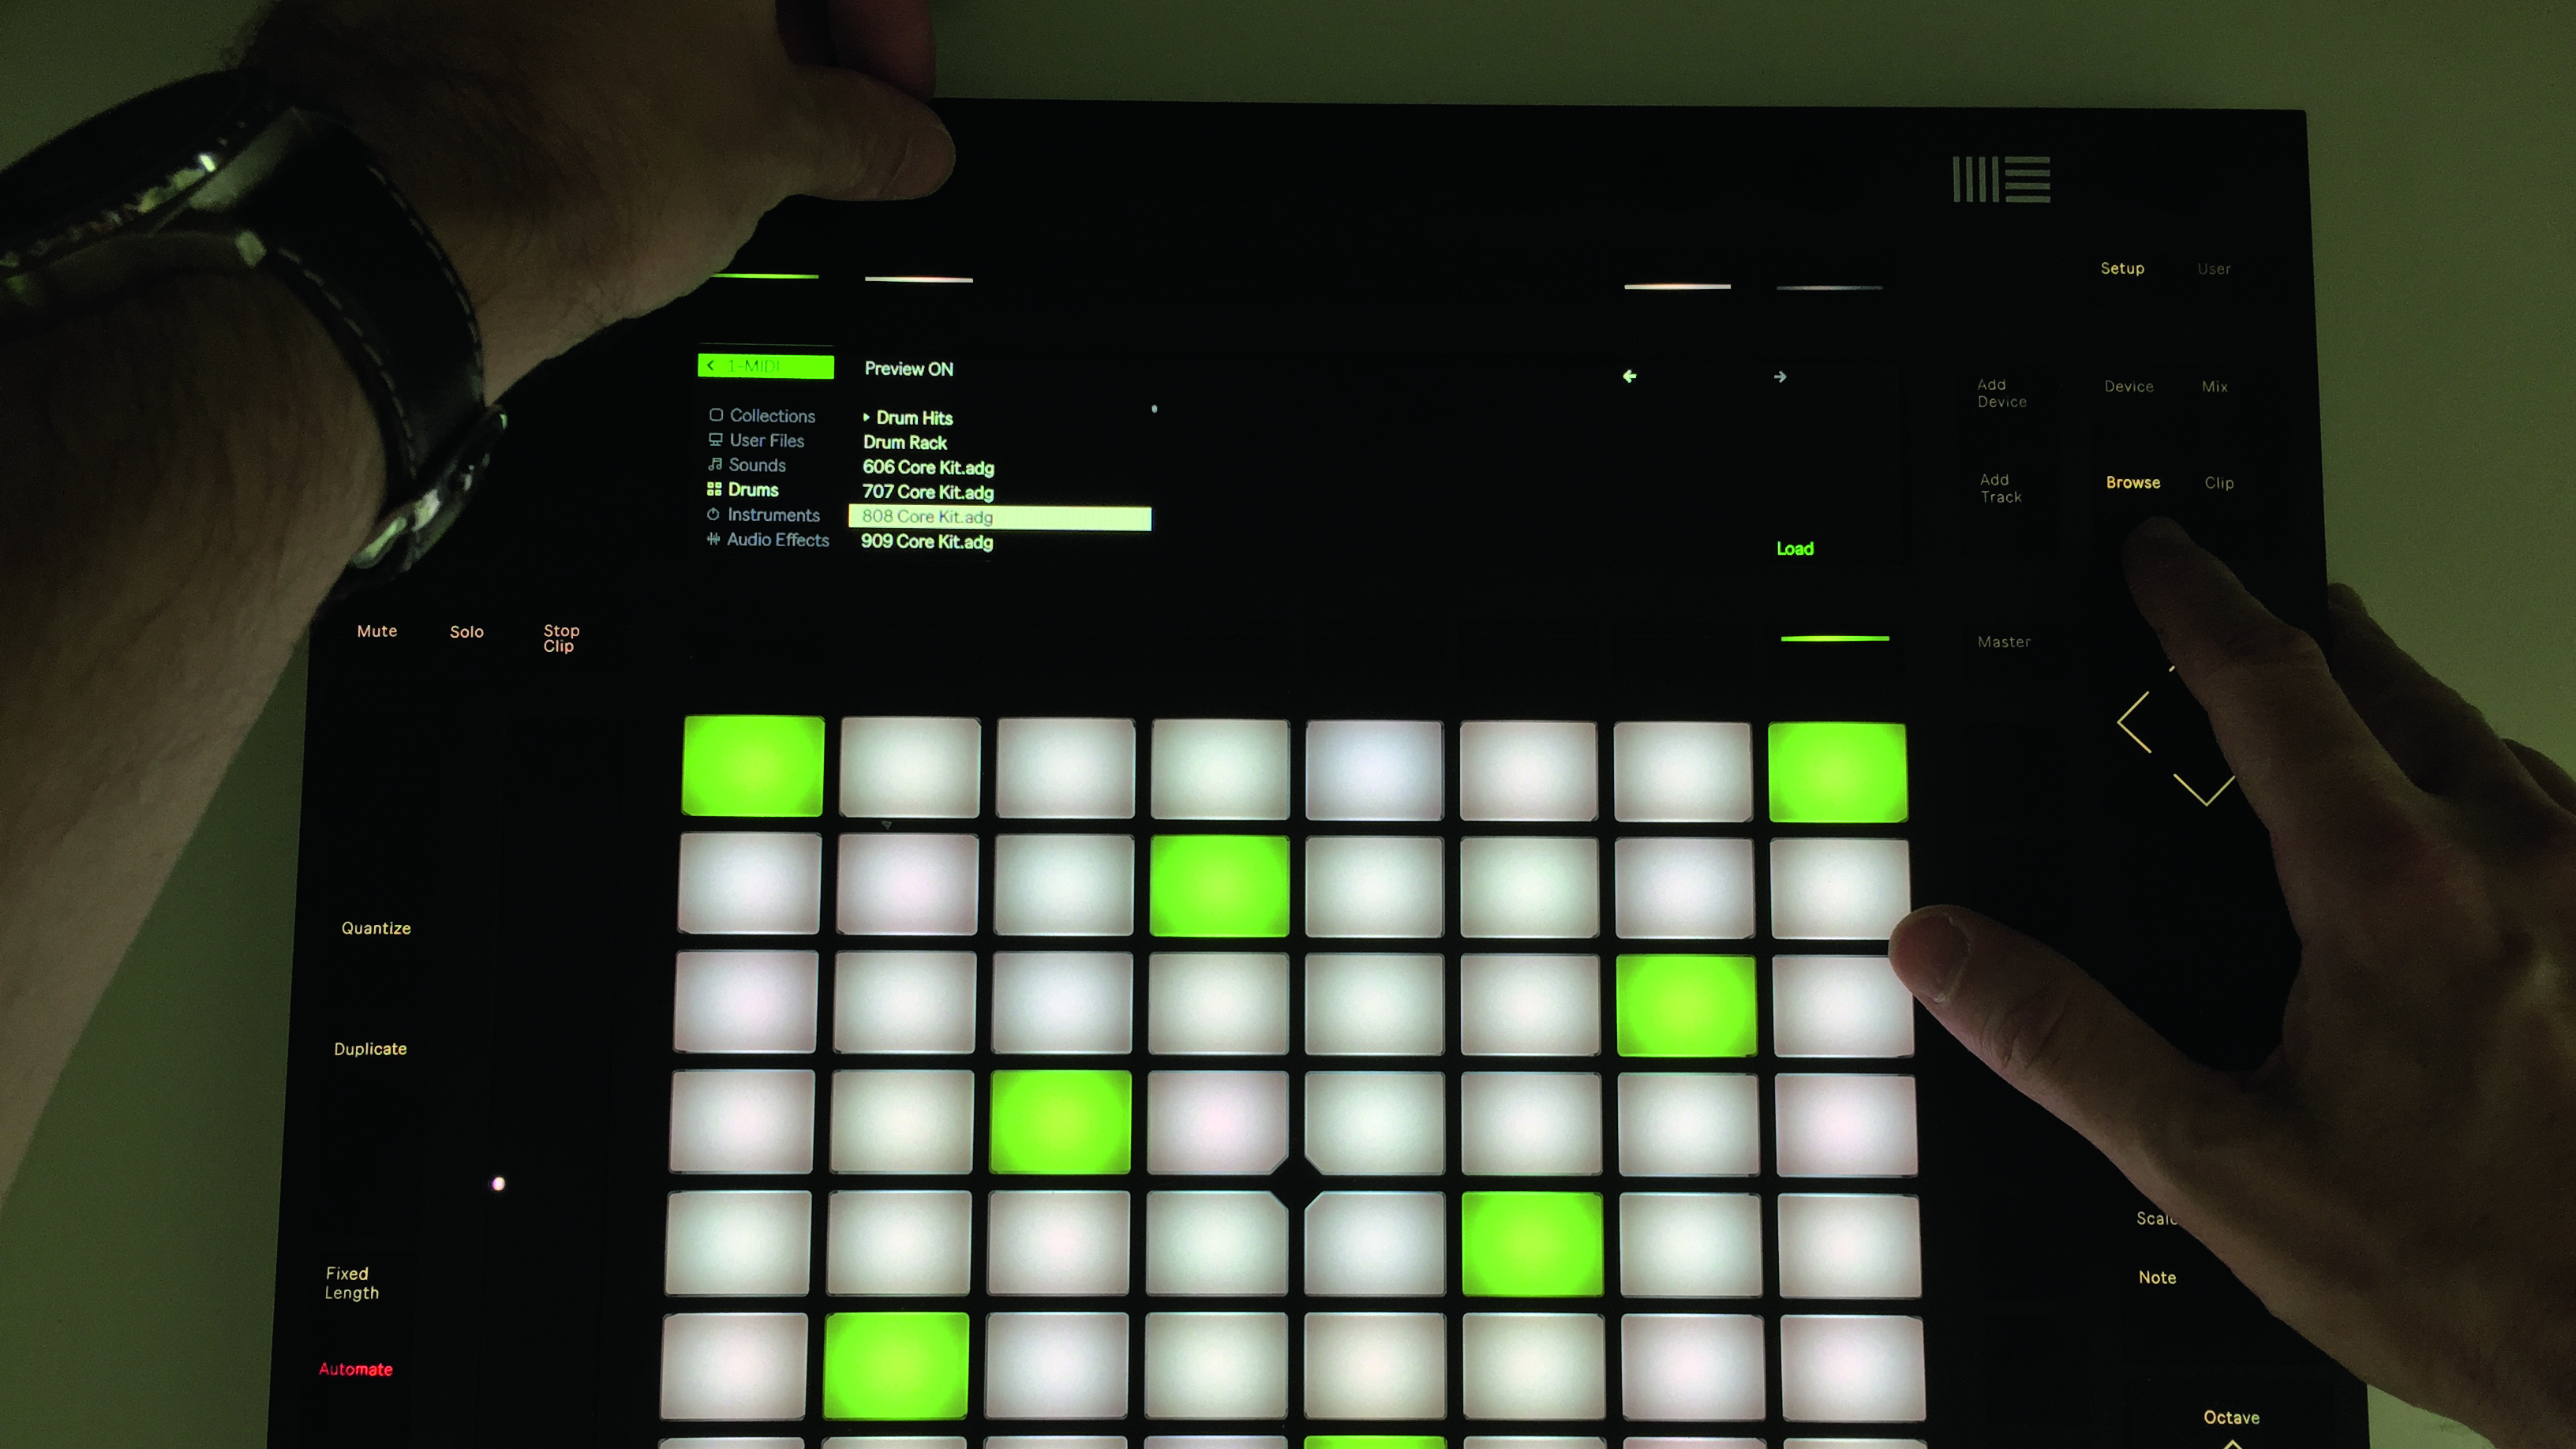
Step 1: To make a basic loop, start with a session containing a single MIDI track. Hit the Browse button on the Push, then use the leftmost two knobs to select the Drums library and scroll through the available kits.
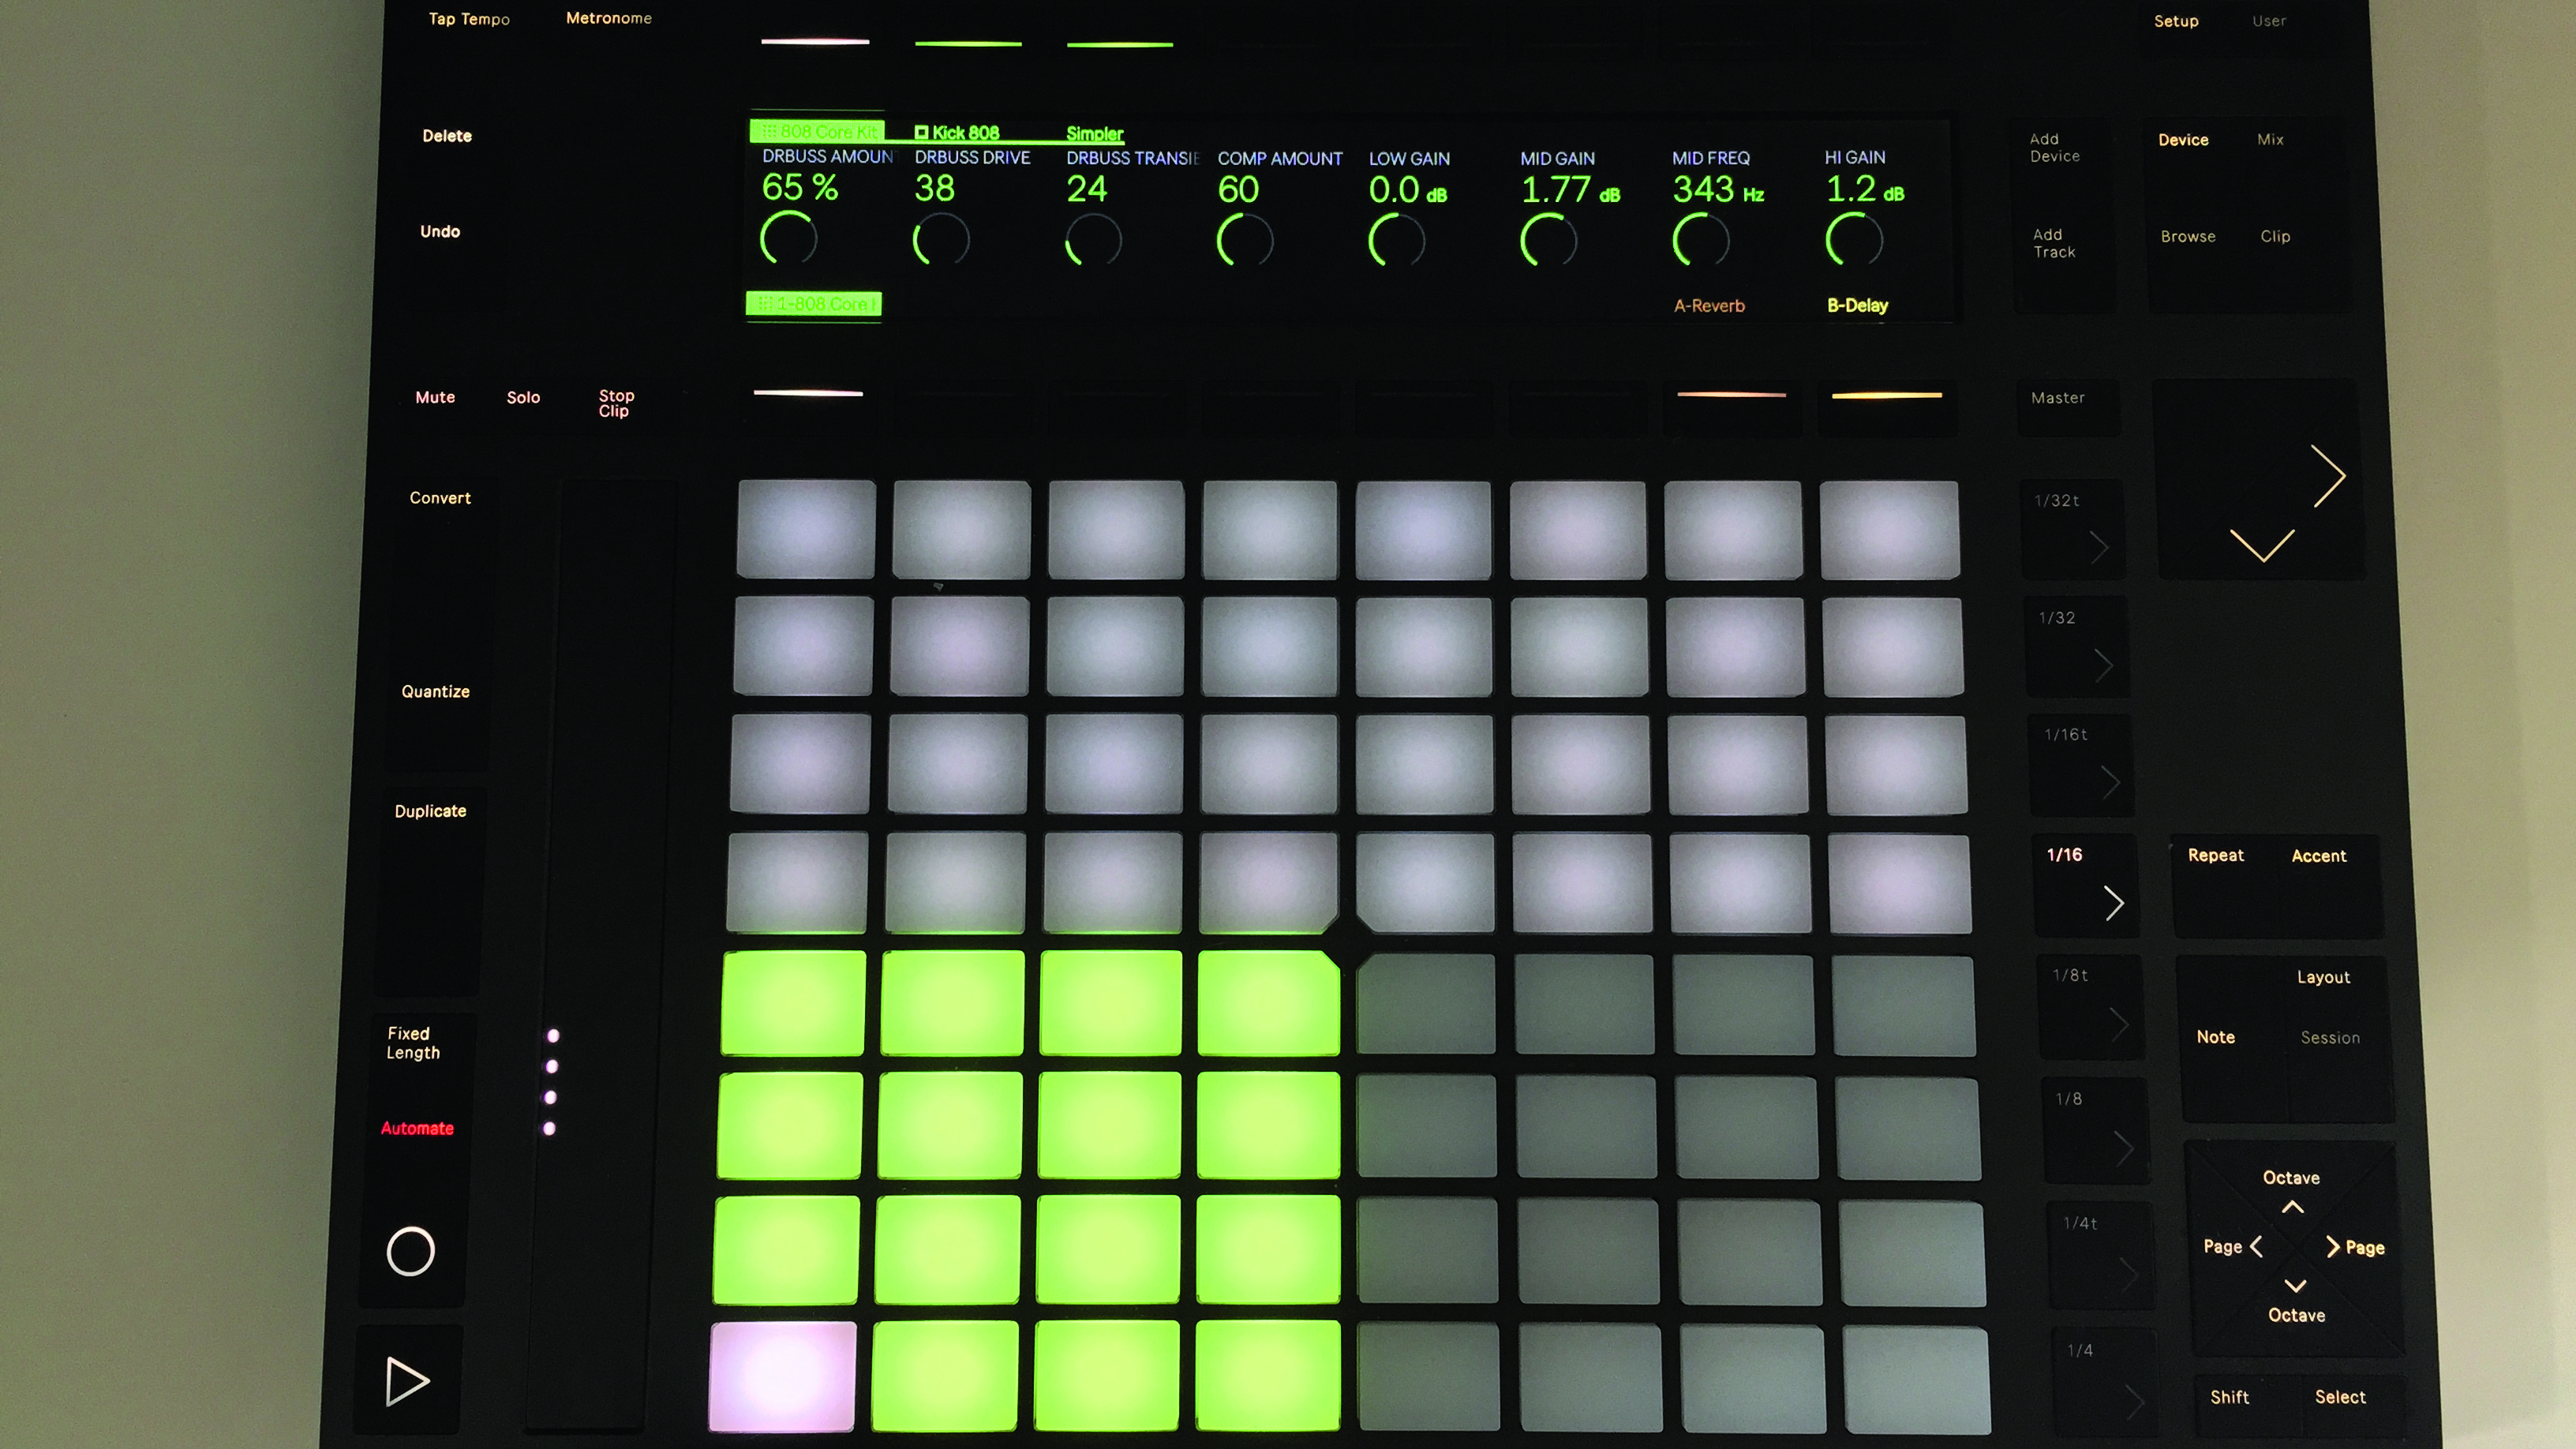
Step 2: Hit the Preview button to hear the kits as you scroll through them, then hit the Load button over on the right to load one into the project. The kit sounds are now playable from the grid of 16 pads in the lower left corner of Push’s pad matrix. The pads will be illuminated the same colour as the track in your session.
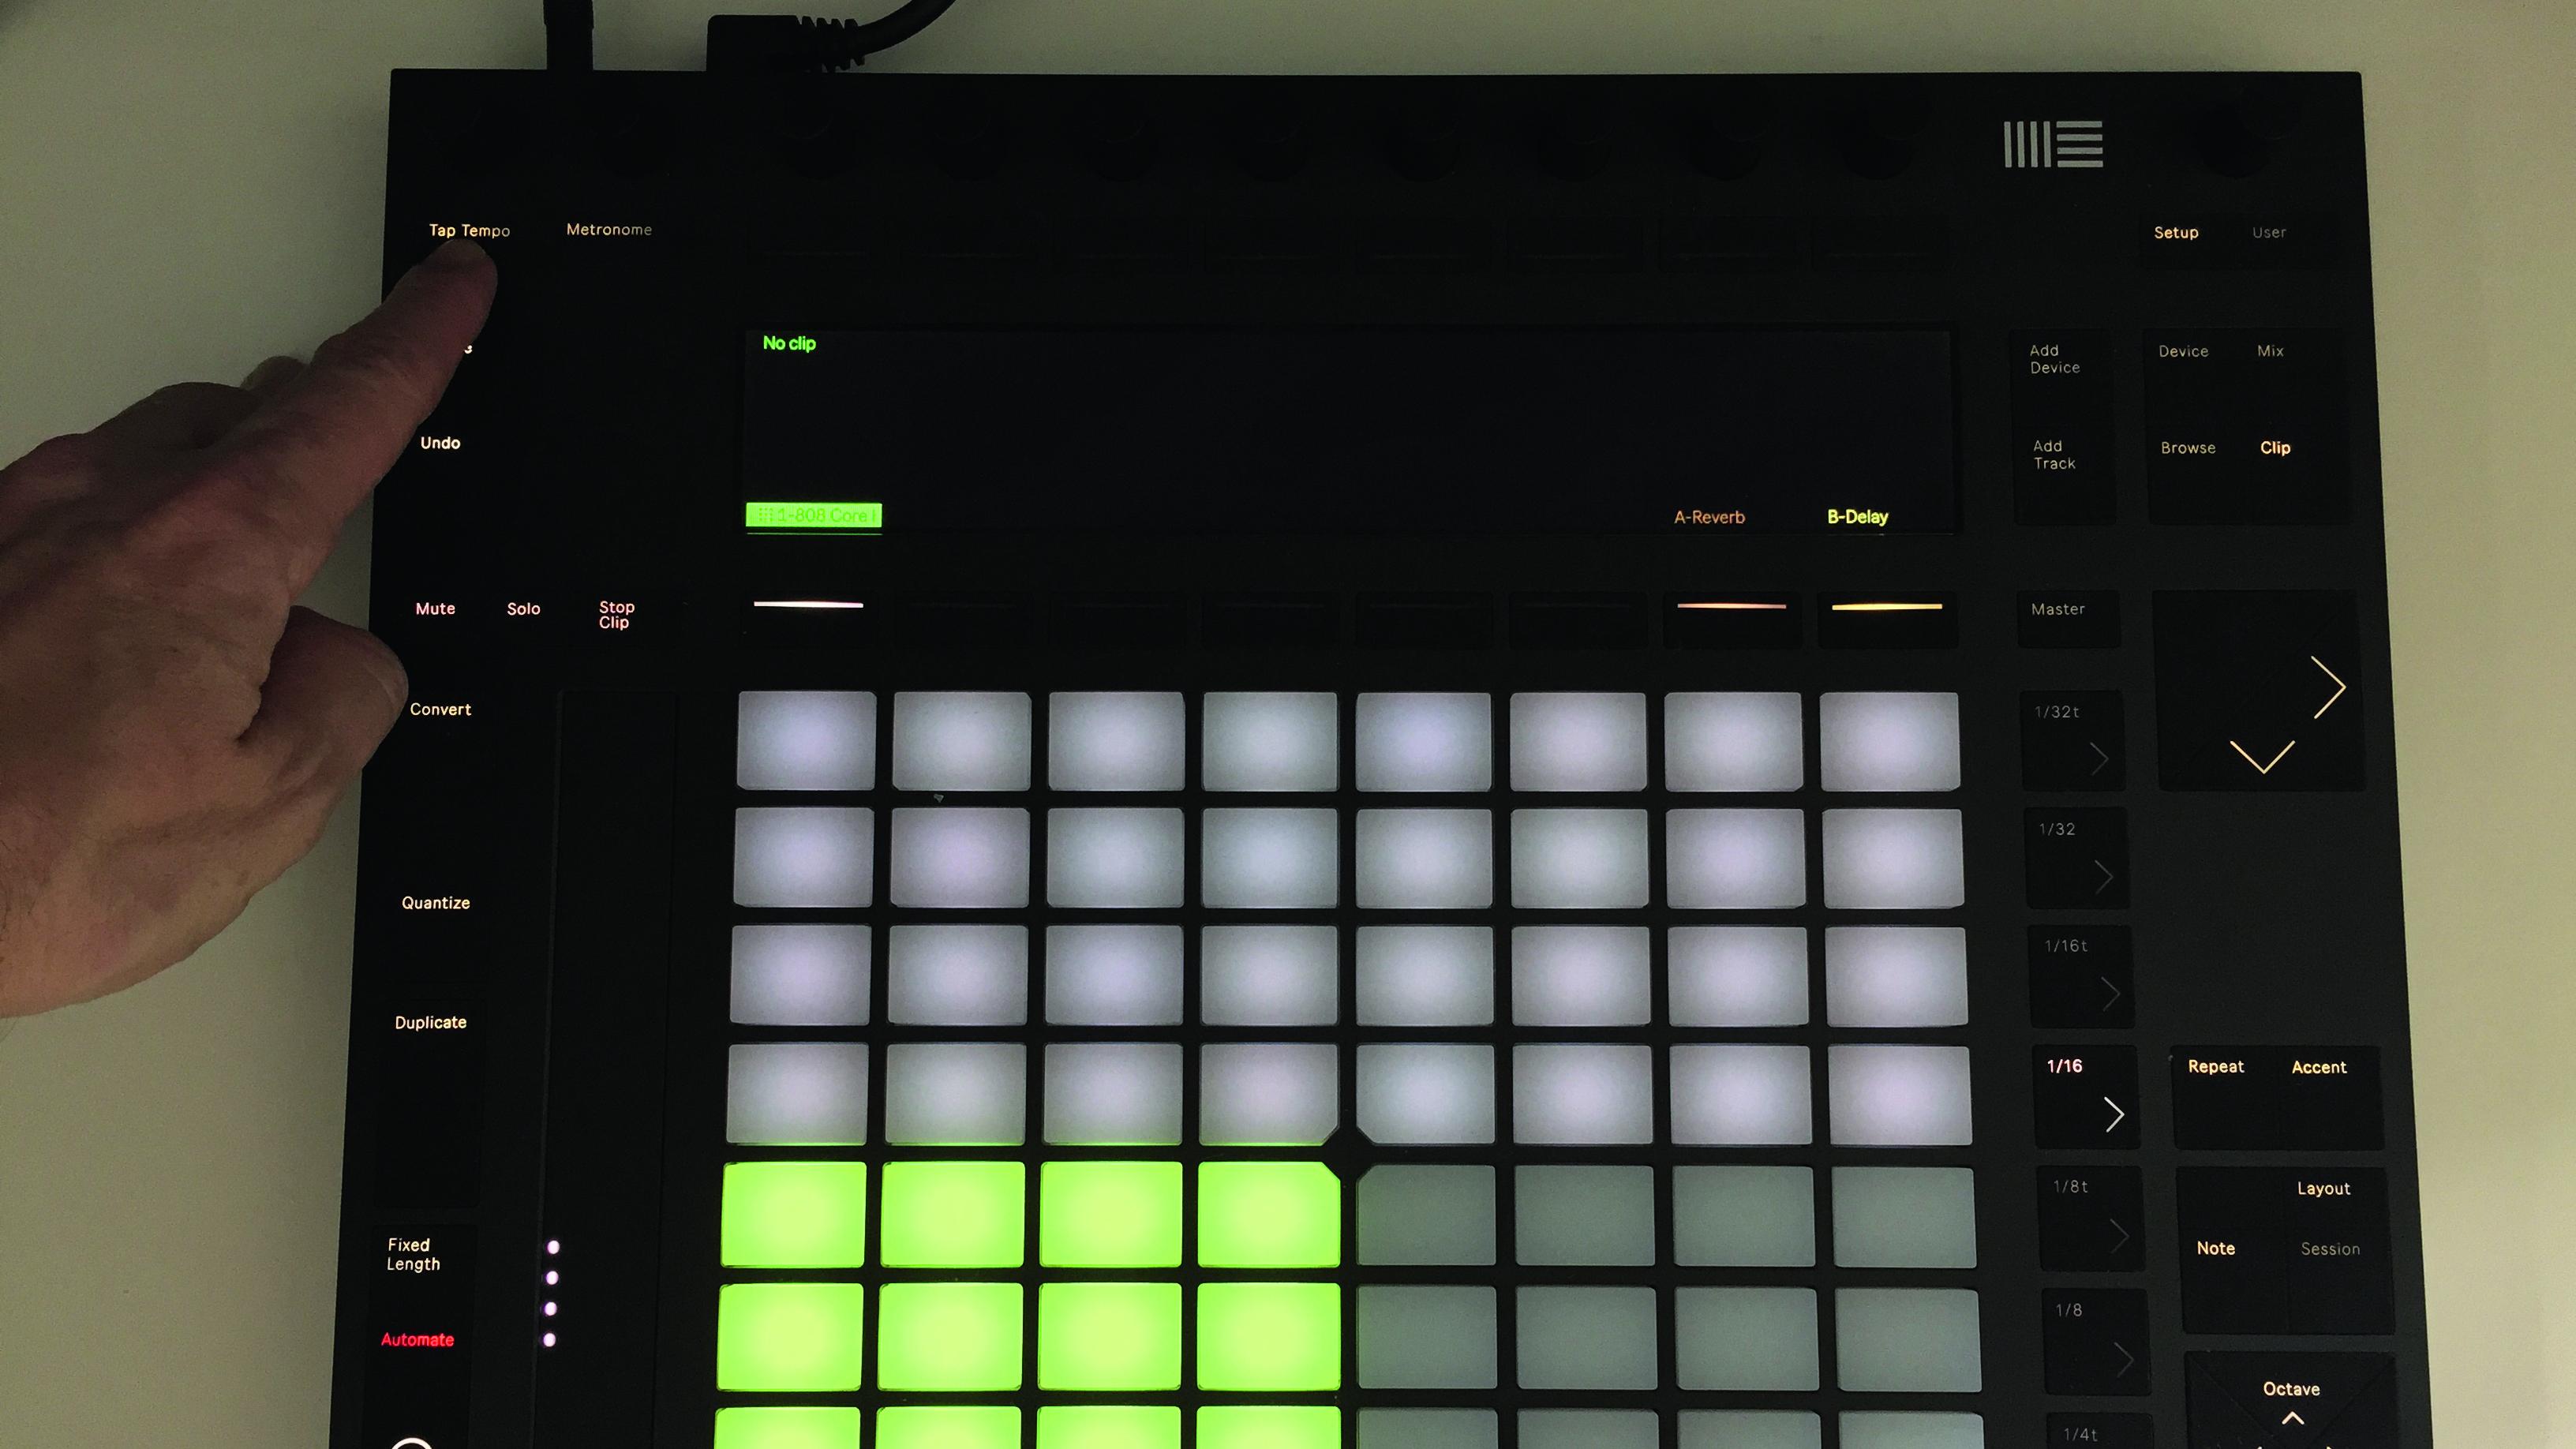
Step 3: Tap the Metronome button at the top left to enable the metronome (you can use the Tap Tempo feature to enter a tempo – just tap four times on the button and Live will use your timing to set the tempo). Then simply hit record and play the pads to lay down a beat.

Step 4: Press the Quantize button on the left to tighten up the timing – you can do this while still in record. You can overdub extra kit sounds while in loop record. To delete parts, just hold down the Delete key and tap the relevant pad. Press the Clip button and use the designated knob to adjust the length of your loop in bars.
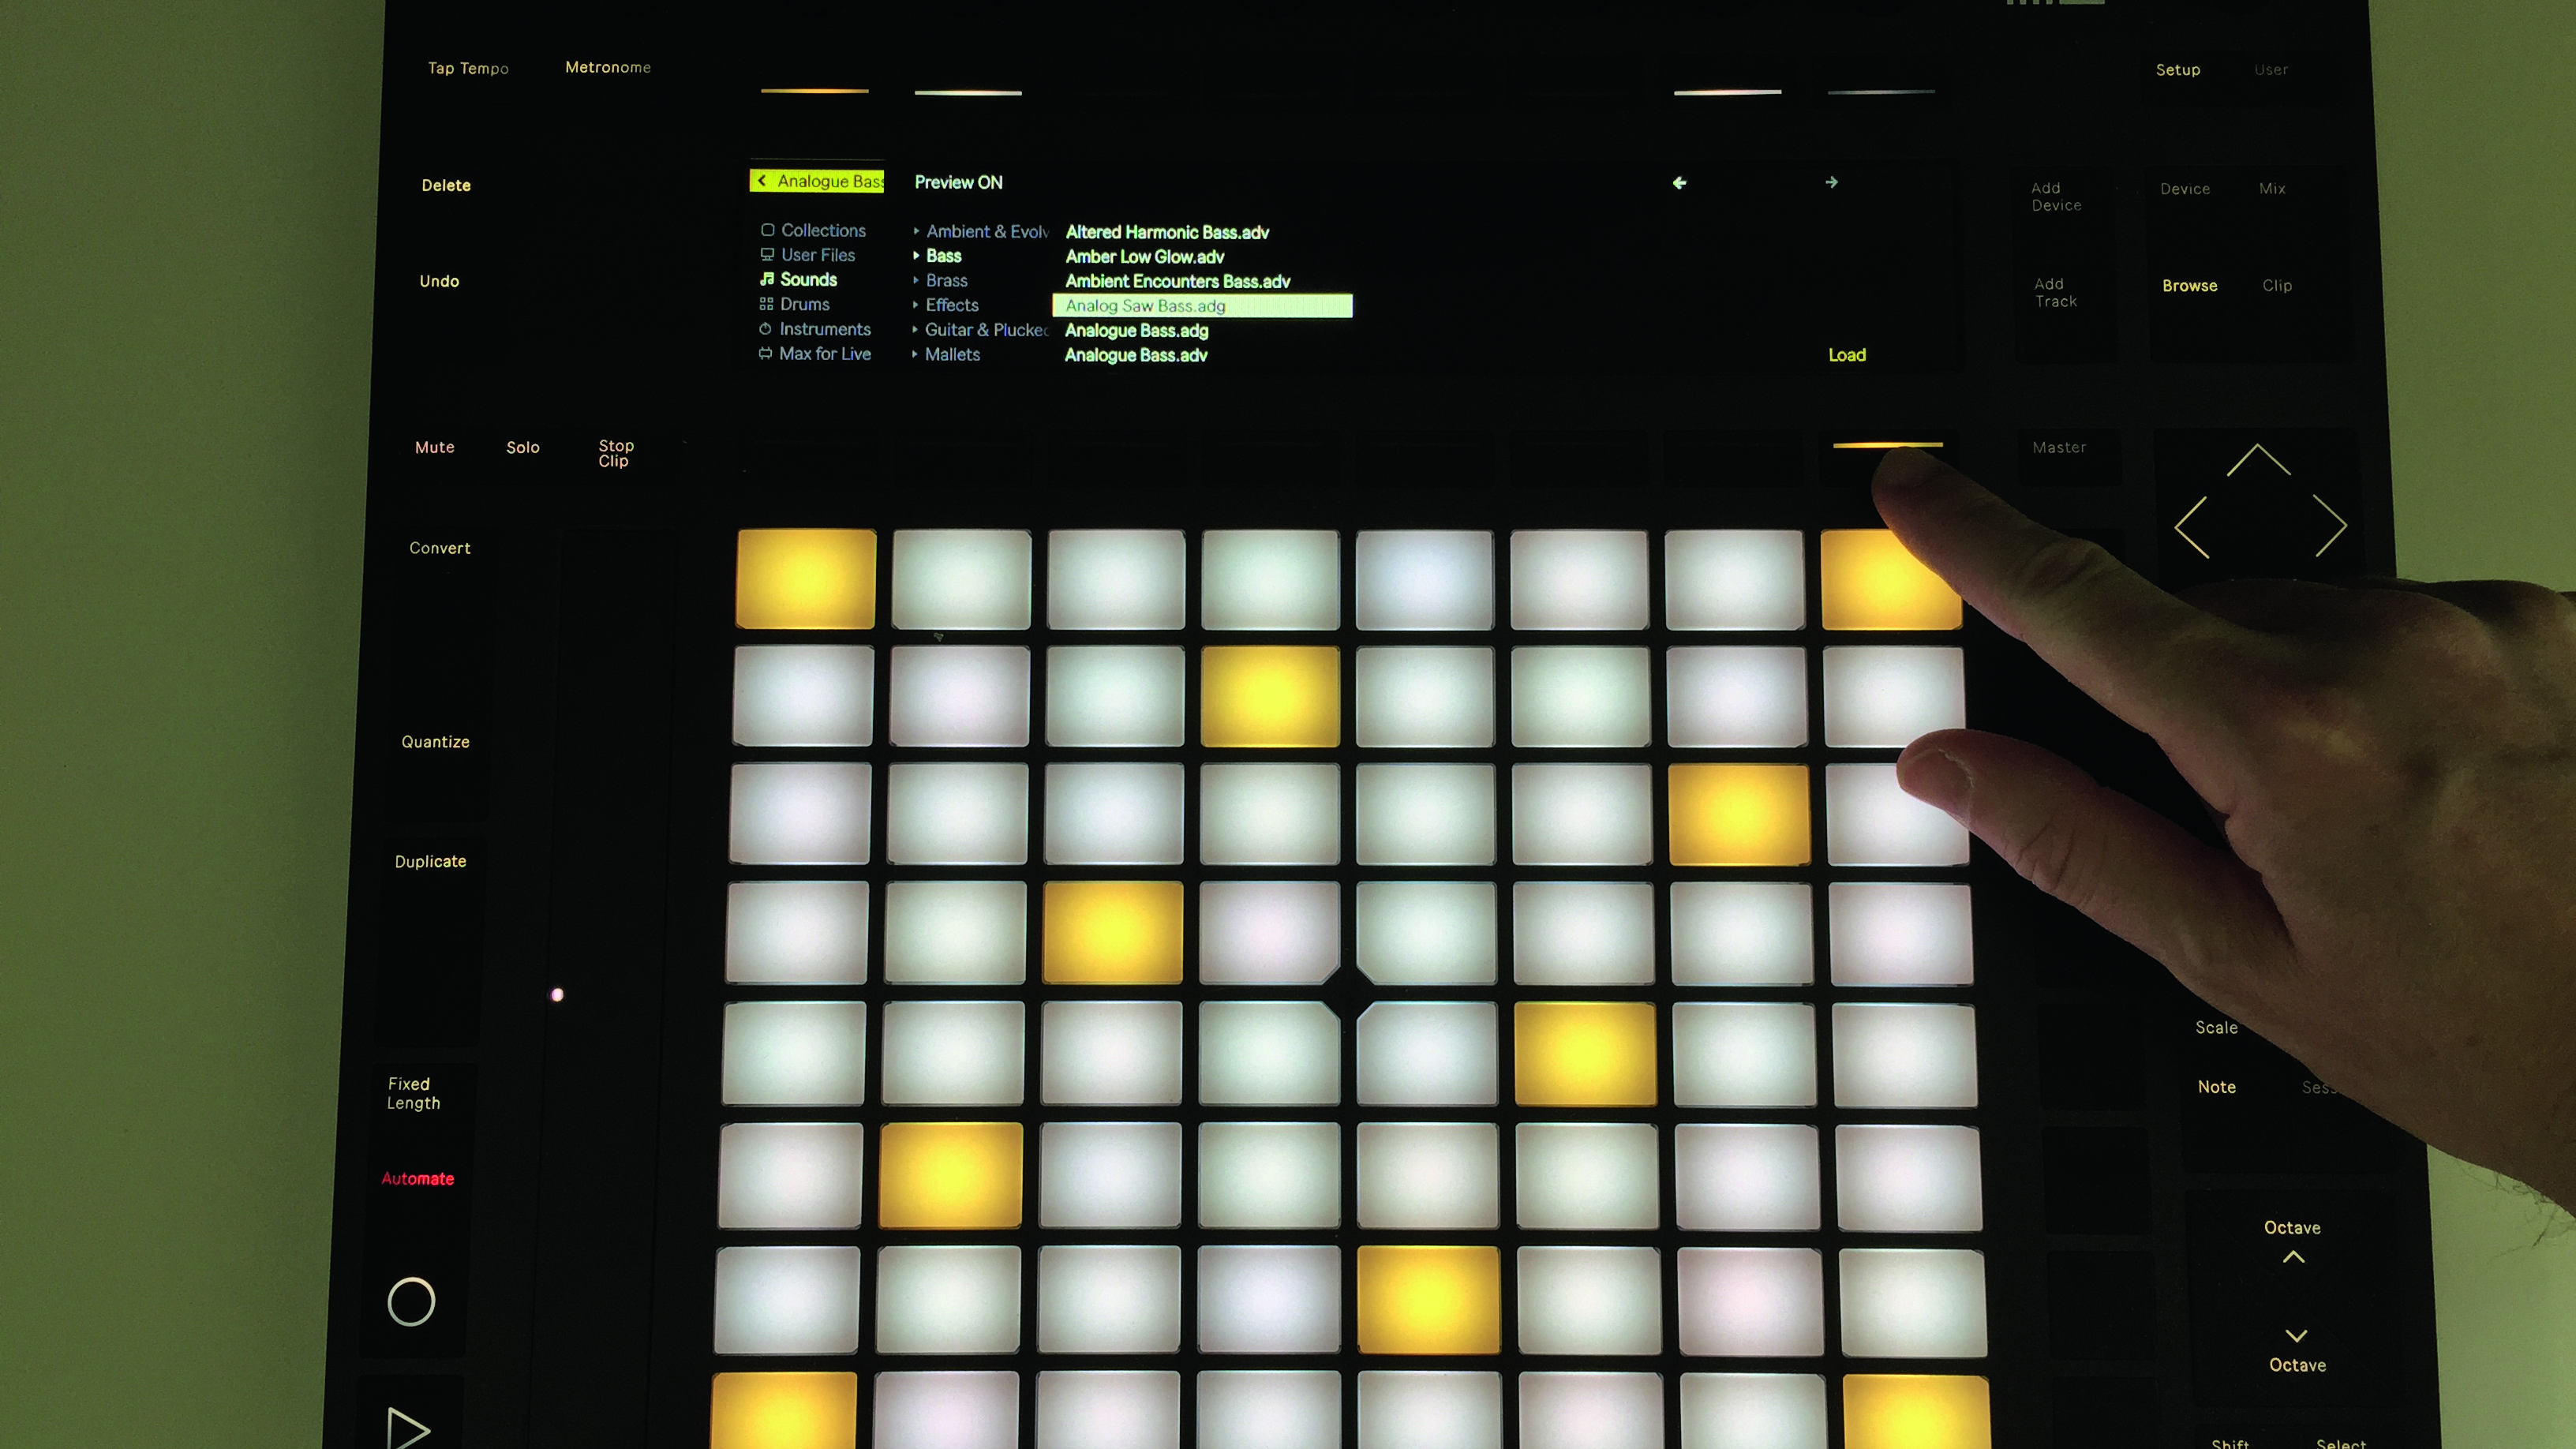
Step 5: To add a bass part, start by pressing the Add Track button to the right of the display. Use the knobs above the display to browse to MIDI Track » Sounds » Bass and choose a preset. Preview will play the sounds so you can audition them as you scroll through. Hit the Load button when you find one you like.
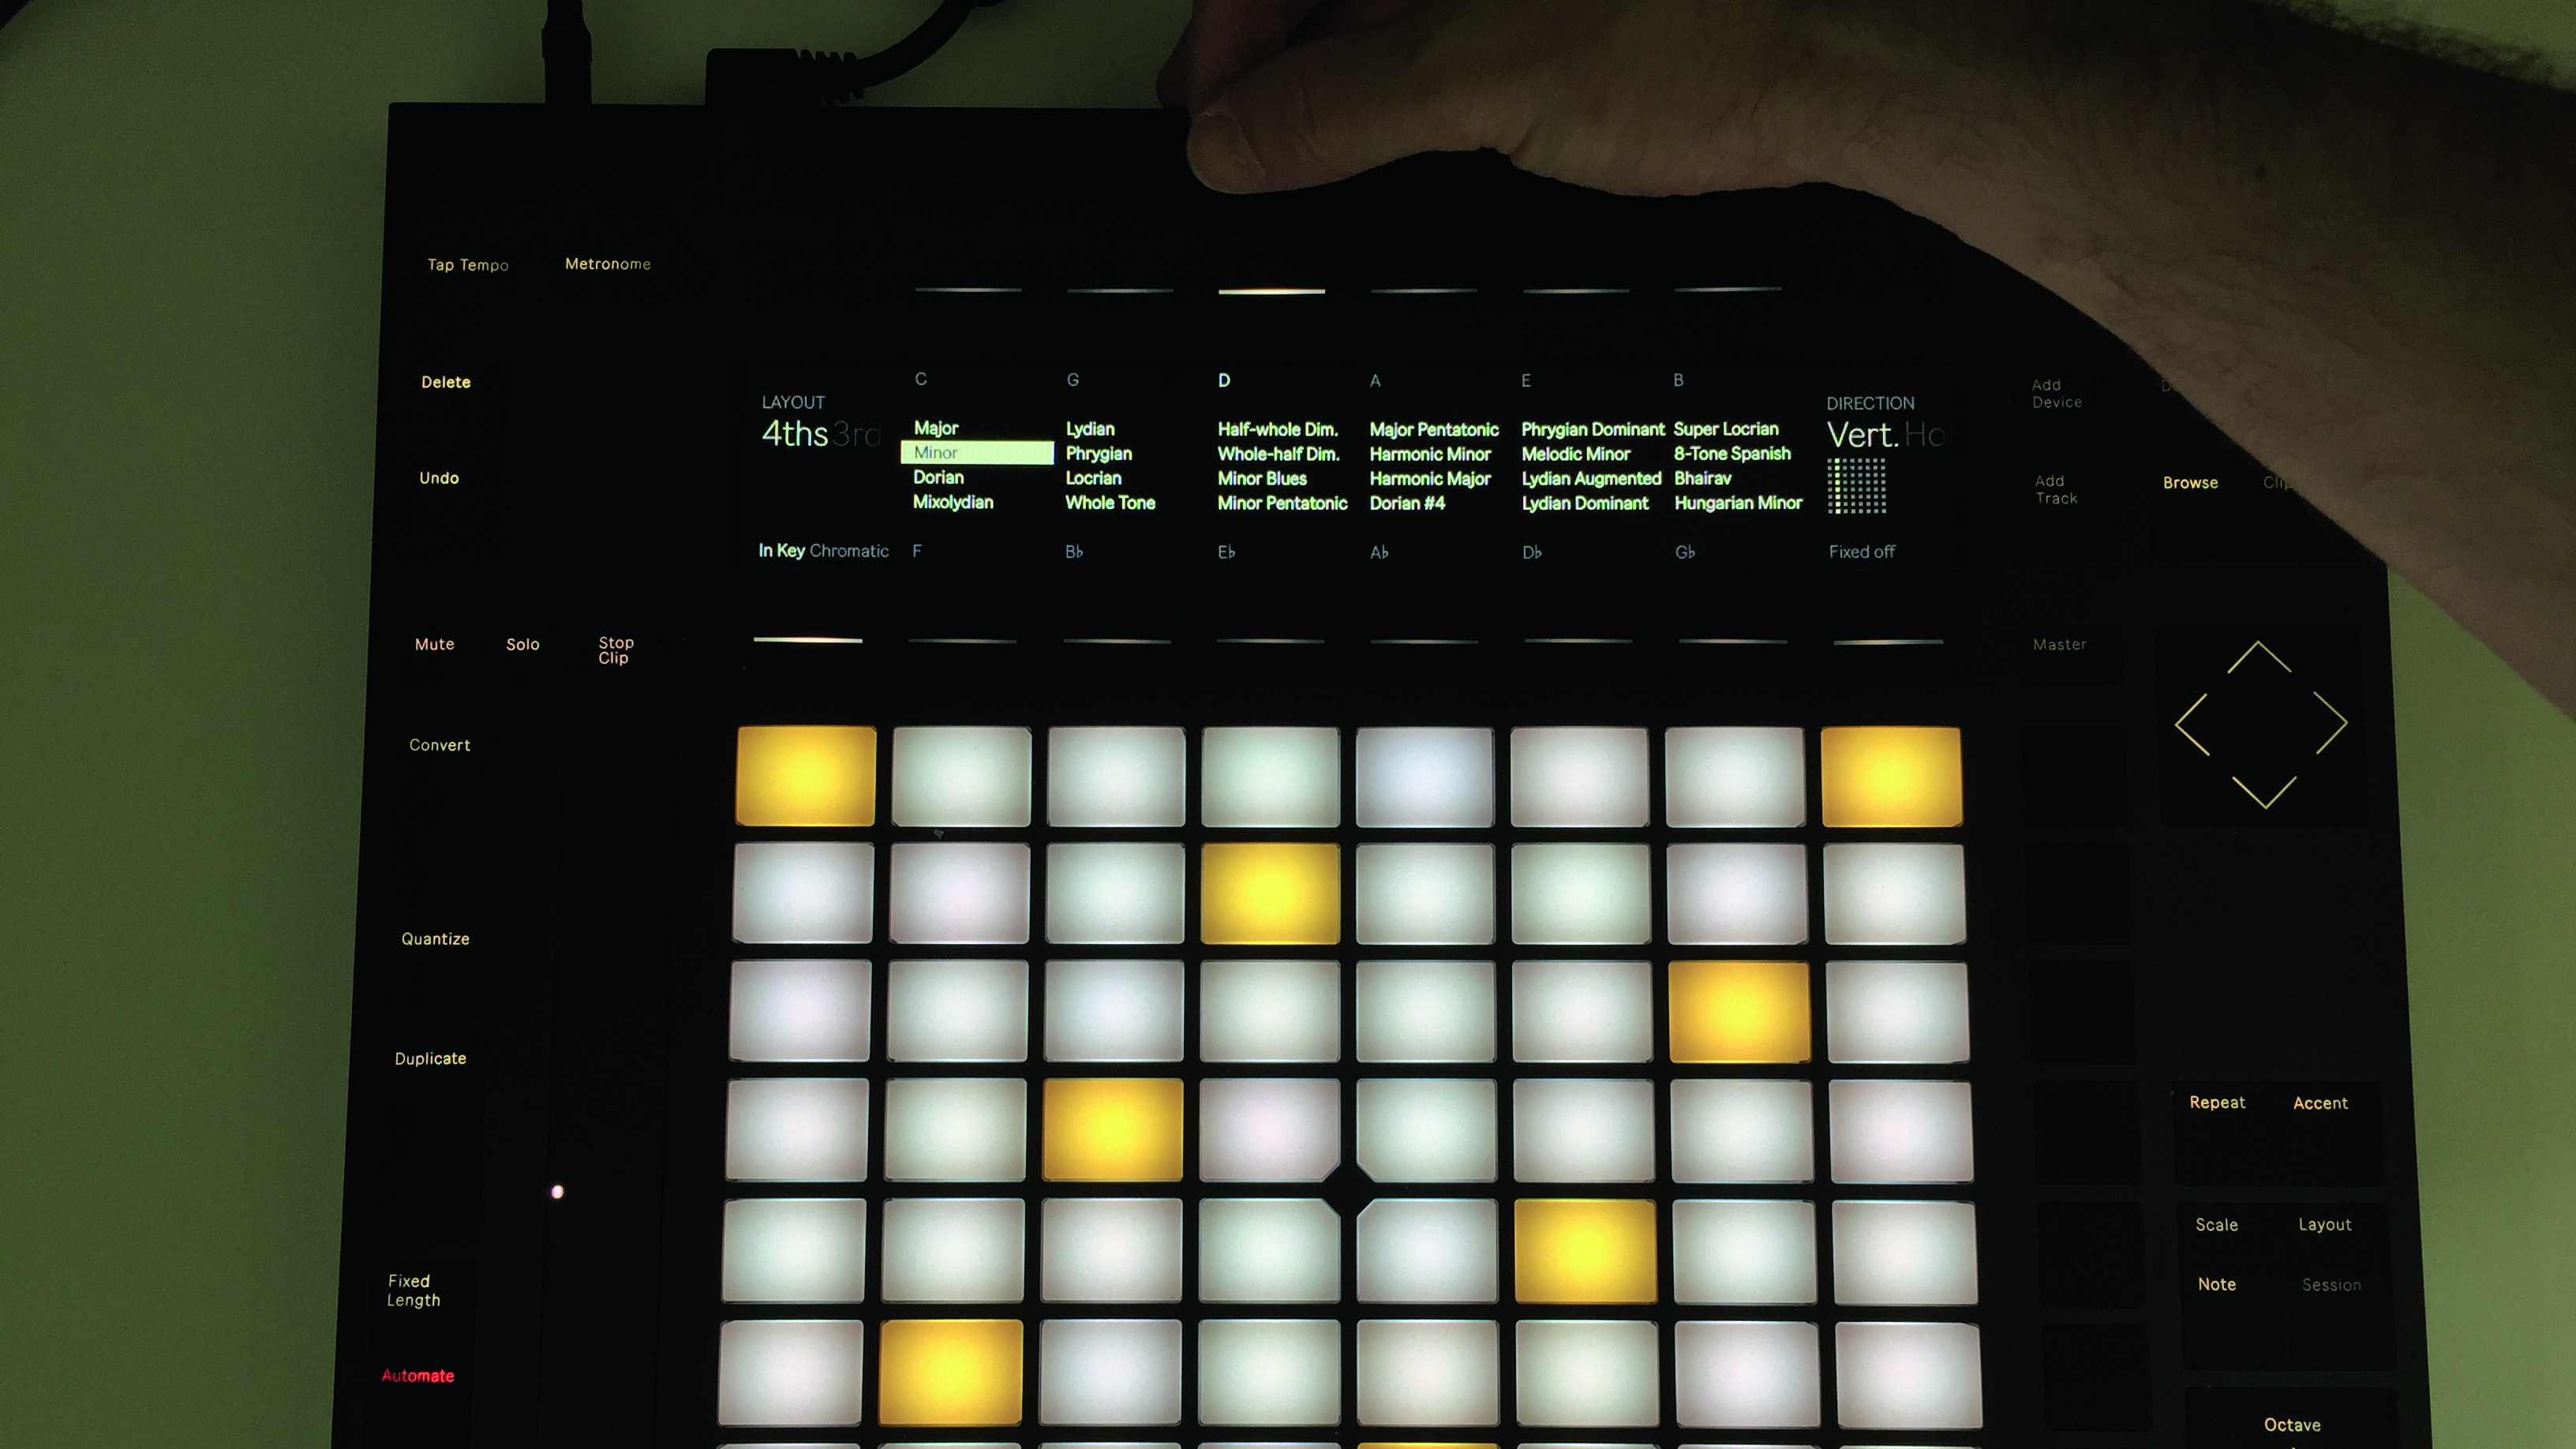
Step 6: Now each pad triggers a note, with the coloured pads representing the root note of the selected scale. To change the scale – default is C major – press the Scale button on the right hand side. Use the buttons above the display to select the required root note, then use the knobs to pick a scale type from the list.
Get the MusicRadar Newsletter
Want all the hottest music and gear news, reviews, deals, features and more, direct to your inbox? Sign up here.
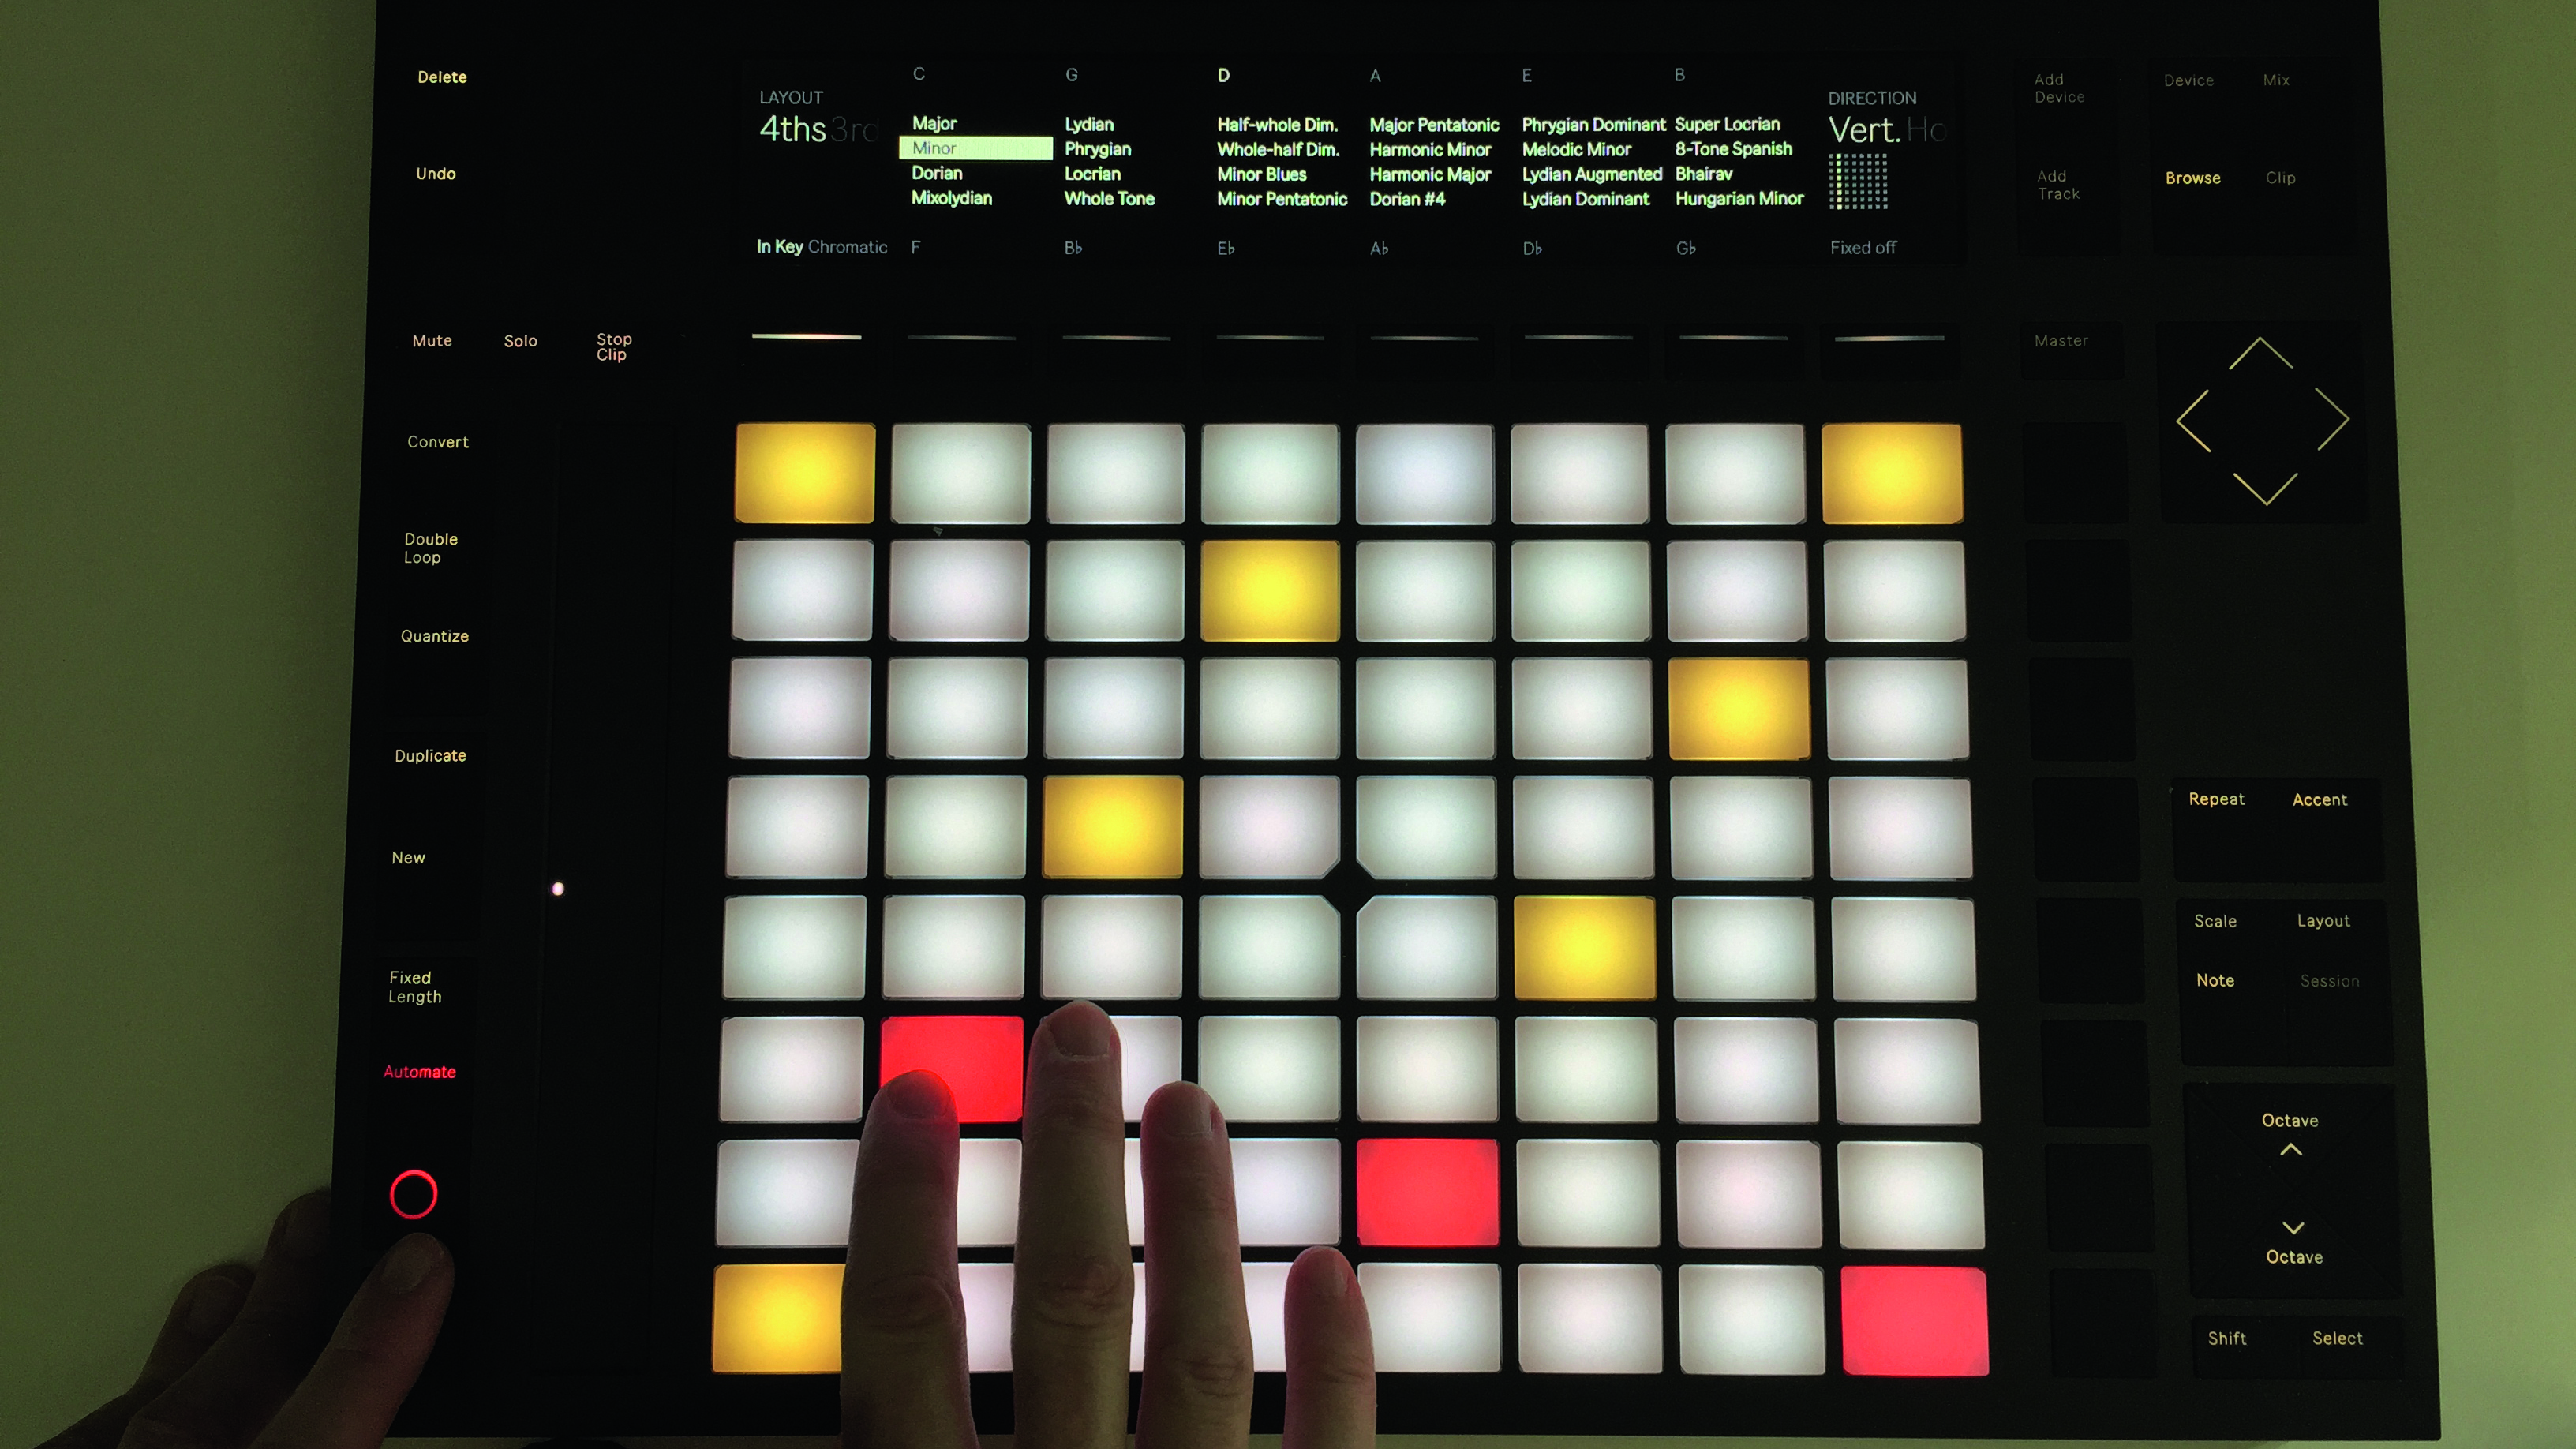
Step 7: We’ve selected the D minor scale here. You can play the notes of the scale starting from a coloured pad horizontally all the way along a row, or you can go across and up in a 3x3 pattern to play the same notes. Hit record again and enter a simple bassline part. Play as much as you need and hit Play again to stop.

Step 8: The four-bar drum loop cycles automatically, and you can set the length of your bass loop by hitting the clip button and setting the relevant length – eight bars in this case. Press Quantize again to put your bass loop in time with the drums. Repeat the last few steps again to add as many new tracks as you want.
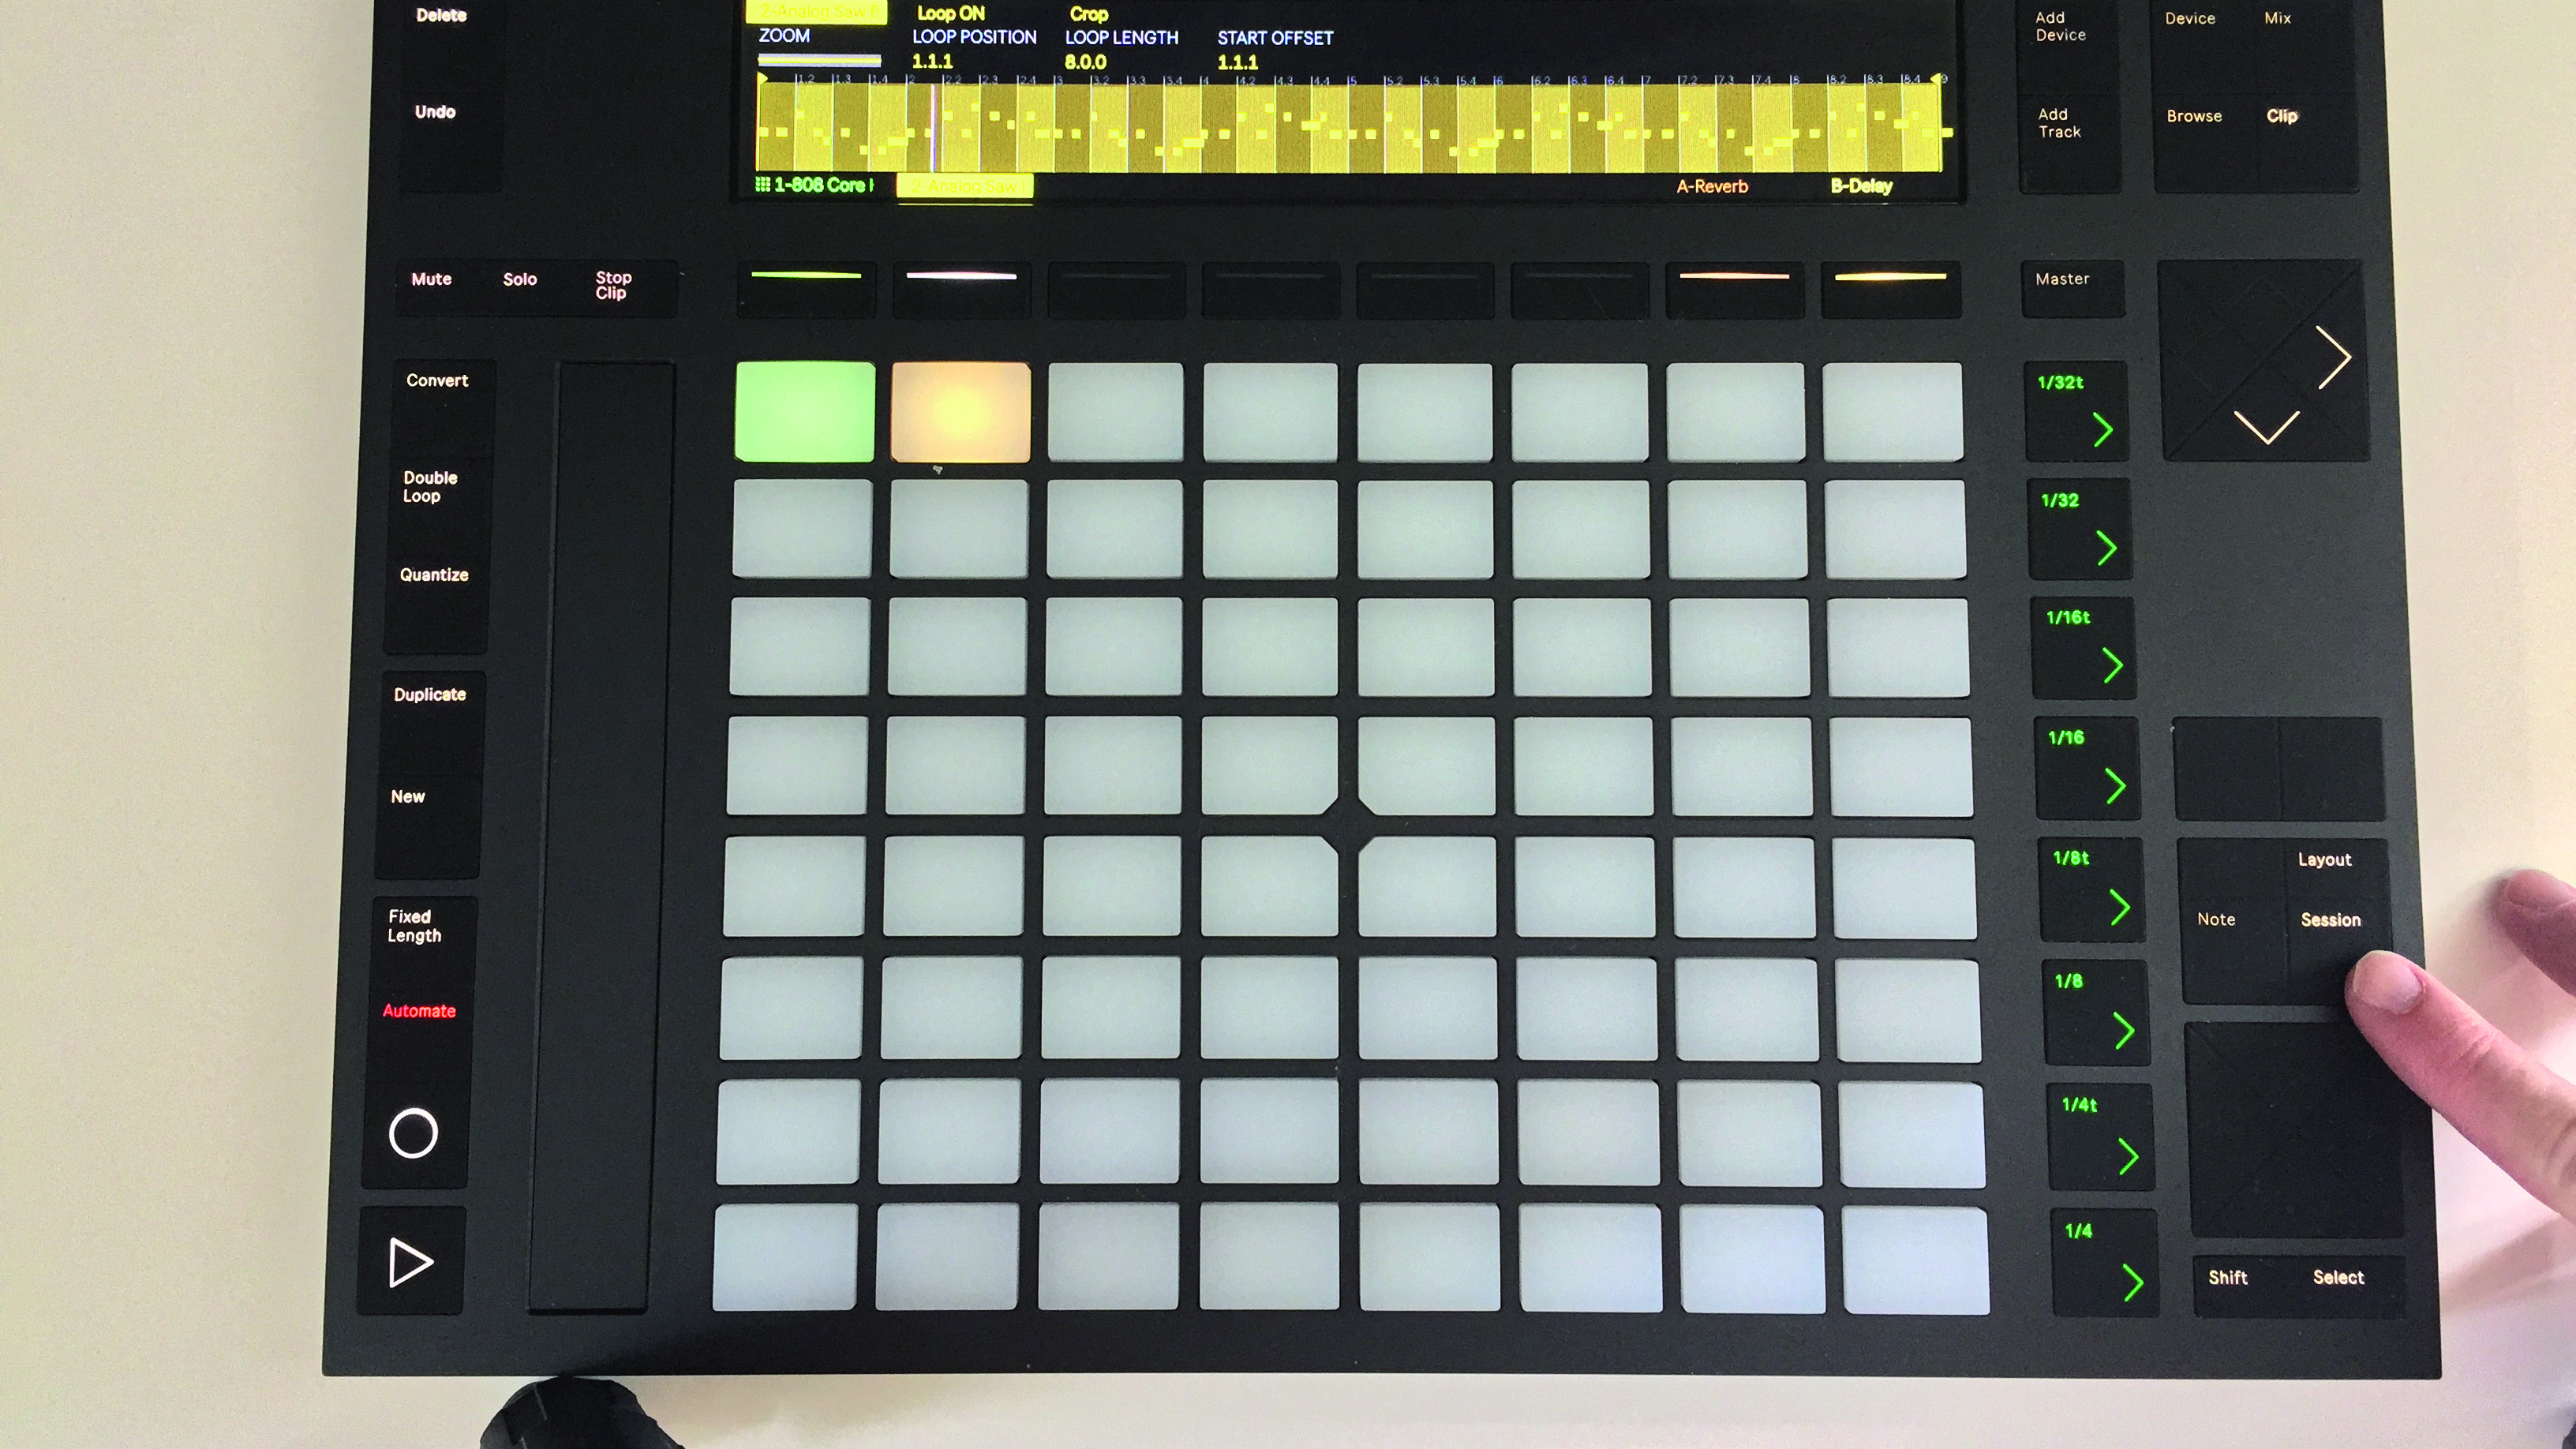
Step 9: Pressing the Session button turns the grid into a representation of Live’s Session View, with the pads working as clip launch buttons. This gives you the ability to perform arrangements of your track on the fly, and record those moves into the Arrangement View for further tweaking and editing later on.
Computer Music magazine is the world’s best selling publication dedicated solely to making great music with your Mac or PC computer. Each issue it brings its lucky readers the best in cutting-edge tutorials, need-to-know, expert software reviews and even all the tools you actually need to make great music today, courtesy of our legendary CM Plugin Suite.

