How to emulate old-school sampler sonics in a modern DAW
Get the sounds and production styling of vintage hardware samplers in software
The history of sampling as we now know it only really stretches back to the 1970s, when the development of digital audio technology meant that, for the first time, sounds could be recorded and played back with a new level of accuracy and unparalleled processing potential. However, these early samplers were expensive, and so generally only accessible to the ultra-rich.
It was only in the 80s that the technology became commercially viable, with hardware samplers gradually dropping in price and increasing in power up to their '90s heyday. Come the late '90s and early 2000s, the writing was on the wall for hardware samplers as software options finally began to mature, and DAWs offered previously unseen levels of sample processing power.
Technically speaking, there’s no such thing as analogue sampling. The name ‘sampling’ itself derives from the process of converting an analogue signal to digital form. However, you can see clear parallels in instruments such as the 1960s Mellotron (which used tape-based recordings to generate sounds) and the ways in which experimental ‘musique concrète’ artists used tape-spliced recordings in their work.
Today’s producers can draw on all of these historical options in their creative process, as every modern DAW packs more sample-processing power than the musicians of the '70s could possibly have dreamed of. Nonetheless, it can be both creatively rewarding and great fun to recreate the compositional and technical limitations of those early hardware boxes in software. Here's how it's done…
For more vintage sampling japes, get hold of the February 2019 edition of Computer Music.
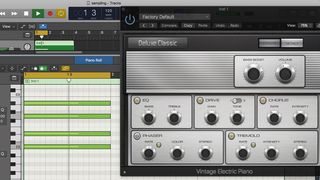
Step 1: For a quick and easy old-school sampler sound in any DAW, sample a chord and process it as though you’re using a vintage sampler. We’ll start with an electric piano plugin playing a simple minor 7th chord. Bounce the MIDI region in place to convert it to audio.
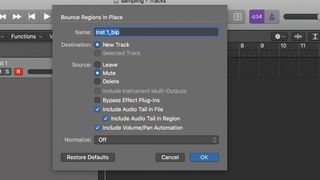
Step 2: Next, we need to convert the bounced audio to a new sampler instrument so we can play it at different pitches. The exact method depends on your DAW. Here in Logic we Ctrl-click the audio region and choose Convert to New Sampler Track.
Get the MusicRadar Newsletter
Want all the hottest music and gear news, reviews, deals, features and more, direct to your inbox? Sign up here.
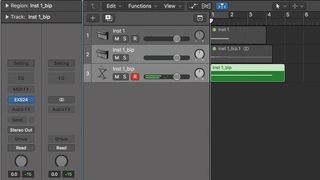
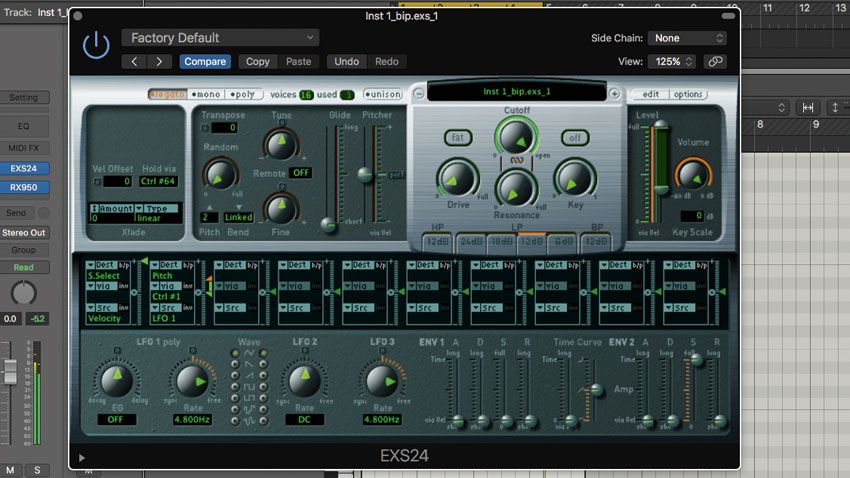
Step 3: A new track is created with the audio automatically loaded into Logic’s EXS24 sampler plugin. The MIDI region plays back the note, but by default it will only play at its original pitch. For this project, we want to play it back at different pitches across the keyboard.
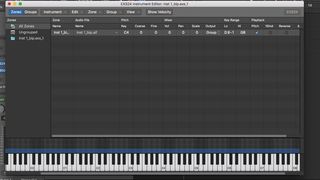
Step 4: In the EXS24 window, hit Edit to view the key mapping of the instrument. We only have one sample, which has been allocated to D#4. Our original chord was a C, so we’ll go ahead and change that to C4 and extend the Key Range all the way along the keyboard.
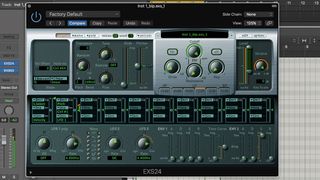
Step 5: We don’t want to play two chords at once, so we can set the sampler to Mono or Legato mode to avoid that. In Legato mode, you can use Glide or portamento to make one chord slide into the next, giving a distinctive retro effect.
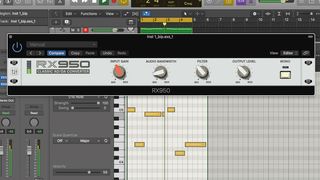
Step 6: Filters, distortion and bit-crushing can all be used to add simple old-school flavour. We’ve gone with RX950 for an Akai sampler emulation. You can experiment with processing before resampling, or even add a bit of vinyl crackle for a truly retro feel.
Computer Music magazine is the world’s best selling publication dedicated solely to making great music with your Mac or PC computer. Each issue it brings its lucky readers the best in cutting-edge tutorials, need-to-know, expert software reviews and even all the tools you actually need to make great music today, courtesy of our legendary CM Plugin Suite.
"If I wasn't recording albums every month, multiple albums, and I wasn't playing on everyone's songs, I wouldn't need any of this”: Travis Barker reveals his production tricks and gear in a new studio tour

“My management and agent have always tried to cover my back on the road”: Neil Young just axed premium gig tickets following advice from The Cure’s Robert Smith

