How to emulate analogue equipment using basic filtering and EQ
By sculpting the frequency profiles of the audio signals within, your mixes can be made to sound convincingly old-school
The recording studio went digital-mad in the 1980s, when producers were falling over themselves to replace noisy, unreliable analogue gear with pristine digital kit.
Over time, however, it became apparent that digital could actually be too perfect, too clear and, at its worst, kind of cold, harsh and lifeless. You might well recognise these symptoms in your own mixes. Classic analogue recordings, on the other hand, had vibe, warmth, presence and authenticity in spades – exactly what producers strive for and listeners crave!
In this walkthrough, we'll show you how to fake the sound and feel of analogue gear in your mixes using nothing more than filter and EQ plugins. Check out the audio examples at the bottom of the page, and for much more on this subject, pick up the February edition of Computer Music.
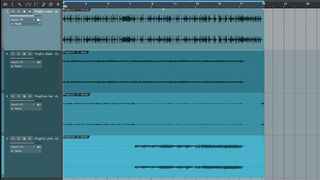
Step 1: It can be tempting to ladle on every last analogue-modelled plugin you’ve got in the quest for a warm and punchy mixdown… but you can push your mix in the same direction with simple EQ and filtering tricks inspired by analogue gear. Start by loading the WAVs named 'ProgFunk…' (click here to download) onto audio tracks in a 132bpm project, then loop them (this demo isn’t in 4/4 time).
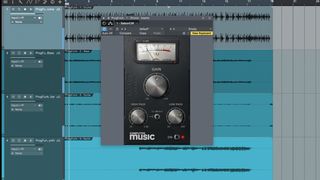
Step 2: The drums in this mix have too much treble information, so add a Satson CM to the Drums track and set Low Pass to 7 to smooth away the top-end digital harshness. Set High Pass to 2 to tighten the low end, controlling the excess sub flab. Satson CM’s gentle 6dB filters are perfect for these tasks, and we’ll be using them subtly throughout the mix.
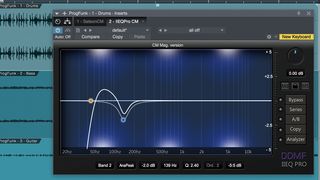
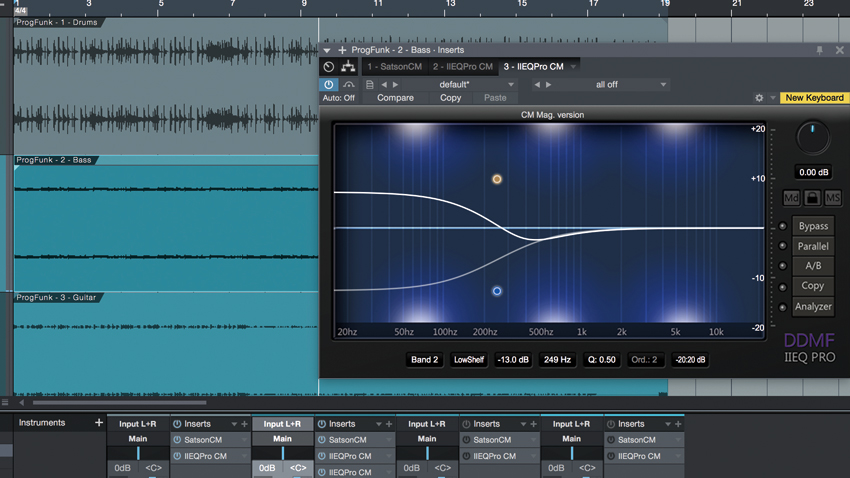
Step 3: The drums are more focused, but we’d like to unify the bottom end with the bass guitar. Using graphs of tape machine frequency responses, we can mimic them using EQ. There are plenty of graphs at endino.com/graphs – we base ours on the Ampex MM1200 2-inch 16-track, using a high-pass at 46Hz with a Q of 0.90, and an AnaPeak band at 140Hz, -2.0dB, 2.4Q.
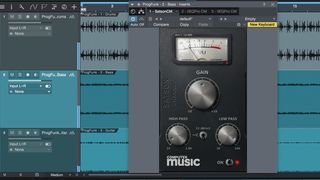
Step 4: Now copy both the Satson CM and the EQ to the Bass channel, to give it the same flavour. We don’t need Satson CM to be quite as aggressive on the bass, so set High Pass to 1 and Low Pass to 9. The bass track sounds good, but it’s focused more on the upper midrange than it is on serious bass frequencies, so let’s tackle that next…
Get the MusicRadar Newsletter
Want all the hottest music and gear news, reviews, deals, features and more, direct to your inbox? Sign up here.
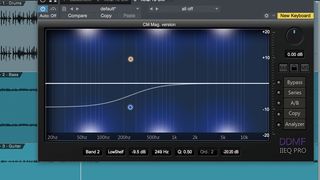
Step 5: Add another IIEQ Pro CM on the bass track. This time we’ll recreate the famous low-end trick associated with vintage Pultec EQ units. Set Bands 1 and 2 to Low Shelf, both at 200Hz, then boost with 1 and cut with 2 by 10dB. The result is… a flat EQ curve that does nothing to the sound! Kinda pointless, right? Now hit the Series button to switch to Parallel mode.

Step 6: The bands create a sub bass boost and a lower mid cut, giving huge perceived bass and warmth. You can adjust settings separately to hone the effect. Copy Satson CM and the tape-curve IIEQ Pro CM from the Bass track to the remaining tracks (including the master), then finalise with your favourite analogue-style EQ, tape sim and compression on the master bus.
Computer Music magazine is the world’s best selling publication dedicated solely to making great music with your Mac or PC computer. Each issue it brings its lucky readers the best in cutting-edge tutorials, need-to-know, expert software reviews and even all the tools you actually need to make great music today, courtesy of our legendary CM Plugin Suite.

