How to design unique melodic instruments using an acapella vocal
ACM expert Shea shouts about his favourite sound design tricks for mutating the human voice into unique melodic instruments
Sound designers are always seeking fresh sounds, and love to get excited about new techniques and ways to craft original creations. Though using ready-rolled samples in their entirety is perfectly acceptable, of course, this’ll only take your creativity so far…
So if you’re looking to give your sound design muscles a good workout, why not use unrelated source material to form the basis of something completely new? By recruiting the myriad of audio-processing tools lying within your DAW and plugins folder, almost anything is possible – as you’re about to discover!
So for this Studio Strategies tutorial and its accompanying video, I’m going to use small parts of an existing vocal acapella sample to create a trio of instruments: a pad, lead and bass. After showing you how to choose and extract suitable sections from the source sample, I’ll walk you through my methods for shaping and processing, using a typical sampler instrument and plugin processors to twist and morph my way to melodic creativity.
As a bonus, you can download my EXS24 instruments. Alternatively, if you’re not a Logic Pro user, feel free to chuck the raw audio into your preferred sampler and treat the sounds with your own choice of effects.
Step 1: The first step is to pick a sample that varies in tone and timbre throughout. For this tutorial, I’ve chosen an unprocessed acapella from Loopmasters’ Liquid Motions sample pack – a vocal line comprising a mix of both short and sustained words.

Step 2: First, I duplicate the audio region to another channel, so we always have an untouched version to refer back to. Next, let’s load a creative reverb plugin (Eventide’s Blackhole) on the audio track, and audition through the vocal, listening out for a section that might work as a sustained pad.
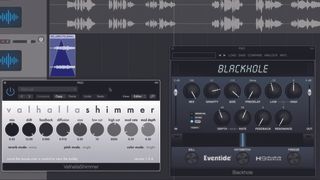
Step 3: I pick a section that sparks interest, then chop out this chunk and duplicate it down to a new track. Experimenting with timestretching and different reverb treatments introduces artefacts that add texture and flavour.
Get the MusicRadar Newsletter
Want all the hottest music and gear news, reviews, deals, features and more, direct to your inbox? Sign up here.
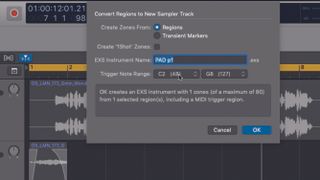
Step 4: Bounce the new file with its effects in place. Next, here in Logic Pro, I create a new Sampler Instrument by choosing Zones From Regions starting from C2 – this spreads the sample across all keys, giving me a polyphonic patch. Sampler enveloping and filtering now shapes my new ‘synth’ patch.
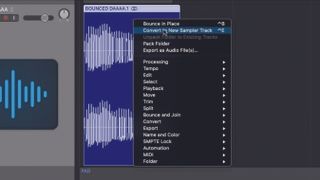
Step 5: To make a vocal-based ‘lead’, I find a percussive part of the vocal – a section with minimal sustain and a distinct attack. As before, I duplicate the new audio region and load it into another sampler instrument, choosing Zones From Regions starting from C2.
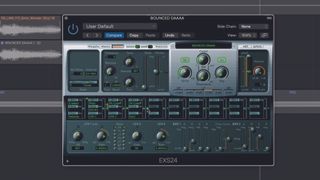
Step 6: With the new EXS24 instrument created, I take advantage of the sampler’s filter and envelope to shape a more interesting source sound. By opening and closing an overdriven filter with the filter envelope, I end up with a unique ‘stab’ lead.
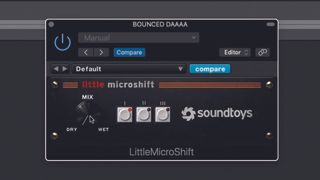
Step 7: Some modulation effects will give this lead some movement. Chorus and/or widening effects are great for adding additional space and texture – in this case, Soundtoys’ Little MicroShift provides the character I’m looking for.
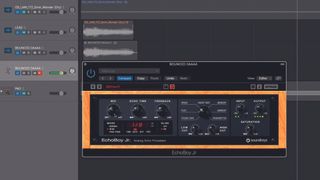
Step 8: It’s time for some reverb and delay. I call up Eventide’s Blackhole reverb again, then Soundtoys’ EchoBoy Jr. for delay. If you dial in a particularly interesting chain of processors, be sure to save them as a channel strip or ‘rack’ in your DAW for future recall.
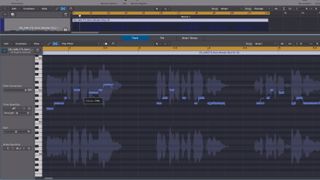
Step 9: Next up, I’m going to use a different vocal chunk to design a bass part. Taking the same idea from my pad, I find a sustained note of vocal; and to make its pitch more obvious, I use Logic’s Flex Pitch to flatten out the phrase’s inherent vibrato.
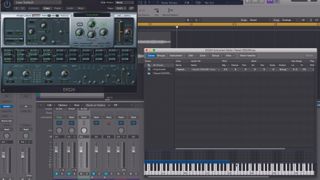
Step 10: After customising the vocal note with editing and timestretching, I use Logic’s Zones From Regions shortcut to create a Sampler Instrument, spreading the sample across all the keys once again. If you’re not a Logic user, don’t worry – this can be done in all decent soft-samplers.
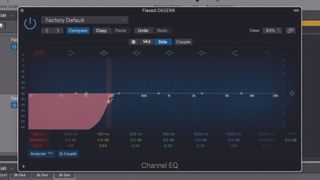
Step 11: Now experiment with effects to enhance the source sound’s timbre. For movement, I call up a chorus effect. This has ‘stereoised’ my bass, so I use a mid/side EQ to eliminate low-end frequencies from the stereo signal.
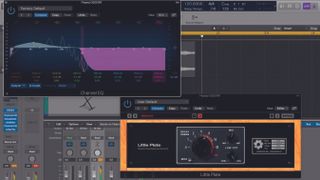
Step 12: Spatial effects can give a bass sound some much-needed ambience, but I recommend you keep the low end clean by restricting the signal’s frequency content. Here, Soundtoys’ Little Plate reverb does the job – I use its Low Cut parameter to cut away all frequencies below 1kHz.
Computer Music magazine is the world’s best selling publication dedicated solely to making great music with your Mac or PC computer. Each issue it brings its lucky readers the best in cutting-edge tutorials, need-to-know, expert software reviews and even all the tools you actually need to make great music today, courtesy of our legendary CM Plugin Suite.

"If I wasn't recording albums every month, multiple albums, and I wasn't playing on everyone's songs, I wouldn't need any of this”: Travis Barker reveals his production tricks and gear in a new studio tour

“My management and agent have always tried to cover my back on the road”: Neil Young just axed premium gig tickets following advice from The Cure’s Robert Smith


