How to customise your drum dynamics with simple volume tweaks
Never mind all that compression and limiting business - you can get your drums sounding better dynamically using nothing but volume and velocity
While complex processing chains and ninja mixing tricks can make all the difference to your drums, the most simple yet transformative factor in creating a unique sound can often be using volume levels to your advantage.
Here, we’ll demonstrate a range of volume-based techniques using a DnB beat in Ableton Live 10, but they can be equally applied in any other DAW. For more creative drum programming tutorials, pick up the August edition of Computer Music.
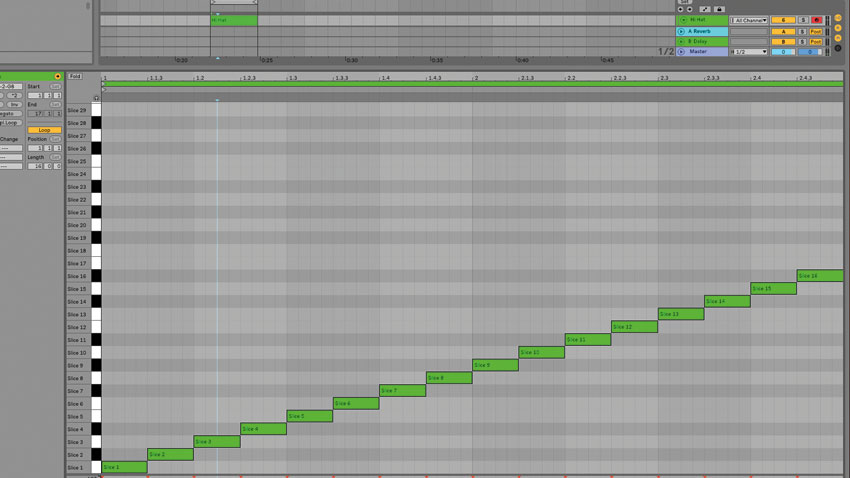
Step 1: First, we group our drum parts together for processing later. Next, we slice our hi-hat stem to a Drum Rack so that we can give the hats more natural dynamics. After trimming the MIDI clip down to two bars, we select all the hi-hats and boost their velocity to 127 to decrease the volume difference between the audio and sliced hats.
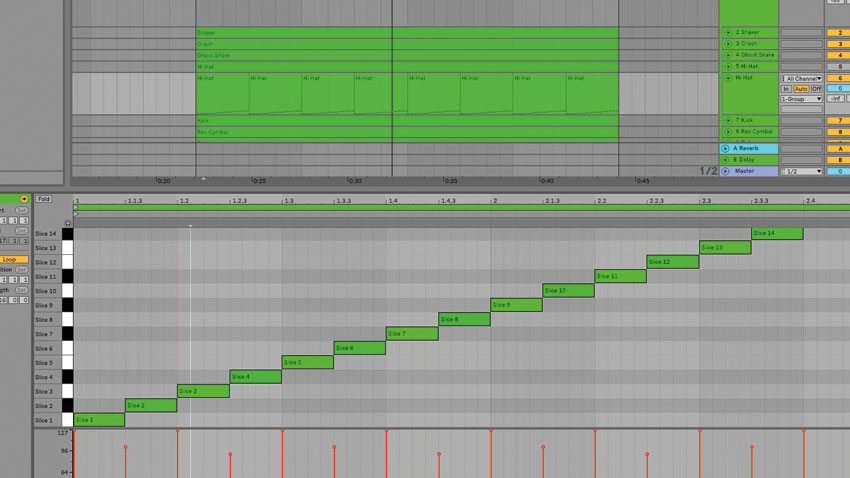
Step 2: Making the offbeat hits softer gives the hi-hat loop a more natural feel, so select every offbeat hit and pull the velocity down to around 100. You’ll hear the hat loop sounds less relentless; adjusting every second offbeat hat’s velocity to around 90 will exaggerate the effect. Now, duplicate the two-bar loop across the 16-bar arrangement.
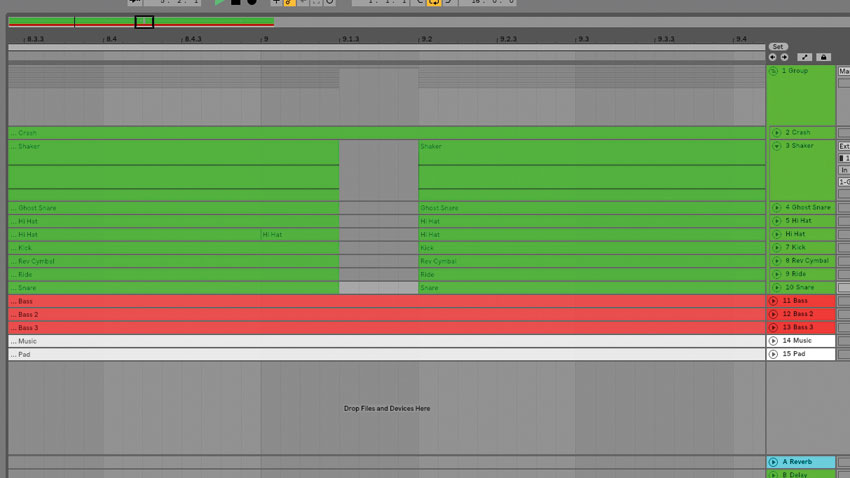
Step 3: A few well-placed silent gaps in the drum track can really draw attention to changes in the arrangement. First, we cut out all the drums except the crash cymbal in the offbeat of bar 9, beat 1 - this leaves a gap between the kick and snare that adds emphasis to the second eight bars of the arrangement.
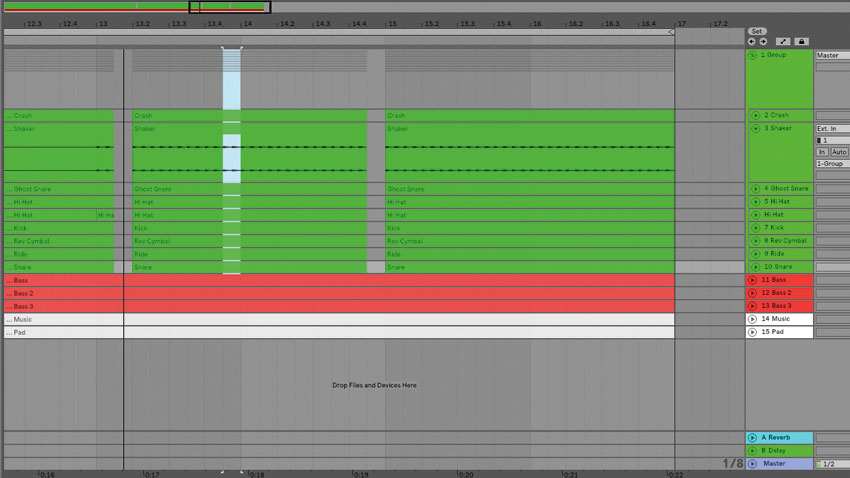
Step 4: Cutting the drums on the offbeat of bar 13, beat 1 makes the change in bass and the added shaker loop really jump out. We also cut the drums after the final snare in bar 14 to give that part of the track a more unique feel. To finish, we make the snare more punchy without lighting up the meters red…
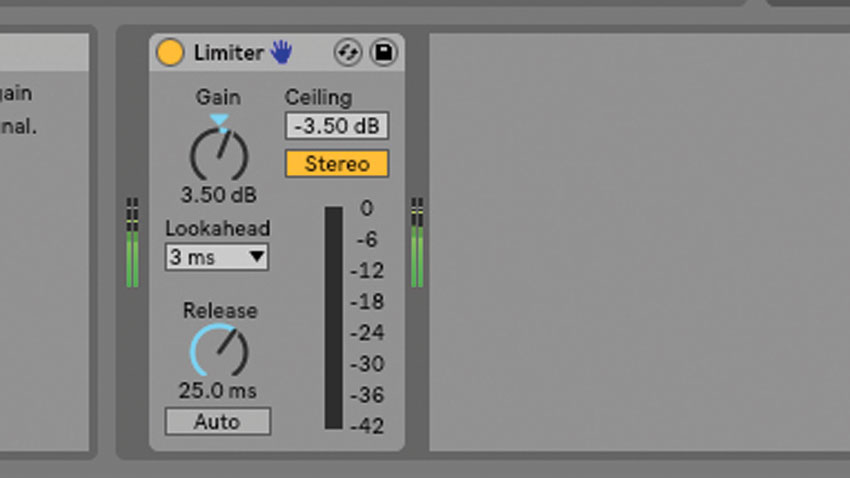
Step 5: Add a limiter to the drums group with the input Gain at 3.5dB, output Ceiling set to -3.5dB and Release at 25ms. Now, push the snare volume up by 4dB. You’ll hear the snare punch through the mix more, while the limiter keeps the peak volume levels in check to avoid clipping.
Get the MusicRadar Newsletter
Want all the hottest music and gear news, reviews, deals, features and more, direct to your inbox? Sign up here.
Computer Music magazine is the world’s best selling publication dedicated solely to making great music with your Mac or PC computer. Each issue it brings its lucky readers the best in cutting-edge tutorials, need-to-know, expert software reviews and even all the tools you actually need to make great music today, courtesy of our legendary CM Plugin Suite.


