How to create epic one-finger chords using Diva's voice-stacking capabilities
Such is power of u-he's mighty virtual analogue synth that it only takes a single digit to conjure enormous sounds!
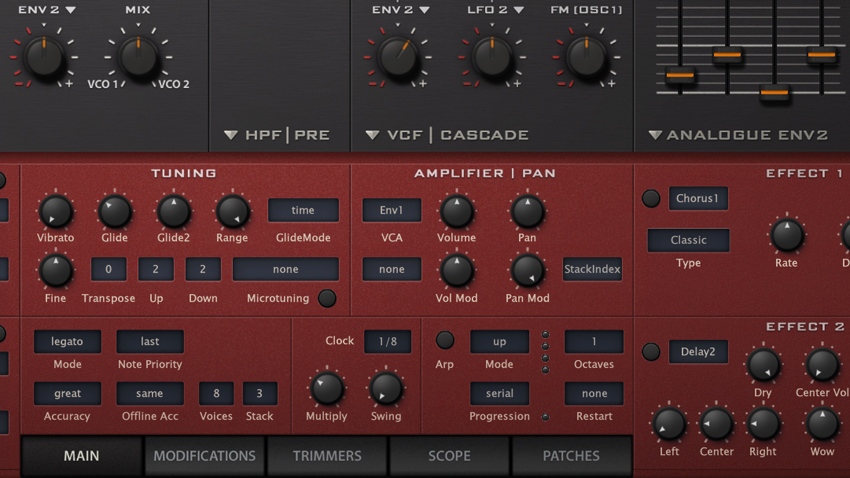
u-he’s Diva is often cited as the holy grail of virtual analogues, bringing the much desired sound of classic hardware synths to our DAWs. Diva maintains a reasonably standard architecture, sure, but it offers the user the unique ability to mix and match modules from classic synthesiser designs. It’s heavy on CPU usage, but if you have a capable machine you’ll reap the rewards.
Indeed, one of those rewards is the ability to stack voices to generate thick, lush chords from single notes, as we'll demonstrate in this walkthrough. For more power synth tutorials, get hold of the April edition of Computer Music.
Step 1: Oscillator tuning provides a great way to get those smoky-sounding deep house chords. We’ll utilise Diva’s voice stack tuning to create a thick chord, playable with but a single finger. Start by loading in the INIT Jupe-8 template. Pull the master Output down to 40 to give us some headroom. Change the mode from Poly to Legato so that only one note is triggered at a time.

Step 2: We’ll start by creating the basic pitch offset between the two oscillators. Turn VCO 2’s Detune dial up to 3 to create a minor third interval (ie, three semitones above the root). Now we’ll thicken things up by adding more layers. Head to the Stack box in the Voice section and change it from 1 to 3. We can use these extra layers to create our chord.

Step 3: Head back to the oscillator section and change the four-way switch to Both. This switch assigns the pitch modulation source for each oscillator. In doing this, we’ve set both oscillators to be modulated by the same source. There’s an Env 2 knob routed to the four-way switch. Change it from Env 2 to StackIndex. Now we can modulate the pitches of individual stacked layers.

Step 4: Turn the dial (now marked Stack) up to 7. This detunes the three layers against each other by seven semitones, producing a rich suspended chord. Smooth things off by turning the filter Cutoff slider down to 90, and move the Res to 30 to add a little bite. To add some filter attack, send it to the envelope by turning the Env 2 dial up to 26.

Step 5: Now that the filter is responding to the envelope, we can modify its shape. Add a slight filter fade-in by setting Analogue Env 2’s Attack to 18, and quicken its drop by moving Decay to 40. To add expressiveness, make the envelope respond to velocity by turning the Vel control up to 100. This shortens the envelope time the harder a note is struck.
Get the MusicRadar Newsletter
Want all the hottest music and gear news, reviews, deals, features and more, direct to your inbox? Sign up here.
Step 6: We can also take advantage of the StackIndex option to spread the voices out over the stereo field. To do this, move to the Amplifier | Pan section and change the Pan Mod assignment from LFO2 to StackIndex. Turn Pan Mod to 100. Now we’ve spread the sound out, let’s add some glide. In the Tuning section, turn the Glide control up to 35 for a smooth transition between chords.
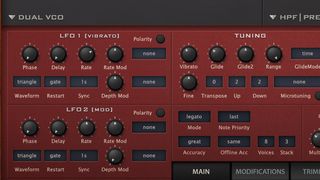
Step 7: A little pitch modulation can add some life to the sound. In LFO1, turn the Depth Mod dial down to 50 to reduce the intensity, and change the assignment box from ModWheel to None. By doing this, we hardwire the LFO so that the position of the mod wheel has no effect. To hear the effect, turn the Vibrato control up to 40.

Step 8: The Modifications panel holds additional modulation destinations. We can make the filter resonance respond to velocity, giving a sharp sweep when a note is struck hard. Change the Resonance Mod assignment box from none to Velocity and set it to 50. A small M will appear next to the filter resonance control, showing the assignment has been made.

Step 9: Finally, we’ll add some effects. Turn on Effect 1, which is Chorus by default. Set the Type to Ensemble and pull the Rate control down to 15. Turn on Effect 2 and change it to Plate2. Turn the Decay time down to 35 and we’re finished! Try playing short notes for riff-based music, or smoothly with sustained, overlapping notes for a deep-sounding pad.
Computer Music magazine is the world’s best selling publication dedicated solely to making great music with your Mac or PC computer. Each issue it brings its lucky readers the best in cutting-edge tutorials, need-to-know, expert software reviews and even all the tools you actually need to make great music today, courtesy of our legendary CM Plugin Suite.

“It’s tougher and faster than ever”: Jump aboard the modern hardgroove train and learn to build a club-ready beat

“You can even buy and create models of instruments that are impossible to build in the real world”: Don't know where to start with virtual instruments? We're here to help
Most Popular


