How to create brand new beats by layering drum samples
Create huge-sounding drums with your own creative stamp, layer, EQ, and repeat
Big-time music producers don’t just stack chips; they stack sounds, most often drum sounds. Doing so helps them create huge beats with unique tones. Of course, there’s nothing about the practice that requires you to have expensive equipment or esoteric knowledge.
But it is, however, a practice. There are methods to drum layering, but much of doing it successfully depends on your own ear, experimentation and repetition. Fortunately, you can try these techniques in just about any DAW with stock plug-ins and tools. Now, let’s pile it on.
Kick drums
We’ll start out by layering two distinct kick drums together and gradually making them sound as if they came from the same drum. First, choose a kick sample with a sharp, fast attack and a mid-range tone on one track. We’ll call it Thud. Next, pick a low, boomy kick with a longer, subby release. A classic TR-808 sample should do, or a sample from any number of analogue or modelling drum machines, like a Jomox Xbase 999 or Elektron Machinedrum. We’ll call this sample Boom.
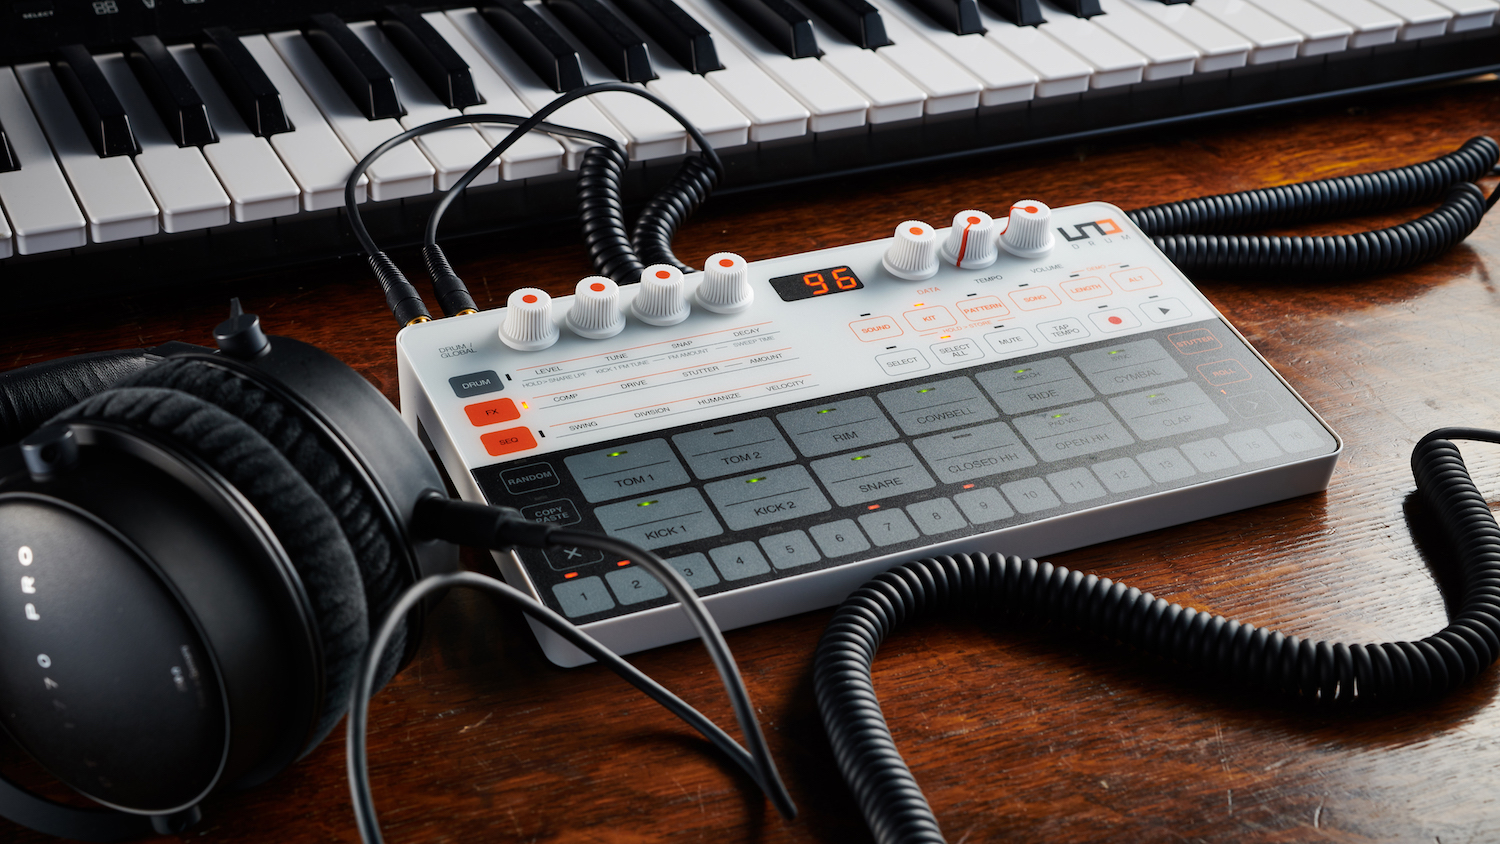
Best drum machines 2020: our pick of the best grooveboxes for beginners and pros
When you line them up and play them both together, the result may just sound like two drums playing at once, when you want it to sound like a cohesive kick from a single source. Low-end from the Thud sample may be conflicting with the low-end from the Boom sample, and vice versa: the mid-range from the Boom may conflicting with the mid-range from the Thud.
Put your favourite multiband EQ on the Thud track and audition the sample. If the EQ works like Ableton Live’s EQ Eight, it will show you the frequencies of the sample as it plays. Put a low-cut filter on the lowest EQ band and then solo the Thud sample as you dial in the low-cut to somewhere around 100-140Hz. Now play both together again to hear the difference. If the Thud kick sounds a little too crispy at all in the high-end, put a high-shelf filter on the highest EQ band and taper off Thud’s high frequencies to your taste. At that point, consider adding some make-up gain on the EQ so that it comes out at around the same level as before. Now put a manual fade on the Thud kick to shorten the tail and make it punchier (Fig. 1).
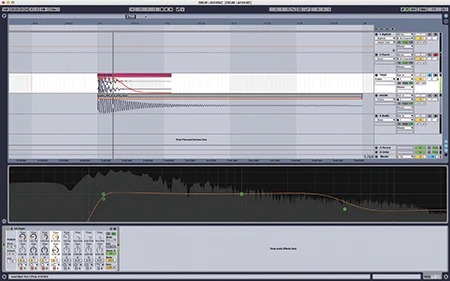
Now solo the Boom kick track and open the Boom’s sample editing window. There, try tuning it down by a few semitones to work off some of its mid-range. When you’re happy with that, put another manual fade out on the Boom kick to shorten its tail as well (Fig. 2).
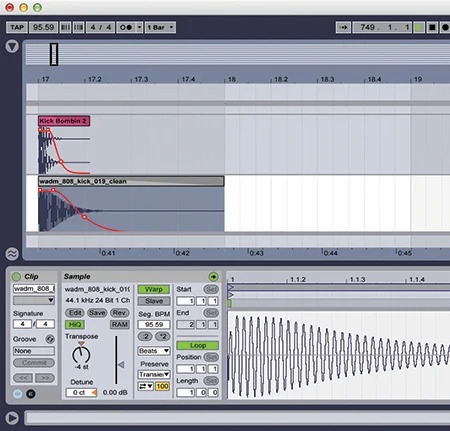
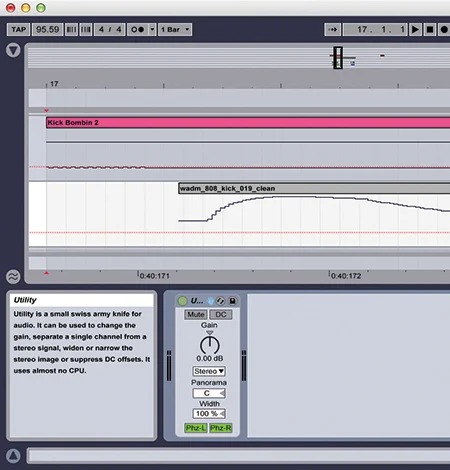
Whenever you layer two drum sounds, especially kick drums, there's a chance you will get partial phase cancellation, which will make some characteristics of the sounds inaudible and/or make the mix blurry or unclear. To check for that, do a polarity flip of one of the drum sounds. DAWs often have stock plug-ins that let you flip the audio's polarity, which they often call inverting the phase. For example, in Apple Logic, it's the Gain plug-in. In Live, it's the Utility plug-in. Some EQ plug-ins also let you flip the polarity, and there are third-party plug-ins like Waves InPhase LT ($75) that offer the function. Flip the polarity of one of the samples, and if you notice an obvious difference in the sounds, that's a positive sign. If you don't notice much or any difference, you may have phase problems. In that case, zoom way in on the tracks in the timeline and nudge one of them back by about a half a millisecond and see if that changes the sound (Fig. 3).
Get the MusicRadar Newsletter
Want all the hottest music and gear news, reviews, deals, features and more, direct to your inbox? Sign up here.
Now if your DAW supports it, group the two tracks and add a saturation plug-in on the group track. It's a not-so-secret weapon for adding a little bit of warmth and colouration to mixed signals, and it should help finalize the melding of these two kicks into one. You could overdrive the saturator and drift into distortion territory if that's what you want. But usually, you'll just kiss the samples with some added punch; either way, watch levels to make sure they don't clip.
By now you should be ready to print or bounce the audio to a new kick drum sample. When you do, we recommend you also normalize it, especially if you are making samples for a collection that you will share or sell. Nearly everything else out there will be normalized for maximum volume, so yours should be too if you want people to notice it.
Now if you want to go nuts and try layering three, four or even more kicks together, have a blast, but note that the more layers you add, the more diligent you'll have to be carve out some frequency space for each layer with EQs and filters and be extra careful about phase cancellation.
Snares and other percussion
This process for layering snares and by extension, other drum sounds is fairly similar to layering kicks, although with some different design elements. So why not try something a little more creative and make one of your “snares” a found sound you record yourself?
Pick a snare sample you love for you base layer, and then for a second layer, record some kind of sustained noisy sound, such as ripping a piece of paper, tearing a rag, scratching the length of your arm, or your own voice mimicking the crowd noise of a stadium audience. Trim that recorded audio to a good snare length and then split the first 0.1 or 0.2 tenths of a second to a new clip and, depending on the audio level, boost it a significant amount, maybe 8-12 dB to create an attack. Then create a fadeout at the end of both of those clips to smooth out the sound. It can also work well to smooth out the sound of your noisy recorded sample with either a subtle, no-tail reverb or a chorus effect to give the makeshift snare layer some colouration.
If the two stacked snare samples sound harsh at all, again group the two tracks and put a multiband EQ on the group track. Put a bell filter on EQ bands at around 600 Hz and/or 1k and adjust them down with a fairly high Q value to get pointy-shaped curves. While in the multi-band EQ, you can use two more EQ bands to boost commonly boosted frequencies in snares: 3.8 kHz and 6.5 kHz for some pop and top-end shine. For those EQ curves, also use bell filters with fairly high Q values (Fig. 4).
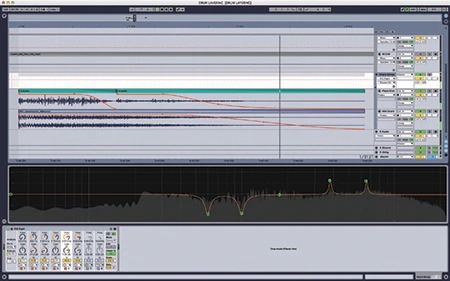
Before printing/bouncing the layered snare down to an audio file, try finding a setting with a compressor/limiter plug-in that gives it an extra final punch.
Shortcut plugins
As satisfying as a job well done can be, a job well done by someone else sometimes really kicks ass. Layering your own samples from scratch can be well worth your time and lead you to some sounds that will be yours alone. Of course, we don’t always have the kind of time it takes to sweat over laborious drum stacking. In those times when you want the great results of drum layering while letting the experts do the legwork for you, there are a couple of great plug-ins that have streamlined the workflow for the most popular type of drum layering— the kick—so that you have creative control yet arrive at professional results fast.
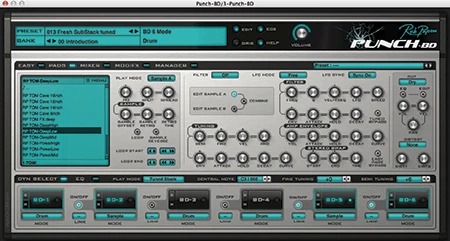
As part of the staggering Punch drum synthesizer ($179), the amazing offshoot Punch-BD is also available separately for $59, and it does one thing comprehensively: synthesis and sampling of up to six layers of bass drums from either the large list of synthesized drum presets included drum samples or any sample you bring from your own collection (Fig. 5). Several play modes let you play the six layers stacked, in a tuned stack that follows the MIDI input notes or in sequence. Besides hundreds of excellent drum presets and samples, there is a full synthesis engine onboard for shaping the sounds with parametric EQ, filters, LFO’s a full effects engine and a mixer for the six drum parts. A clever Easy page lets you alter the synth characteristics of all six drum layers at once. It’s hard to imagine ever getting bored with layering kicks in Punch-BD. If anything, you may get overwhelmed with the possibilities at first.
Another option, BigKick ($65) from Plugin Boutique/Credland Audio counts immediacy and simplicity as strengths, as well as professional results. It doesn’t have quite the insane flexibility of Punch-BD, but rather it focuses on two-layer kick drum combinations similar to our example at the top of this article: One layer handles the attack of the kick drum and the other layer handles the “body,” or the rich low end of the kick (Fig. 6).

BigKick’s top Sample section lets you import the hundreds of included kick attack samples or lets you import your own, with controls for highpass filter, decay and gain. The Body tone generator section lets you dial in the amp envelope and pitch characteristics of the kick’s low end. An Auto Play button plays a 4/4 kick along with your DAW’s clock while you design the kick, and when you’re finished, you just drag the sound onto a DAW track. It even promises that your layered kick drums will be absent of phase problems.
Whether you go with one of these very capable plug-ins, design layered drums for yourself, or both, you should feel empowered to solve one of the persistently nagging problems of electronic music making: sourcing drums that are both huge enough to carry slamming dancefloor tracks and also sound unique to your own productions. Happy layering.
Quick tips: beef up your tracks with these simple tricks
• Kicks that punch Use sidechain compression to make space in your music for the layered kick, and also trim any long release tails off the kick samples so the sidechain doesn’t stay open for too long.
• Get the clap Layer kick drums and different types of cymbals with clap samples. This will help them cut through a mix with high frequencies and to help make your sounds unique. Try some of the mixing tips above on the claps or do your own experimentation on them. Also, try tempering the final bounced down sound with a lowpass filter.
• Dope dupes Try quick layering by duplicating the original sample twice. Pitch up one dupe a certain amount and pitch down the other dupe a certain amount. Mind the phase advice from above to avoid problems.
• Sub-stitutions Layer a kick drum with a simple low-pitched sine wave for some sub-bass and try it also with some distortion or overdrive added for extra harmonics. Stack several sine wave oscillators for greater heft. Sub variations instead of a sine wave include a square wave with a lowpass filter on it or sub-bass presets on an FM synth.
• Clean out the bass-ment Layered kicks can get pretty fat, so create an EQ bus effect and route everything to it except your kick and bass tracks. Roll-off all frequencies below 100 Hz on the bus EQ.
• One love You don’t always have to layer multiple drum sounds. If you find or make single samples you absolutely love and that work in your music, you’re not being lazy by sticking to one sample per sound. Go with it.
Electronic Musician magazine is the ultimate resource for musicians who want to make better music, in the studio or onstage. In each and every issue it surveys all aspects of music production - performance, recording, and technology, from studio to stage and offers product news and reviews on the latest equipment and services. Plus, get in-depth tips & techniques, gear reviews, and insights from today’s top artists!
