How to create a simple chord progression in your DAW
We kick off the first in a series of music theory tutorials with a look at the very basics of chord construction
If there’s one thing guaranteed to polarise a room full of computer musicians, it’s music theory. With just one mention of a dominant seventh or a double flat, the MIDI keyboards come out, and the two sides line up against each other and proceed to fight to the death until just one remains, gasping for breath in a heap of piano wire.
OK, so it’s not quite that bad, but there’s definitely a divide nonetheless. Some musicians preach the importance of theory but never get any tracks finished, while the other side shun the lexicon and knuckle down – but their tracks don’t always sound quite… ‘right’.
Here at MusicRadar, we’re firmly in the middle. It’s the emotion that counts, but we know that a dose of useful knowledge can inspire a truly unique track. Music theory is just that: theory. It explains why certain notes work together, but they still work together if you don’t know why they do. That’s why we believe that you should develop your theory skills while actually making music - after all, it’s too easy to use your lack of knowledge as an excuse for lack of output. It’s important that you don’t get lost down the theory rabbit hole, and instead actually get around to making some kick-ass music, equipped with good old-fashioned learning to back it all up.
In this feature and the series that follows, then, we're going to bring you up to speed on the basics of music theory from a practical perspective, starting with the construction of a basic chord progression.
For the full Music Theory Made Easy! feature, pick up the Autumn 2018 edition of Computer Music.
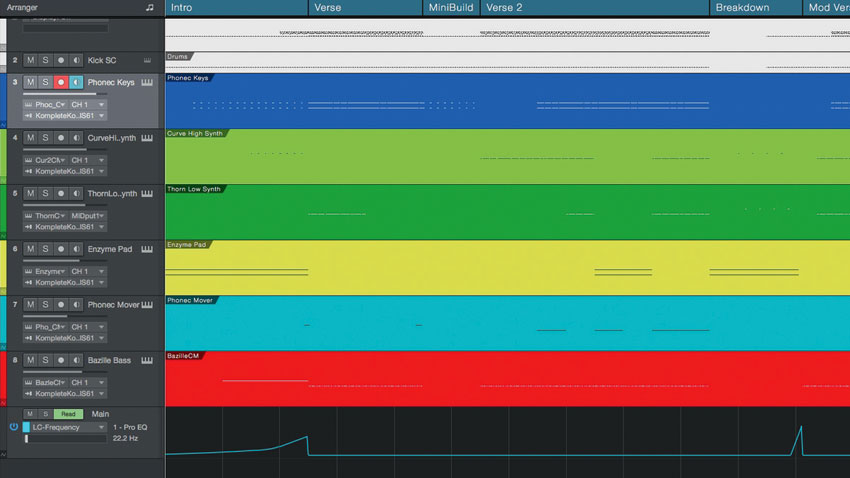
Step 1: Let's make some simple three-note major and minor chords. Load up our sample project.
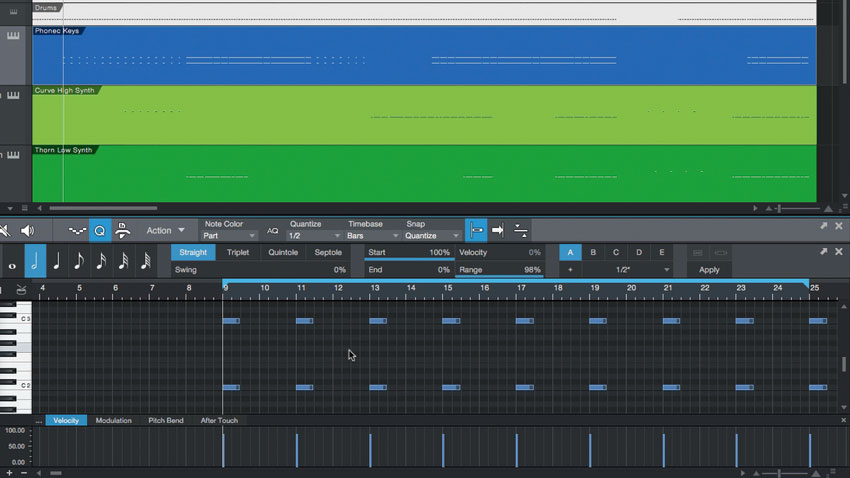
Step 2: The Chords Keys.mid track is triggering Phonec CM. Right now, every chord is two C notes, spaced an octave apart - pretty boring! A chord is created by playing two or more notes at the same time. For the first eight C chords in the MIDI part, delete the top note so we can build something new.
Get the MusicRadar Newsletter
Want all the hottest music and gear news, reviews, deals, features and more, direct to your inbox? Sign up here.
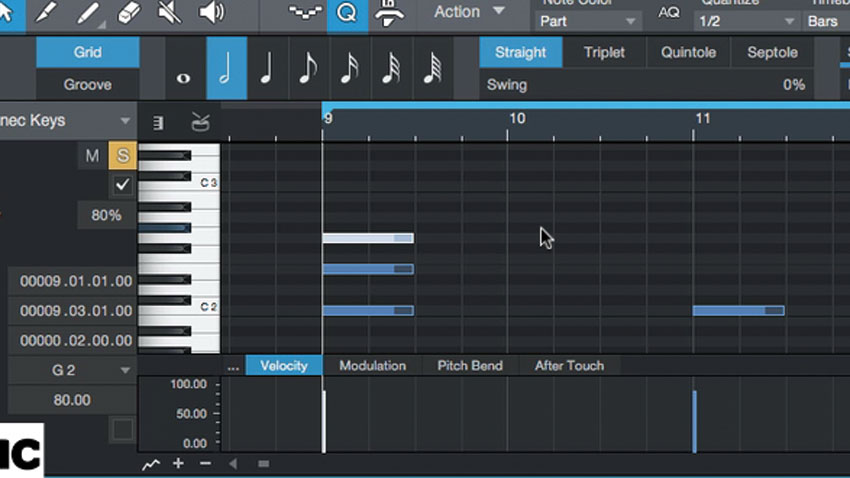
Step 3: There’s a world of possible note combinations, but here we’ll focus on the most common by creating specific three-note chords - aka ‘triads’. We’ll start with a C major chord. Take the C note and duplicate it four steps up to the note E. For the third note, duplicate that E, and move it up by three steps to G. Our C major chord contains the notes C-E-G.
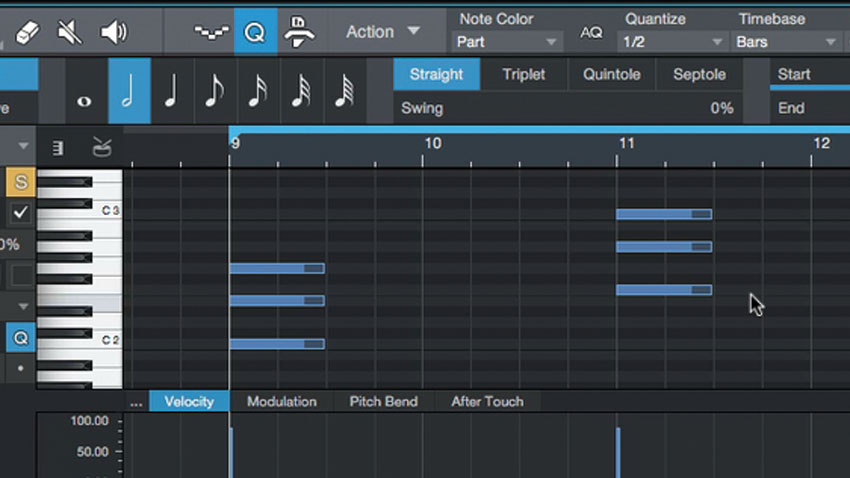
Step 4: Next we’ll duplicate this chord, moving all three notes to make the chord F-A-C. This chord is F major. Although we have different notes, the pattern between them remains the same - from the first note, F, we go four steps up to find our second note, A, and then three steps up to find our third note, in this case C.
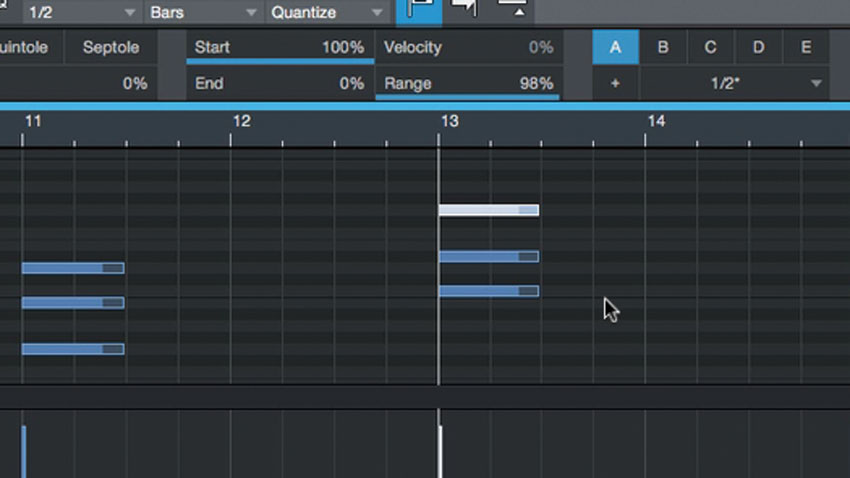
Step 5: If we continue to move this chord to other notes, we’ll still get a major chord, because of the pattern between the notes. Move the chord notes to make it a G major (G-B-D). Now we’ll make a minor chord as the third chord, namely C minor: C-D#-G. Compare it to the C major at the start - the only real difference is the middle note.
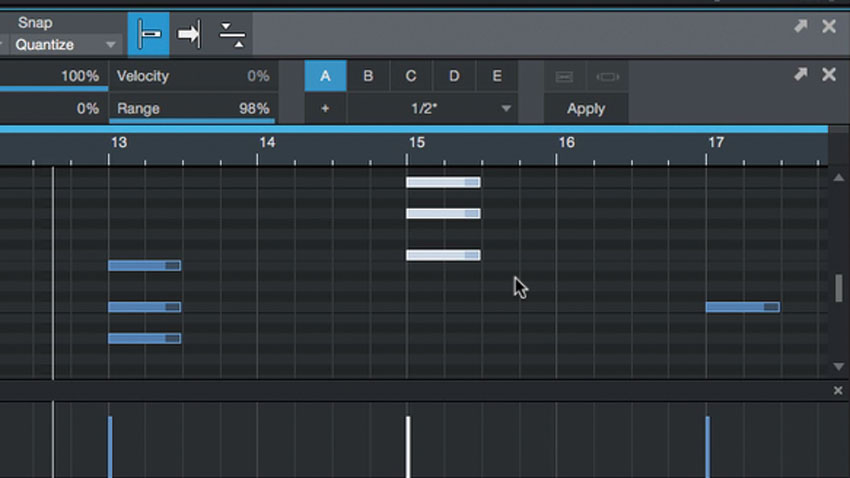
Step 6: Again, what makes this chord minor is the pattern between the notes (up three, up four). We move it down to make it an A minor (A-C-E), then program our last chord as an F major (F-A-C). We then duplicate this chord progression for the entire track on this instrument.
Computer Music magazine is the world’s best selling publication dedicated solely to making great music with your Mac or PC computer. Each issue it brings its lucky readers the best in cutting-edge tutorials, need-to-know, expert software reviews and even all the tools you actually need to make great music today, courtesy of our legendary CM Plugin Suite.


