How to 'comp' multiple recordings onto one track
Use comping to construct the perfect take
RECORDING WEEK 2022: Although it’s nice to think we can capture an awesome performance in one take, recorded music is, of course, subjected to extensive repeat listening. This reveals imperfections that we’d probably ignore or simply not notice in a one-off live performance, and puts us under pressure to capture the best performance possible, without any sloppy timing or tuning.
We’ve already looked at how to deal with a handful of multitrack takes – now let’s step things up a level and look at some more intensive overdubbing and comping options.
With the comp sorted, you can then do any further editing, which includes timing and tuning tweaks
Once again, there’s a particular universal method that will work in any DAW. Here, the key is to set up lots of identical tracks, moving from one to the next as you record successive takes.
With this technique, there’s no attempt to punch in on existing tracks. You simply overdub a bunch of takes and then go back over them, cutting out the sections you want and compiling them on a new track.
The second, more DAW-specific method typically works by recording in cycle mode. You can either work on sections of the song or the whole thing, but either way, what you’ll end up with is your overdub takes as virtual tracks or layers on a single DAW track. These can then be viewed together with a master track at the top. By highlighting the sections you want to hear, you create the compiled take.
Every DAW has its own name for this (Swipe Comping in Logic Pro X), and it’s certainly much quicker than the universal method given above. What’s more, until you render the final edit, it’s usually possible for you to go back and make changes. With the comp sorted, you can then do any further editing, which includes timing and tuning tweaks.
Comping: the universal method
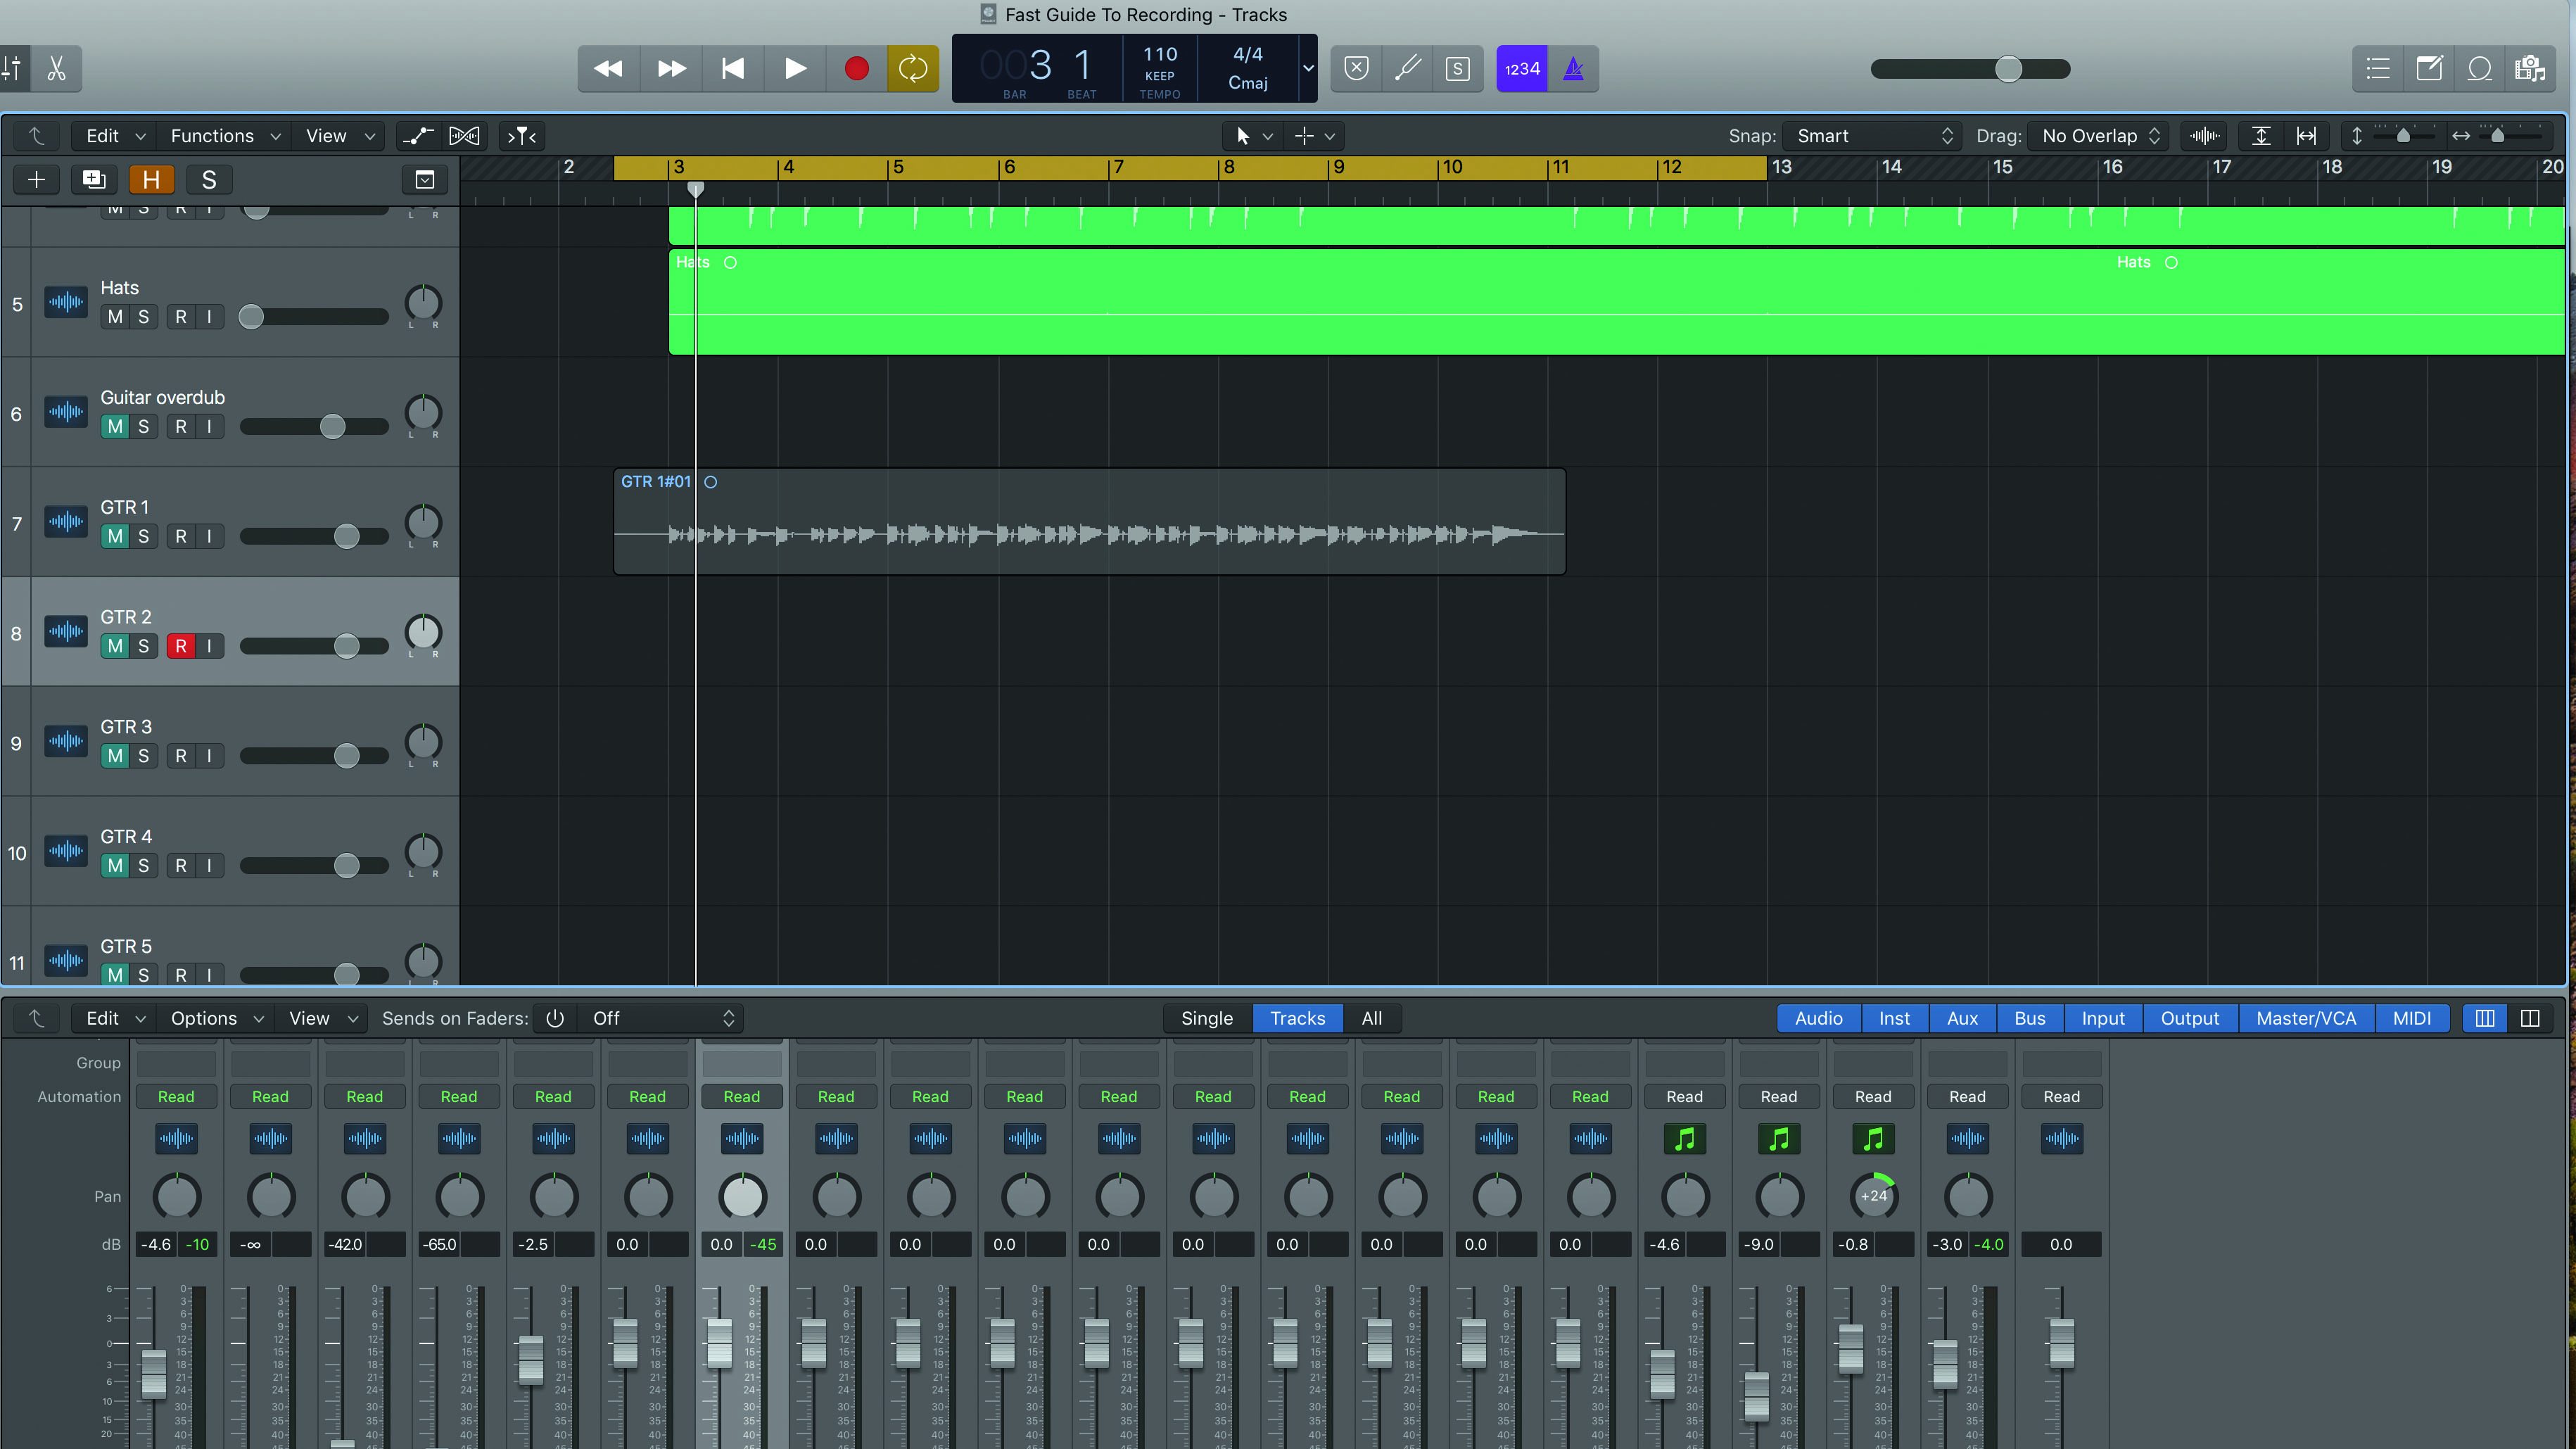
Step 1: Start by making up a set of empty tracks, ensuring that your desired input is routed to each one. Play through the section you want to overdub and record one take. Mute the track you’ve just recorded – as you don’t want to hear it yet – and move on to the next blank track.
Get the MusicRadar Newsletter
Want all the hottest music and gear news, reviews, deals, features and more, direct to your inbox? Sign up here.
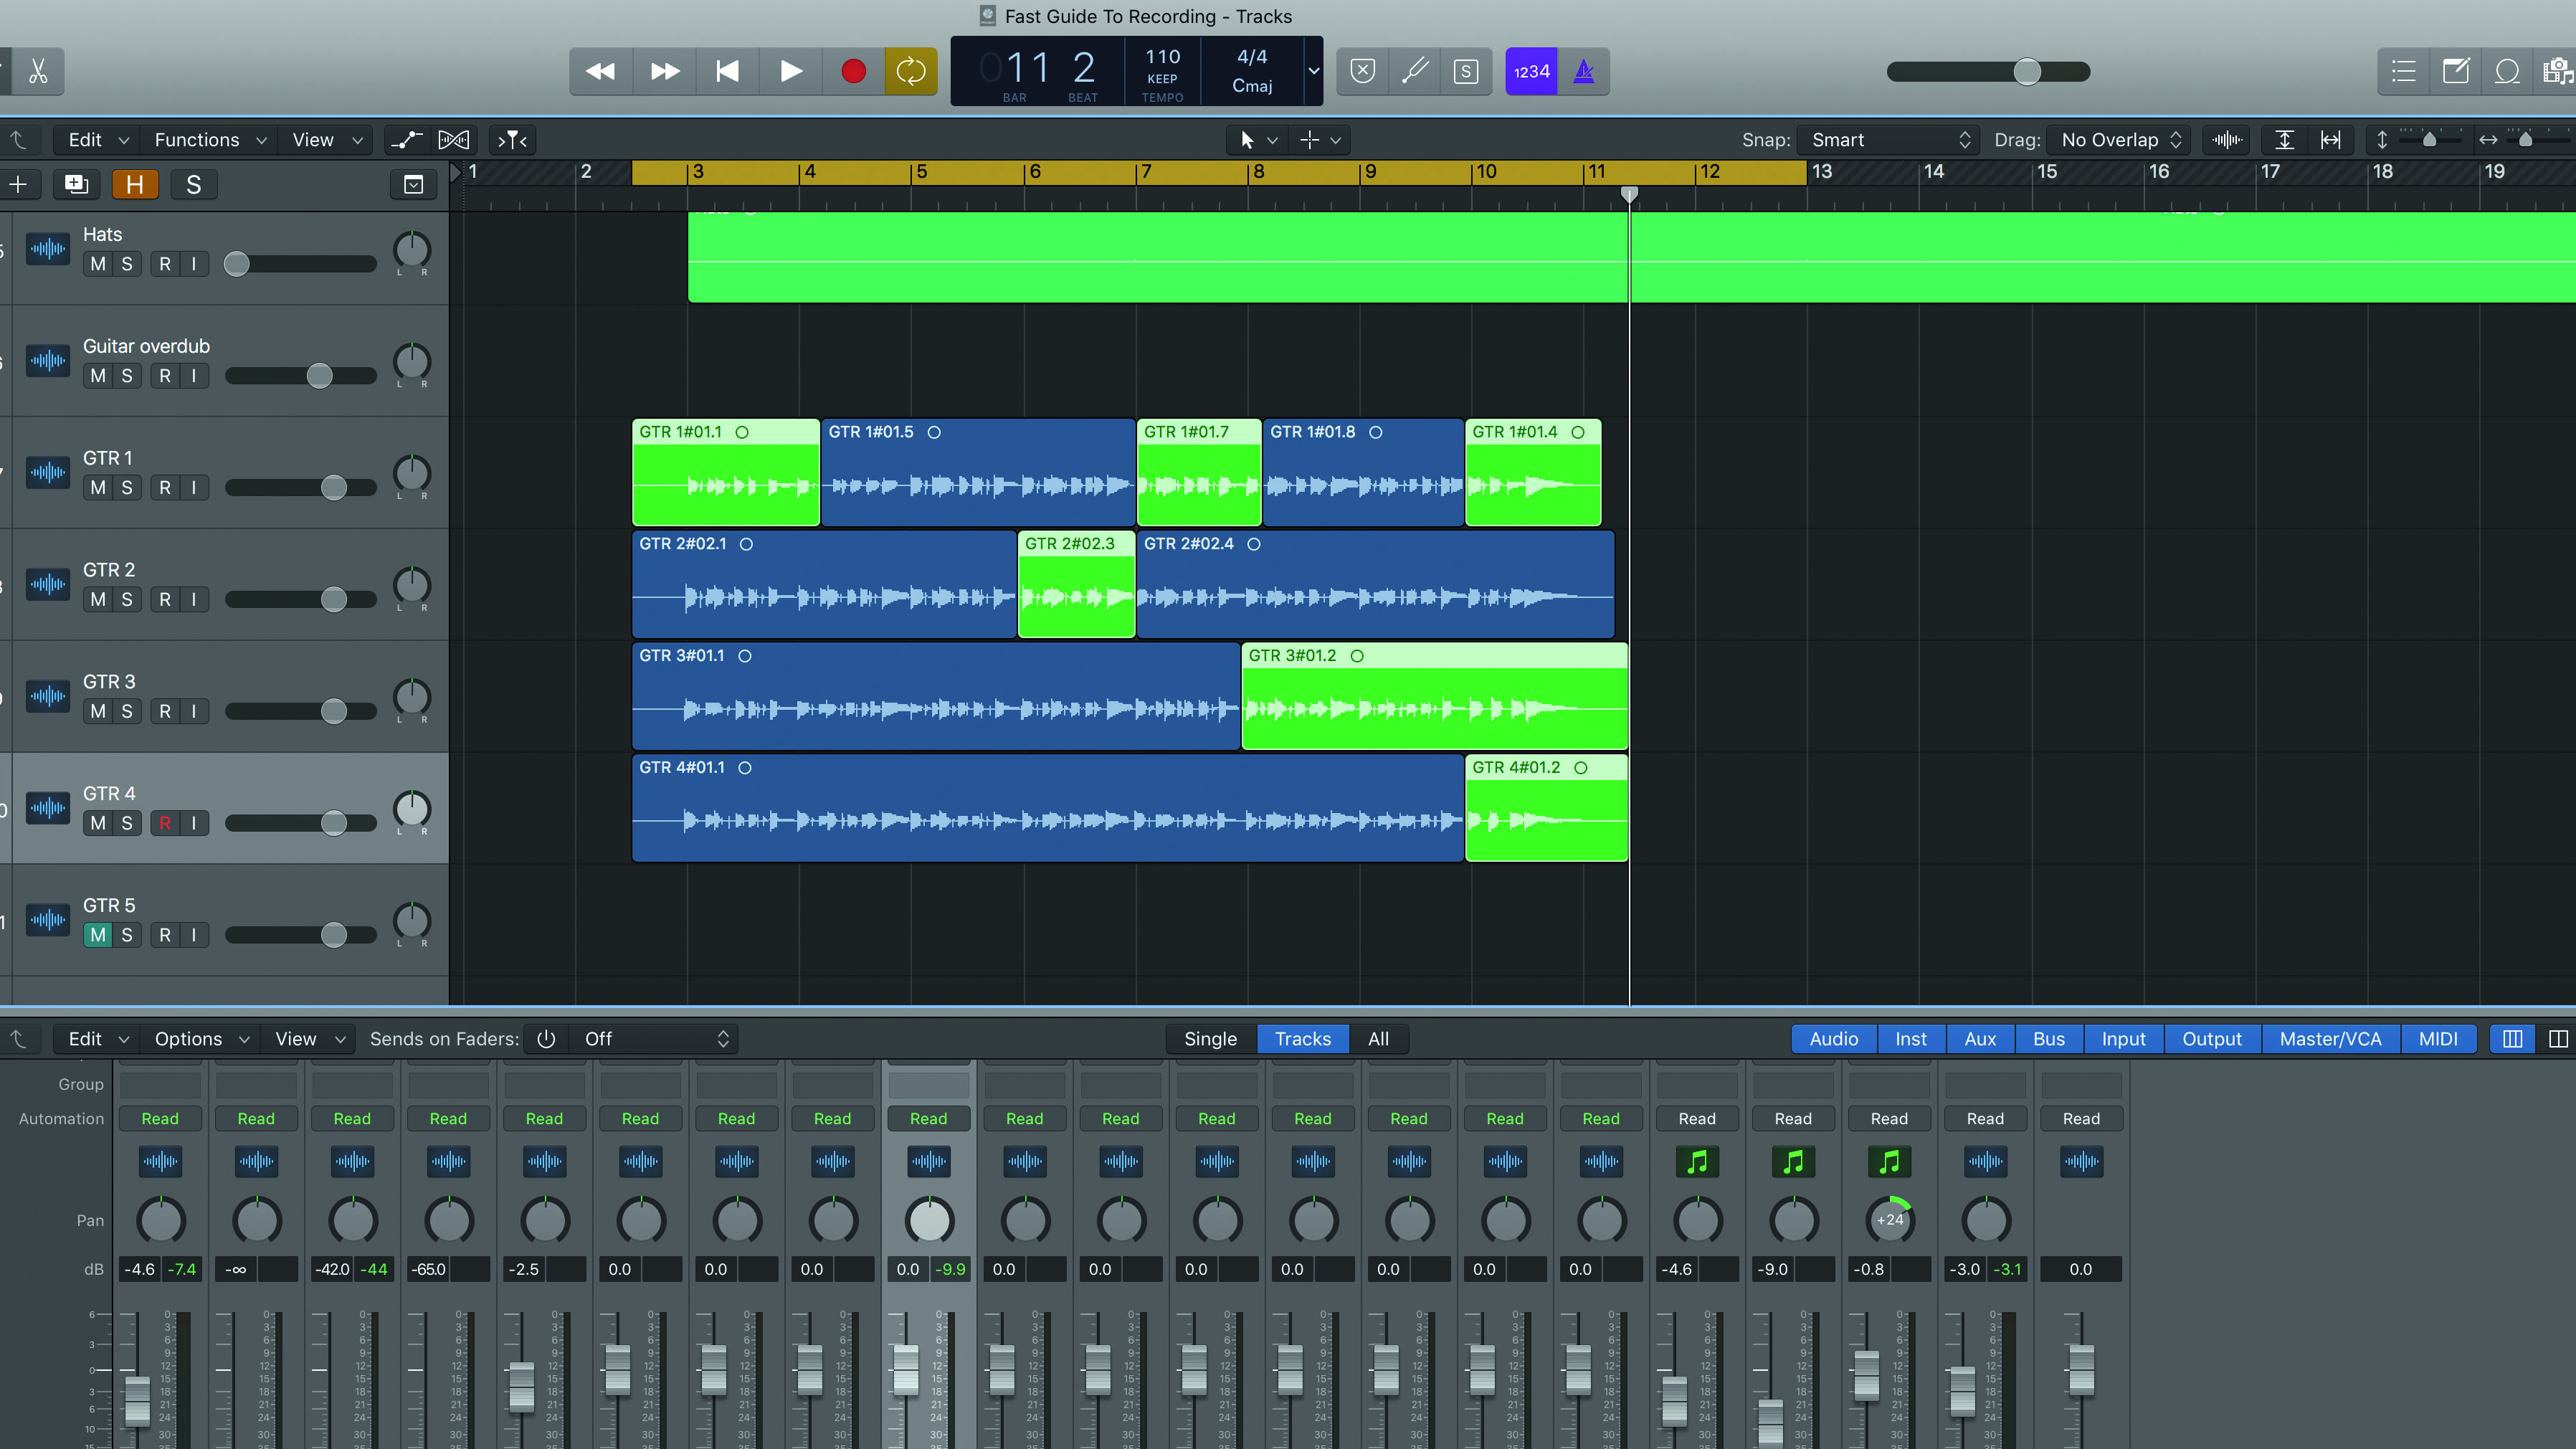
Step 2: Repeat this process until you have enough takes, then listen back to them one at a time. As you do so, divide each take into sections to separate the bits you think are good enough. Colour coding them can be helpful and also indicates the sections you don’t have covered yet.
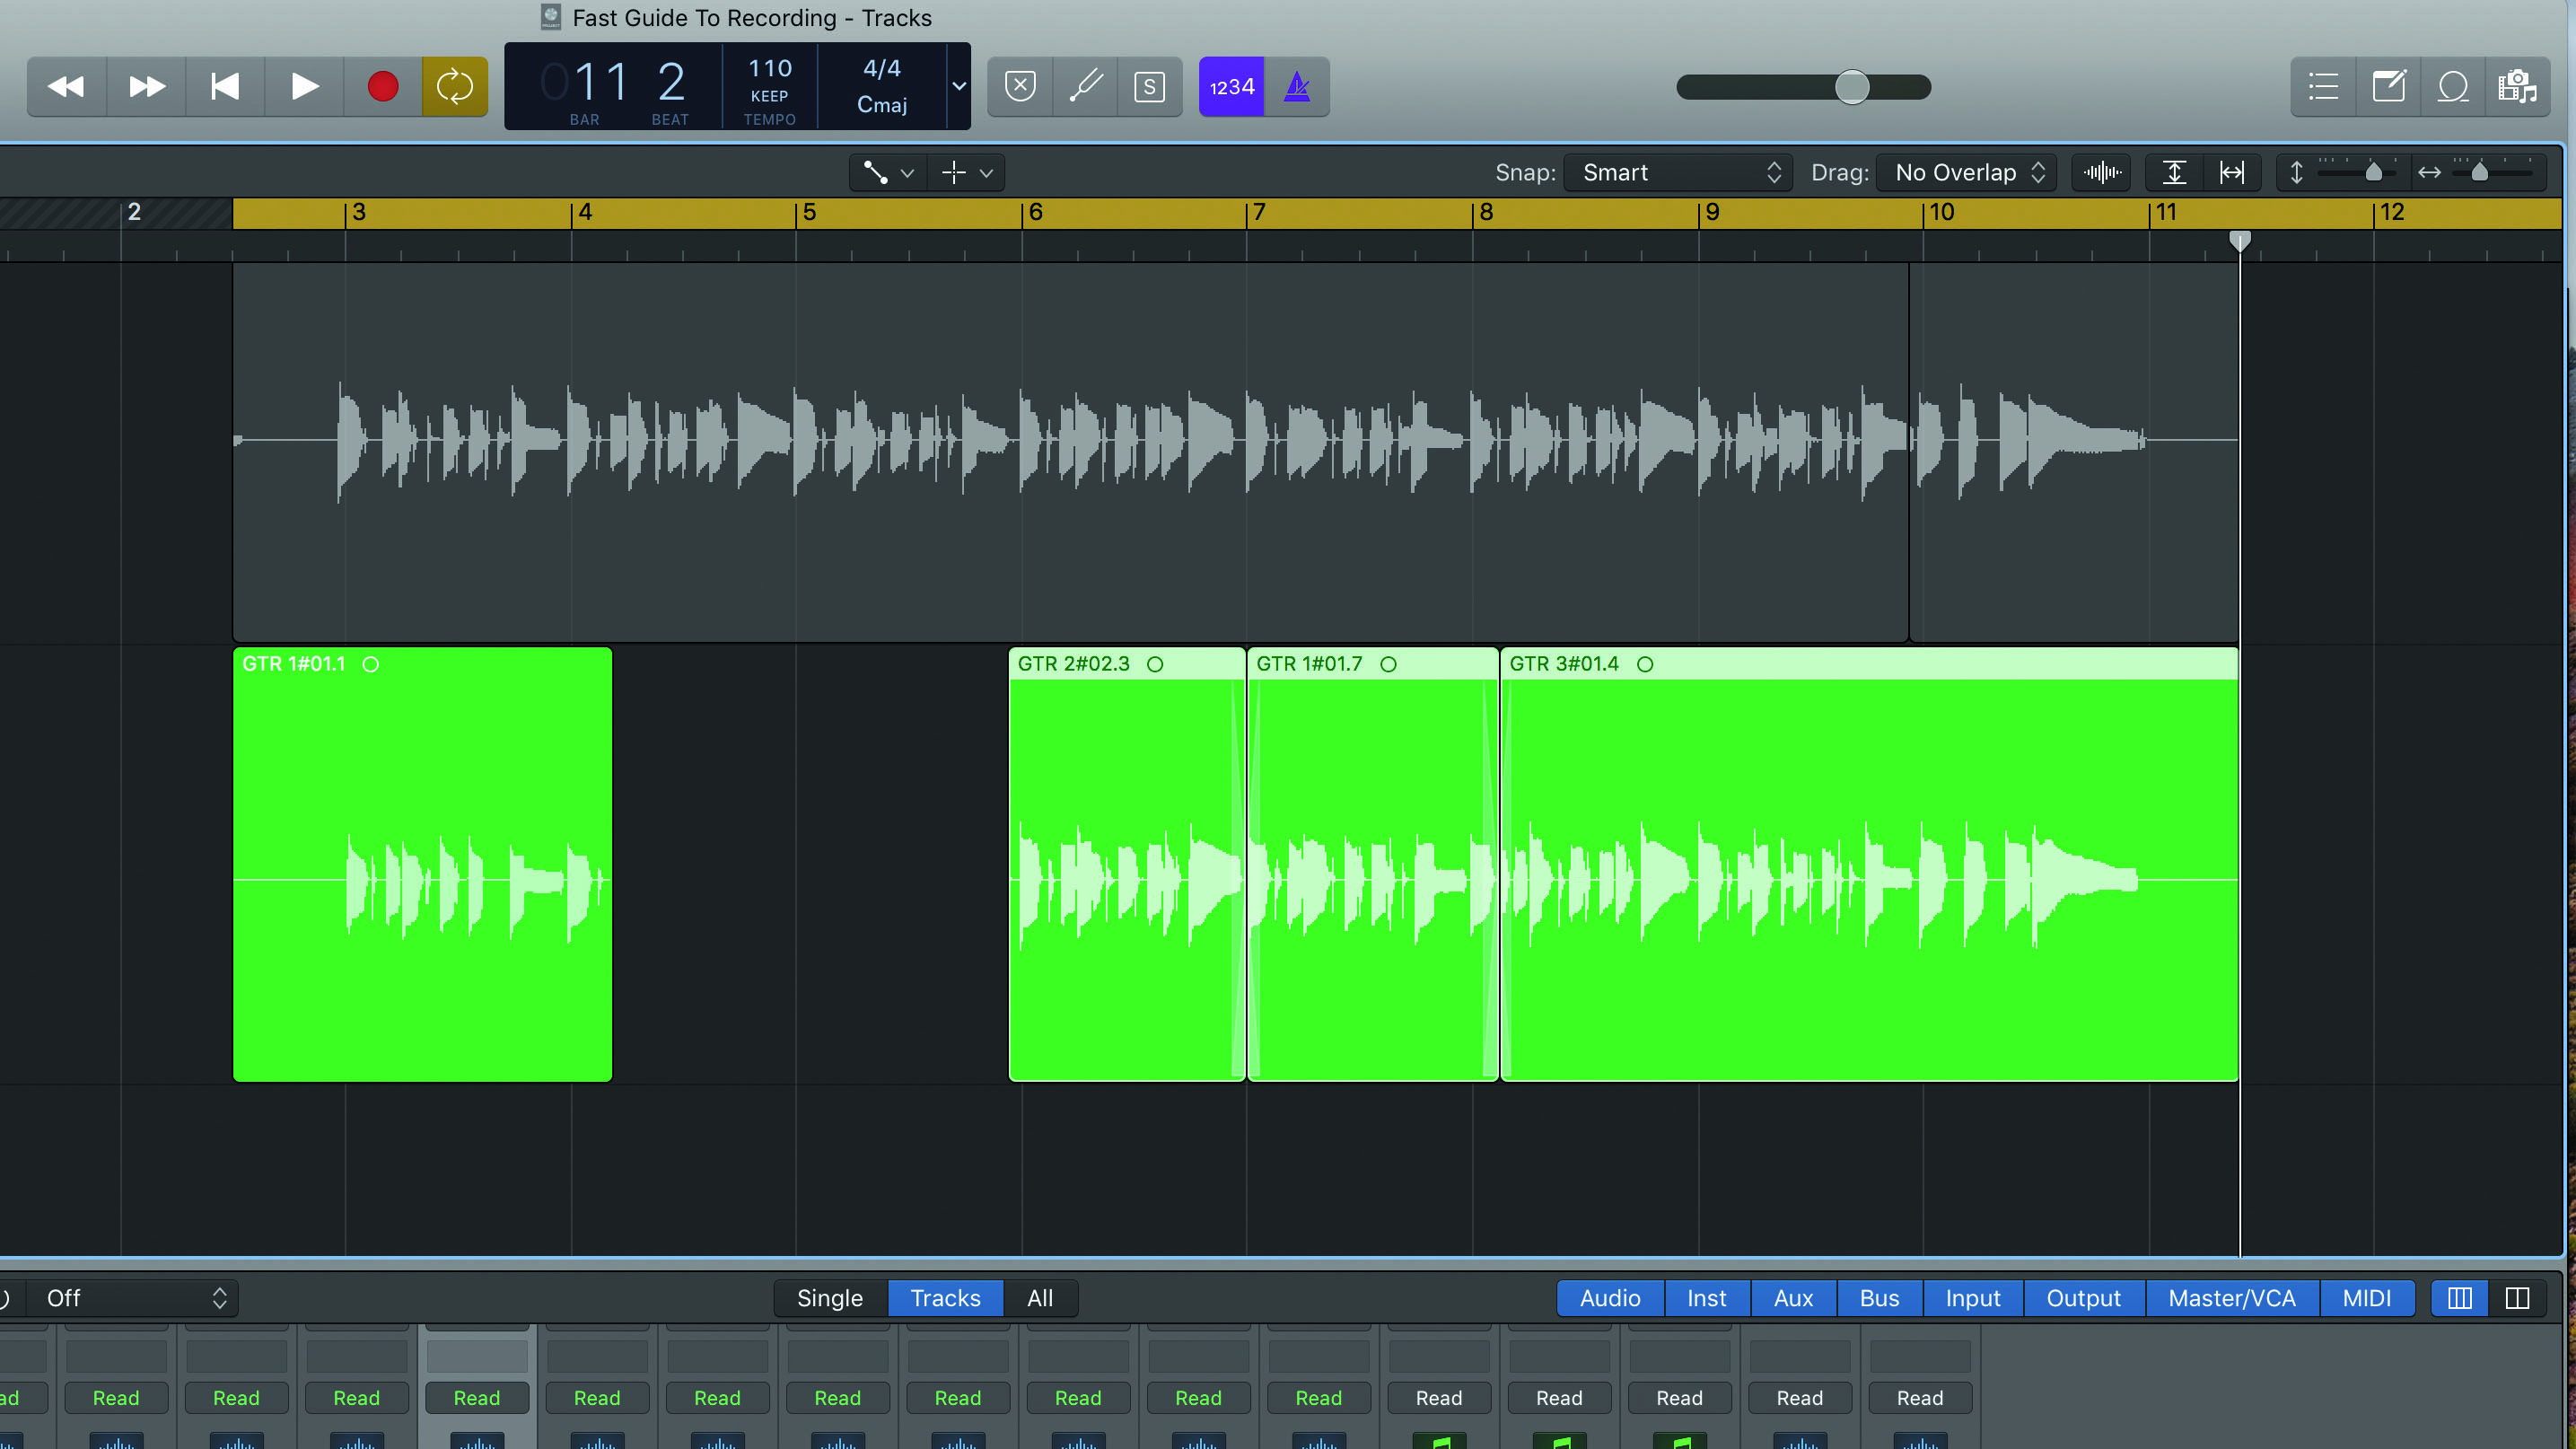
Step 3: Move sections to a new track to create your compiled master. This takes trial and error as some sections will work better together than others. If you don’t have all the sections needed, return to step 1 and record more takes. When happy, tidy up the joins and apply crossfades.
Comping: the cycle method
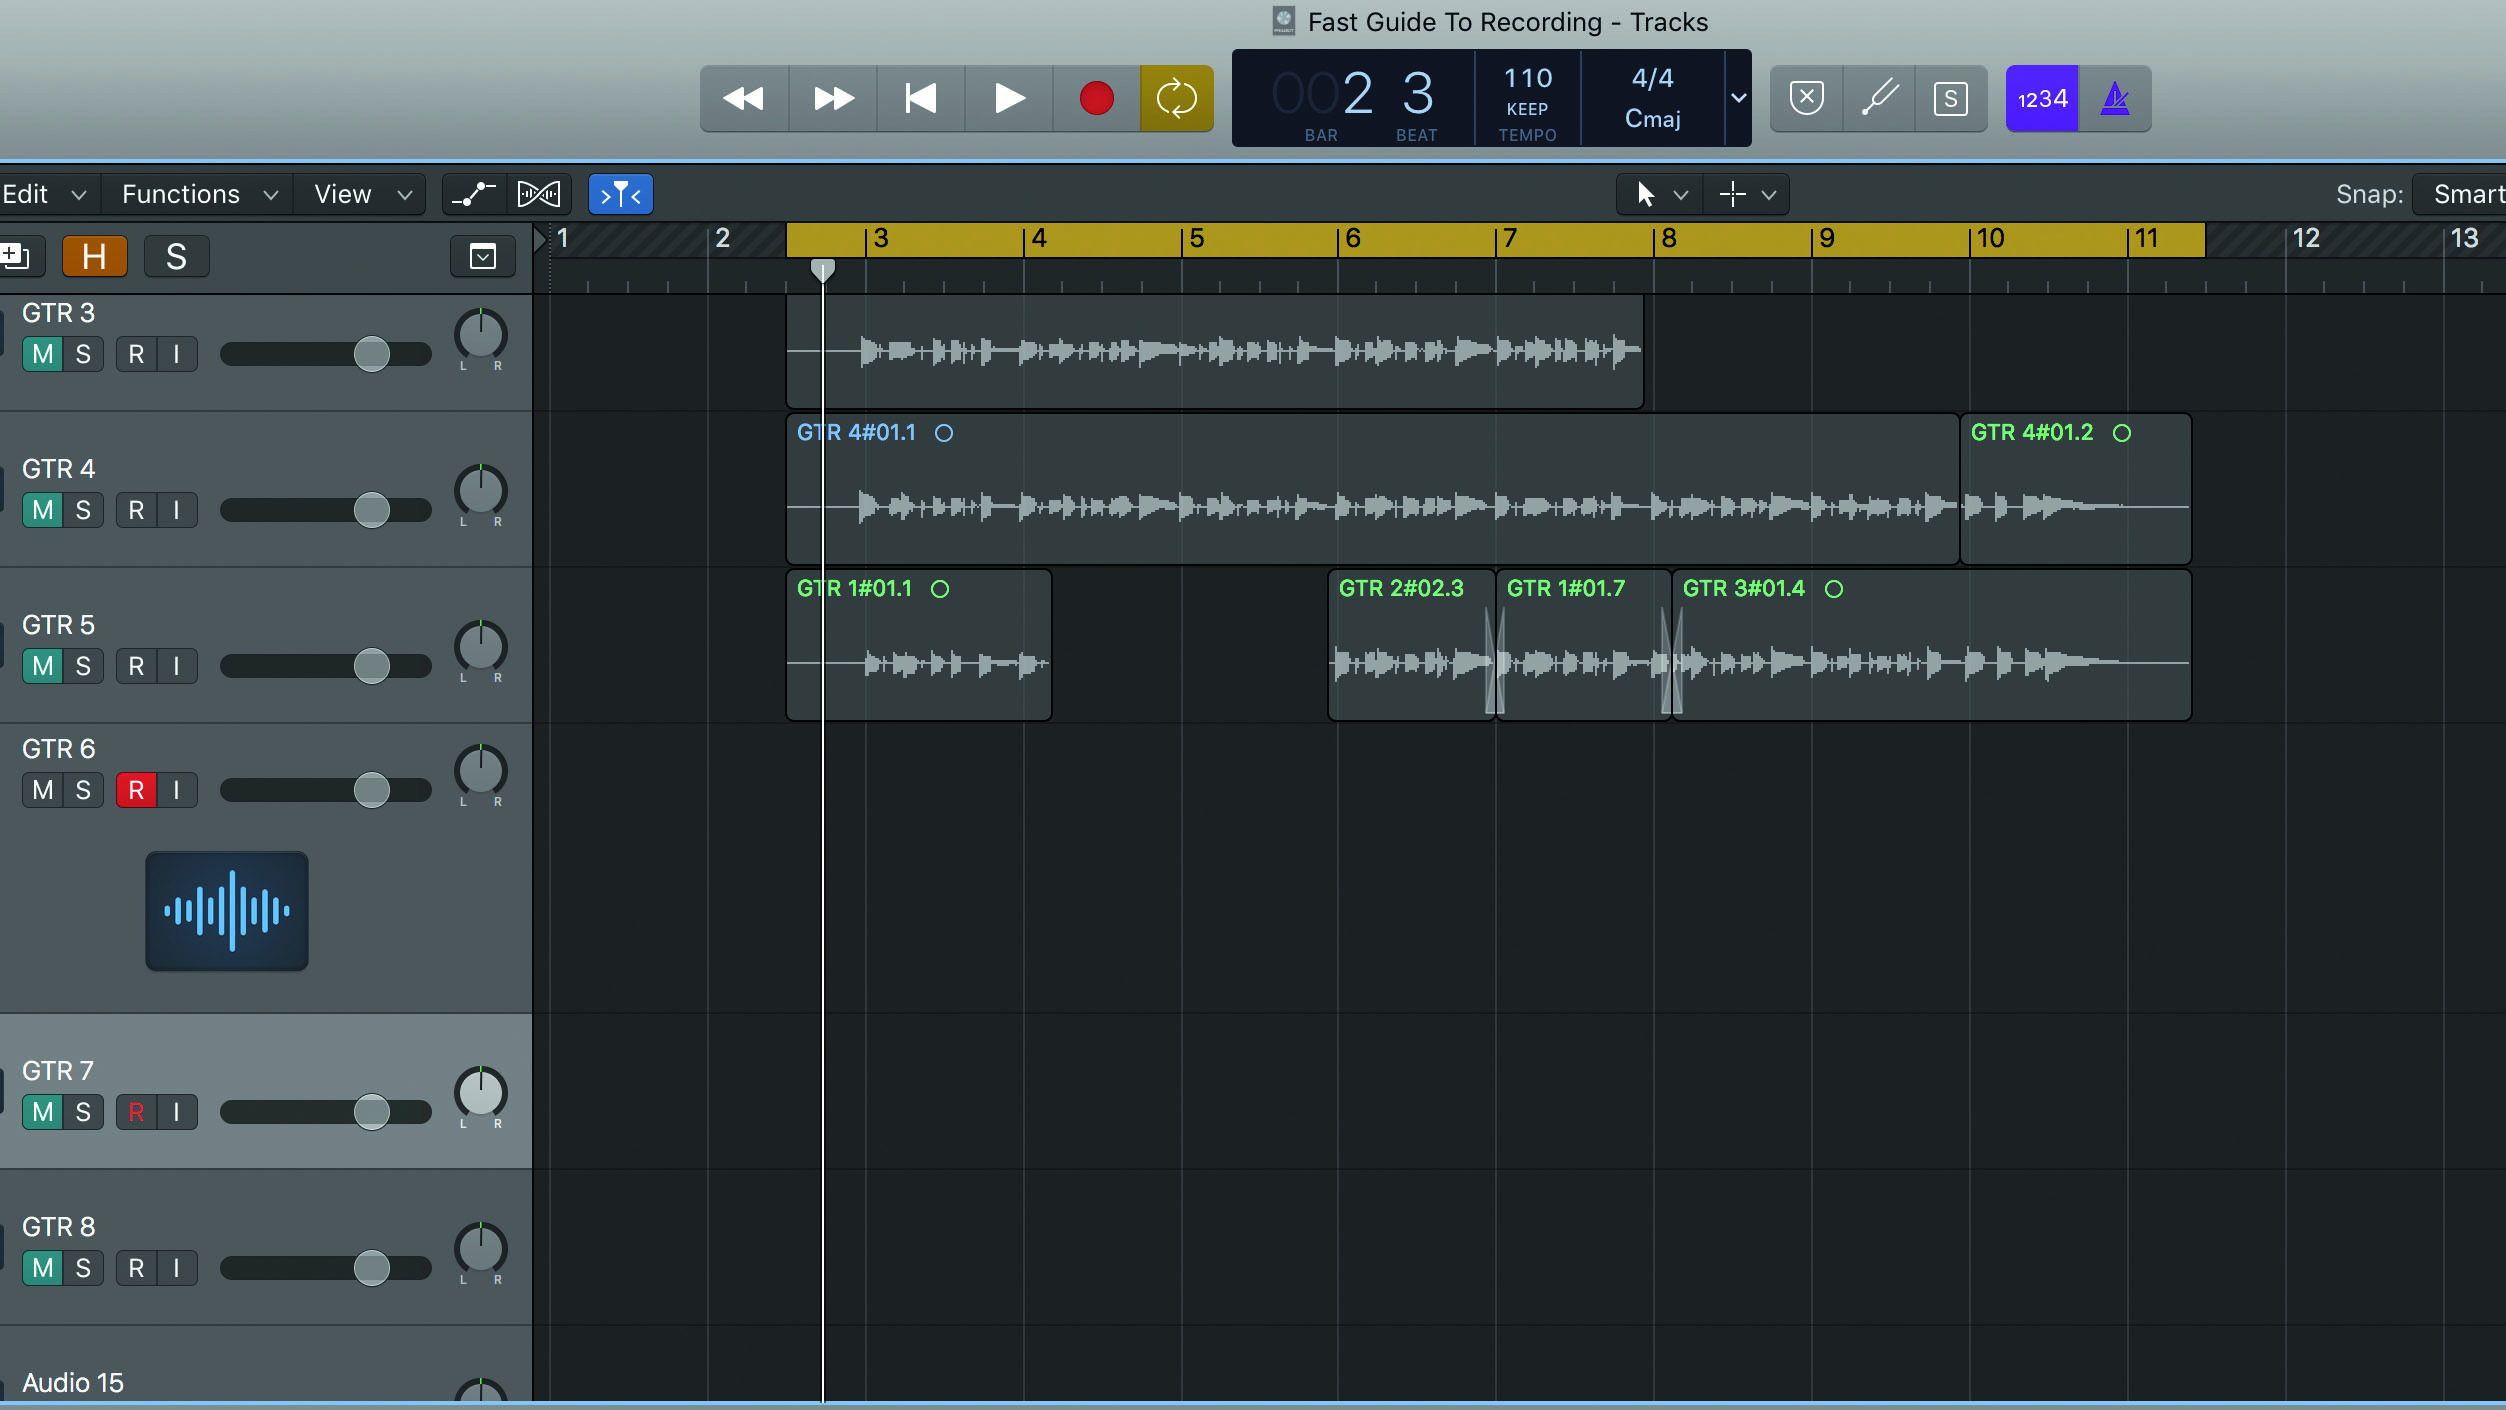
Step 1: Each DAW has its own approach to this, but common to most is the requirement to work on a cycled section of the track. First, set up loop points and select a track to record. Remember, with this technique you only need to set up one track, which saves time.
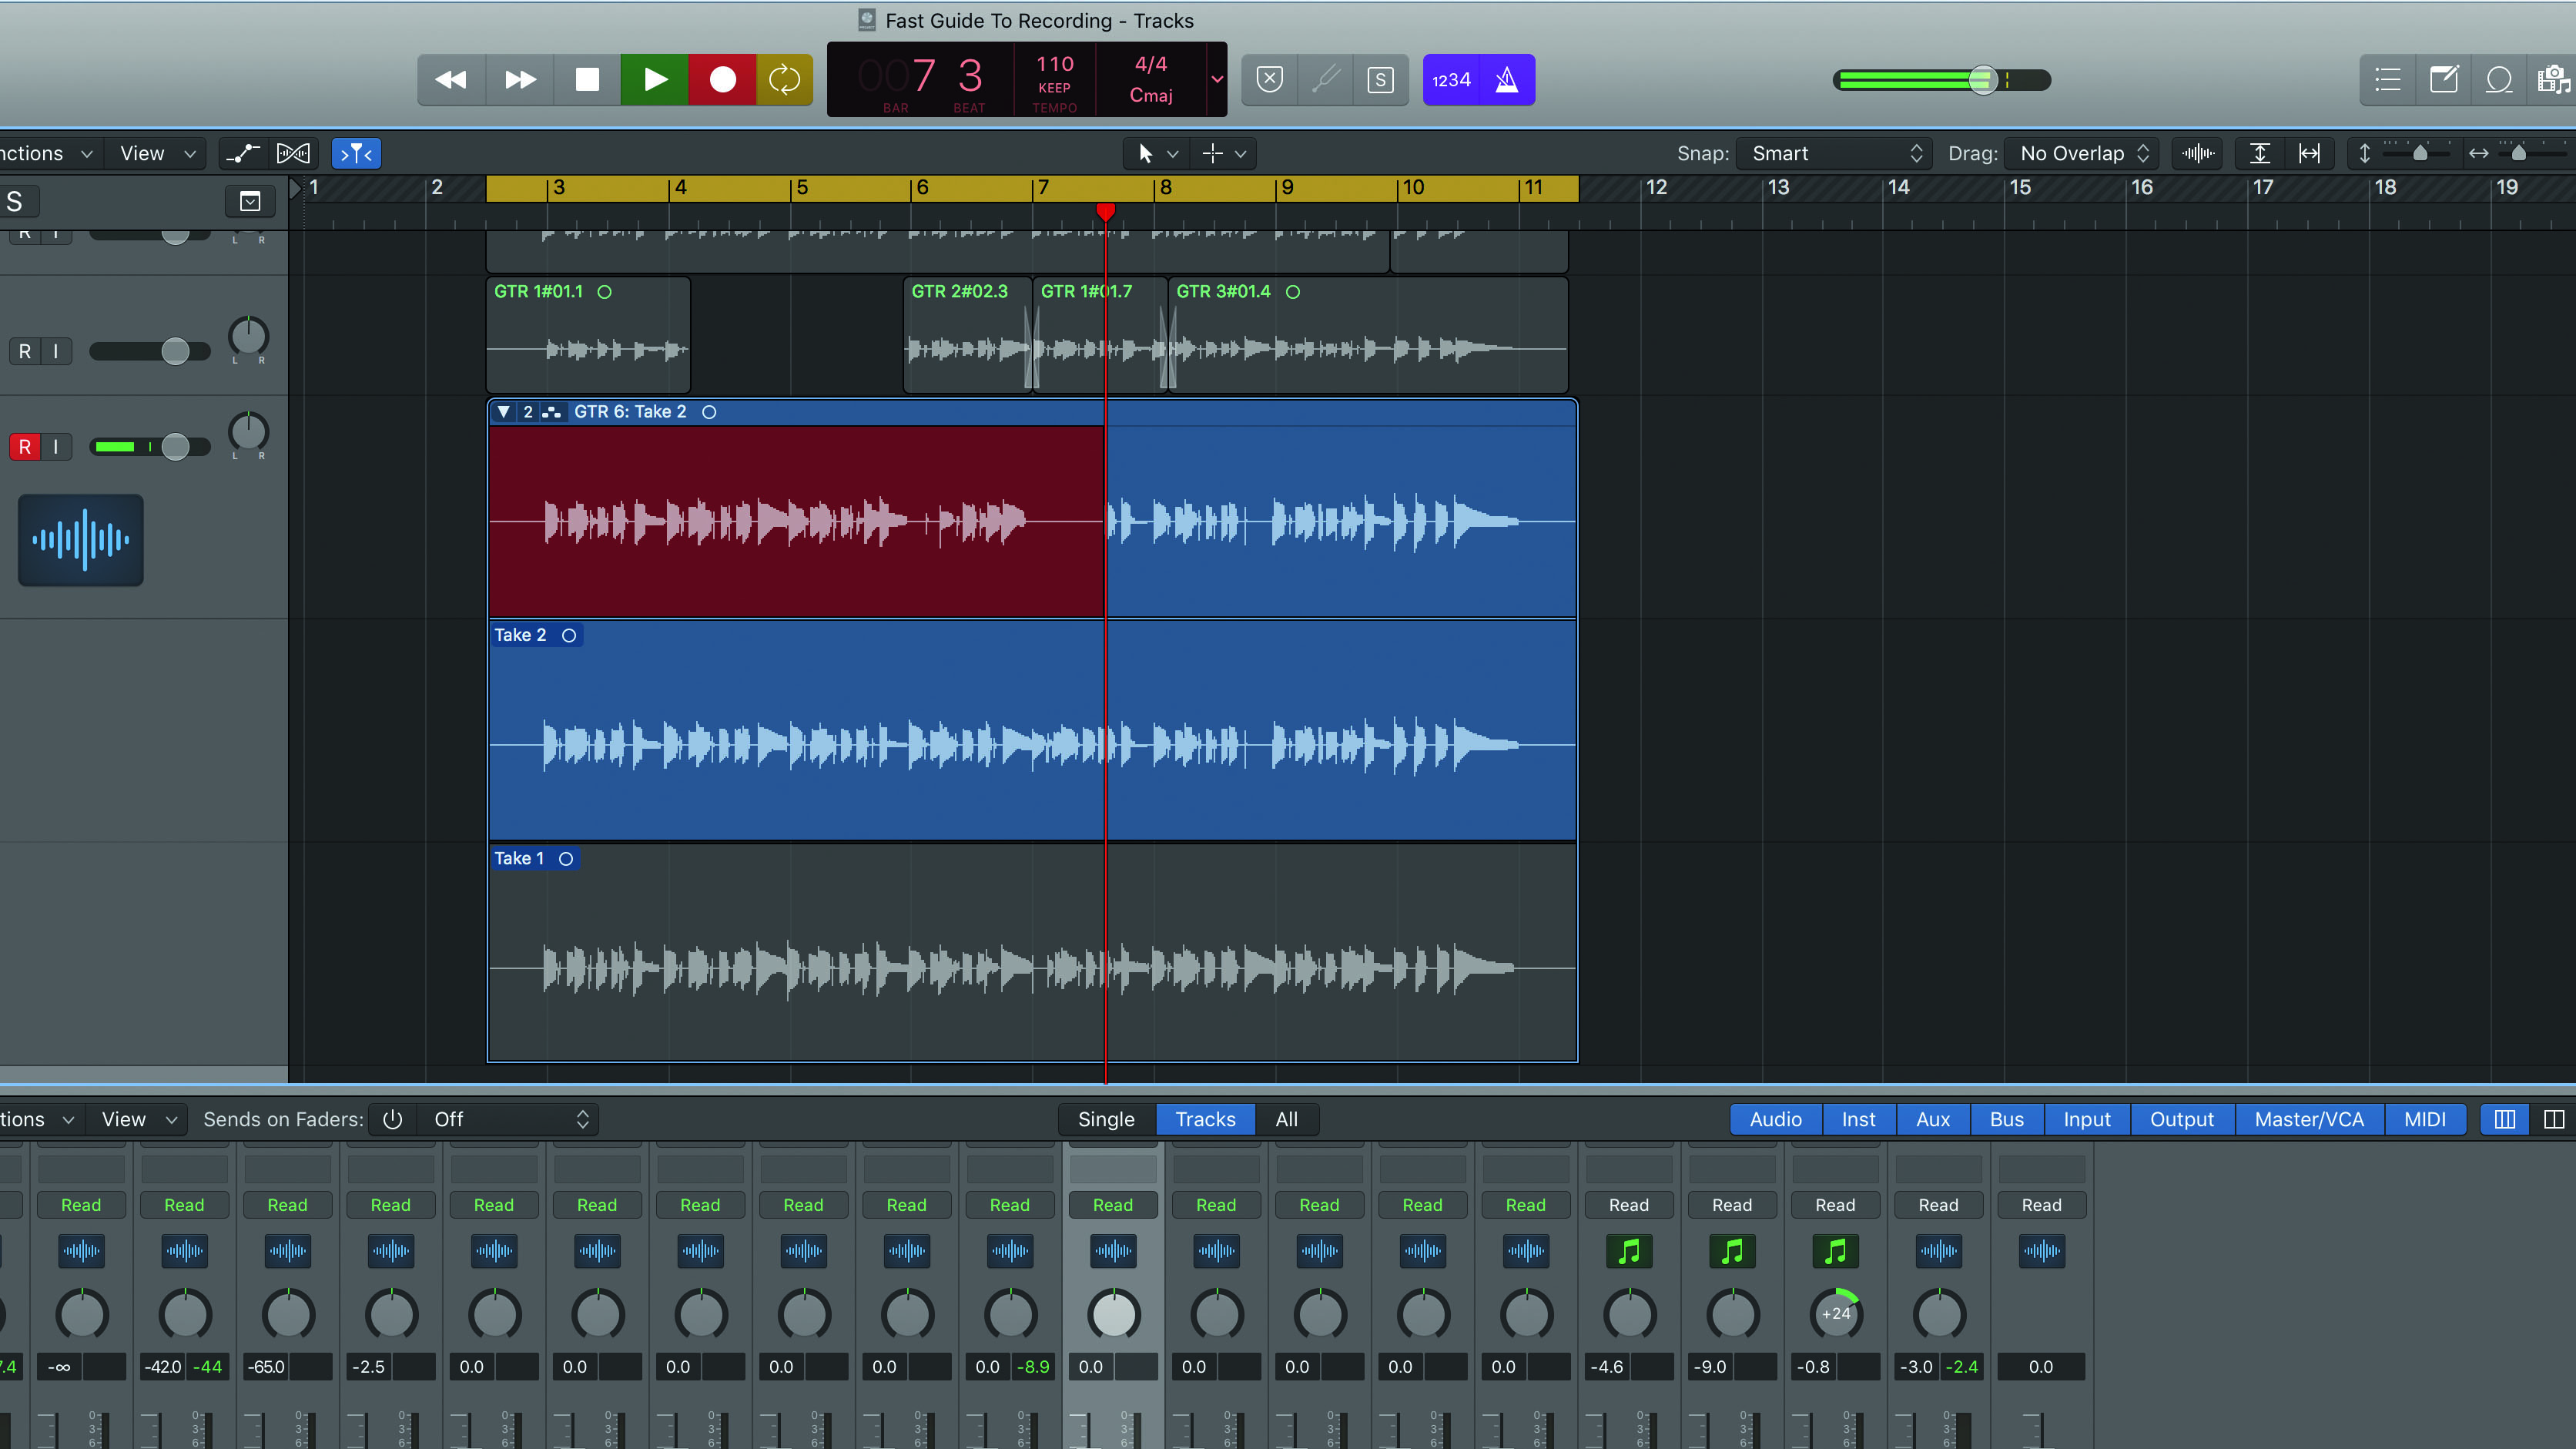
Step 2: Hit record and cycle round the same section, capturing a few takes. Here we’re using Logic Pro X, with which you can watch the takes stack up one after the other with each cycle. Each take is numbered and the most recent take is at the top of the list.
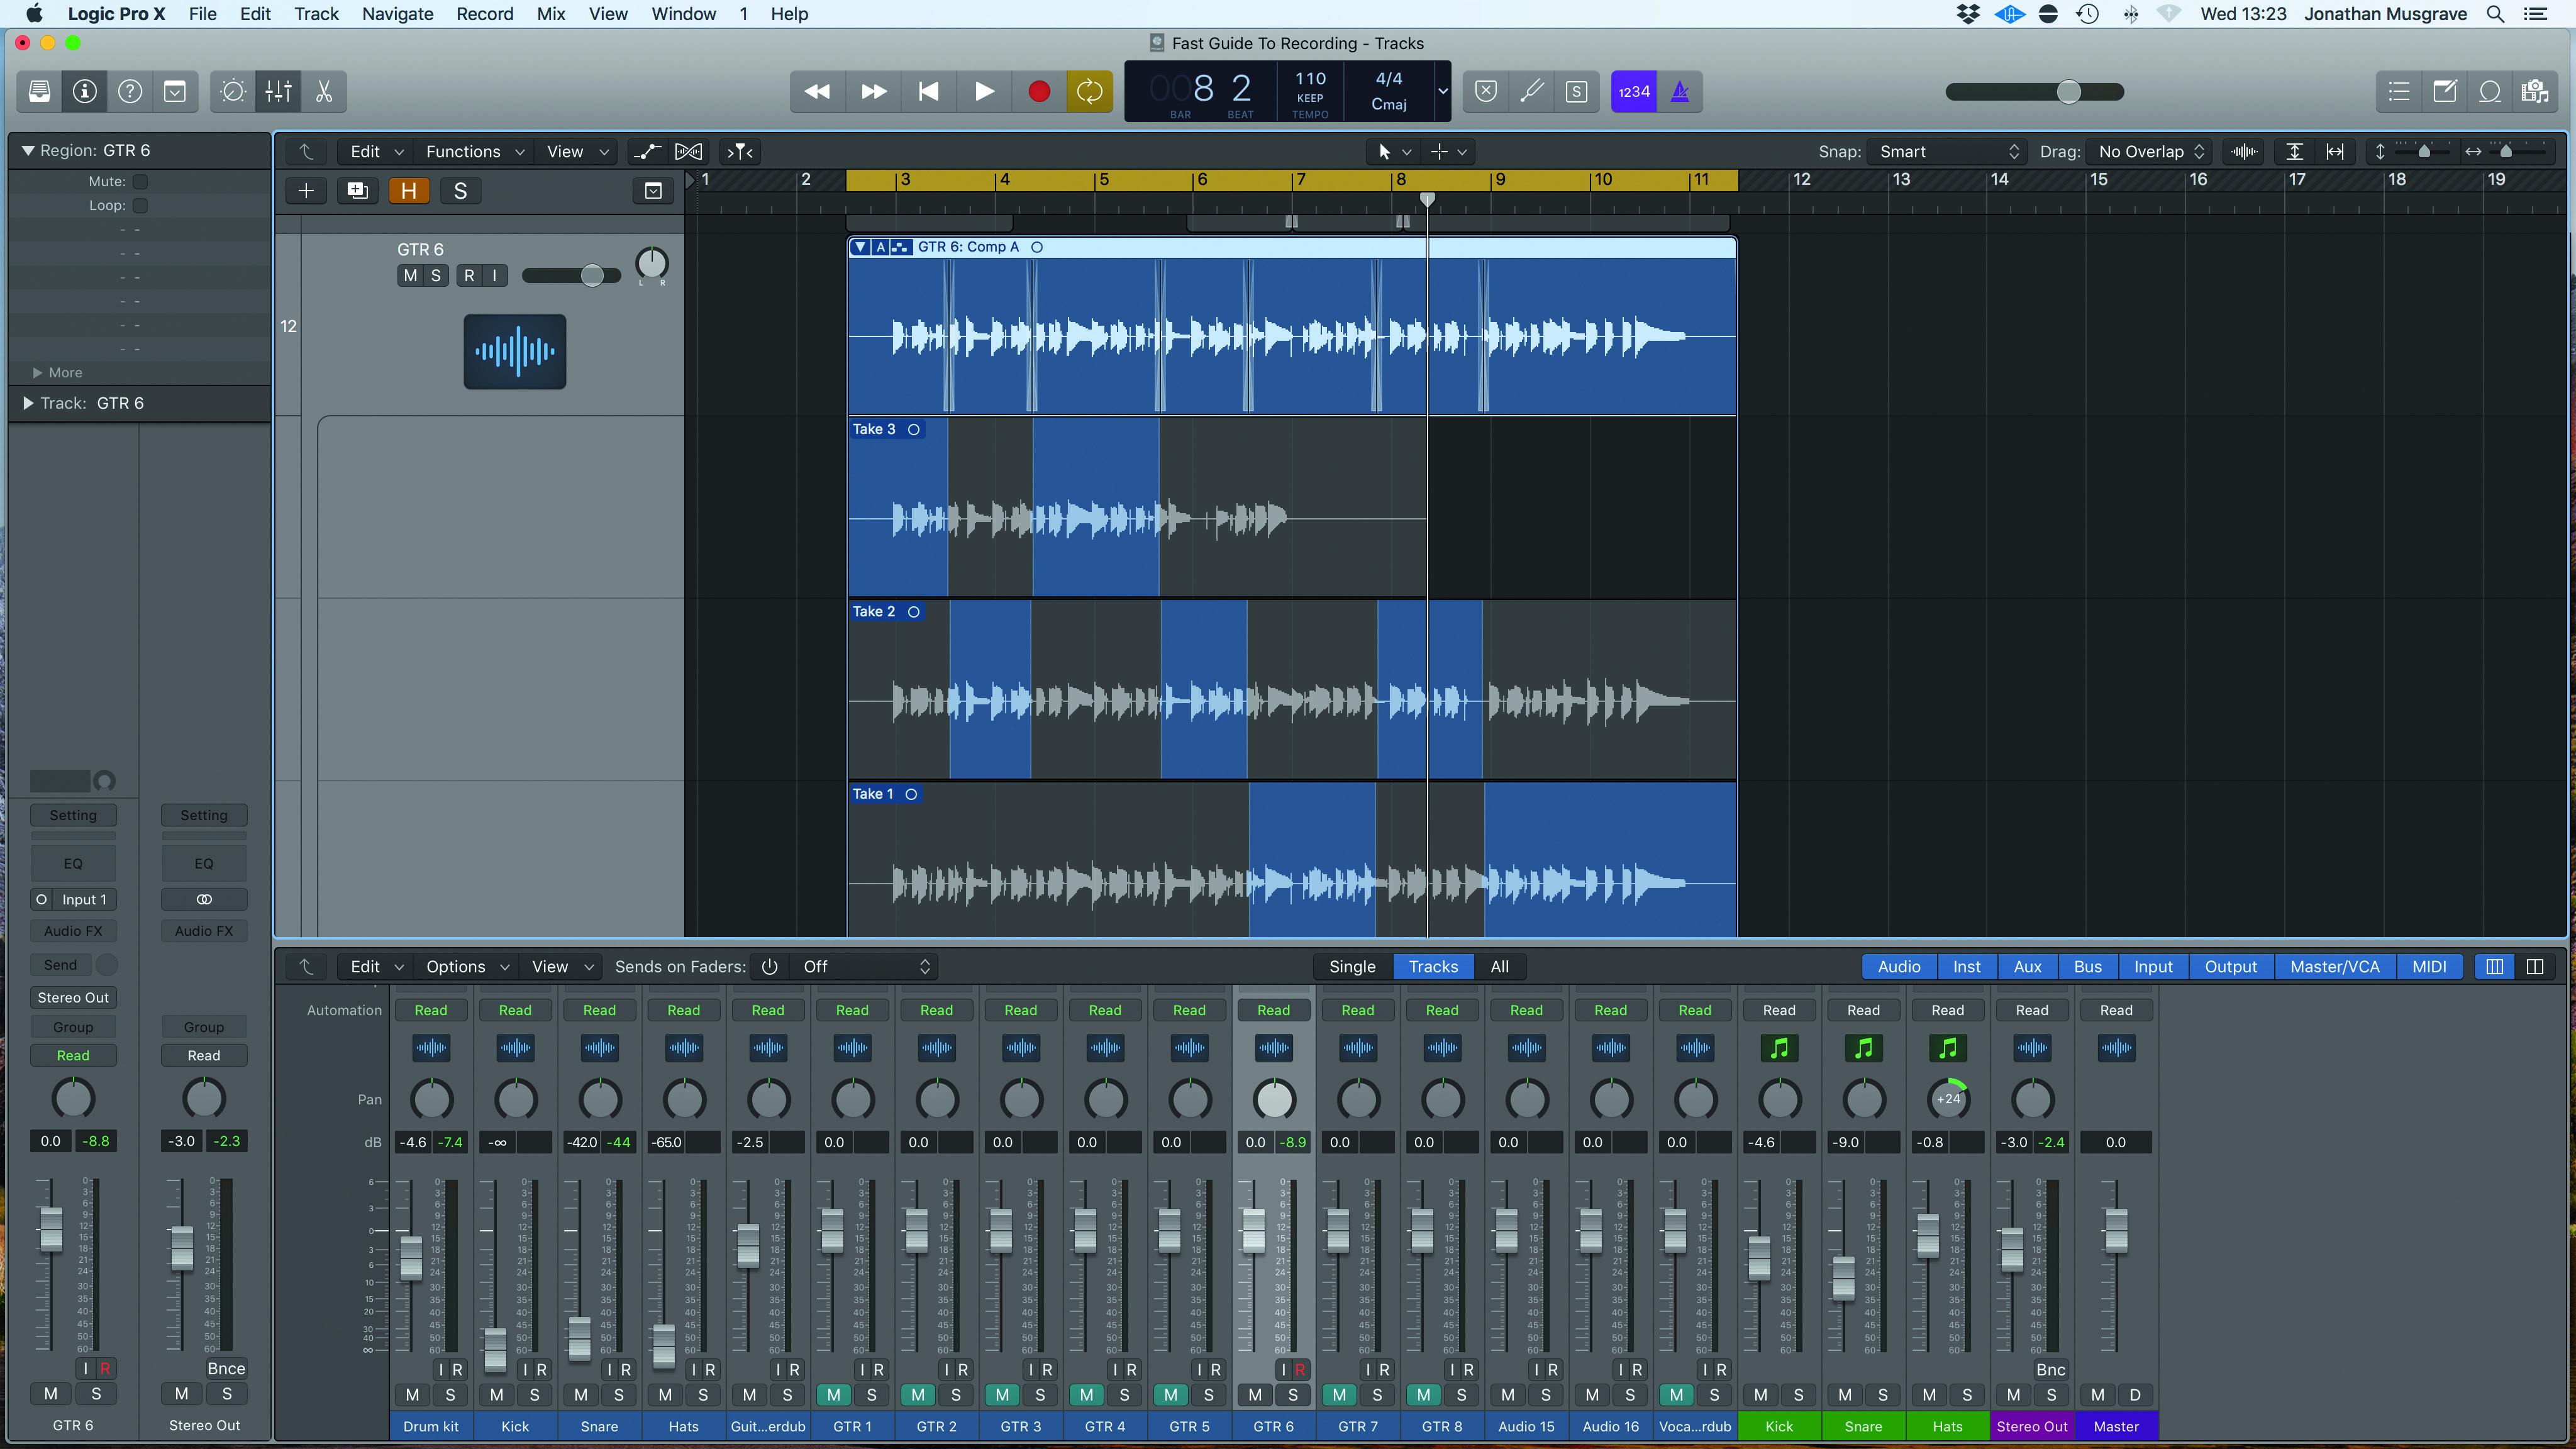
Step 3: When you have enough takes, stop recording and listen back to each one. Then, in Logic Pro X, you simply select – or ‘swipe’ – the sections you want to hear. As you do this, the master track at the top reflects the contiguous sections you’ve chosen. Finally, we export to a new track.
Computer Music magazine is the world’s best selling publication dedicated solely to making great music with your Mac or PC computer. Each issue it brings its lucky readers the best in cutting-edge tutorials, need-to-know, expert software reviews and even all the tools you actually need to make great music today, courtesy of our legendary CM Plugin Suite.
"A classic compressor for free on Valentine's Day – it must be love!": Universal Audio is giving away an 1176 plugin as a Valentine's gift - here's how to get it and use it
“A magical part is this sidechain with the bass”: Lady Gaga breaks down Disease in new studio video


