How to collaborate remotely on the same project in different DAWs
Discover ways to get around compatibility issues
How did you choose your DAW? What was it that made you pick Live, or Pro Tools, Cubase or Logic Pro? Part of it might have been cost, but it’s also likely that the workflow and features of the program played a significant part in your decision-making process. Which, by extension, means that you rejected the other options because they worked differently.
And herein lies a problem if you want to collaborate with someone else who uses a different DAW. While, broadly speaking, all DAWs are capable of the same types of things (MIDI programming, working with plugins, recording and processing audio, etc) they all work differently, deliberately pulling up the moat around themselves, to ensure a distinct lack of compatibility. You can’t open a Pro Tools project in Cubase, and you can’t open a Logic Pro project in Live. That’s the bad news.
The good news is that there are a number of ways in which electronic music producers can collaborate on projects, and mere technological concerns should never get in the way of the much more important factor, which is that collaboration will teach you more about music, enable you to write music you’d never write on your own, and teach you important skills like diplomacy, engineering and people management. It can also make you more productive, saving you time on one project to free you up to work on another.
Let’s start with some basics. We’ll see in the walk-through below that, if you’re happy to work in an audio-only environment, collaboration is straightforward, as every DAW will let you load audio files and get to work adding, processing or mixing them.
If audio file swapping isn’t enough, or appropriate for the work you’re collaborating on, MIDI files remain a great option. MIDI is a universal format with a set of parameters which are common across all DAWs, so you’ll find that opening a MIDI file in a DAW different to the one in which it was first written shouldn’t be an issue. Tempo information will be imported, as will all note and controller data, so the more thorny issue then becomes matching the sounds which were allocated to each part.
If you own the same plugins as your collaborator, this might just involve a chat or a set of screenshots to show which sounds were used but if not, it might not matter.
If your job is to push the production onwards, swapping some sounds for better ones may be your role. Equally, if adding new parts, the original sounds will be on your collaborator’s system when the project is passed back. See these issues as an extra creative step, not a creative block. Don’t let them stand in the way of your desire to work with others.
Get the MusicRadar Newsletter
Want all the hottest music and gear news, reviews, deals, features and more, direct to your inbox? Sign up here.
Stem preparation: the universal language of audio
Audio has its restrictions. Once rendered, an audio file can’t easily have its individual notes changed, or its ‘tone’ swapped out for another, and so audio files do tend to be associated with the latter stages of production. Why print audio when you can carry on being flexible with MIDI? Yet nothing beats audio for collaborative efficiency.
There are a number of ways to prepare audio files, depending on the nature of your collaboration, check out the video above for more, but in this walkthrough, we’ll show you how to look out for output channel effects before printing stems, and how to set the same start and end points for each stem to make life much easier for your collaborator.
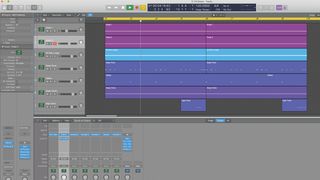
Step 1: We’re starting with a dark, tense track made from a couple of synth pulses and assorted percussion parts. Note that we’ve got an output channel strip of effects which is hyping the overall mix substantially. If we’re just printing a stereo reference file, no problem, but it’ll cause problems when we start stemming.
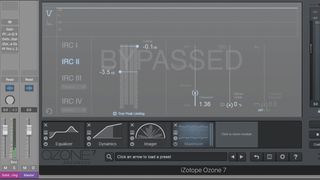
Step 2: We’re going to ‘record’ (or ‘bounce’, ‘render’ or ‘export’, depending on your chosen DAW) each of our stems through the output channel, so we need to bypass our output channel effects. Otherwise each one will be loudness maximised, which is unnecessary and a sonic disadvantage to the individual mix elements.
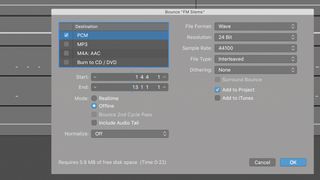
Step 3: Solo each sound to render each individually either in real-time or offline. Be sure to render everything from the same point (ideally a bar before any audio starts) and that you add some ‘empty’ bars at the end to avoid clipping effects tails prematurely. Here’s a bar-long sample of each stem.
Future Music is the number one magazine for today's producers. Packed with technique and technology we'll help you make great new music. All-access artist interviews, in-depth gear reviews, essential production tutorials and much more. Every marvellous monthly edition features reliable reviews of the latest and greatest hardware and software technology and techniques, unparalleled advice, in-depth interviews, sensational free samples and so much more to improve the experience and outcome of your music-making.
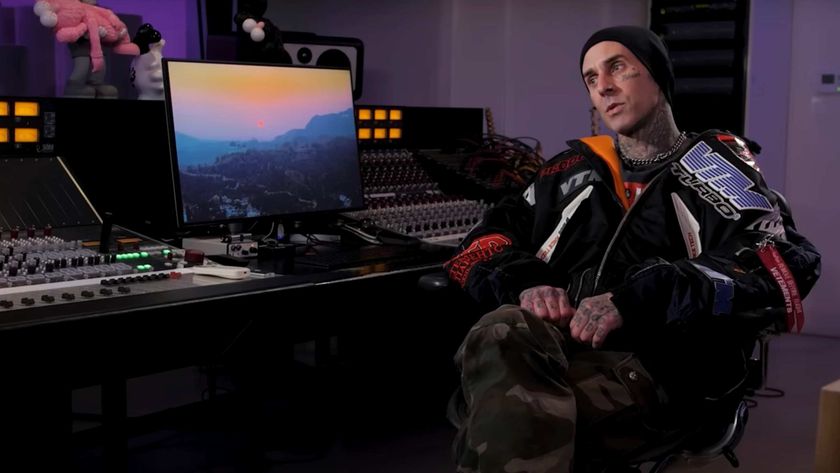
"If I wasn't recording albums every month, multiple albums, and I wasn't playing on everyone's songs, I wouldn't need any of this”: Travis Barker reveals his production tricks and gear in a new studio tour

“My management and agent have always tried to cover my back on the road”: Neil Young just axed premium gig tickets following advice from The Cure’s Robert Smith


