How to arrange tracks in Ableton Live: going from Session to Arrangement View
If you're stuck in the Session View, we can help...
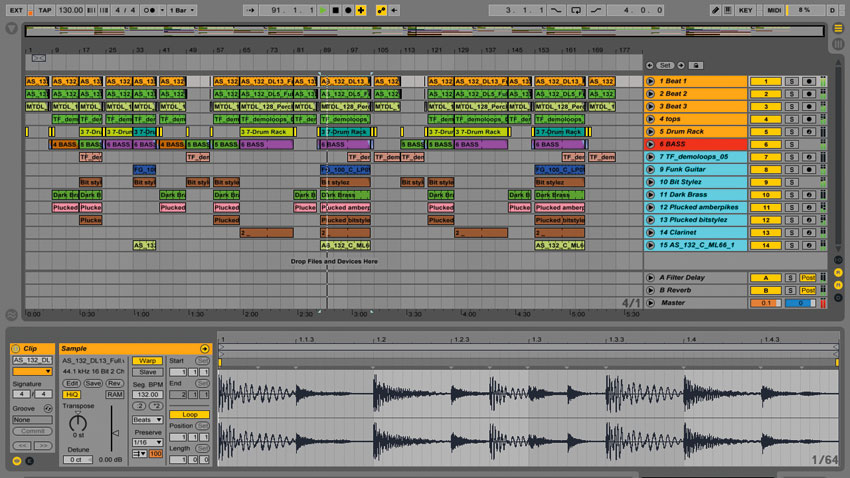
Live’s Session View is a mighty sketchpad for assembling clips into multitrack sequences, but if you’ve transitioned to the DAW from a traditional, linear-based arranging background, its loop-based nature can at first seem restrictive when it comes to developing ideas into fully arranged tracks. This is where the Arrangement View comes in, enabling you to chip away, move things around and generally finesse and finagle your project into something that sounds like a finished record with a proper beginning, middle and end, rather than a set of repeating loops.
But how do you get clips into the Arrangement View to start with? Here are the two main methods to consider…
Read the full Arrange Tracks Like a Pro feature only in the December 2018 edition of Computer Music.
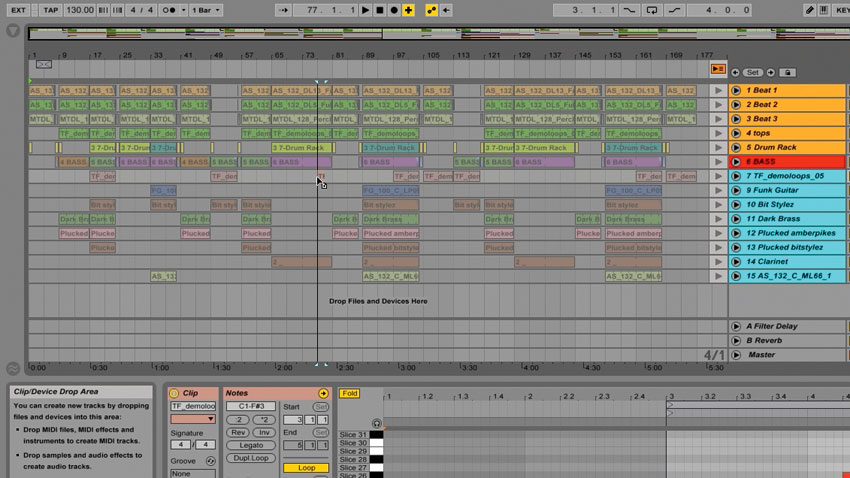
Method 1: Drag and drop via Tab key
The default hotkey for switching between Live’s Session and Arrangement Views is your QWERTY keyboard’s Tab key, and you can use it to transfer clips from one to the other and back again.
In the Session View, click to select the clips you want to transfer - individual ones or a multiple selection - click-hold one of the selected clips, hit the Tab key to switch to the Arrangement view, then drag the clip to the desired position in the timeline and release - simple! The ability to select multiple clips at once lets you build up a solid arrangement fairly quickly using this method, and the bonus is that it also works in reverse: if you record a new idea directly into the Arrangement View that you want to experiment with further, you can drag it into Session View using the Tab key in exactly the same way.
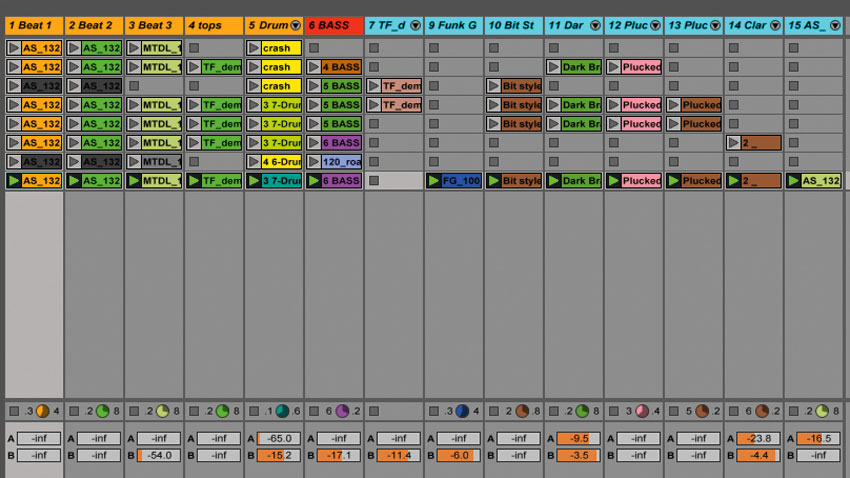
Method 2: Arrangement record
You can also trigger Session View clips on the fly and record the results directly into the Arrangement View. Ensure all tracks in the Session View are disarmed for recording, and that the Arrangement View’s Cycle mode is disabled. Hold down Shift and click the Record button in the transport bar - Live will wait until you trigger your first clip, then start recording your moves. As you jam out a performance, a corresponding set of regions will be recorded onto the tracks in the Arrangement View. This works especially well with a hardware controller. Once finished, press the Stop All Clips button in the master channel to end the recording and switch to the Arrangement View, where you can tweak the performance and complete your track by recording new parts, transition effects and percussive punctuation directly in at the correct points in the song.
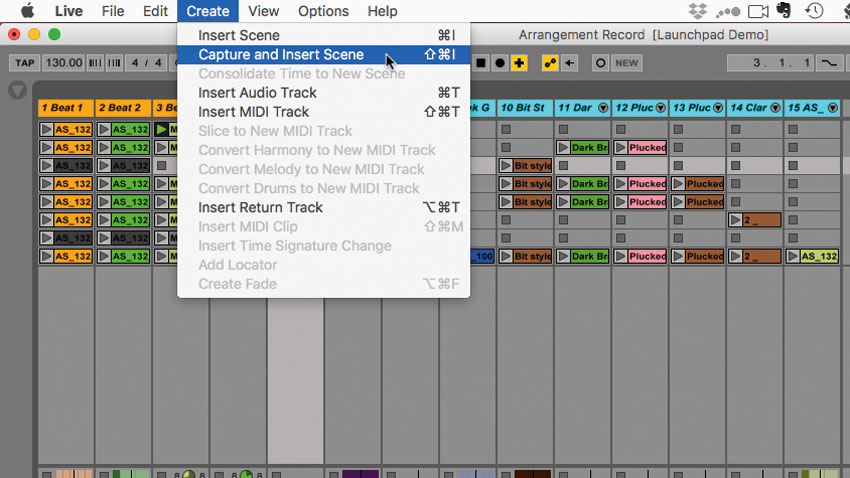
The scenic route
If using the Arrangement View doesn’t appeal, you can still use the Session View to generate arrangement ideas in the form of Scenes. If you have multiple clips laid out in the Session View, experiment with different combinations by playing one clip at a time, then mixing it with others one at a time. When you hit a combination that works, turn it into a Scene by selecting Capture and Insert Scene from the Create menu. Give it a suitable label (verse, breakdown, etc), then try a few more combinations of different clips. Once you’ve built a few Scenes, try playing them in different sequences to sketch out rough arrangements.
Get the MusicRadar Newsletter
Want all the hottest music and gear news, reviews, deals, features and more, direct to your inbox? Sign up here.
Consolidation service
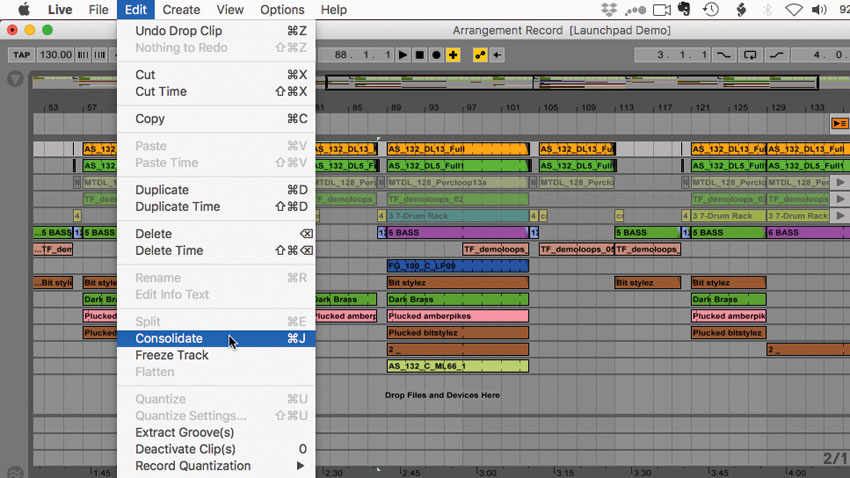
Live’s Consolidate command (Cmd/Ctrl-J) is really useful for tidying things up in the Arrangement View, especially if you’ve ended up with loads of tiny little clips scattered everywhere - it replaces a selected range of material on a track with one new clip. Not only does this look tidier, but it’s also useful when, for example, you have a linear sequence of clips that work well together as a part. Consolidating these into one long clip allows you to drag its edges to create further repeats. On audio tracks, Consolidate renders the selected clips into one single piece of audio, replacing the existing clips in the Arrangement View.
Ableton Live arrangement tips
1. Keep ’em separated
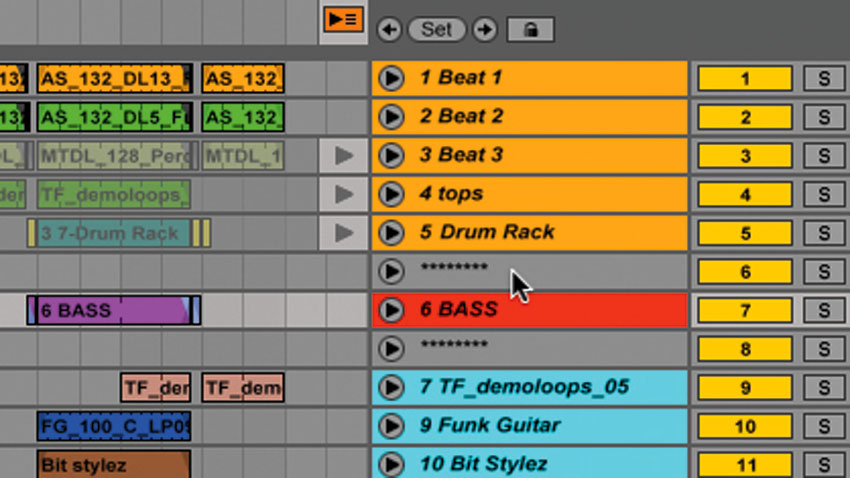
If your project contains a lot of tracks, create a blank track and place it between two distinct groups of tracks as a visual separator. This keeps things tidy and lets you home in on specific areas of your arrangement more quickly.
2. Copy that
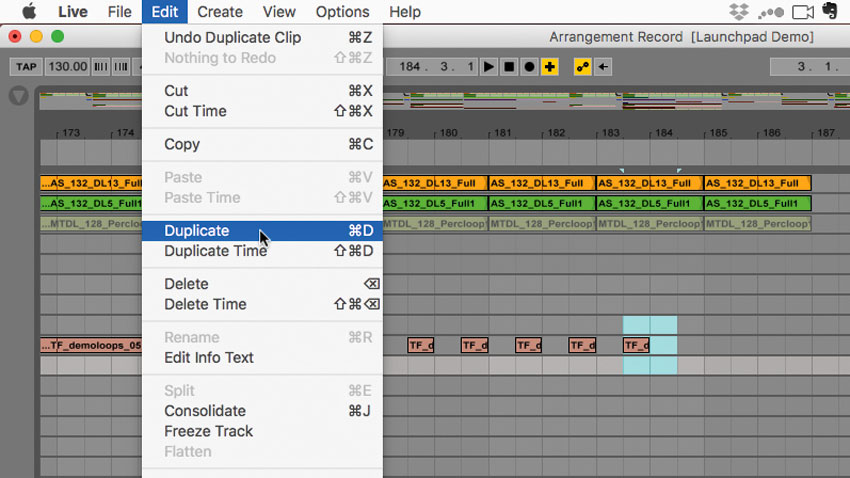
Live’s Duplicate command (Cmd-D on Mac, Ctrl-D on PC) is a handy tool for knocking out arrangements quickly. It essentially duplicates the selected area directly after the selection - in other words, it’s brilliant for repeating sections.
3. Fold it up
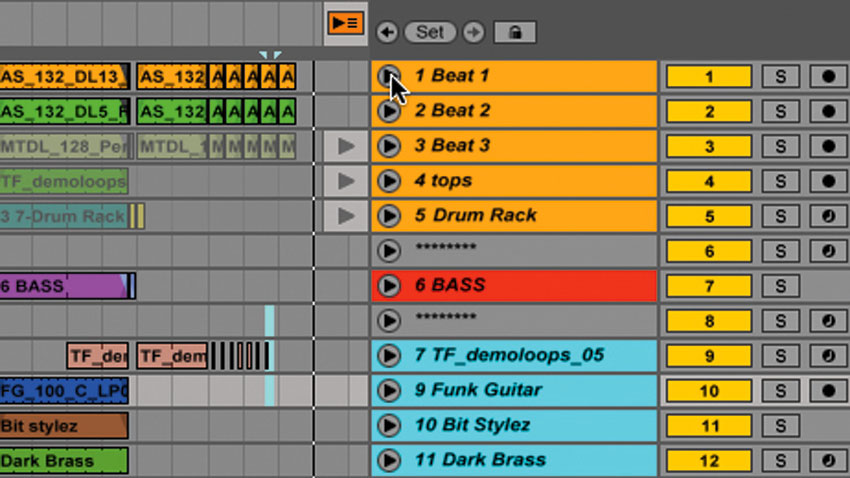
For a quick tidy-up of the Arrangement View, Alt/Option-click one track’s fold button to fold all the tracks in your set. Find it next to the track name in the track header column on the right of the screen.
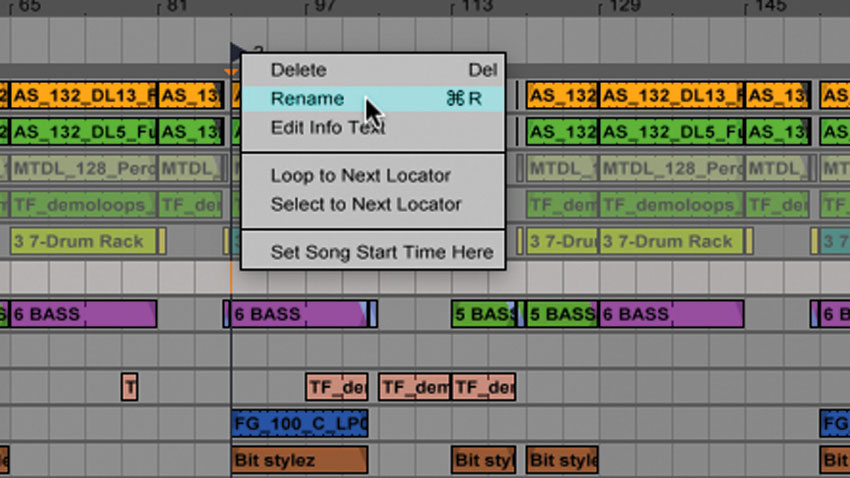
4. Marker respect
Use markers to mark where specific song sections occur. Create them by clicking a track, hitting Set above the track headers, moving the marker flag to the desired position, and renaming it.
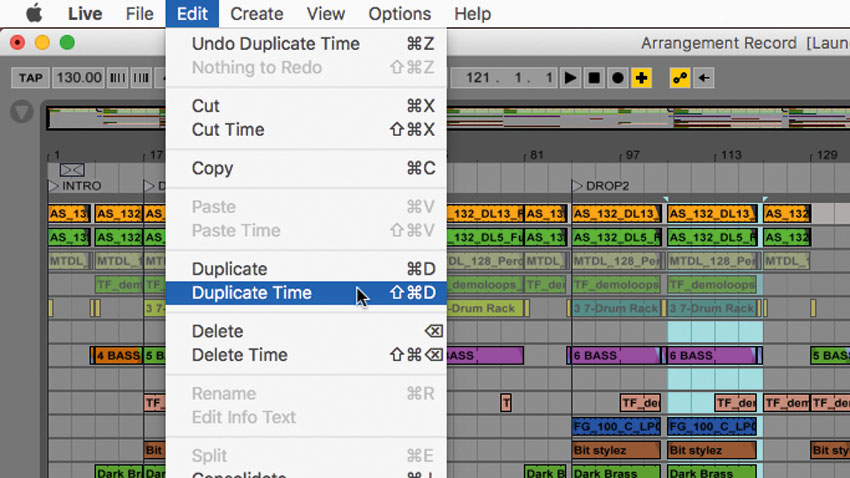
5. Time travel
The Duplicate and Delete Time commands not only work on the region highlighted by the loop bracket, but move subsequent regions earlier or later, extending the track or closing up gaps, depending on which command is used.
Computer Music magazine is the world’s best selling publication dedicated solely to making great music with your Mac or PC computer. Each issue it brings its lucky readers the best in cutting-edge tutorials, need-to-know, expert software reviews and even all the tools you actually need to make great music today, courtesy of our legendary CM Plugin Suite.


