How to hard-tune your vocals using Logic Pro's stock pitch correction plugin
Use the hard-tuning effect on vocals with this step-by-step tutorial
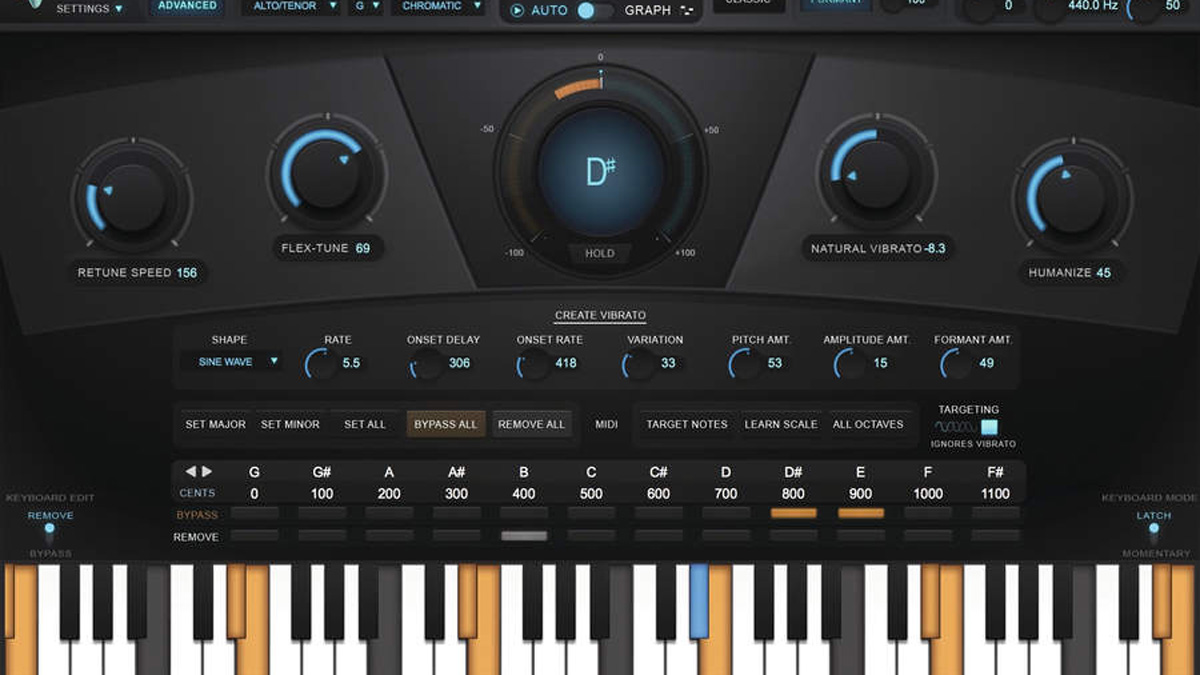
Let's beign by loading a song which you feel would benefit from having a vocal part that adopts the hard-tune treatment. Bear in mind, this does not have to be a lead vocal, and could be a counter melody or backing vocal. Sometimes, using hard-tune sparingly can be more effective.
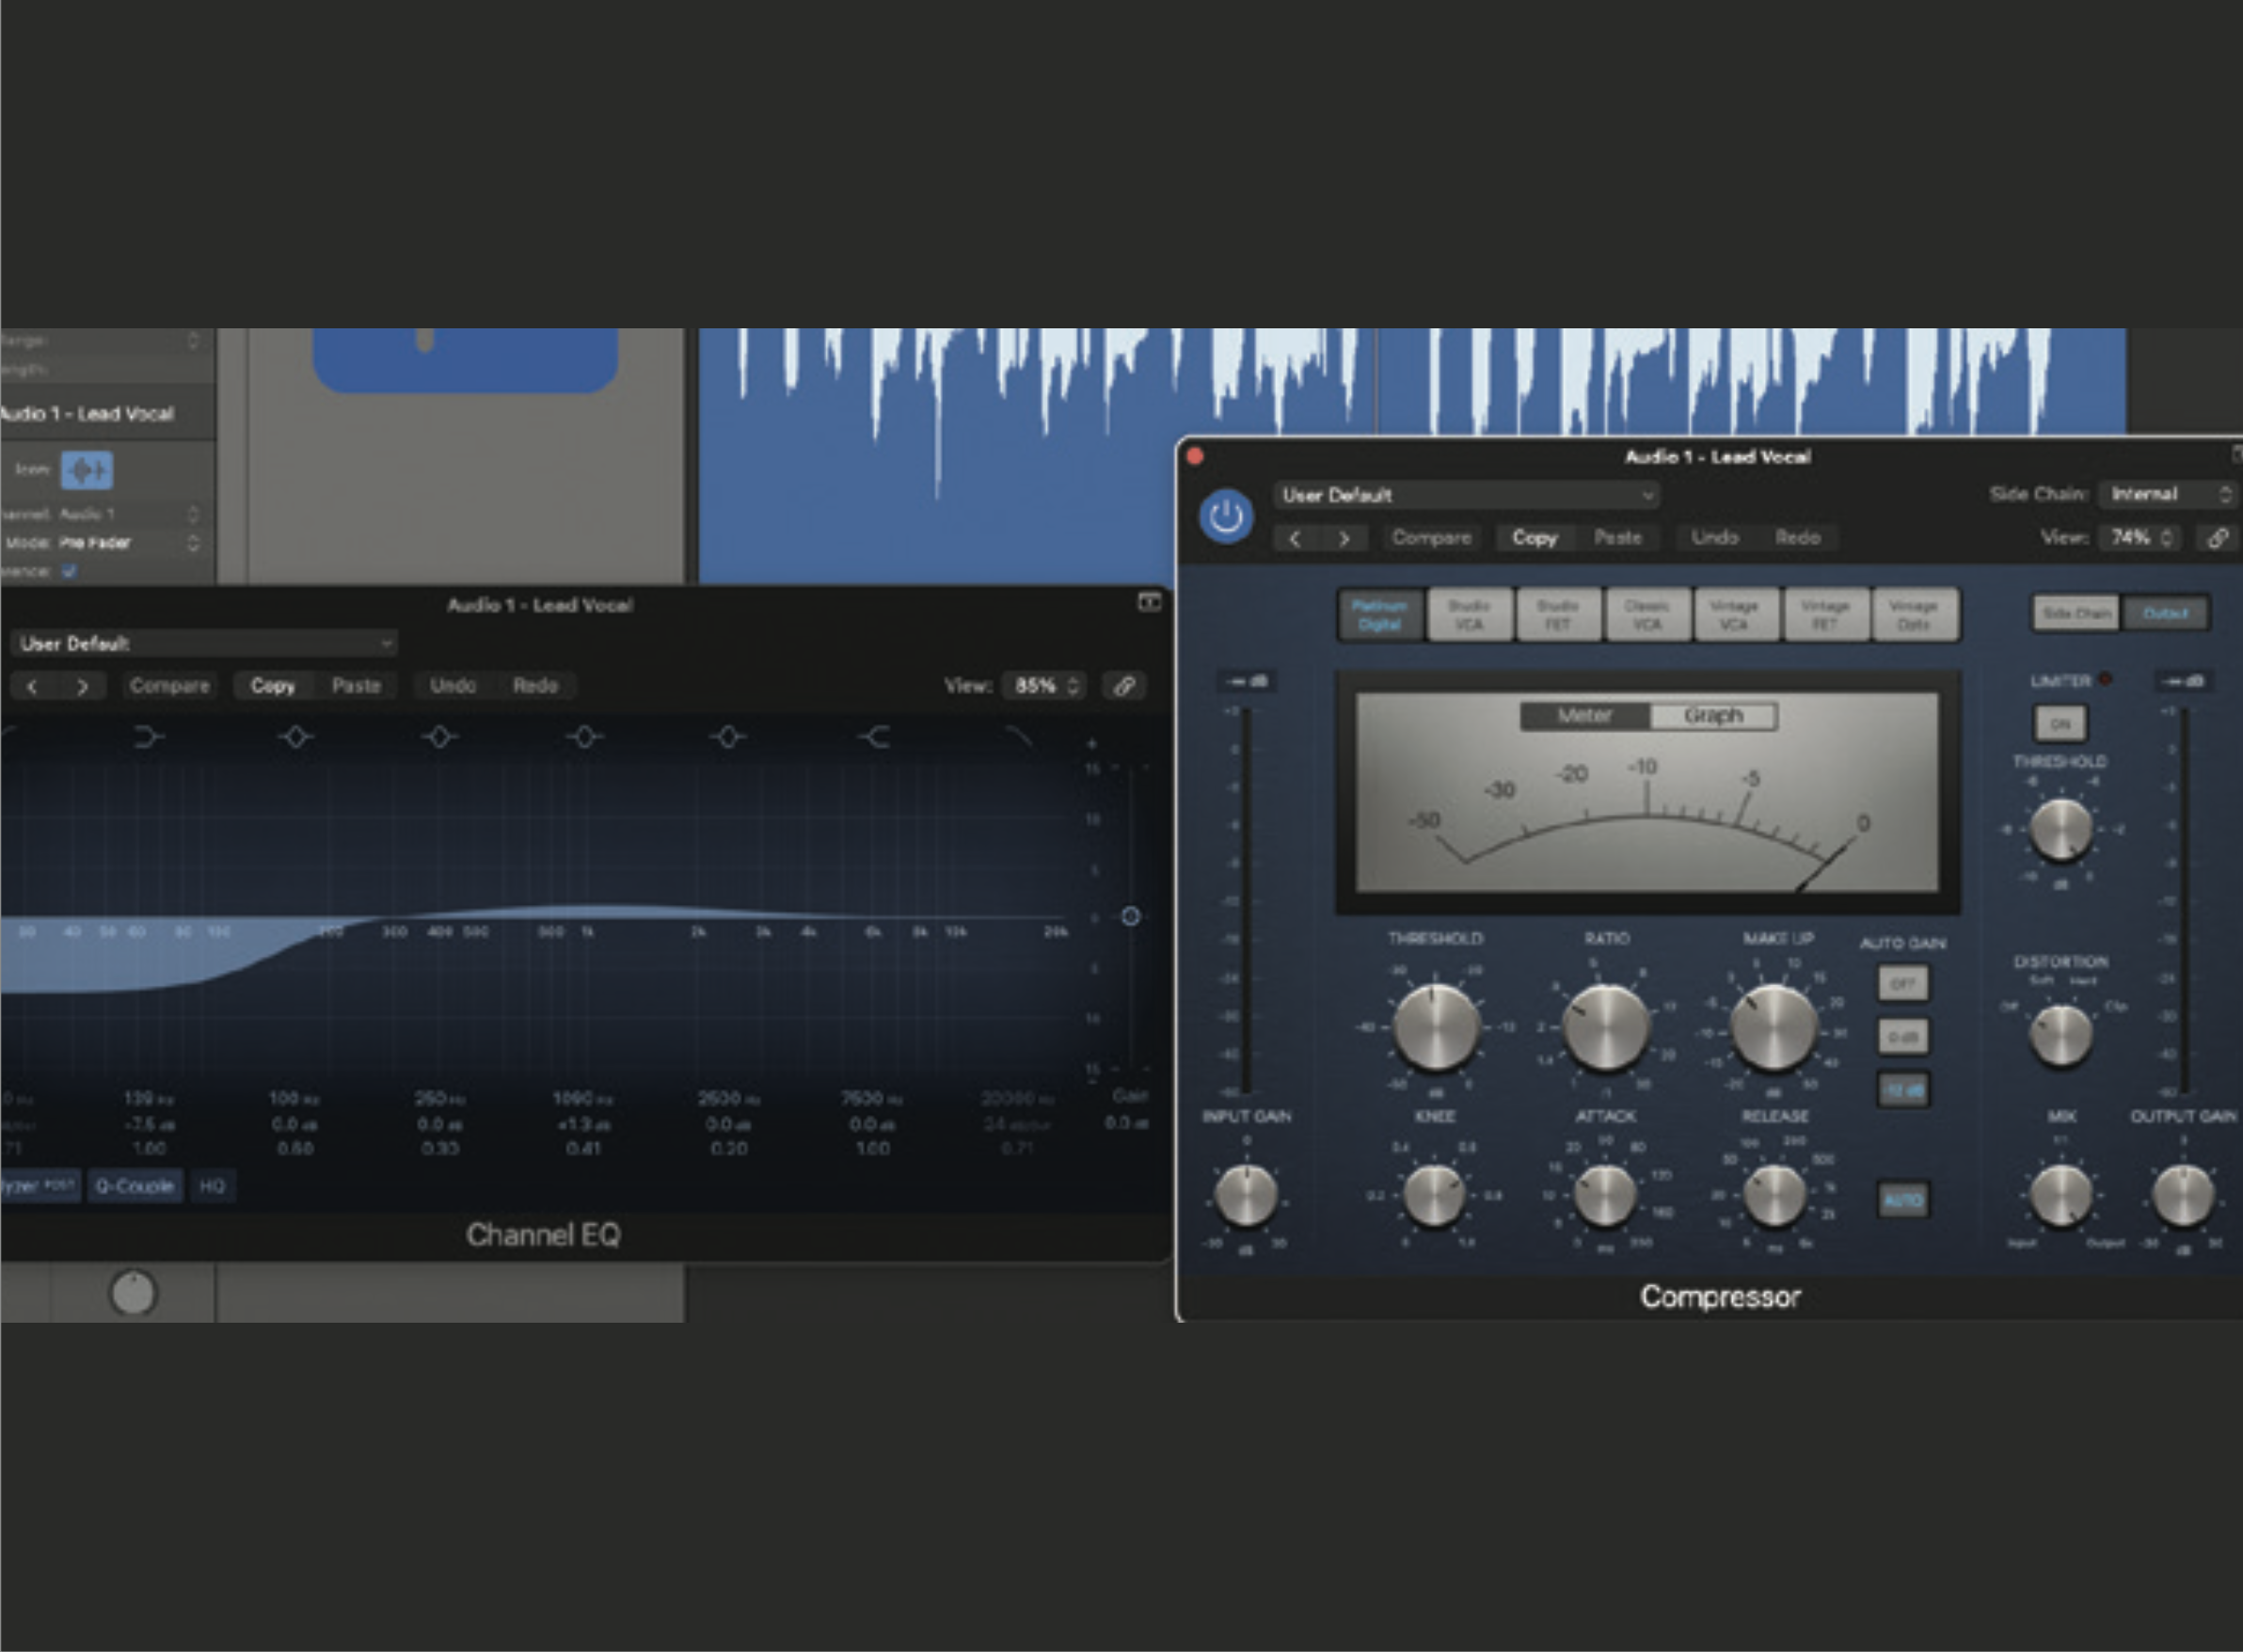
Prepare the track that you want to affect by applying EQ and compression. Much like our vocoder preparation, you might find that too much bottom-end frequency isn’t very beneficial to the overall mix. Adding compression will provide the correction plugin with a better signal to lock to.
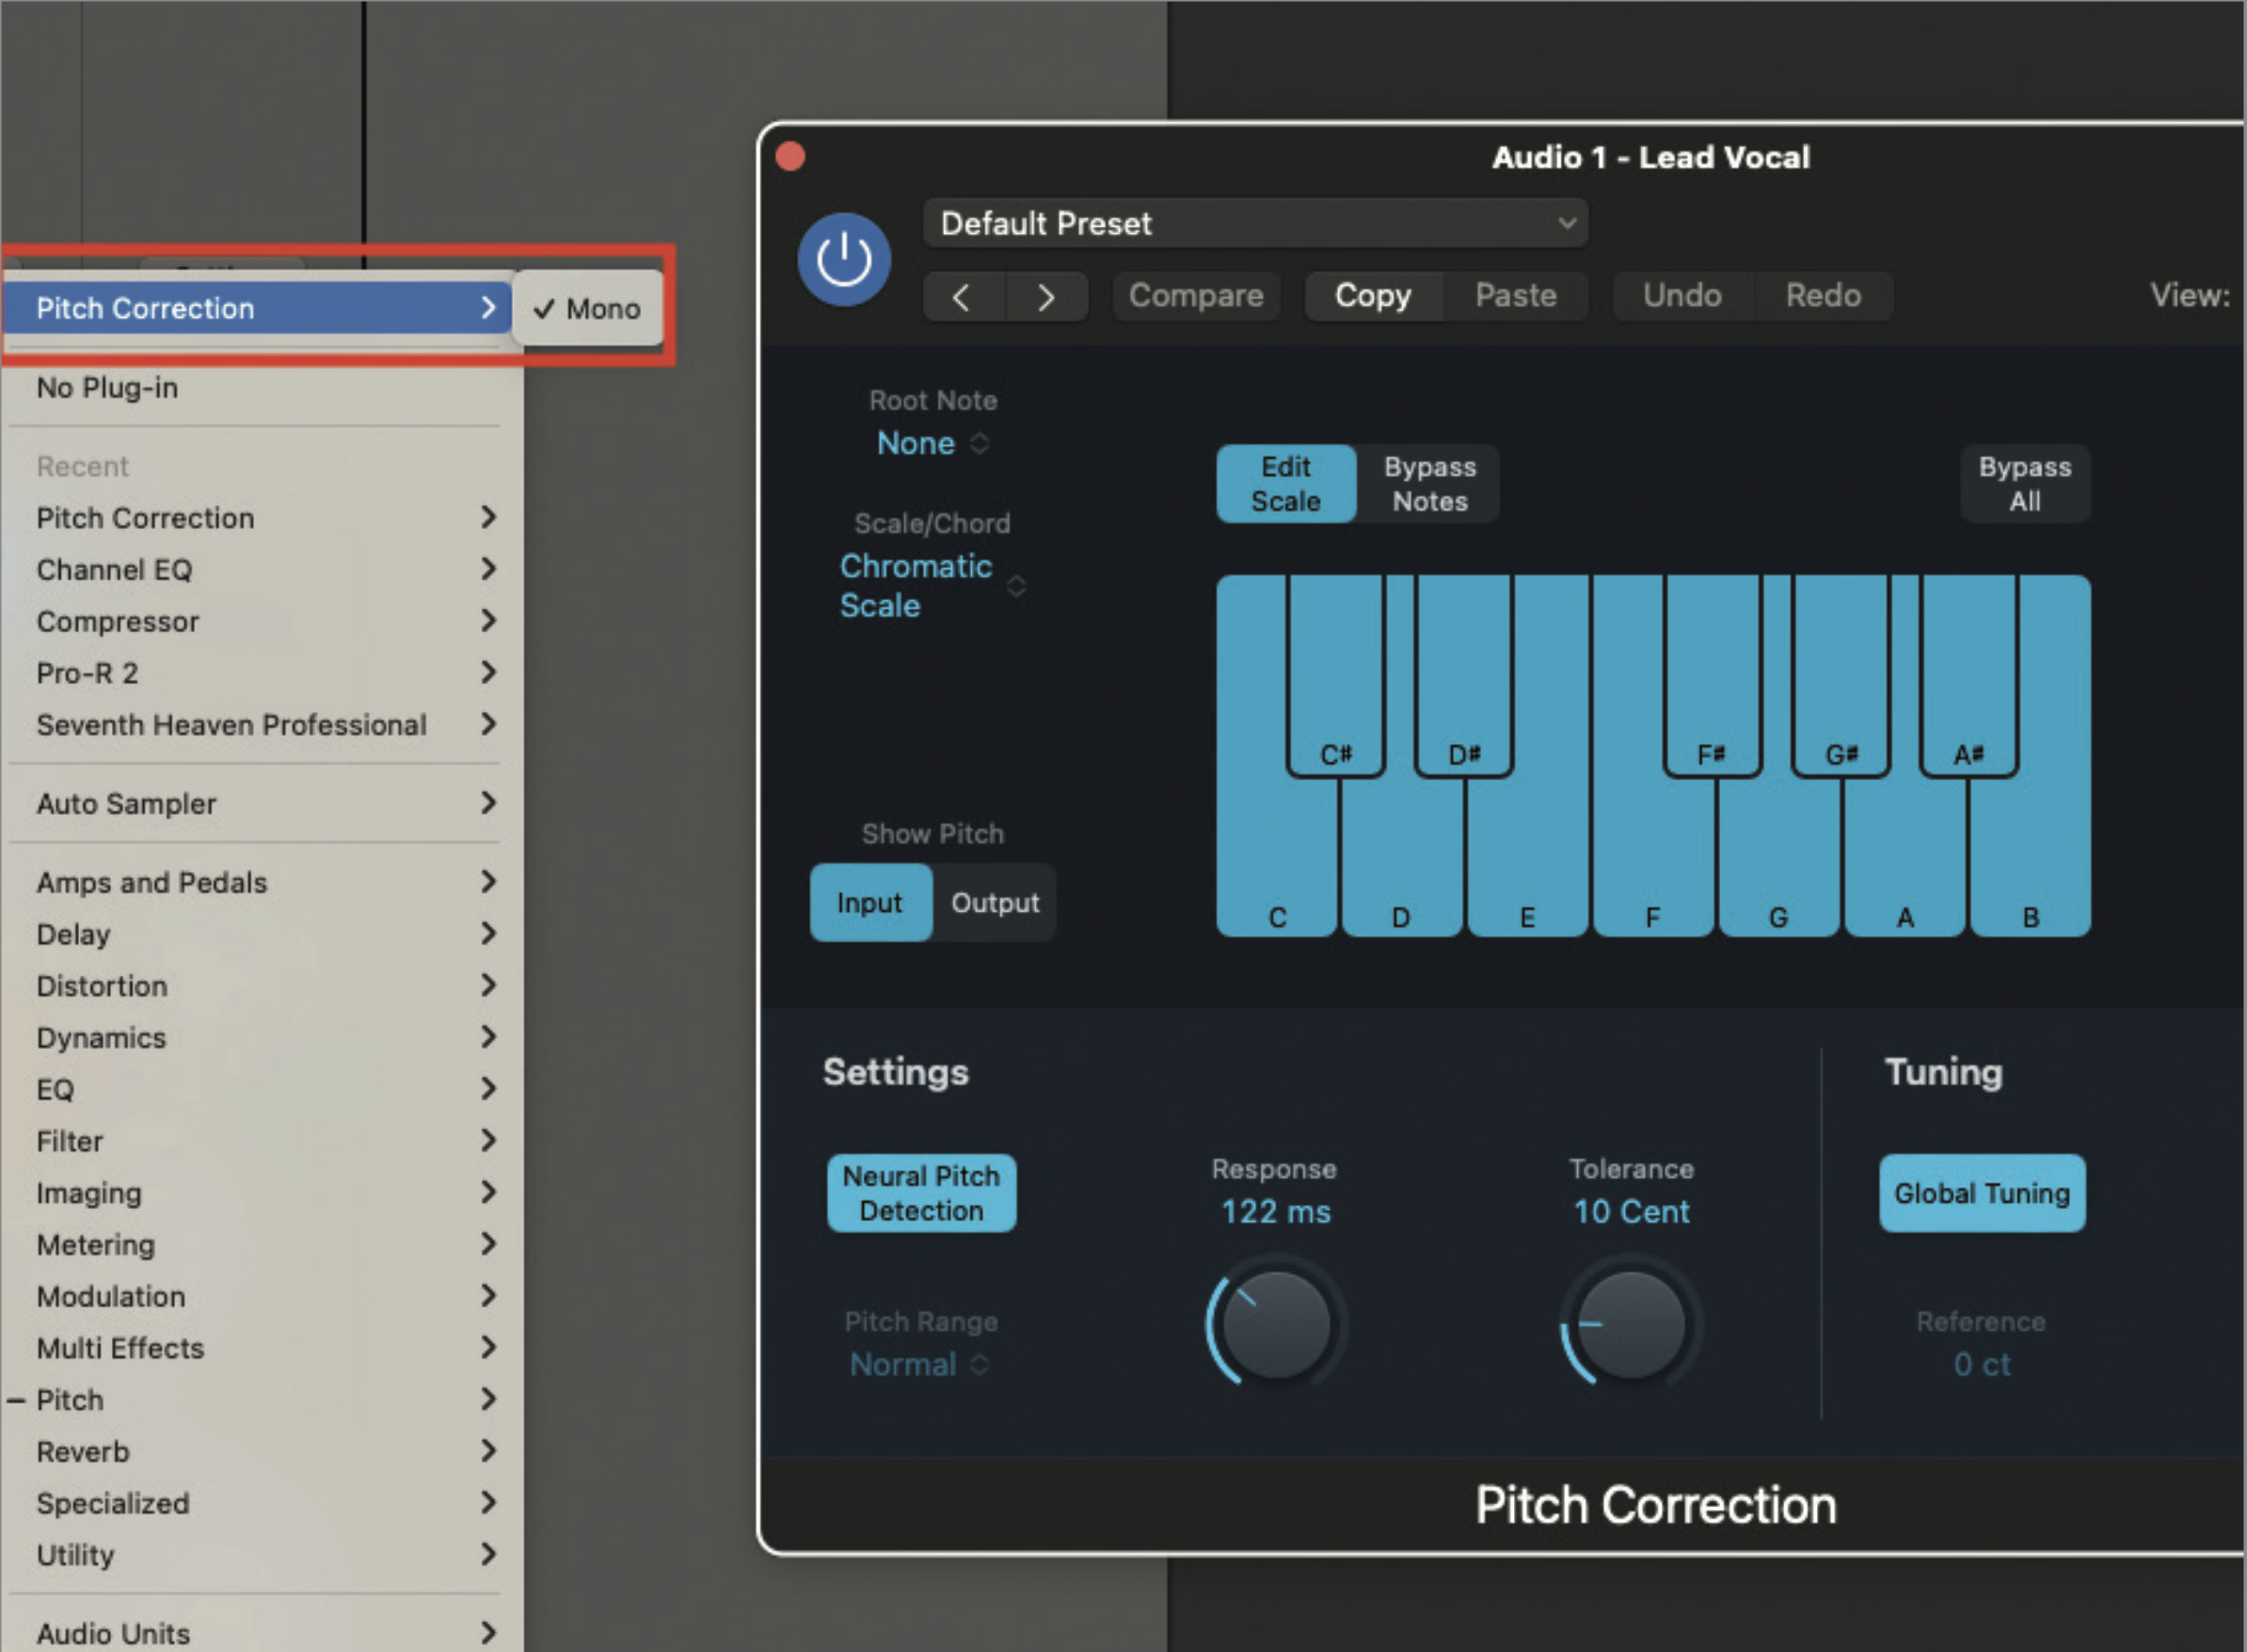
Now add your pitch correction or Auto-Tune plugin; most DAWs provide some form of pitch correction plugin, and the settings will be fairly consistent across all plugin types. If you have the Antares Auto-Tune plugin, you will probably find this to be a cut above anything included for free within your DAW. Our example demonstrates the pitch correction plugin included with Logic Pro X.
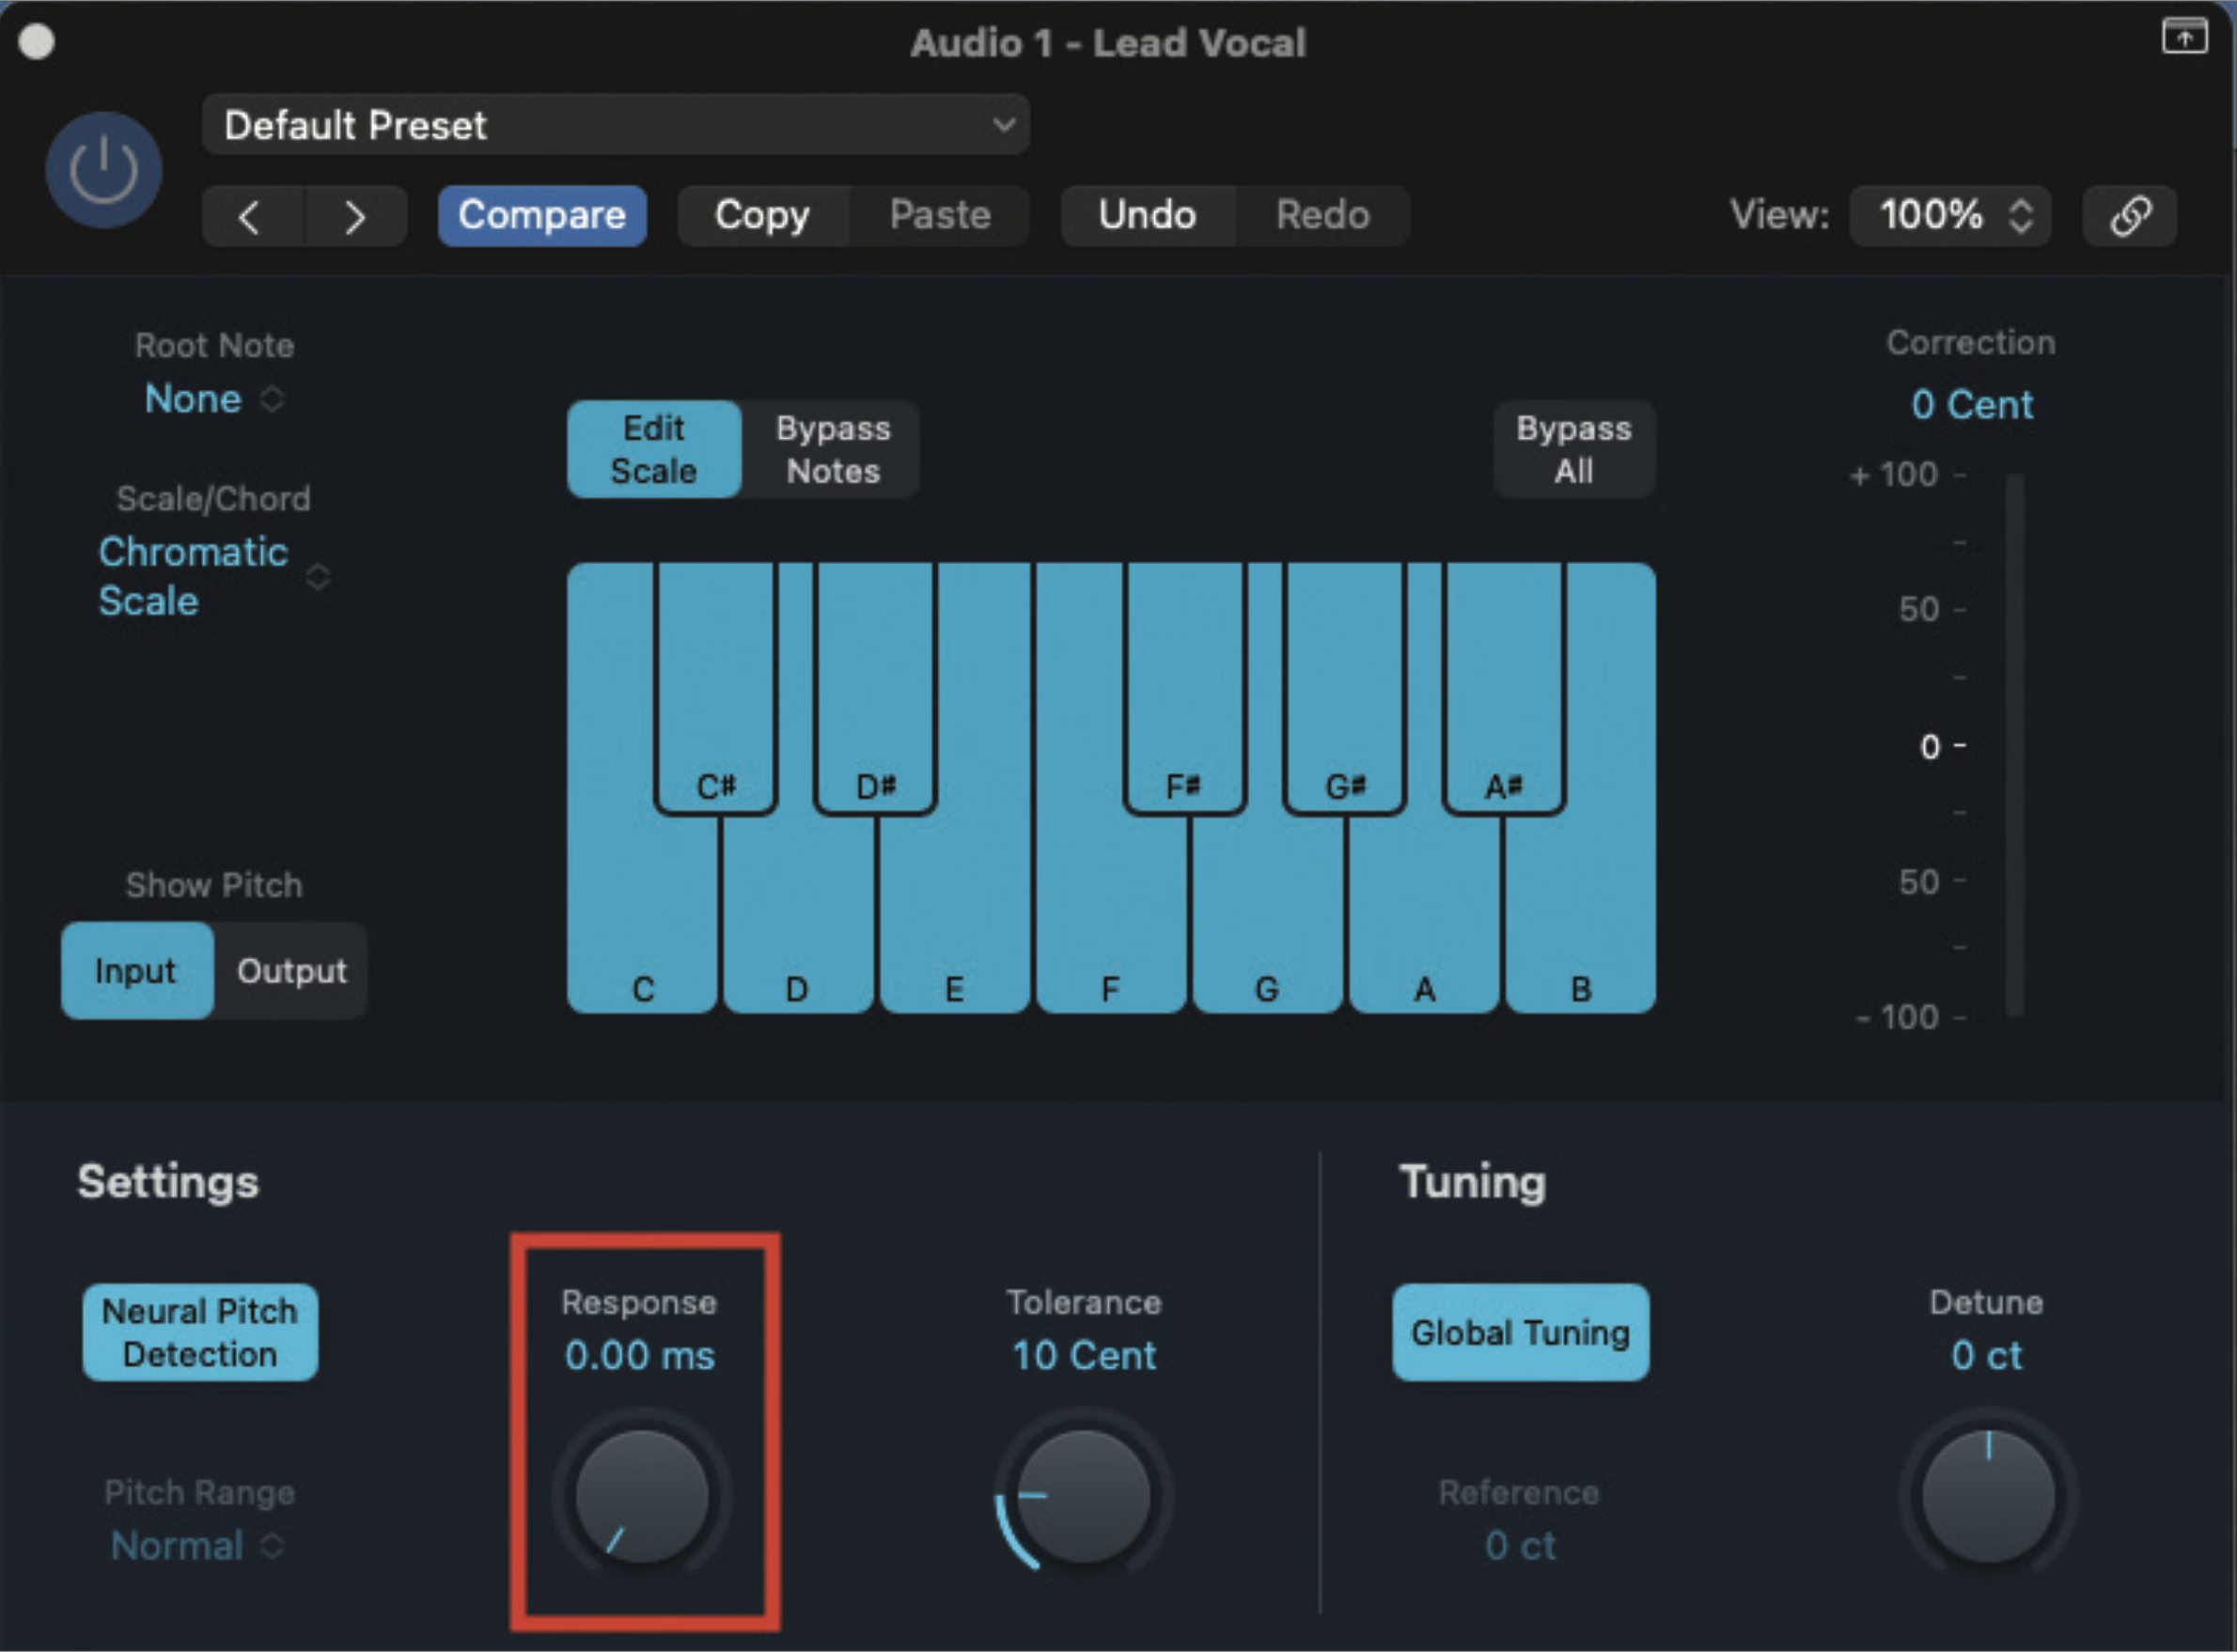
Begin by auditioning your vocal track, by pressing play on your DAW. We want to set the plugin so that it applies correction immediately. We can activate this by locating the response time, and reducing it to a value of 0ms. You should immediately hear the pitch ‘twitching’ as it tries to settle on a note.
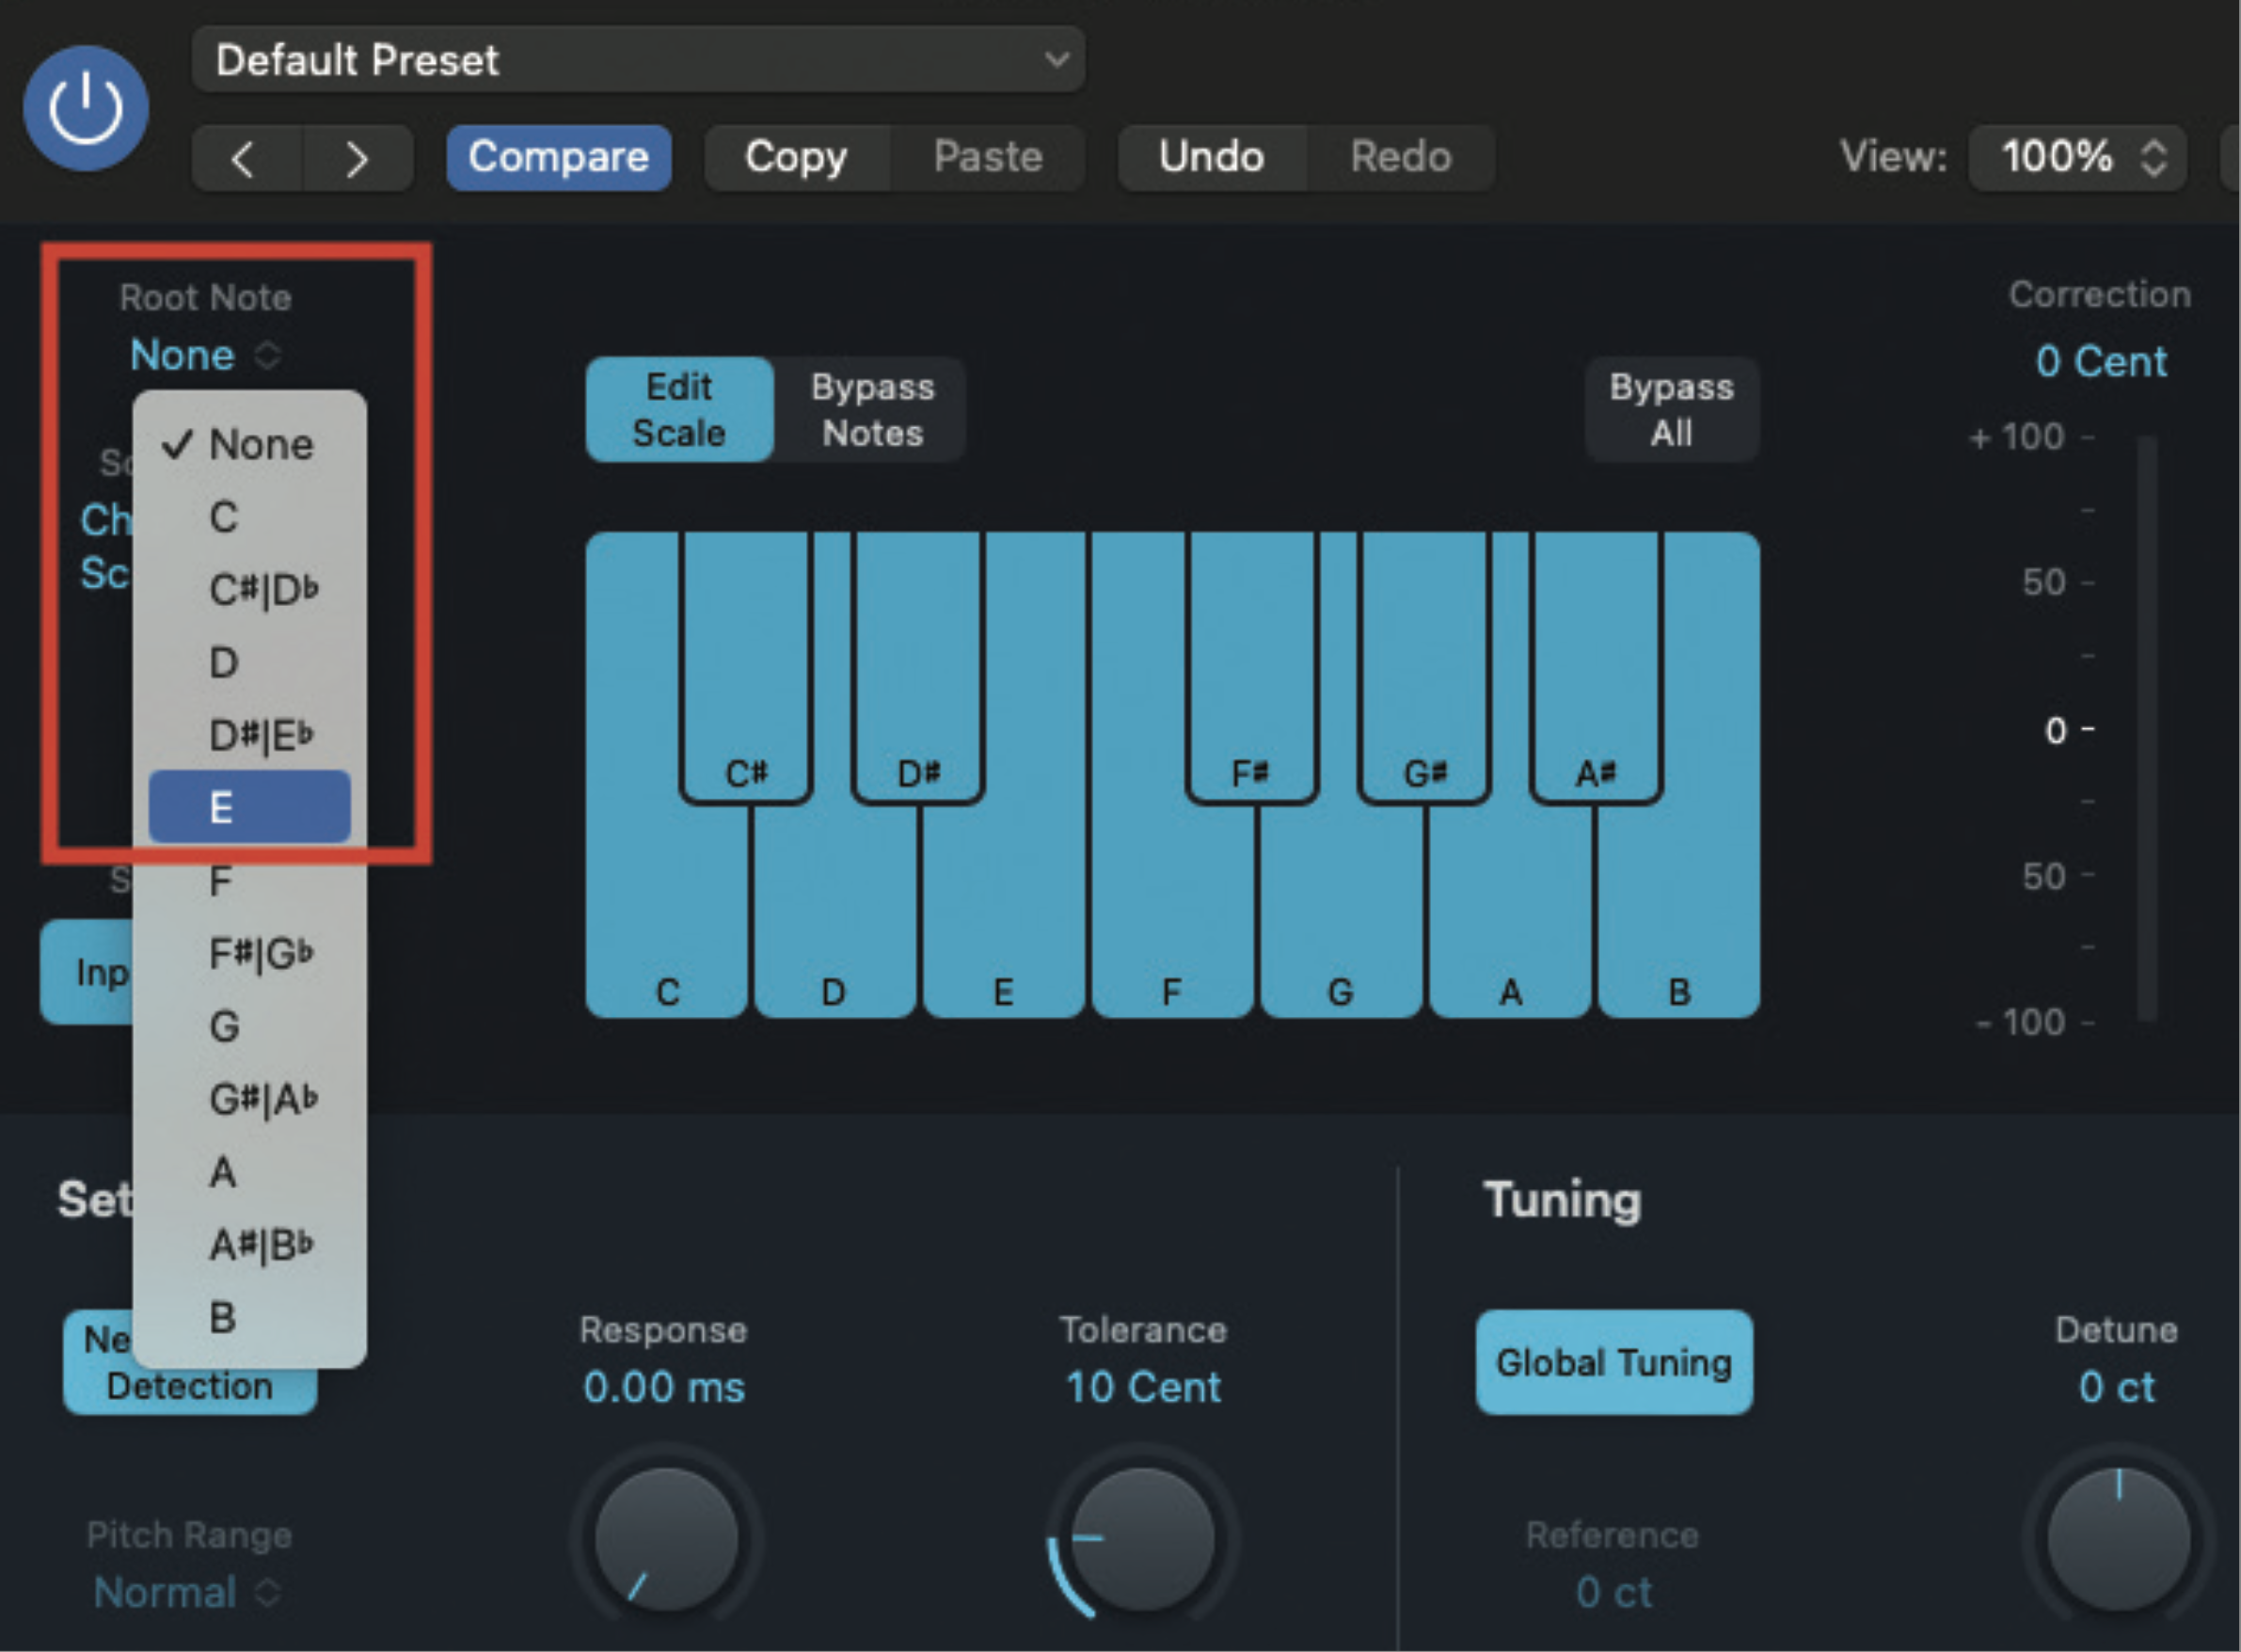
In order to achieve an optimum effect, we need to alter elements relating to the scale of the song. Our example is in E major, so we want to begin by selecting the root note of the scale, which in this case will be E.
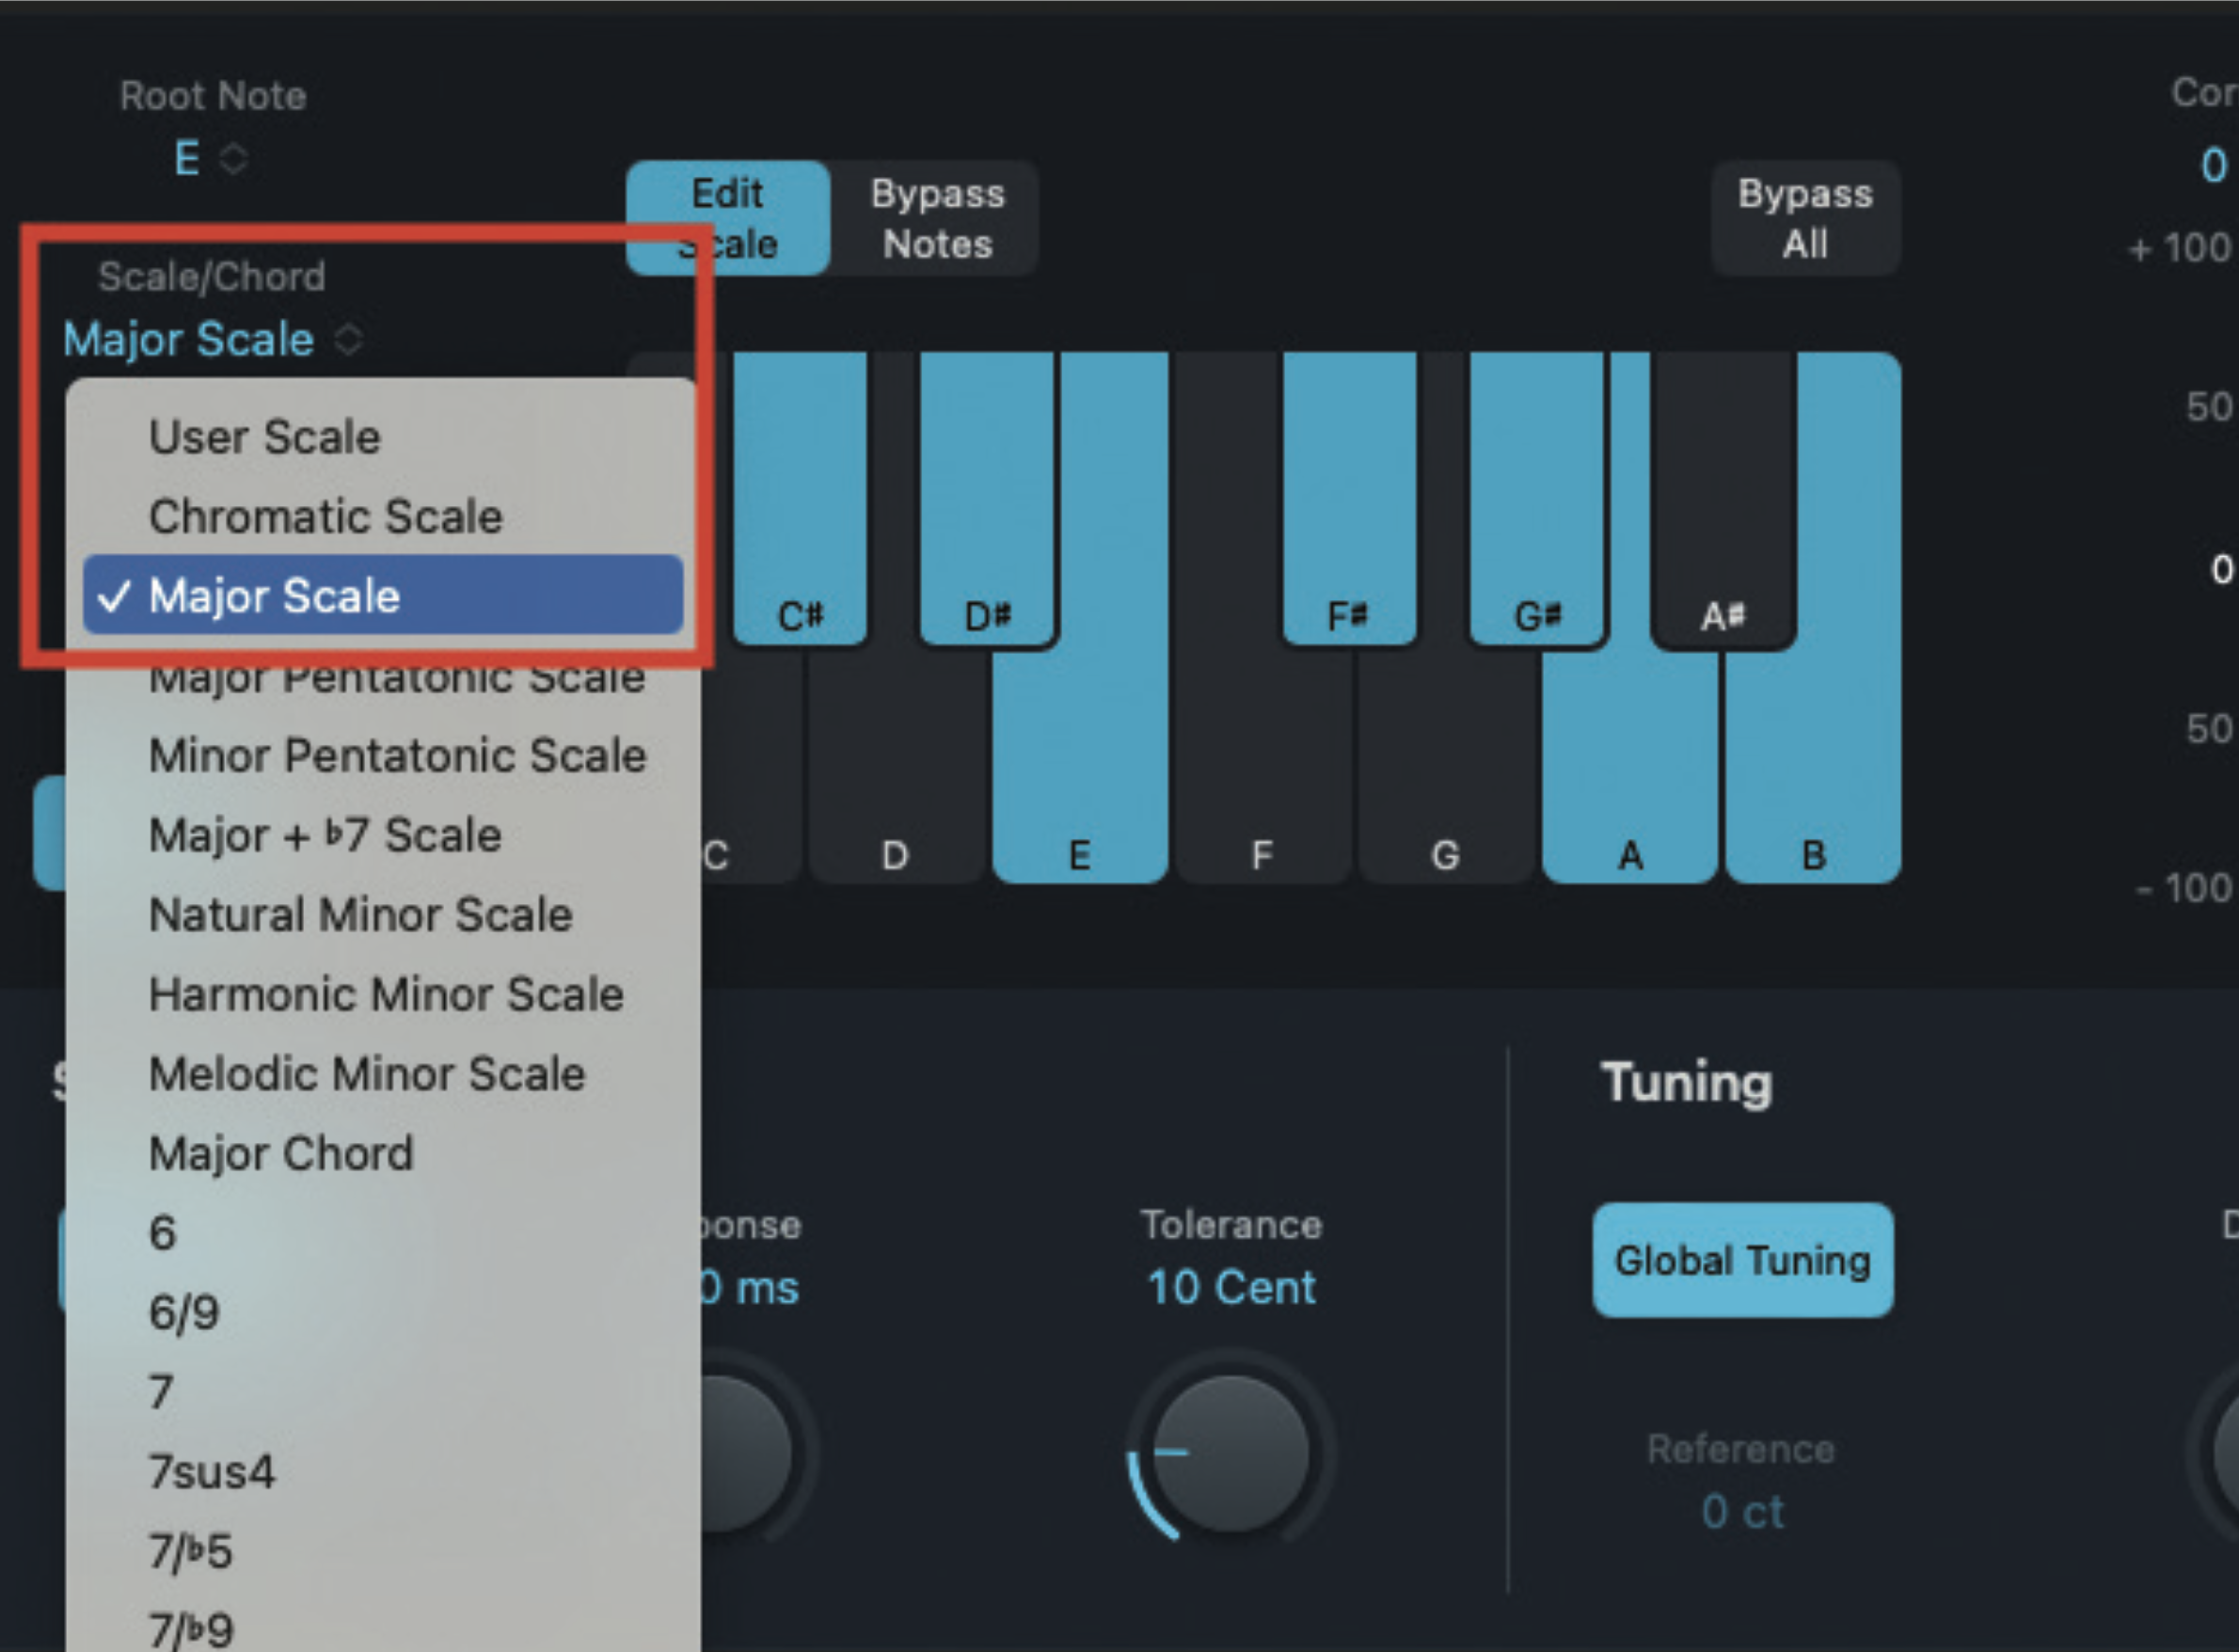
By default, many pitch correction, plugins will preset to a scale type known as ‘chromatic’. This is a rising scale, made up of semitones. To amplify the overall effect, we will set our scale to major. If your song is in a minor key, select minor. There are often plenty of other scale options, which include chord and mode types.
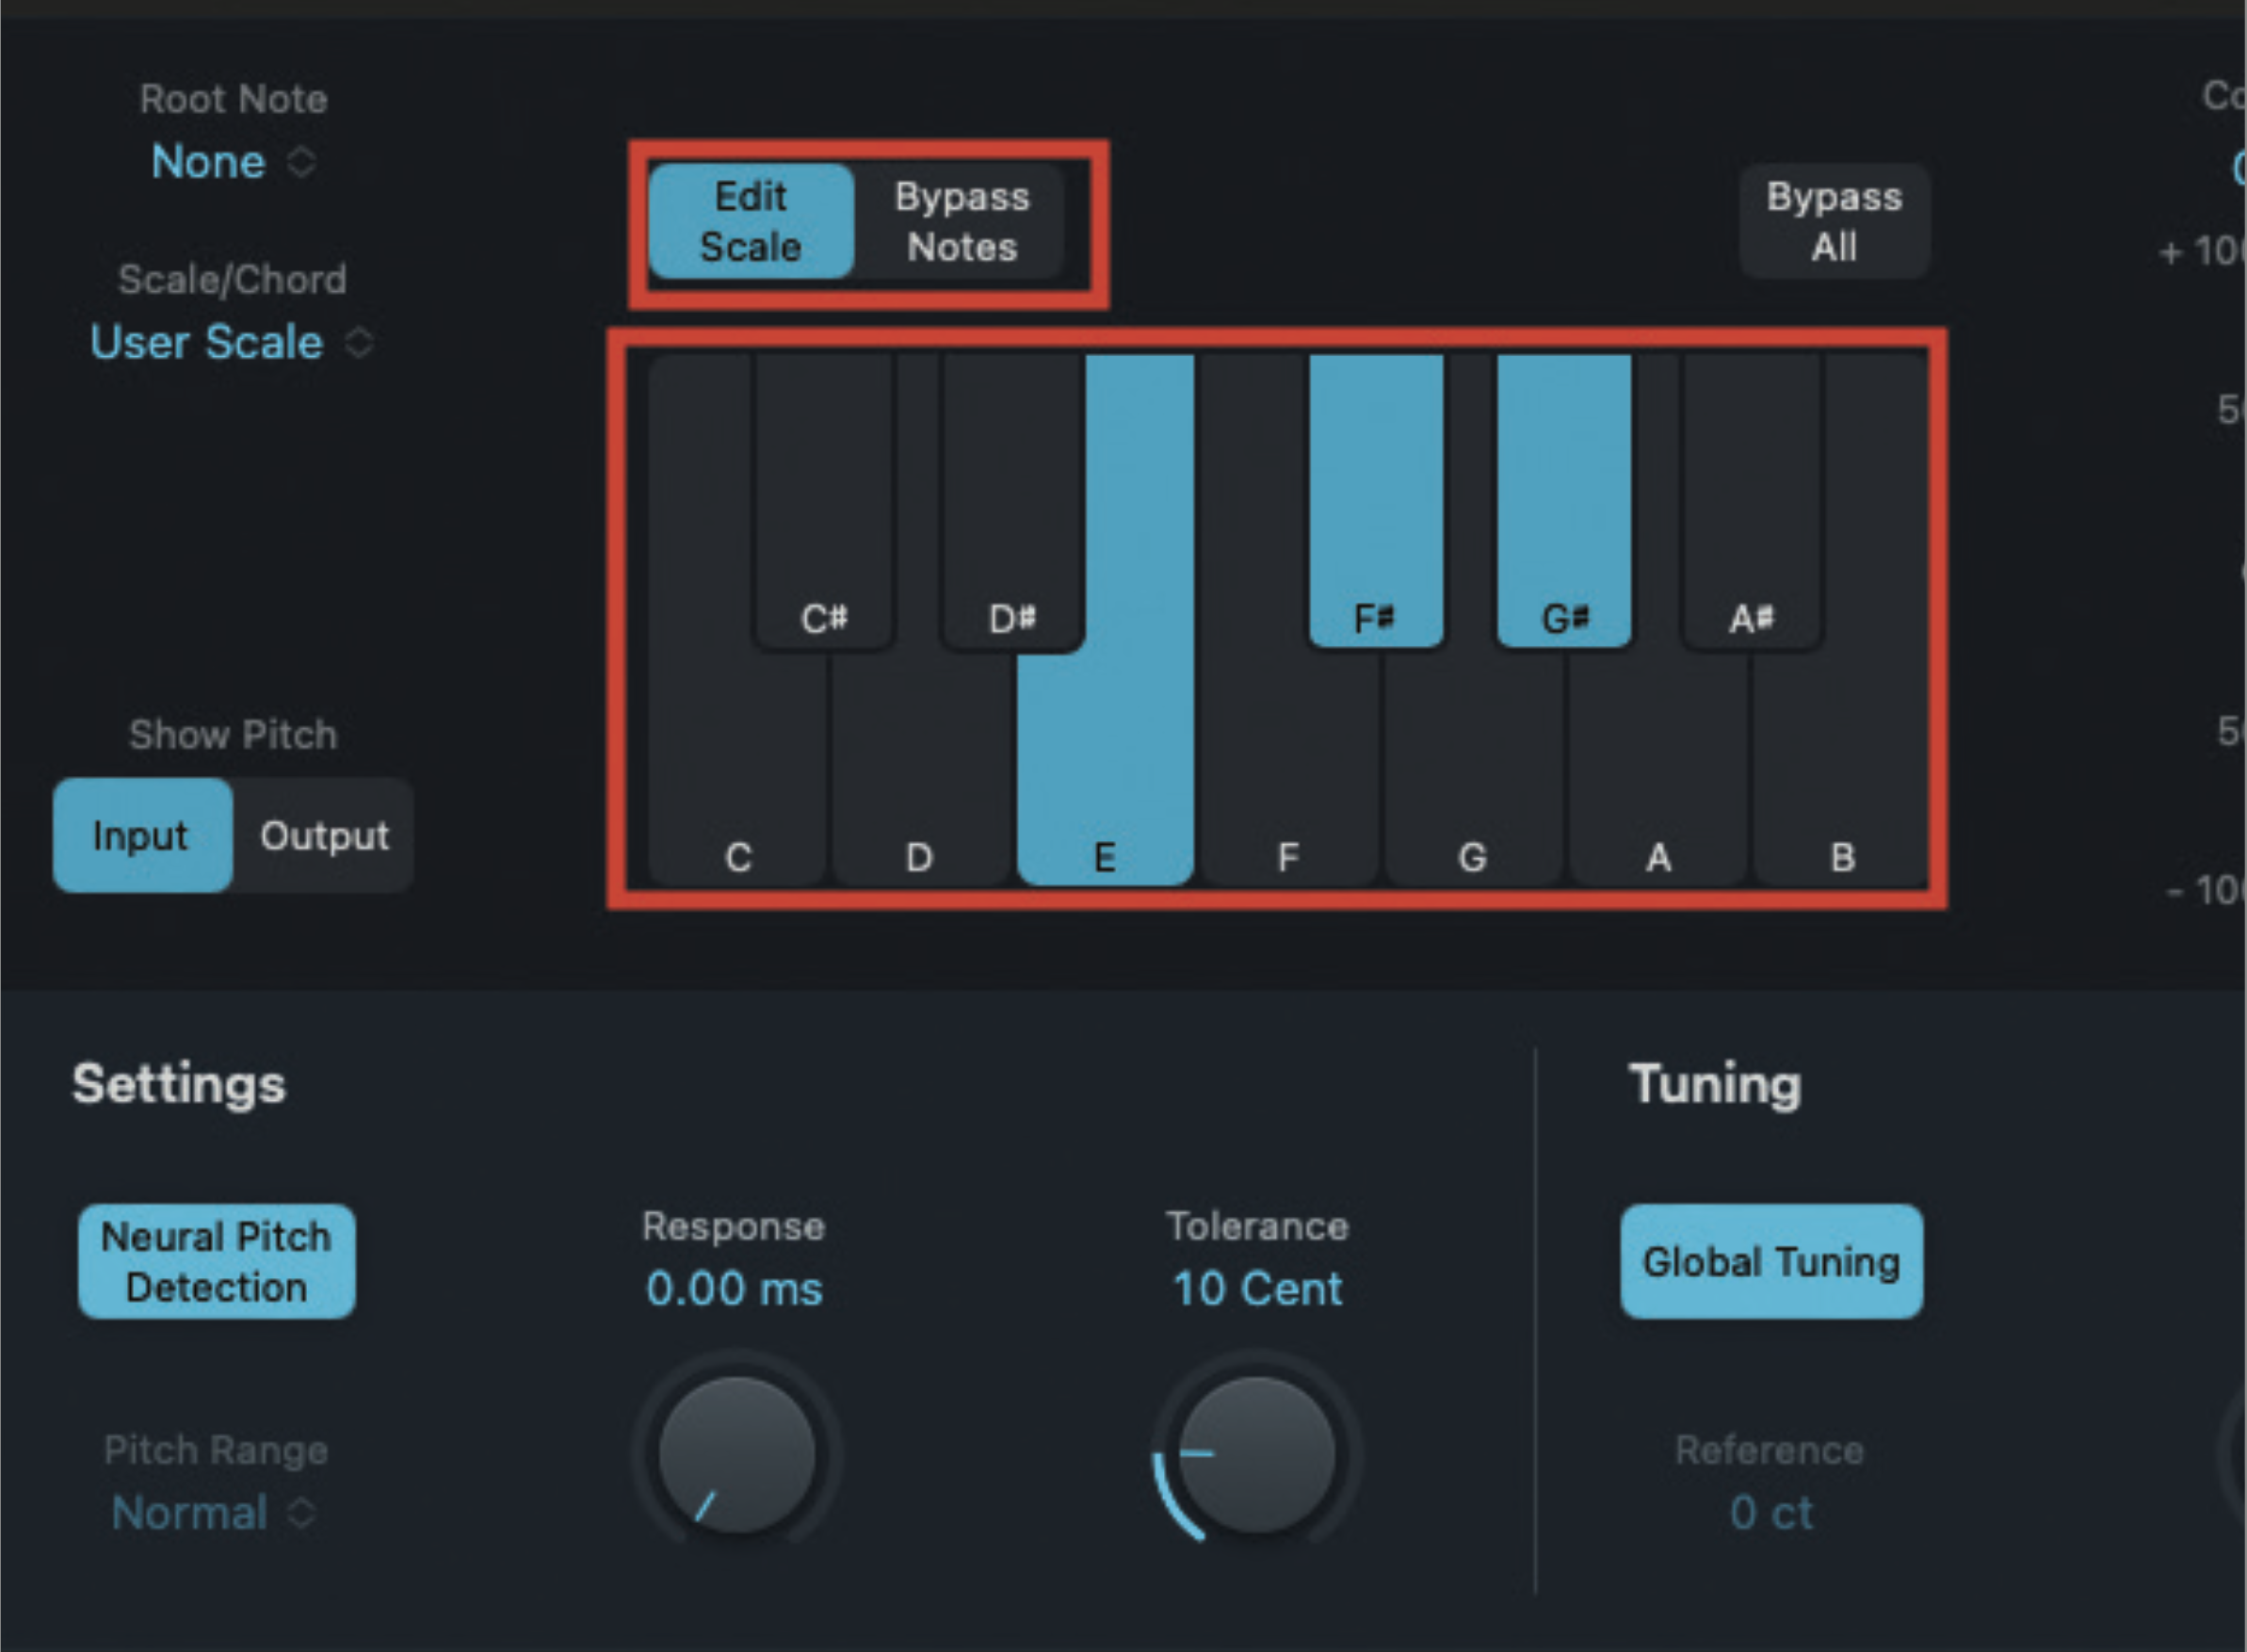
Our example of vocal contains only three notes, which are E, F# and G# . We can highlight the effect of the hard-tune, by deselecting the notes in the scale that are not required. Deactivate the notes that we do not need, for an even better and far more accurate overall effect.
Get the MusicRadar Newsletter
Want all the hottest music and gear news, reviews, deals, features and more, direct to your inbox? Sign up here.
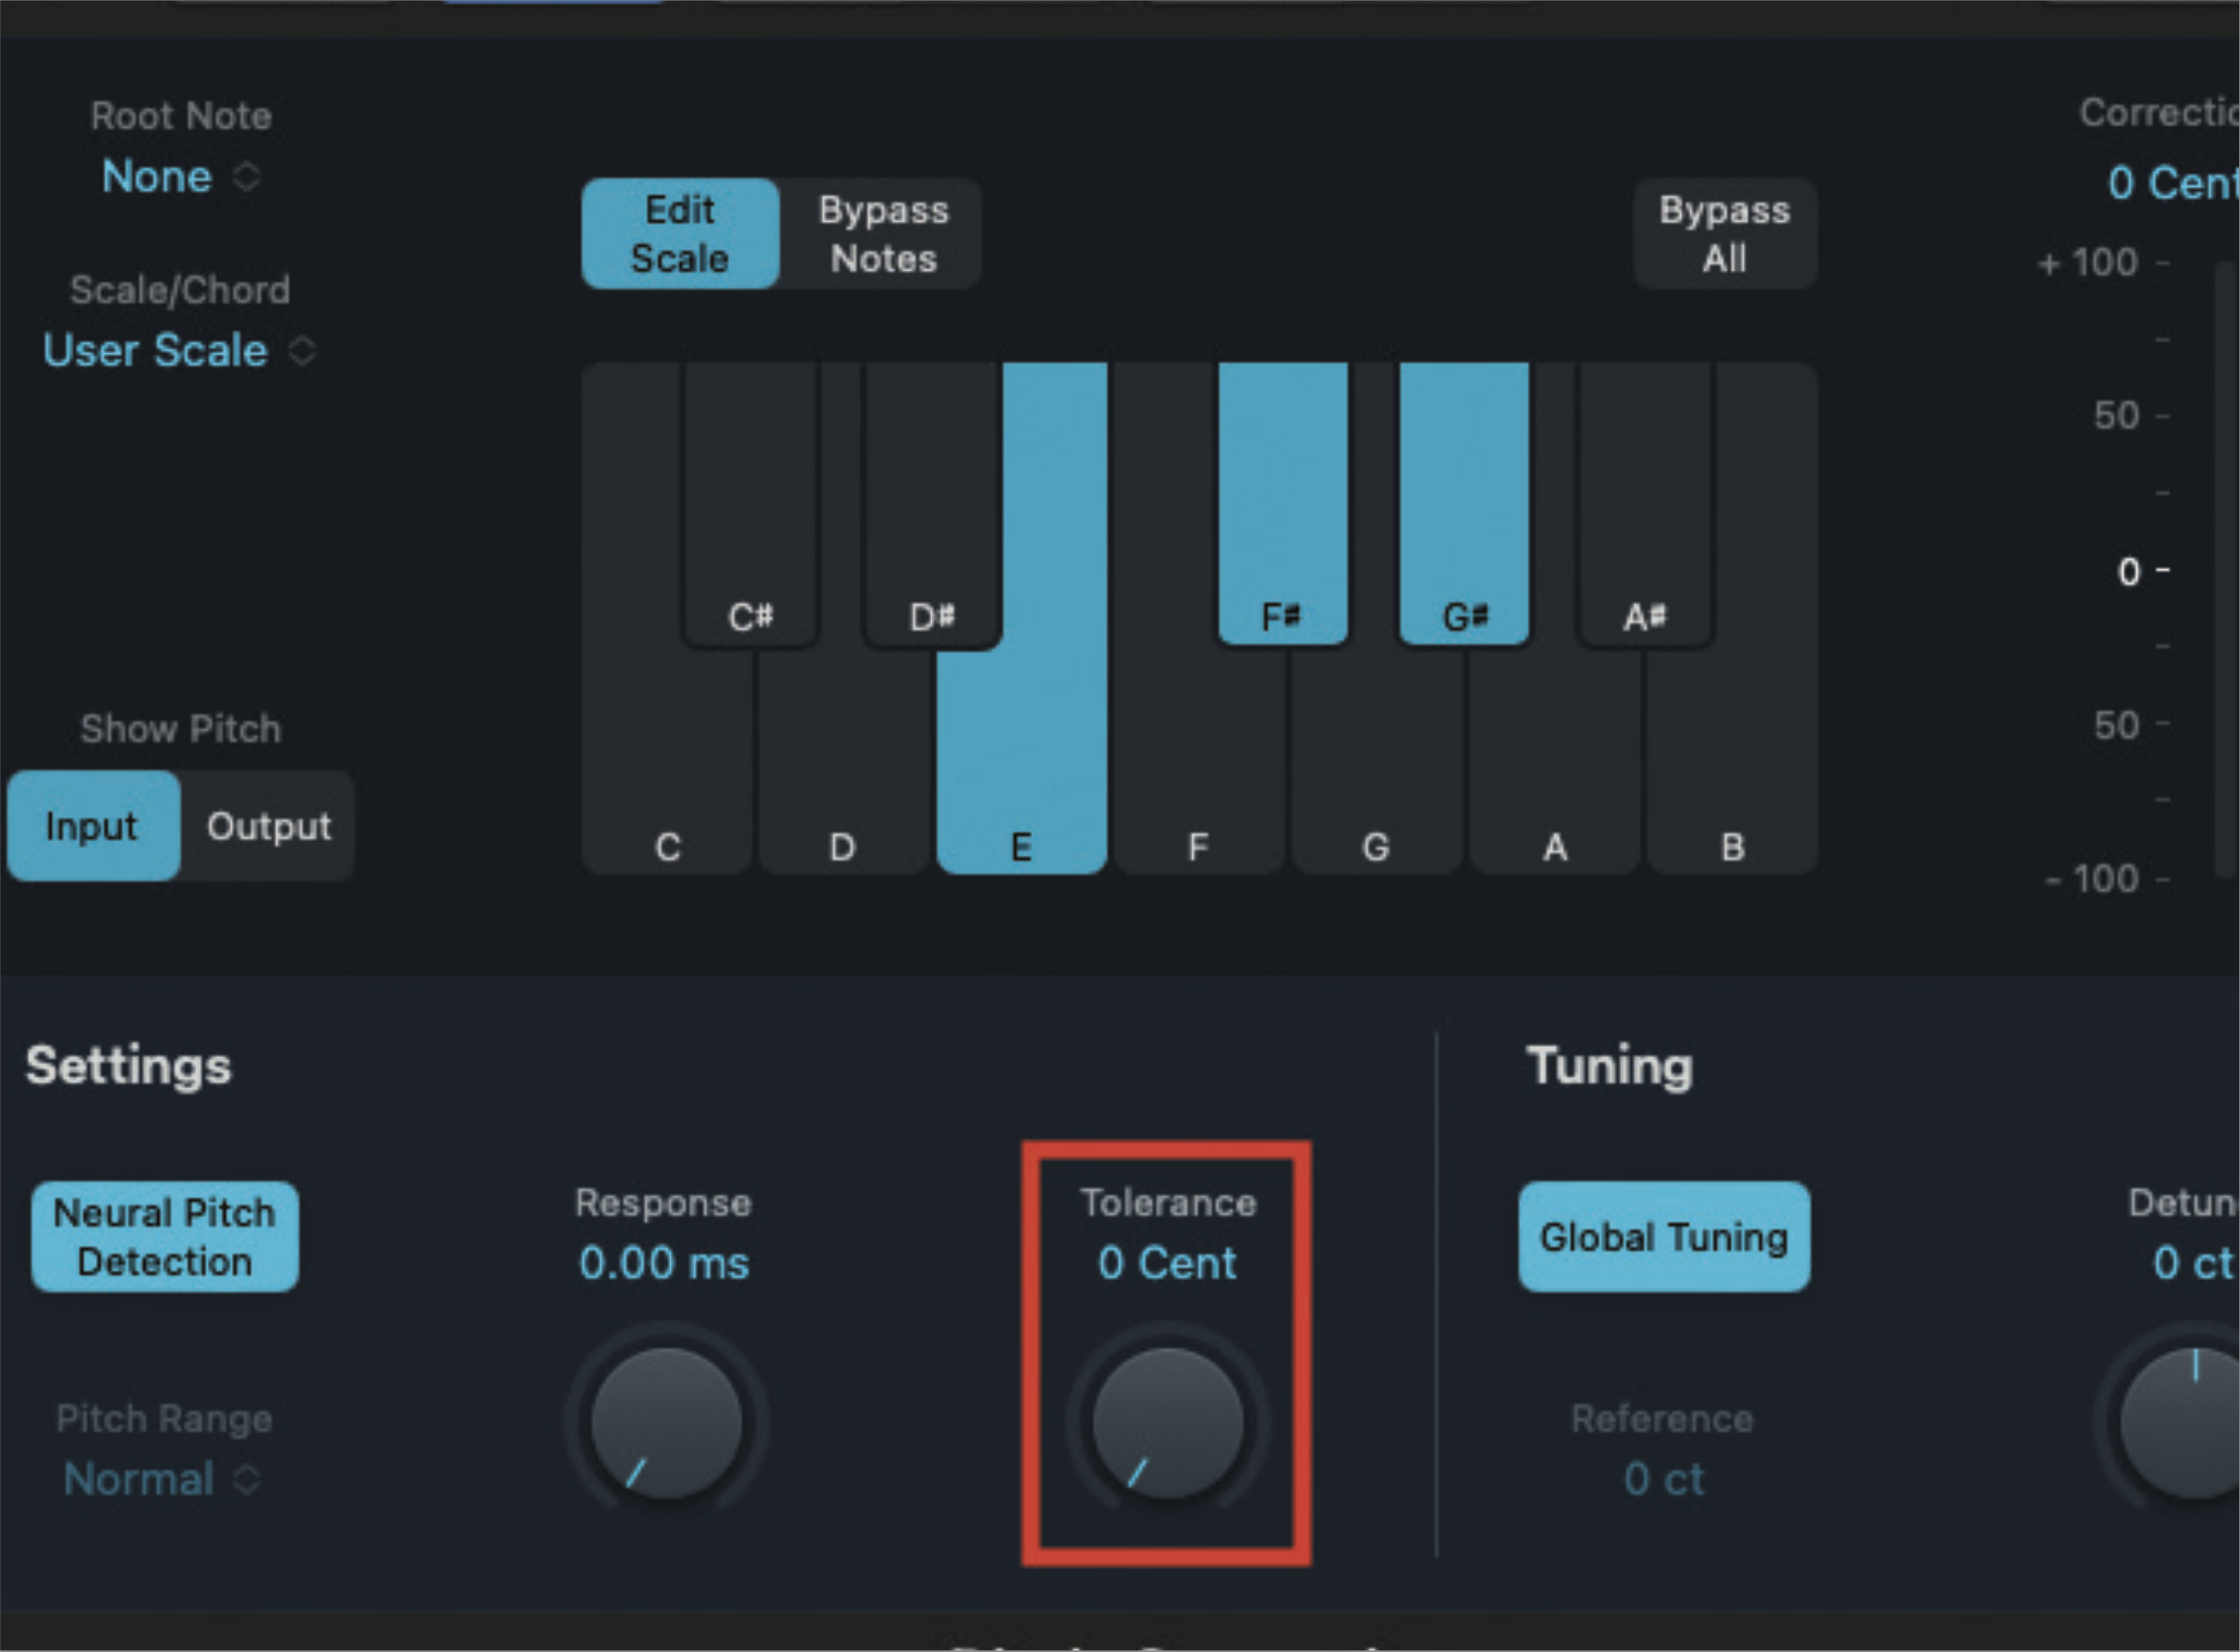
Some plugins may offer a form of humanise or tolerance control. This is not something we really want in this hard-tune setting, so reduce any such controls to a value of zero. Of course, if you do like the sound created by humanising your track, you could leave, or even increase this setting.
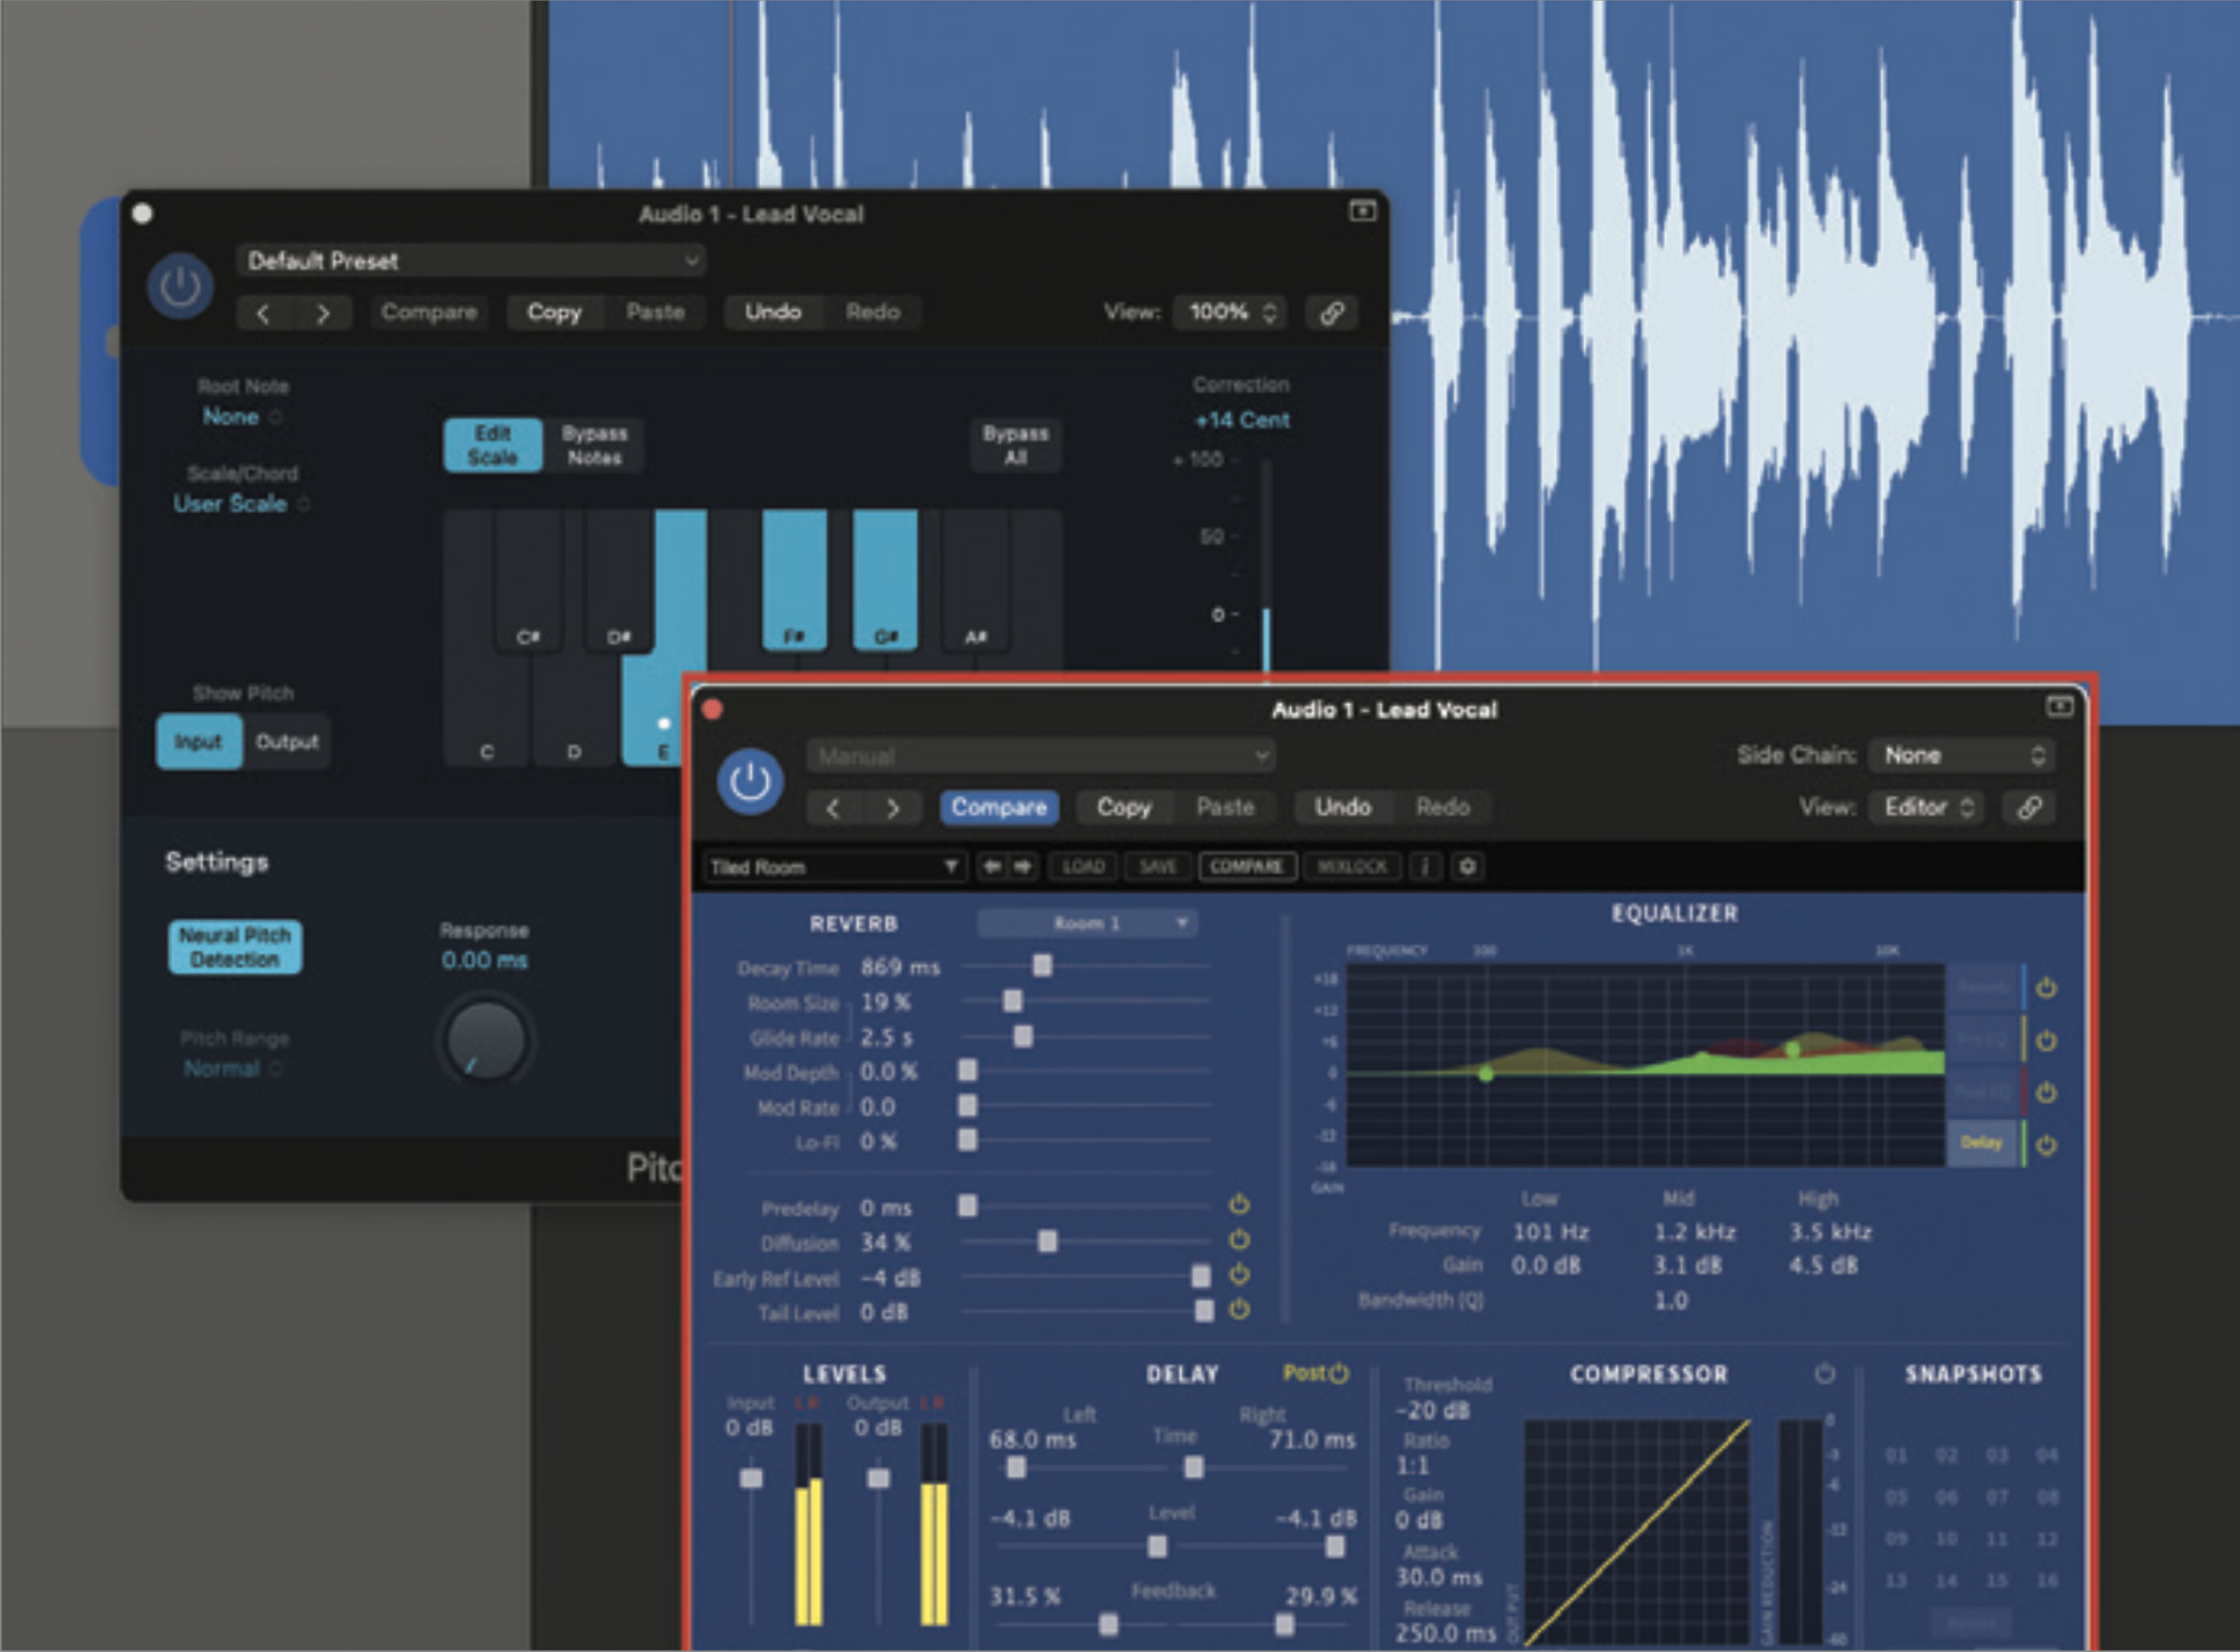
Finally, don’t forget that this is still a vocal track, and applying some of the usual vocal effects, will be hugely beneficial. Try applying delay or reverb after your pitch correction plugin.
Roland Schmidt is a professional programmer, sound designer and producer, who has worked in collaboration with a number of successful production teams over the last 25 years. He can also be found delivering regular and key-note lectures on the use of hardware/software synthesisers and production, at various higher educational institutions throughout the UK


