How to use Granulator III, the new version of Ableton's powerful granular synth in Live 12: "We were frequently distracted from writing this tutorial by encountering great new sounds to save for later"
One of the best Max for Live devices has been given a refresh. Here's the lowdown on its latest version
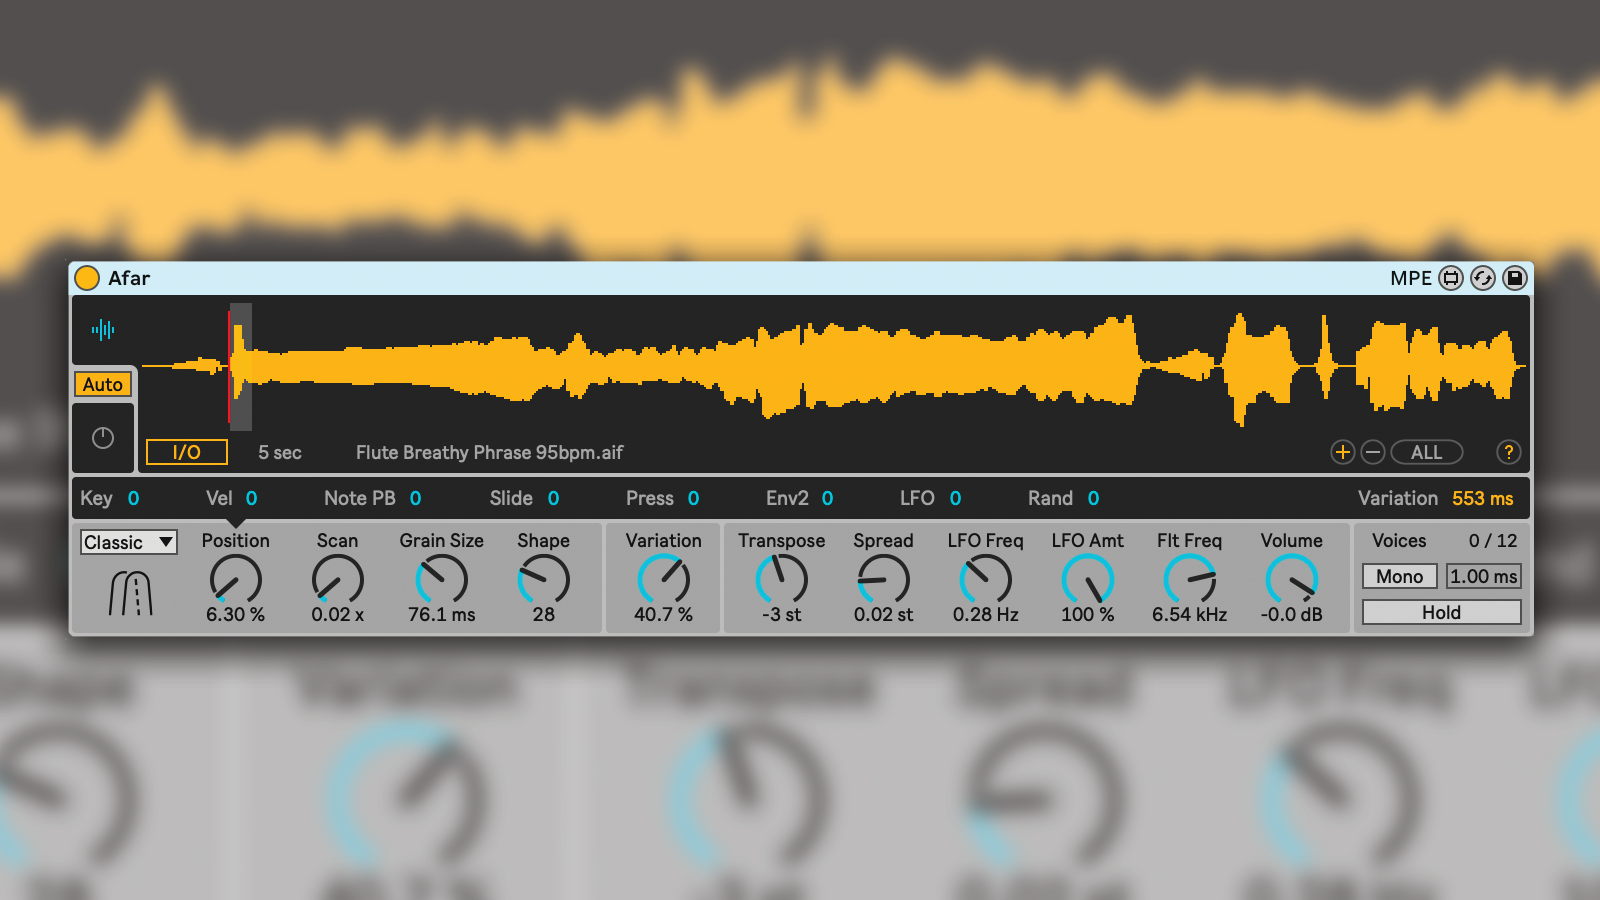
Granulator III is a free sample-based synthesis instrument for Ableton Live 12 (Max For Live is required), designed by Ableton co-creator Robert Henke. Granulator works by importing or recording a sample and replaying small segments of it one at a time - comprised of grains, as they’re called.
Grains can vary in length from two milliseconds to two seconds, and mostly, using Granulator is about manipulating these grains in different ways to create new and evolving textures or rhythms. Granulator III has received a UI clean-up, and perhaps most importantly, a new integrated Capture feature for direct audio recording into the device.
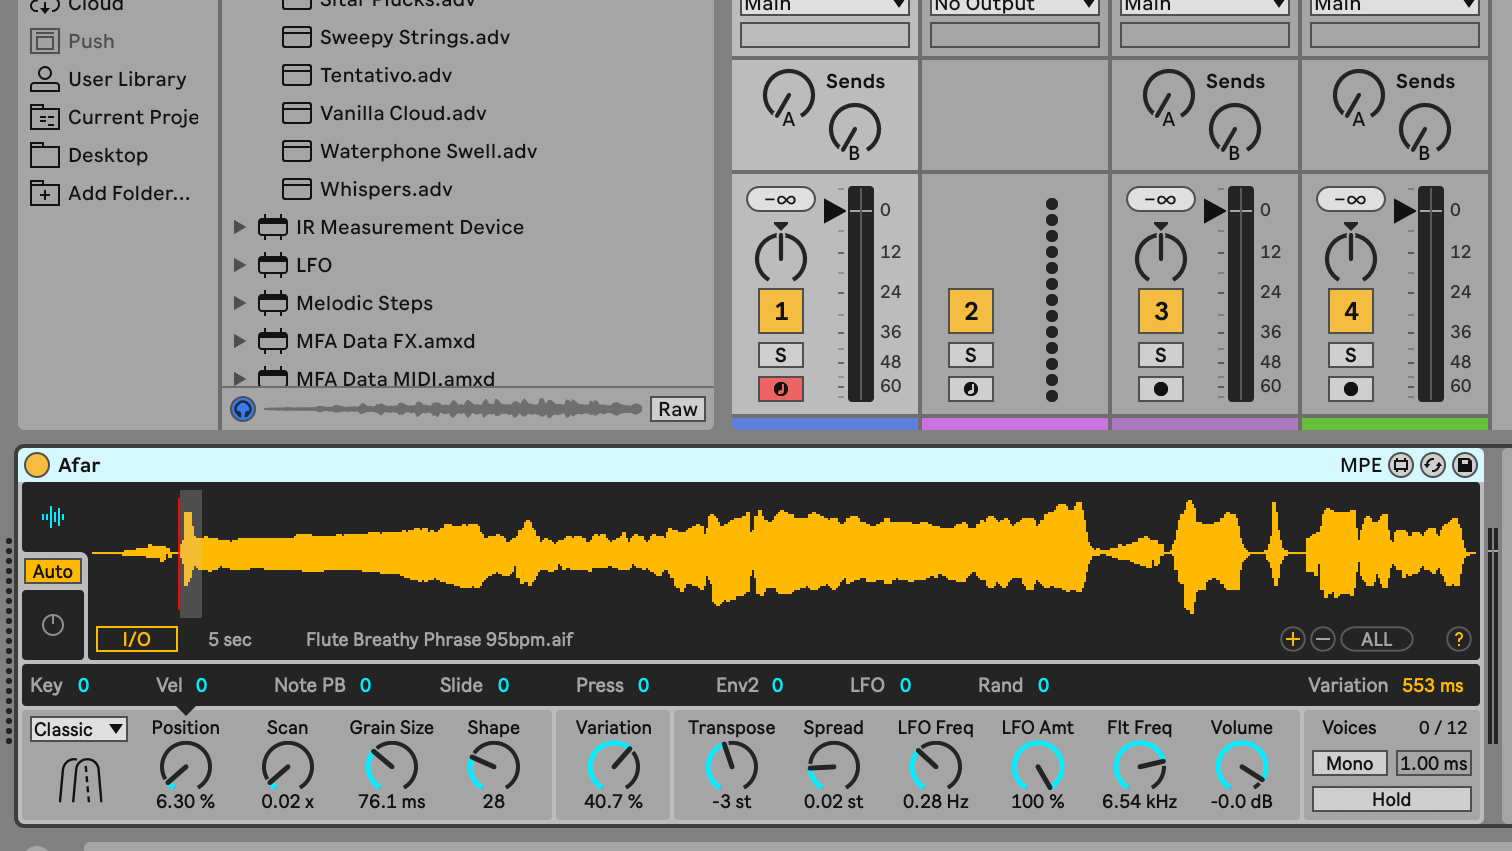
Start by making sure your versions of Ableton Live and Max For Live are as up to date as possible. You can also download the demo version of Ableton Live 12 and work with that. Granulator III itself is free, as we said, but you may have to pay to upgrade or certainly to purchase Live.
As we stated in the introduction, Granulator III is only compatible with Live 12. Once installed Granulator III will appear in Live’s Browser alongside the other Max For Live instruments. Installation includes a number of presets, complete with their loaded samples, which will give you a quick idea of what Granulator III can achieve.
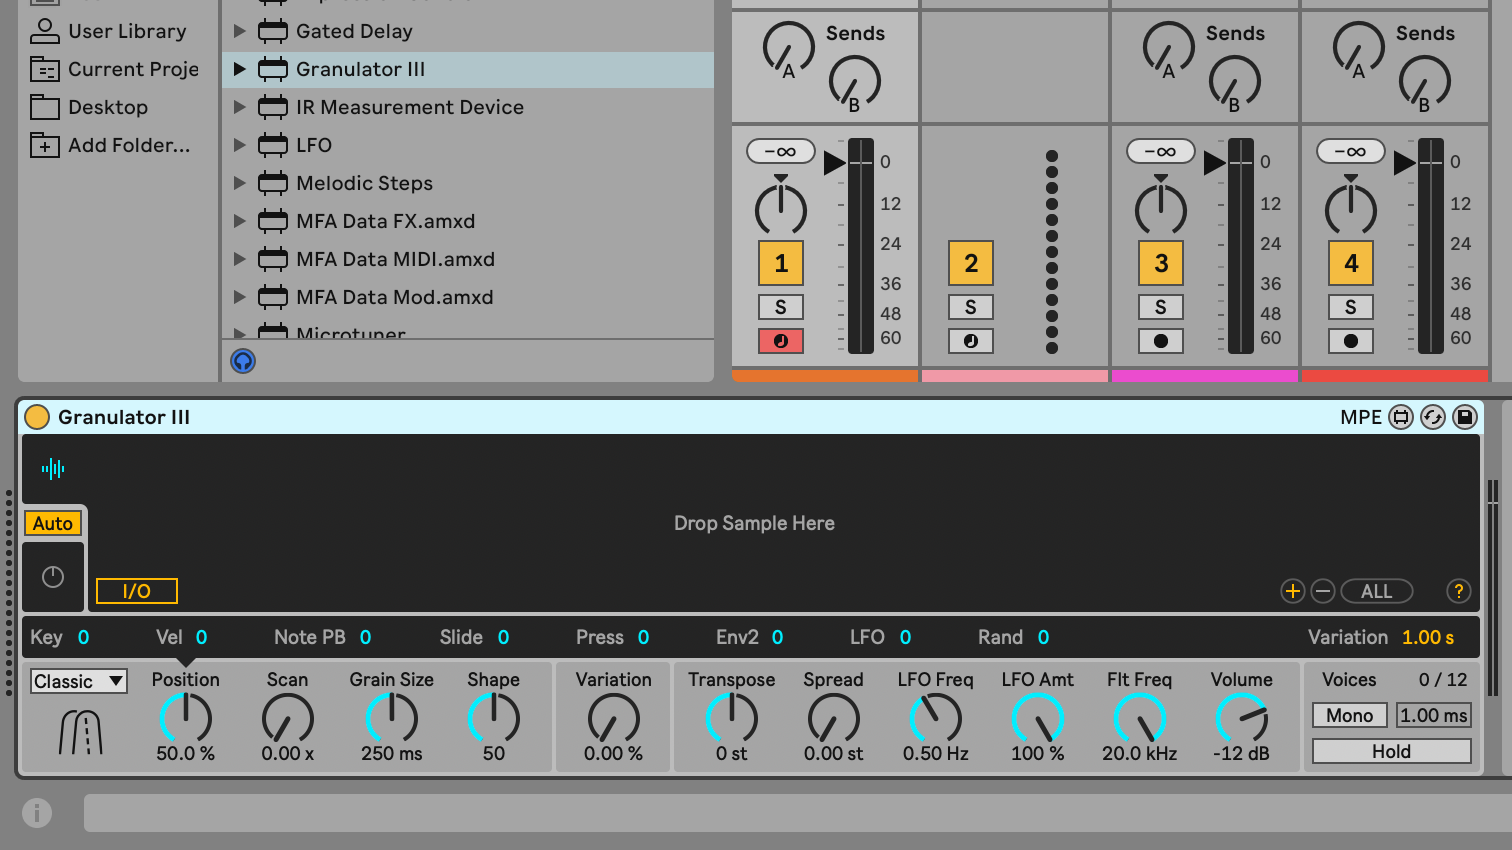
As you’d expect, Granulator III can be programmed, like any Ableton instrument, with notes and controllers entered in the MIDI Editor. Because it’s MPE compatible, we can even draw in MPE values. However, we can use a keyboard to play it like a true sampling instrument.
This introduces real-time performance style elements such as velocity, pitch bend, and pressure. At the most basic level, and there’s nothing wrong with that, tap ‘m’ on your computer keyboard to enable Live’s virtual MIDI keyboard, which lets you use the computer keyboard as a piano-style input device, with z and x changing octaves, and c and v changing velocity.
In the above example, we have the Granulator III Sweepy Strings set played with our MacBook's virtual MIDI keyboard, over three octaves.
Get the MusicRadar Newsletter
Want all the hottest music and gear news, reviews, deals, features and more, direct to your inbox? Sign up here.
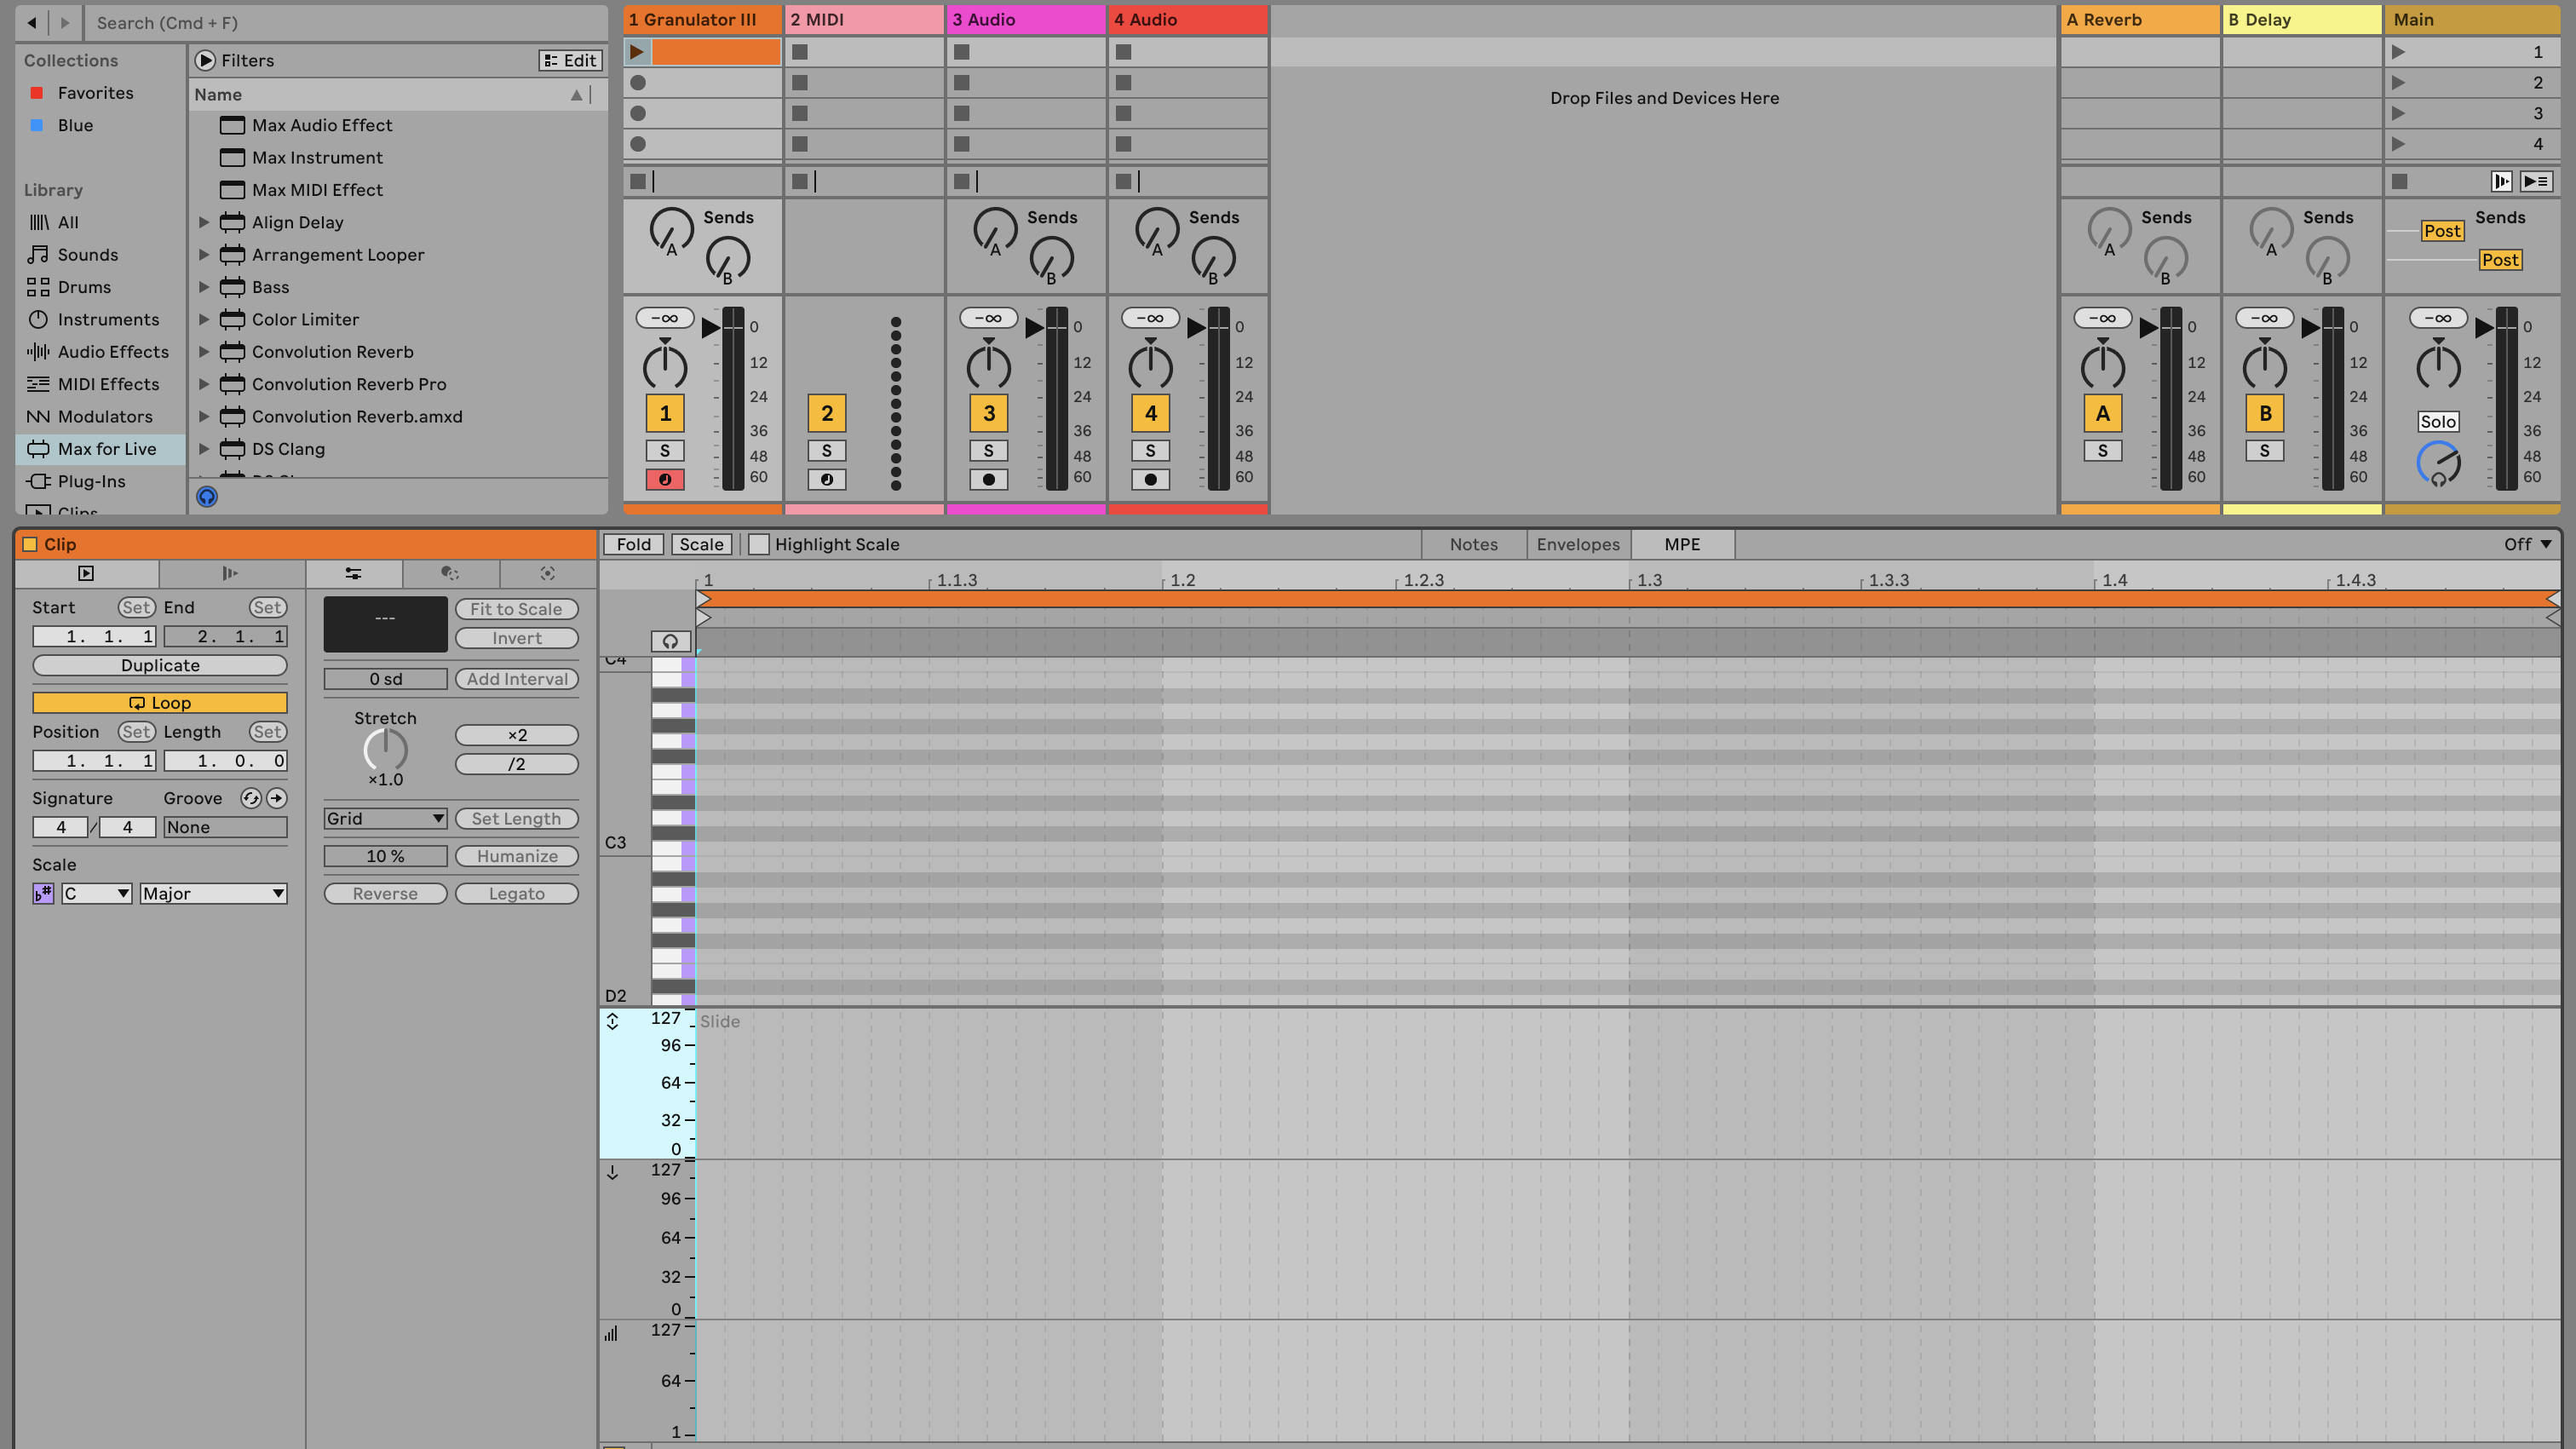
We already mentioned that Granulator III is fully MPE compatible. MPE parameters include note, velocity, pitch bend, slide (modulation), and pressure. All of these can be applied using the MIDI editor in Live, but it’s fair to say that the most important element of MPE is using it during performance, so ideally you should try to use a suitable controller.
Other than the hardware, MPE of course requires a suitable instrument and that’s where Granulator III comes in. It’s MPE-ready out of the box, with the controls available at the top level of the device; that’s another good thing about Granulator - the interface is generally very transparent and accessible (with an exception that we’ll mention later).
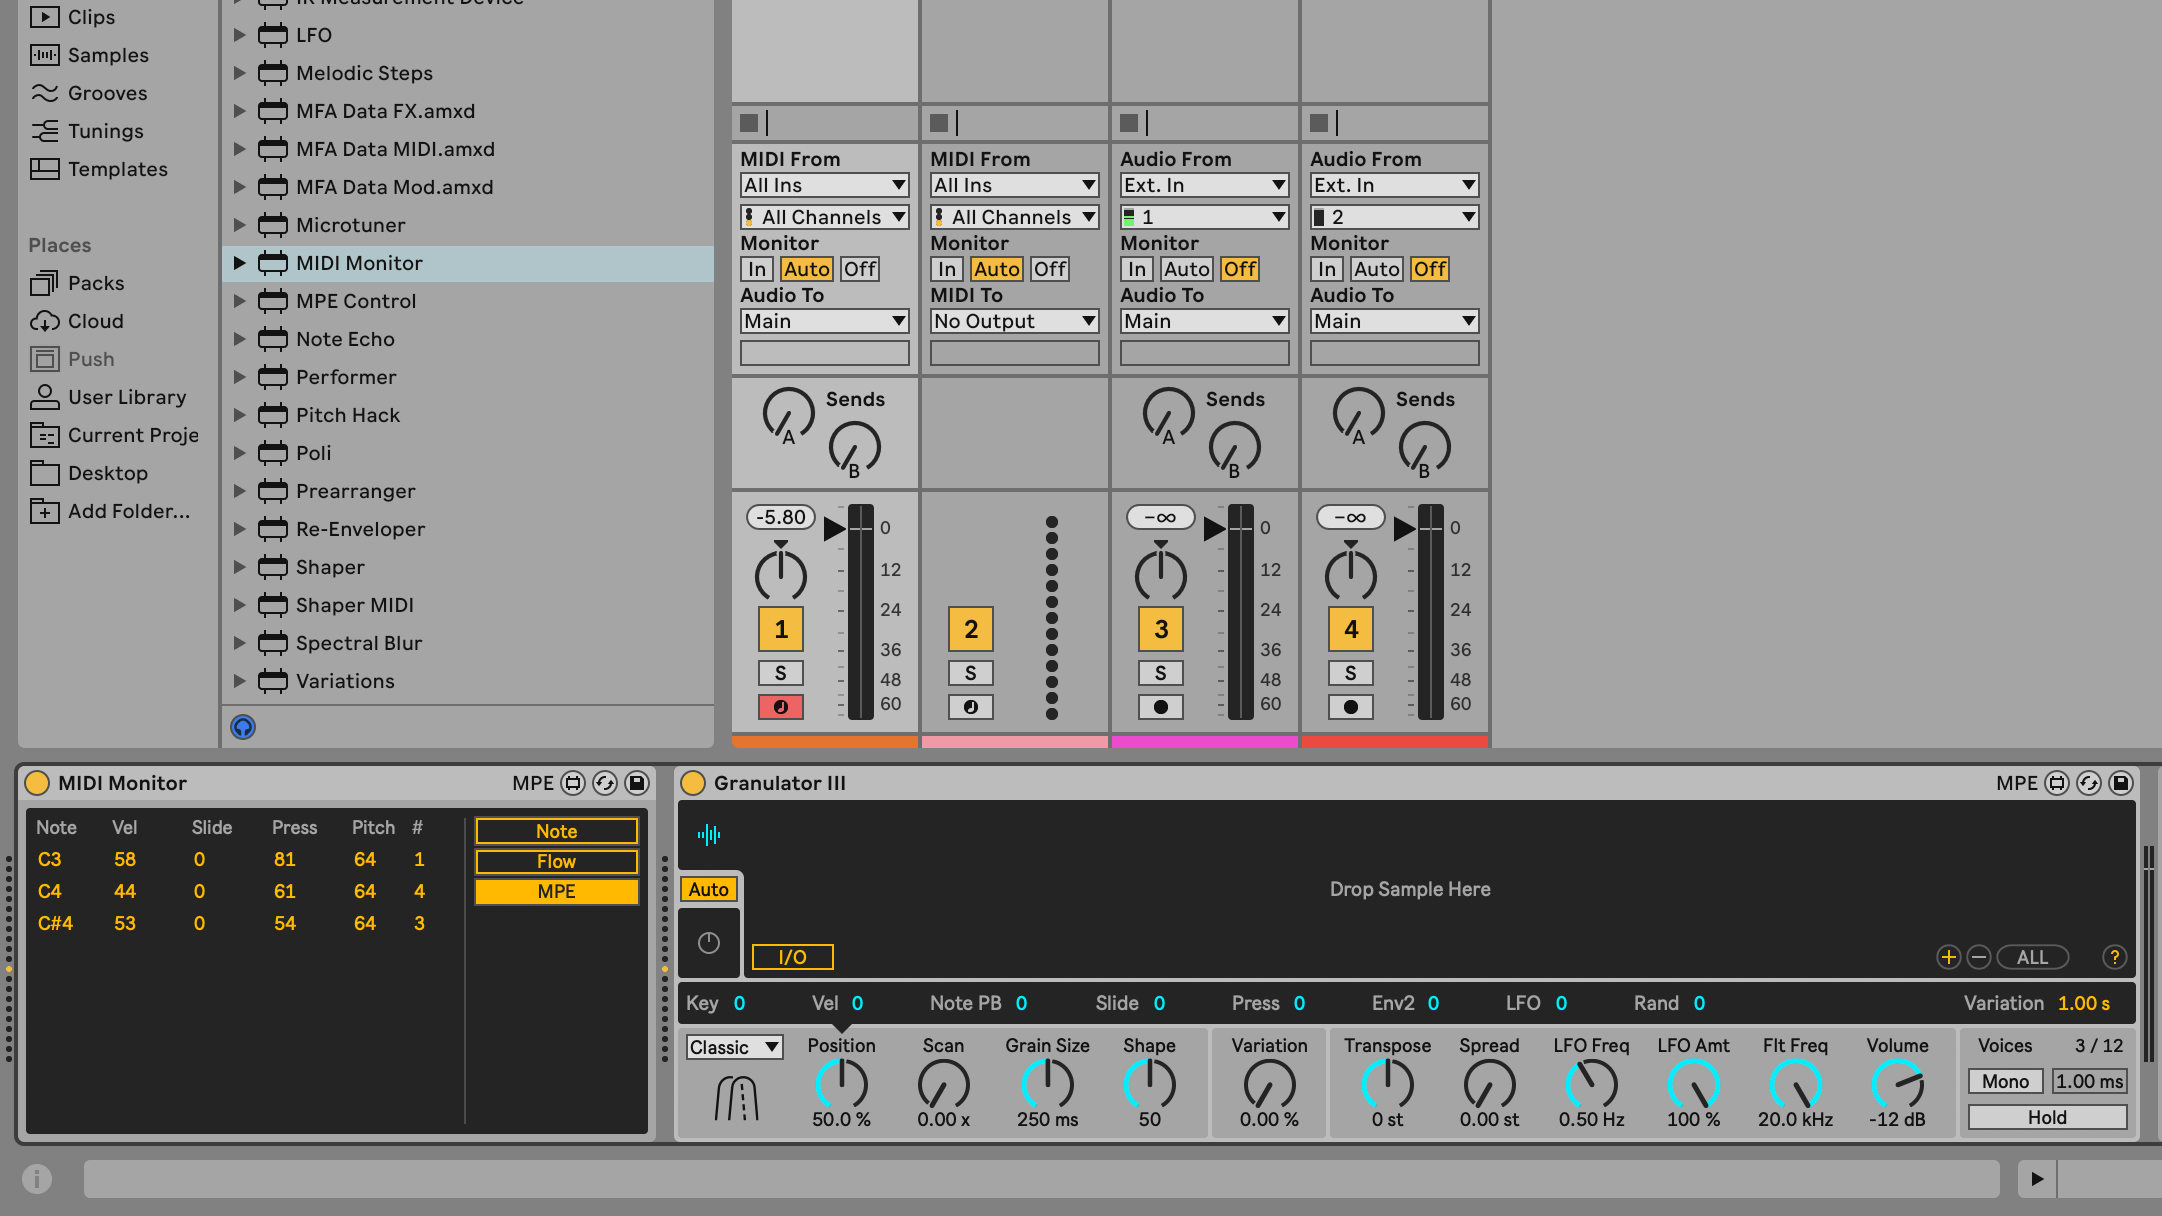
We like to use the Roger Linn Designs Linnstrument for our MPE needs, but you can also use Ableton Push 3 (in standalone or controller versions), the Roli Seaboard, the Joue Play, and others.

Not every player, and not every situation, requires the full depth of expression that MPE can provide, but it’s good to be aware of, and Ableton Instruments such as Granulator III are a great opportunity to start using it - it’s very useful for both ambient evolving sounds and creating realistic simulacra of stringed instruments. When using MPE instruments with Live, the Max For Live MIDI Monitor and MPE Control devices are very useful utilities for observing and reassigning incoming MIDI messages.
In this example, you can hear the same preset as previously, but this time played using our Linnstrument, with MPE slide mapped to sample position. This is followed by the same preset, played with the Linnstrument, with velocity mapped to position and grain size.
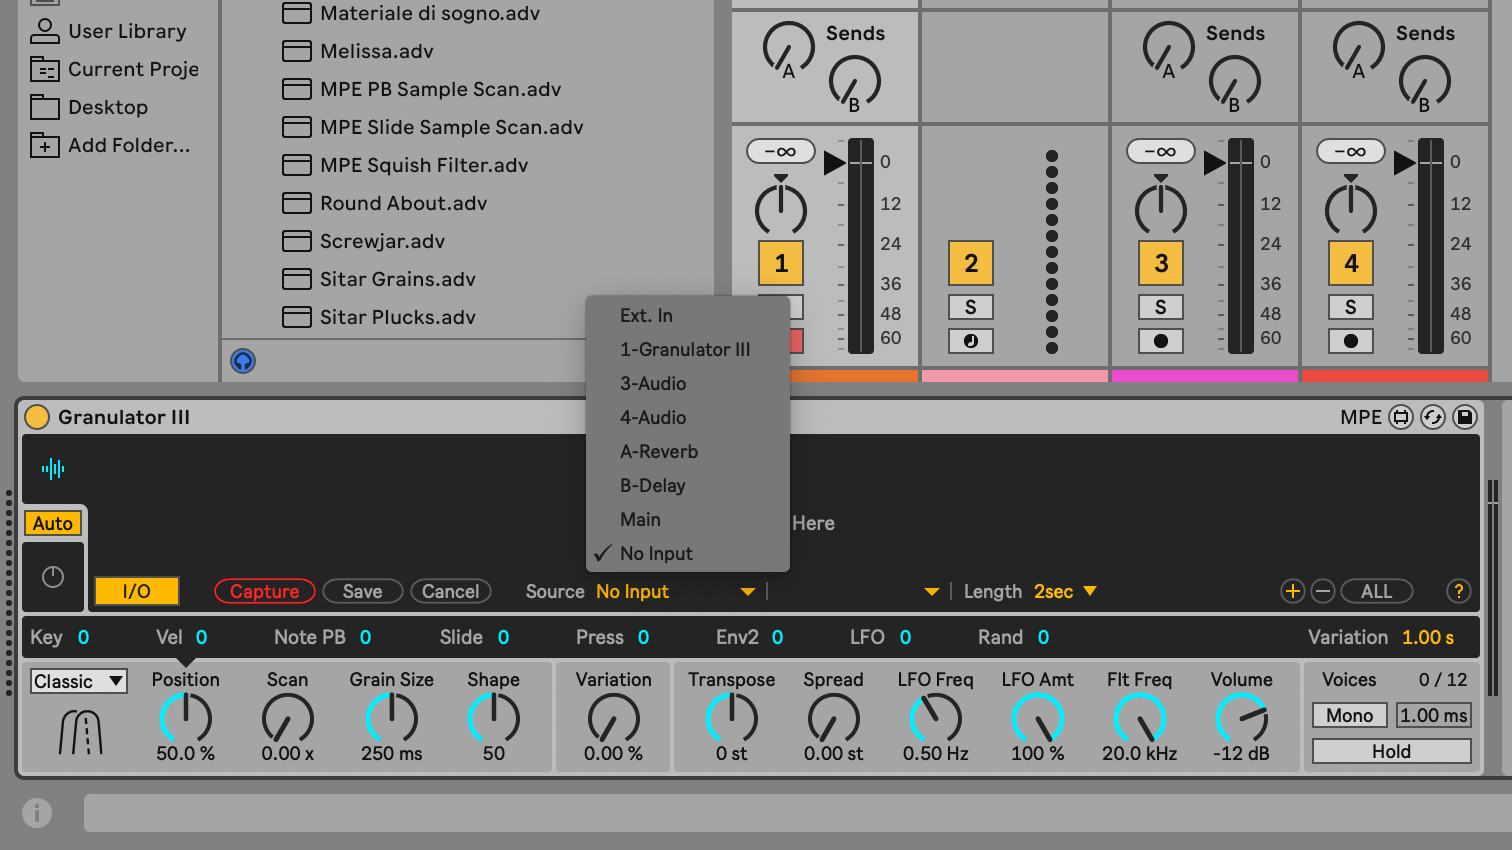
The ability to capture audio (not to be confused with Live’s existing MIDI Capture function) is new in Granulator III, and really streamlines the process - it’s quite unusual in Live to encounter any device that allows direct audio recording (and we’d like to see the ability to record directly into Simpler and Sampler as well, while we’re at it).
At the left of the Granulator III interface, click on the Sample View icon with the little waveform icon. Then you’ll see the empty ‘Drop Sample Here’ area, and below that an I/O switch. Click that to see the Capture buttons - here you have to select a source, and input channel/s, you’ll also see a little level meter.
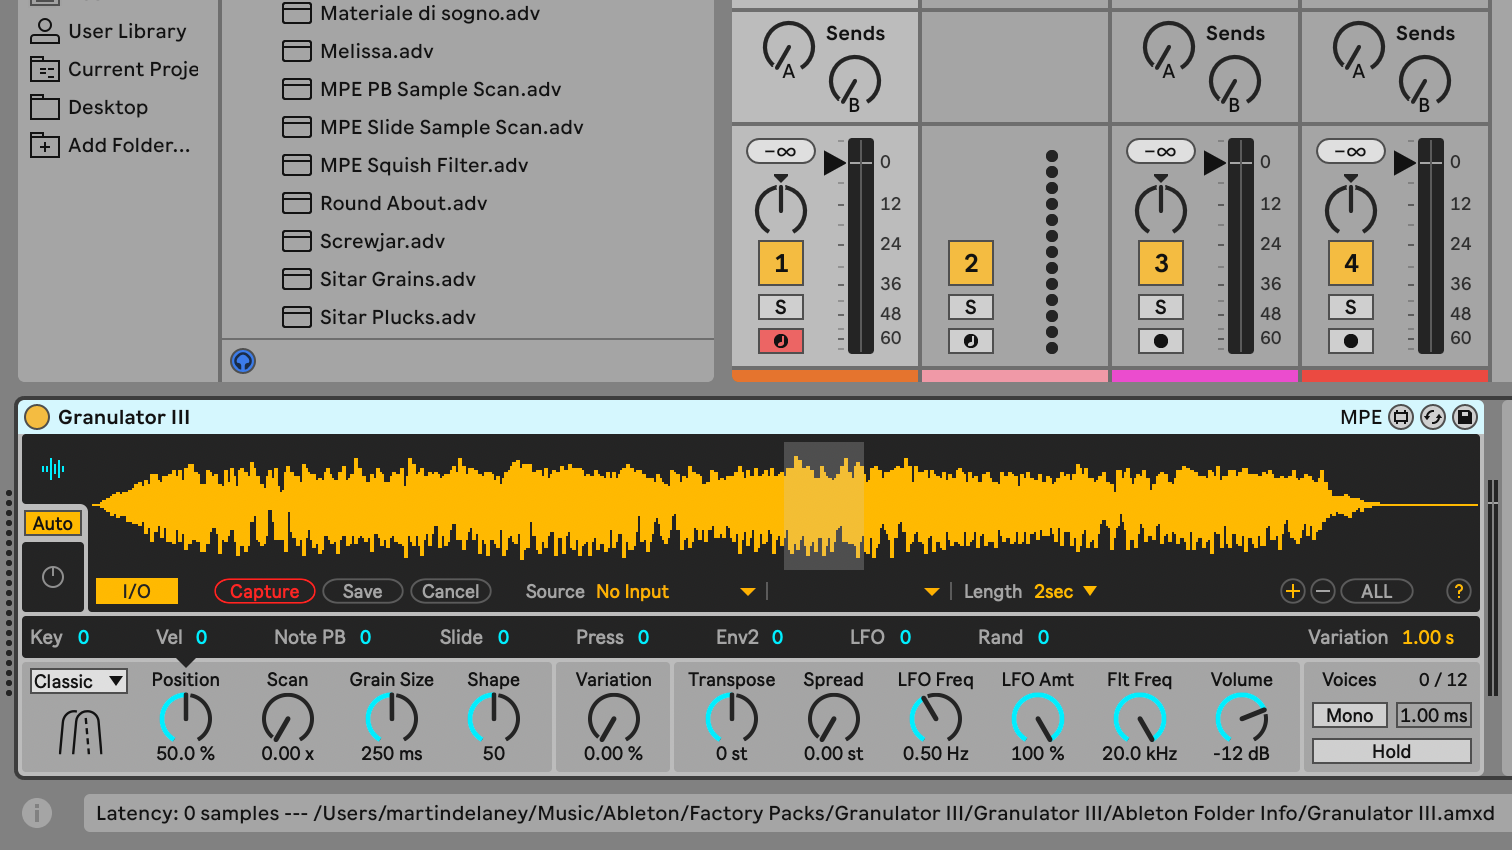
Before recording, choose a sample length using the Length pop-up, from one to eight seconds. Then click on the Capture button, and recording will take place according to your Length selection - you’ll see a waveform fill the display. The final step is to click the Save button after recording, otherwise the sample will be lost when you quit the project.
The other way of working with Granulator III is to import samples by dragging them from clips in the project, or the Browser. We used a chord played on a double bass as our example and it worked well. Importing also has the advantage of allowing longer samples to be used - we dropped in a three-minute stereo song mix and Granulator III happily skipped through that just as it did with shorter samples.
As for what kinds of sound to use, that’s up to you. The great thing about Granulator III is that you can feed it almost anything, and get something useable out of it, if you have a flexible approach.
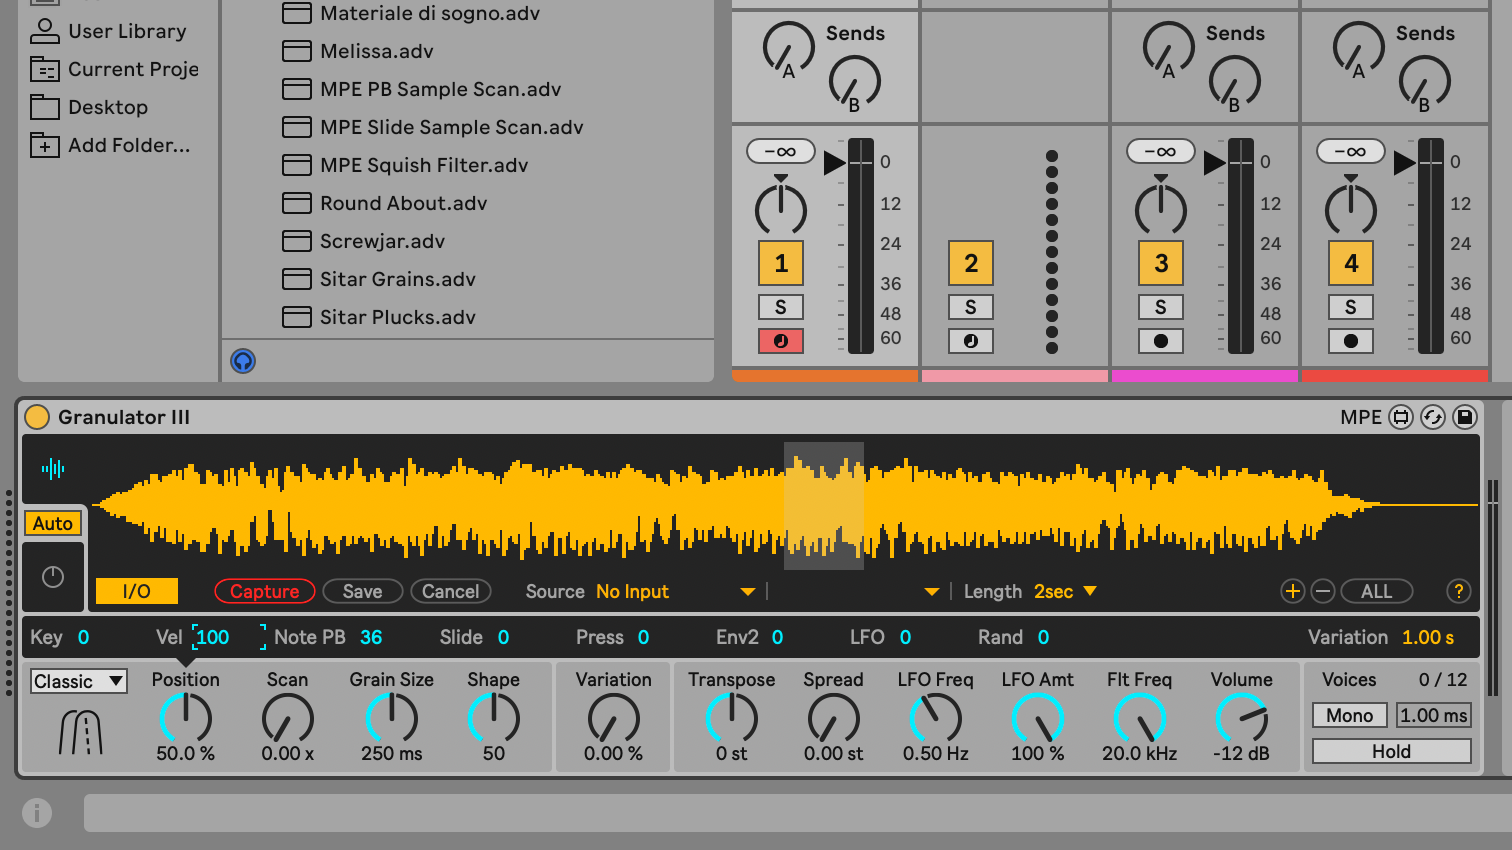
Sample loaded, we’re ready to play. Note the smaller black panel below the main display - this is where you decide how much your keyboard input will affect Granulator III’s settings. If you click any of the lower controls, such as Position, or next to that, Scan, you’ll notice that some of the values displayed above those will blink in and out of existence, depending which rotary control you select, indicated by a small downwards triangle.
Frankly we found this quite confusing at best, and would prefer some kind of expanded popup view, but there it is. Movement is a critical part of Granulator III’s sound, and it’s really where MPE can add a new dimension to your playing, particularly how it relates to grain position. When Position is selected, try adjusting each of those values in turn, and listen to how each one interacts with the grain position - maybe it’s better to test them one at a time before applying combinations - some times you can have too much expression, maybe.
Here we have an original bass guitar sample, loaded into Granulator and played straight from the Linnstrument, before being played again from Linnstrument with a MIDI CC manually sweeping through position.
After that we applied an LFO to the position parameter, an LFO on variation, and finished with some manual changes of grain size. Finally you can hear the part with Utility in Mid/Side Mode and Delay effect on the sides only.
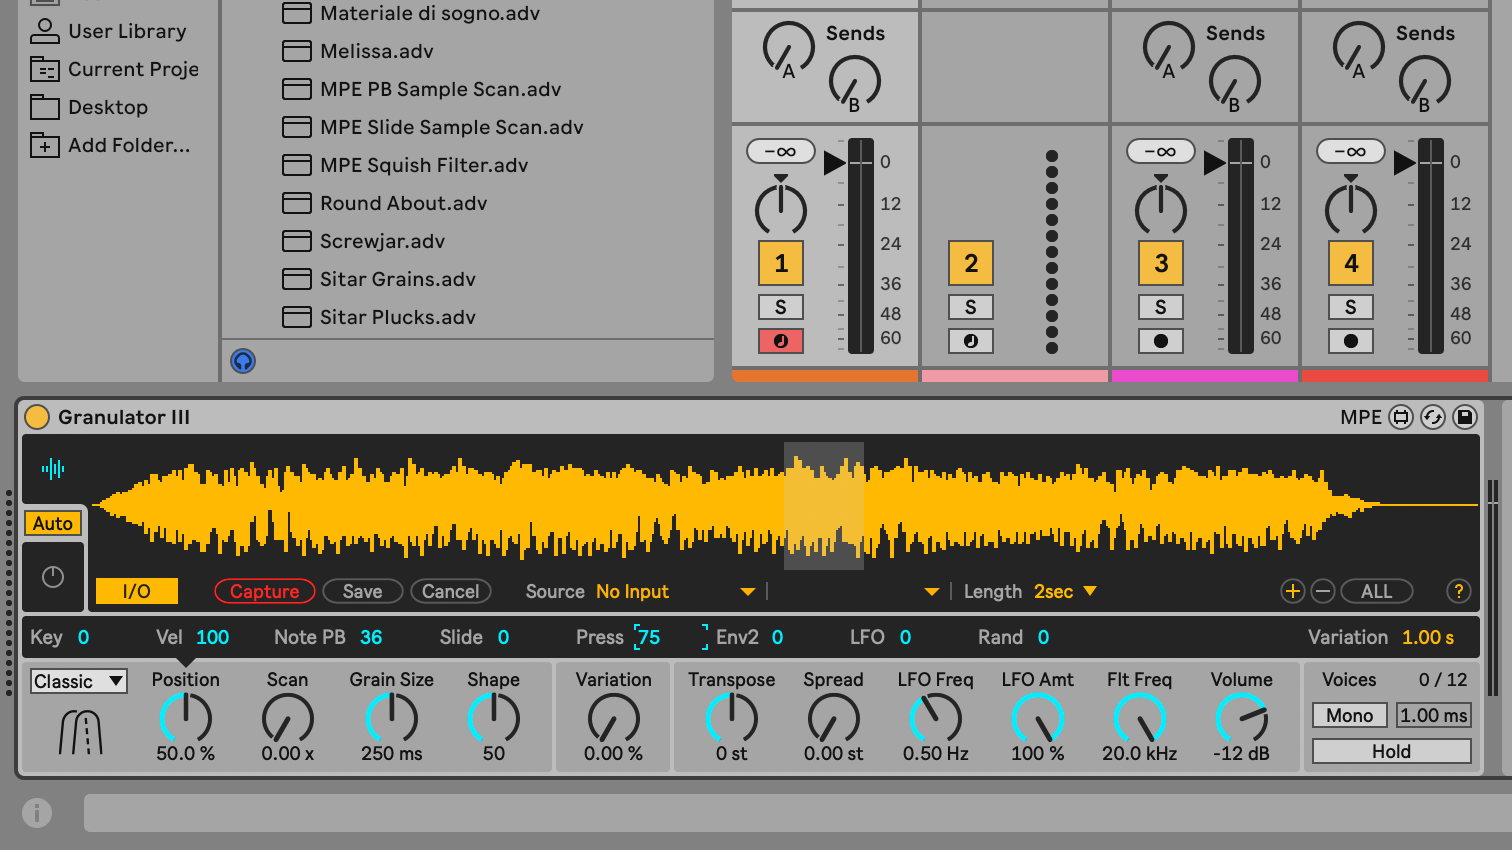
Moving from left to right across the display is as good a way as any. The Key value ranges from 0-100, as all of these do, and if you push that value up, what will happen is that as you play in some notes, not only will pitch change as usual, but a different region of your sample will play; this alone imparts a more organic quality.
Next to that is Note Pitch Bend, which similarly will move through your sample as you send pitch bends from your keyboard, we particularly like this one. And it works the same way as you go through the other controls, finding your own preferred way to change position will make a big difference to your sound, that is of course in conjunction with your sample choices.
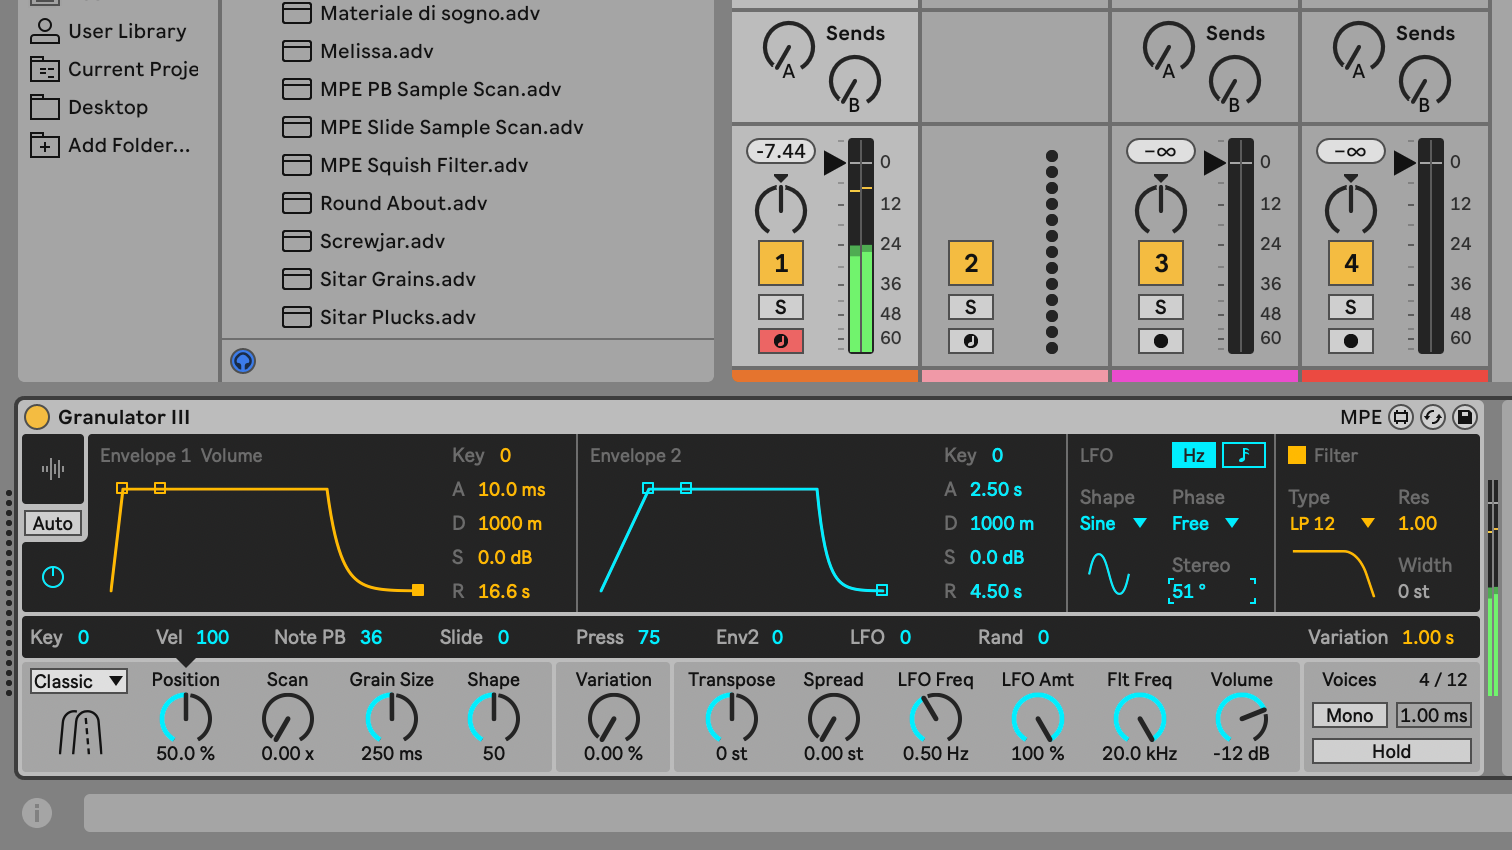
But if you really don’t want to, or can’t, play in real-time, you’re still covered. Click the small circular Control View button at the left of Granulator III, to view settings for both envelopes and the LFO (note that there’s also a smart Auto feature, where it will show you what you need in the central display based on what controls you’ve clicked on). Envelope 1 applies to volume only, while Envelope can be freely applied to other parameters, courtesy of those values in the smaller display.
Each envelope has a full range of ADSR controls, with release times of up to 30 seconds. The LFO is also freely assignable, and is the classic way to add a more regular rhythmic quality, and the Stereo control is great for offsetting the LFO in left and right channels.
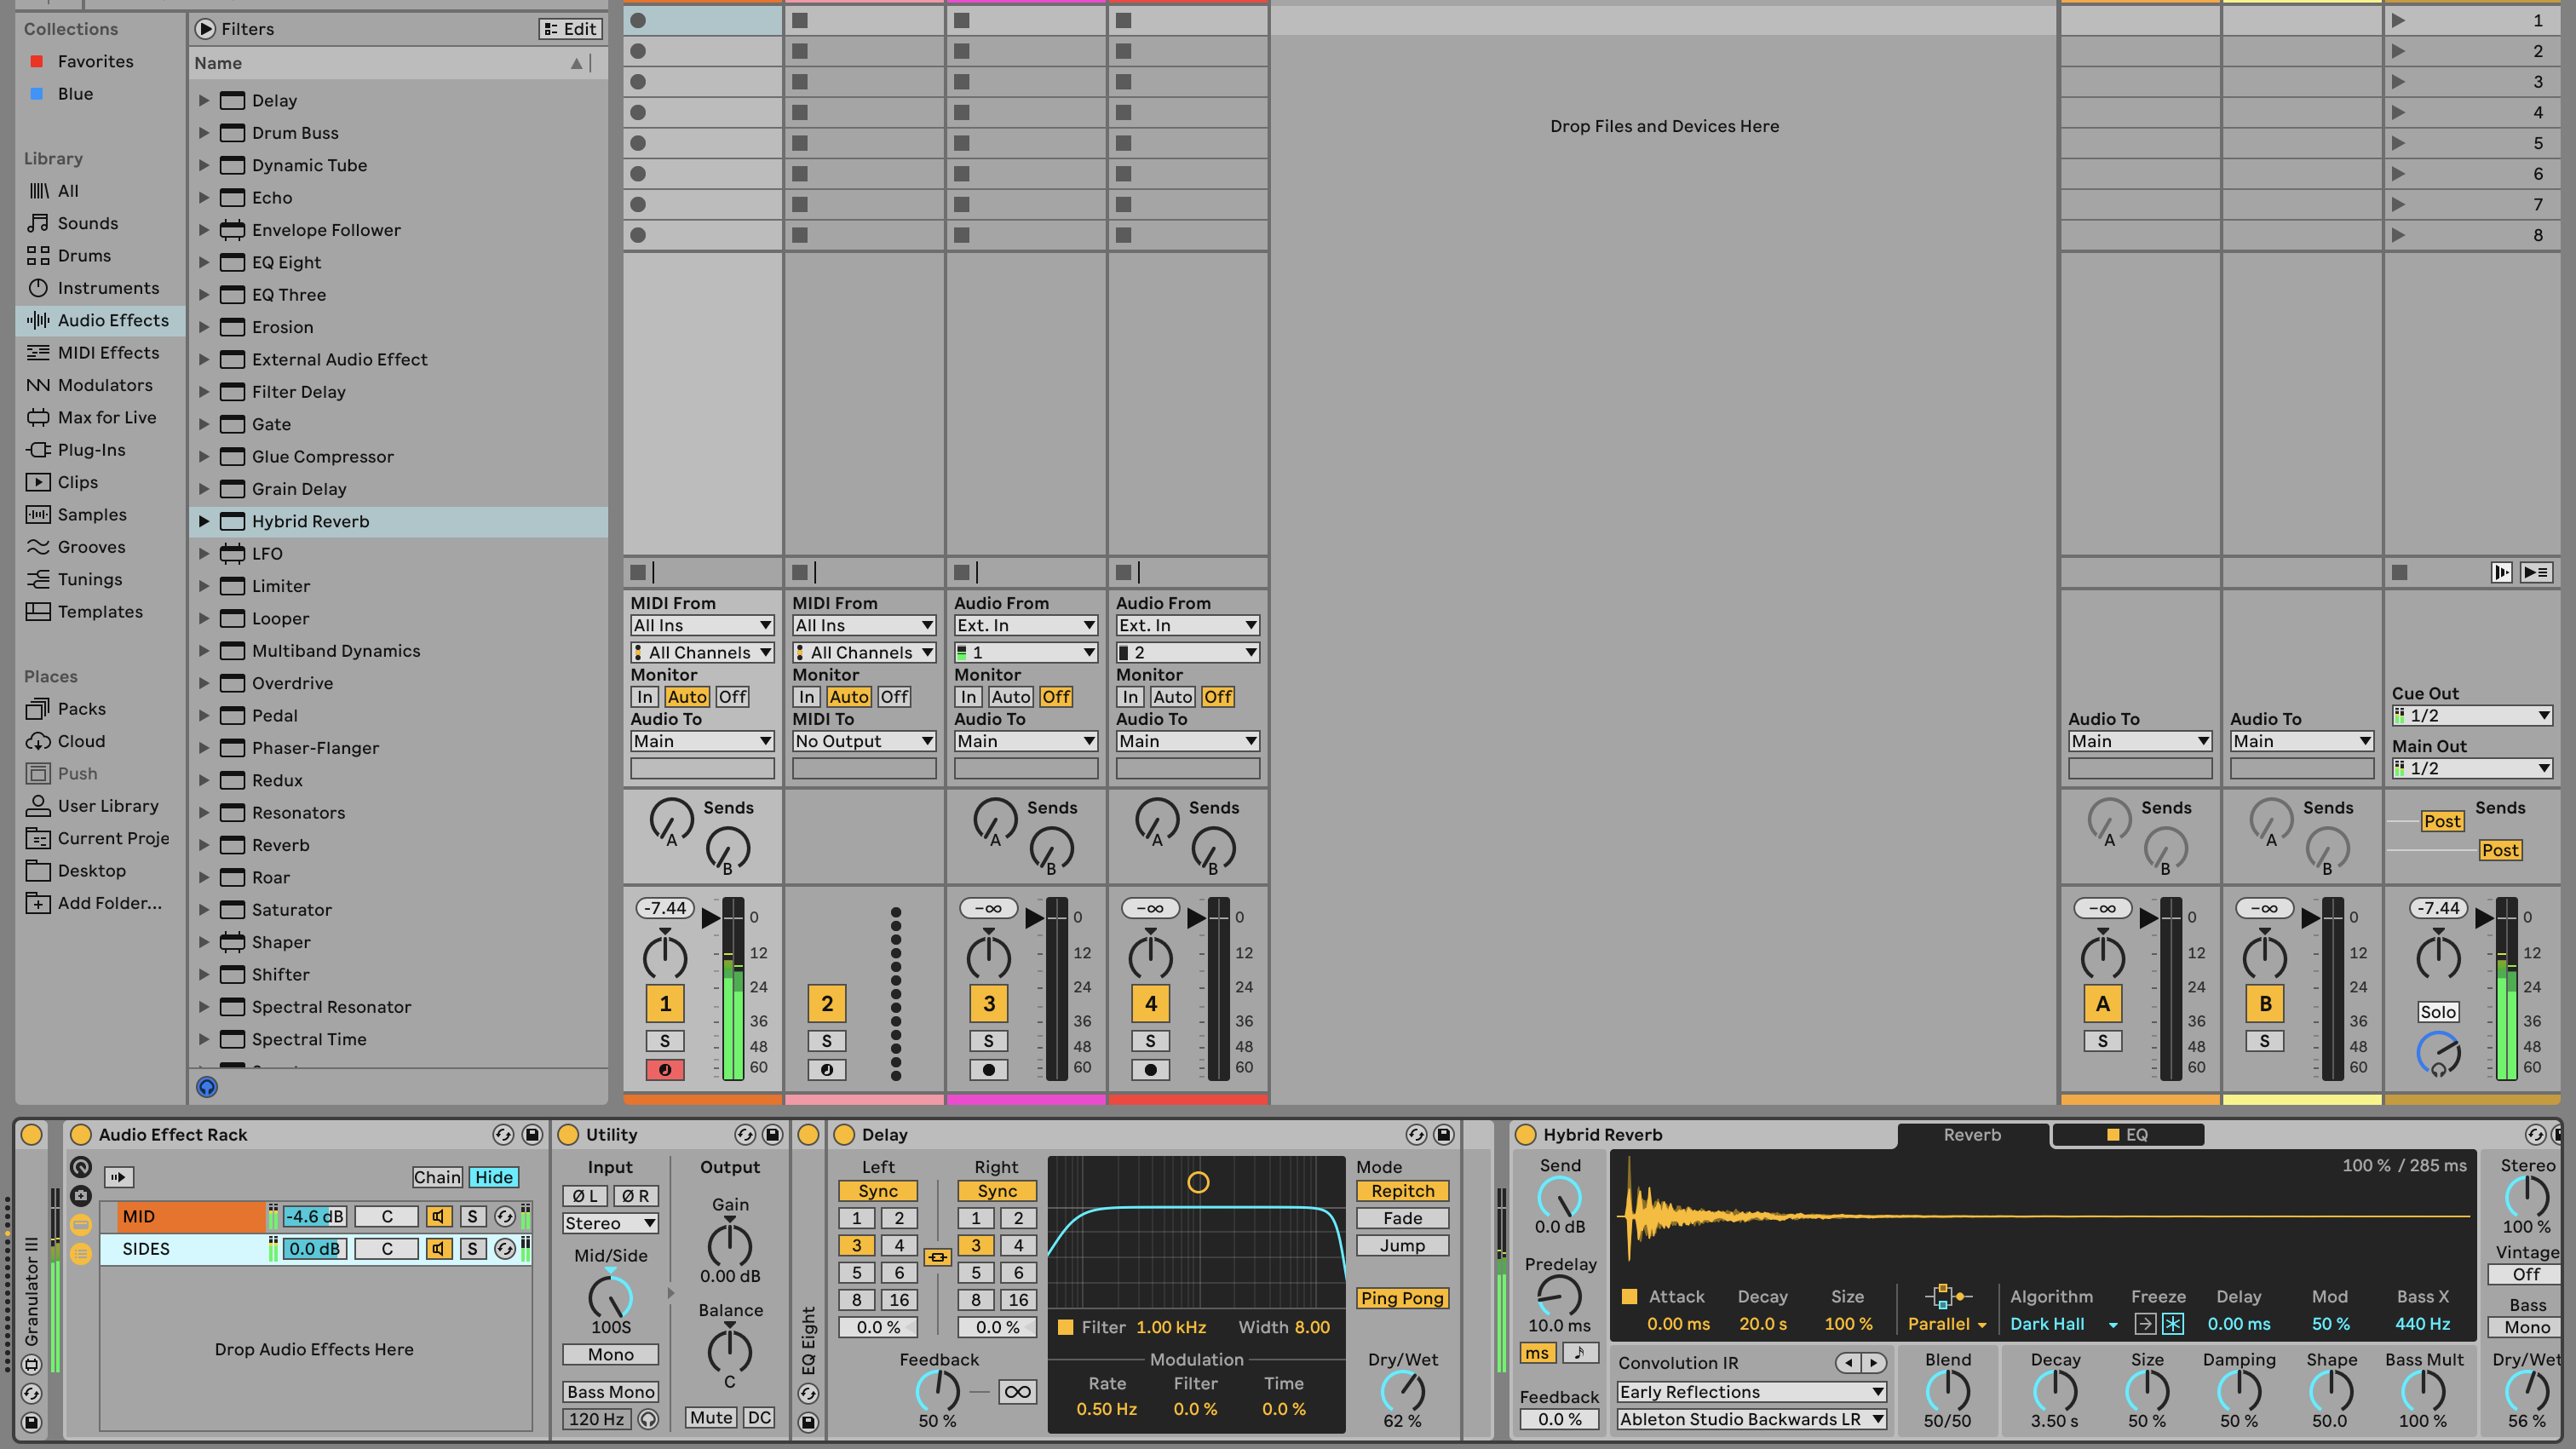
It should go without saying that Ableton Live instruments don’t exist in isolation - there are so many options with MIDI and audio effects.
Once again, all of this depends on what samples you’re using, but with our bass chord sample, we got great results by creating an audio effect rack with two chains, and using Utility to split the Mid/Sides, then EQing both elements differently, applying the Delay effect to the sides (in Ping Pong mode), and dropping Hybrid Reverb in after the rack, so it applied to the entire output. Played via the Linnstrument, this gave us some nice deep moody tones, with some high end stereo activity as well.
Granulator III isn’t a sampler in the sense of making piano or bass sounds, it’s more about abstract sounds and tones, although it can still sound musical, generally with longer samples and larger grains. We were frequently distracted from writing this tutorial by encountering great new sounds that we had to save in folders for later use in our own music - what higher compliment is there?
We guess Ableton are trying to nudge people towards MPE in general, and that expensive Push 3 purchase in particular, and it’s true that MPE really unlocks Granulator III, probably better than any other Ableton instrument so far.

Martin Delaney was one of the UK’s first Ableton Certified Trainers. He’s taught Ableton Live (and Logic Pro) to every type of student, ranging from school kids to psychiatric patients to DJs and composers. In 2004 he designed the Kenton Killamix Mini MIDI controller, which has been used by Underworld, Carl Craig, and others. He’s written four books and many magazine reviews, tutorials, and interviews, on the subject of music technology. Martin has his own ambient music project, and plays bass for The Witch Of Brussels.
“From a music production perspective, I really like a lot of what Equinox is capable of – it’s a shame it's priced for the post-production market”: iZotope Equinox review
"This is the amp that defined what electric guitar sounds like": Universal Audio releases its UAFX Woodrow '55 pedal as a plugin, putting an "American classic" in your DAW


