How to design a 'glide and rise' lead synth patch
Creating an interesting synth lead for an arpeggiated hook in your track isn’t difficult. We just glide ’n’ rise!
One of the most commonplace musical devices used in commercial production is the use of a synth sound with lead-like potential, performing an arpeggiated sequence or pattern which repeats throughout the entirety of a track.
The idea goes back to when early sequencers only had capacity to sequence a small number of notes, such as eight or 16; this motivic concept quickly caught on, initially within more experimental electronic music, before the idea infiltrated commercial music avenues. Think of synth bands from the ’80s such as Depeche Mode, Eurythmics, or even artists like Howard Jones, and their catchy, hook-driven pop classics are littered with repeating sequences.
As the sequencing technology that we have today is unrecognisable compared to those early musical meanderings, we can take the spirit of the concept but go further, both musically and in terms of production. While many EDM or techno tracks will use a similar concept, thanks to the looping function contained within all DAWs, we want to create an engaging lead sound, which provides movement and depth in equal measure.
Using ZebraCM, a free synth plugin bundled with every issue of Computer Music Magazine, we’ll use a ramped LFO to provide filter movement, while placing the synth in legato mono-mode will add a unique and engaging dimension.
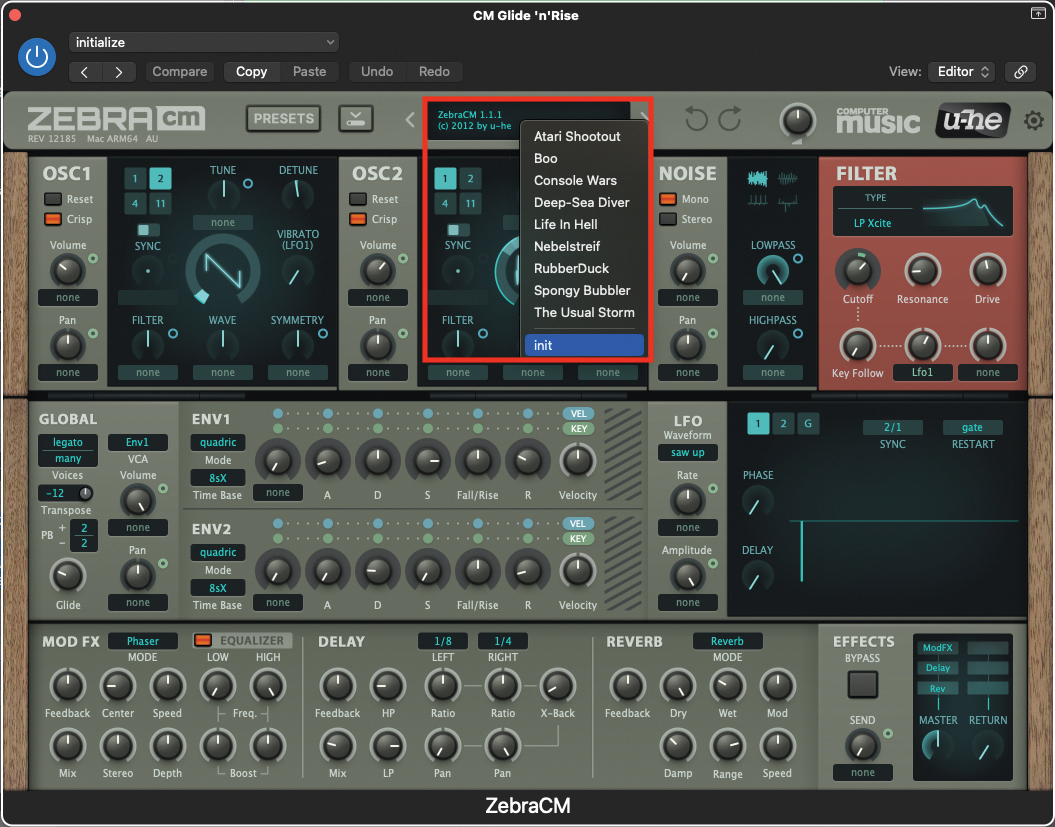
We’ll begin by initialising a patch on the ZebraCM. Open up your DAW and load up the plugin. Once the plugin window is open, move to the central display at the top of the window, click to reveal the drop-down menu, and select ‘init’ from the bottom. This will initialise the patch.
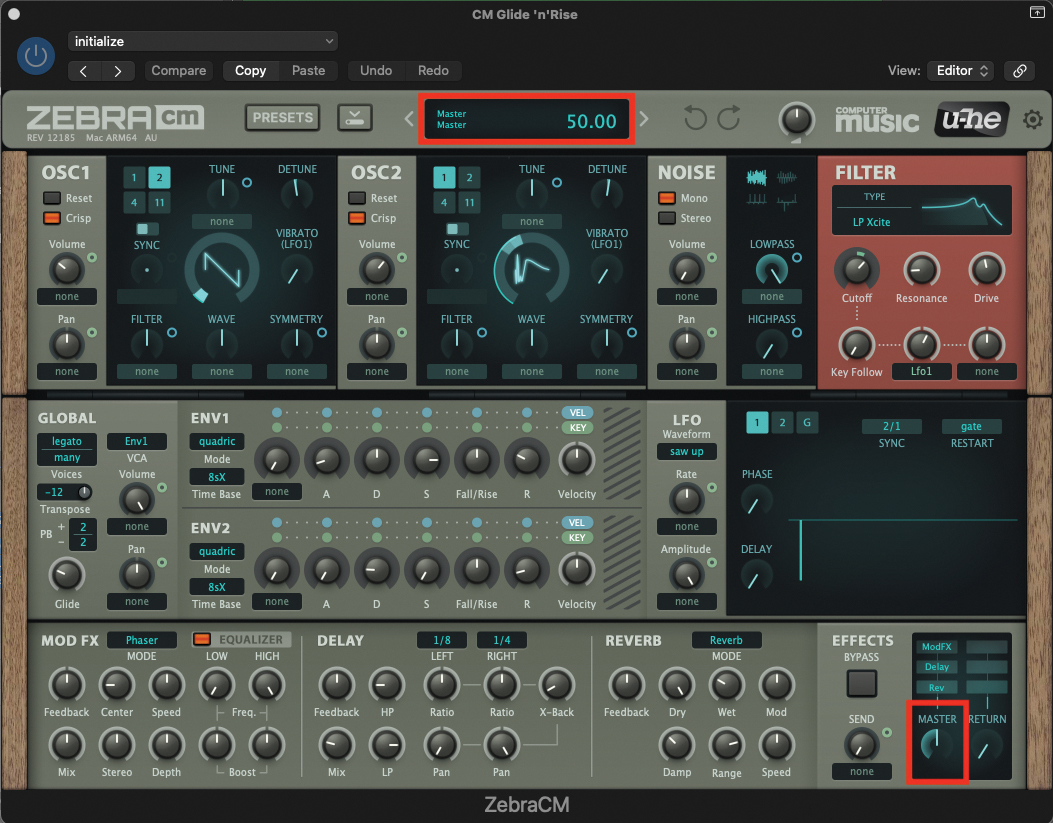
Our ‘Glide ’n’ Rise’ patch is going to be fairly loud, so now would be a great time to reduce your master volume to a level of 50. Just as a reminder, every time you tweak a pot or setting on the plugin you will see an accurate value/numeric in the upper display.
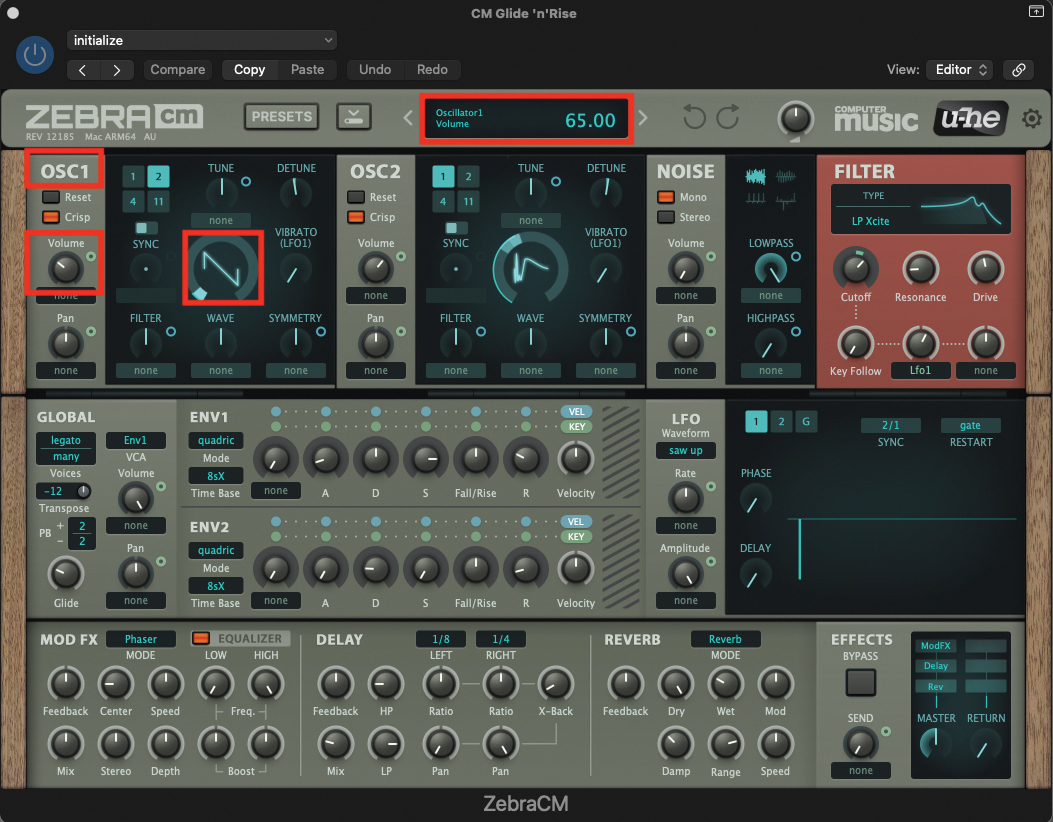
Let’s start creating our patch by visiting the OSC1 section; we are going to be using the default Sawtooth waveform, so leave the wave as it is. However, we do want to reduce the OSC1 volume to a value of 65.
Get the MusicRadar Newsletter
Want all the hottest music and gear news, reviews, deals, features and more, direct to your inbox? Sign up here.
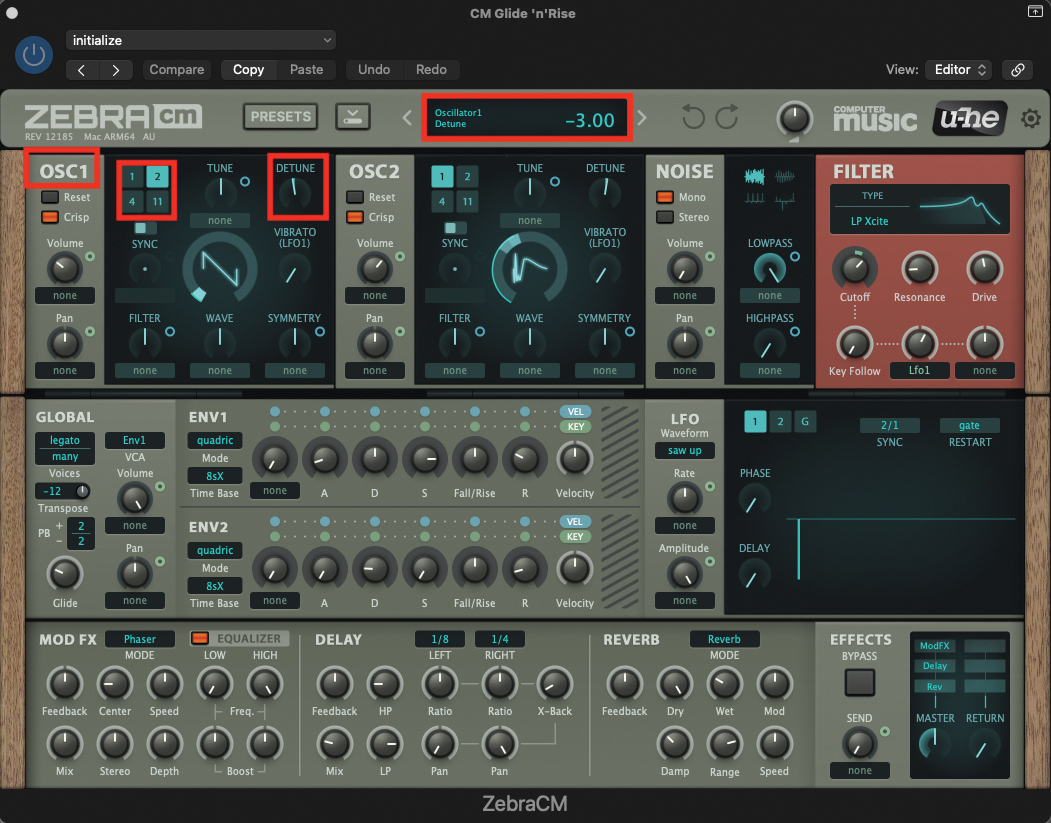
Staying within the OSC1 section, we are going to thicken the initial waveform by adding a second aliased wave. Click on the number 2 in the upper left corner of OSC1, so that it becomes highlighted in turquoise. Then adjust the detune value to -3.00.
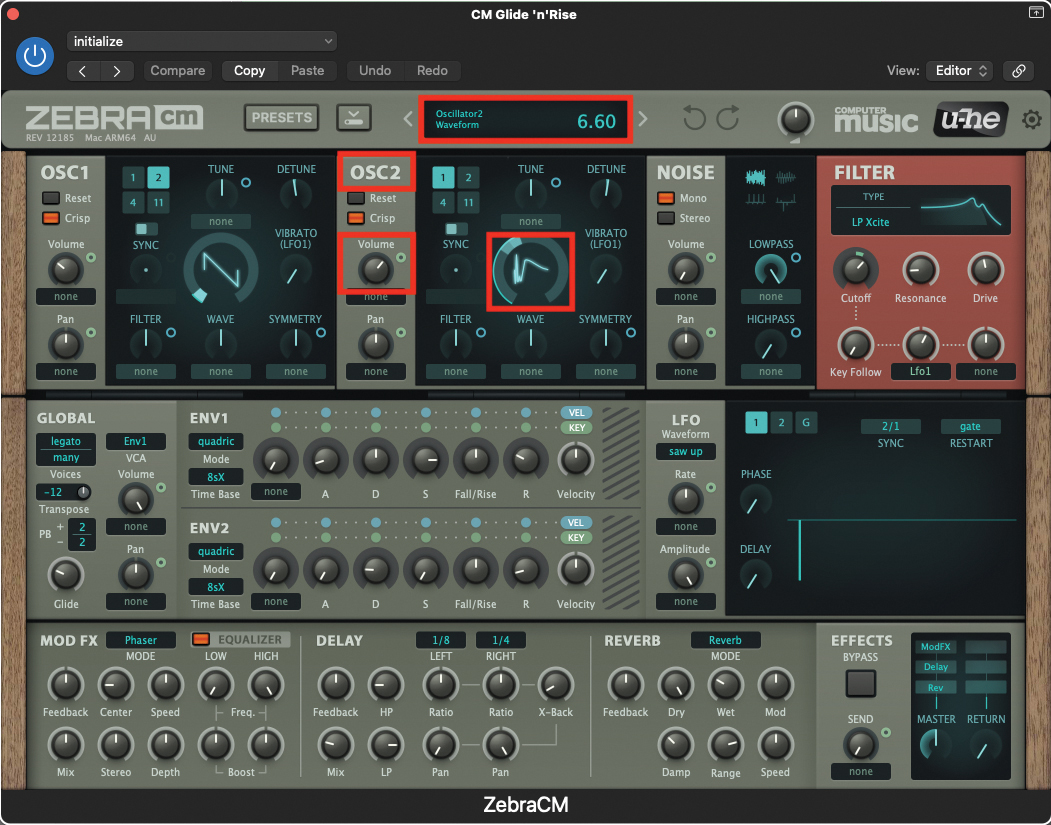
Now move across to the OSC2 section where we are going to use a second waveform to create a sound which cuts nicely against the Saw of OSC1. Adjust the waveform to a value of 6.60. Then adjust the volume of OSC 2, increasing it to a value of 126.
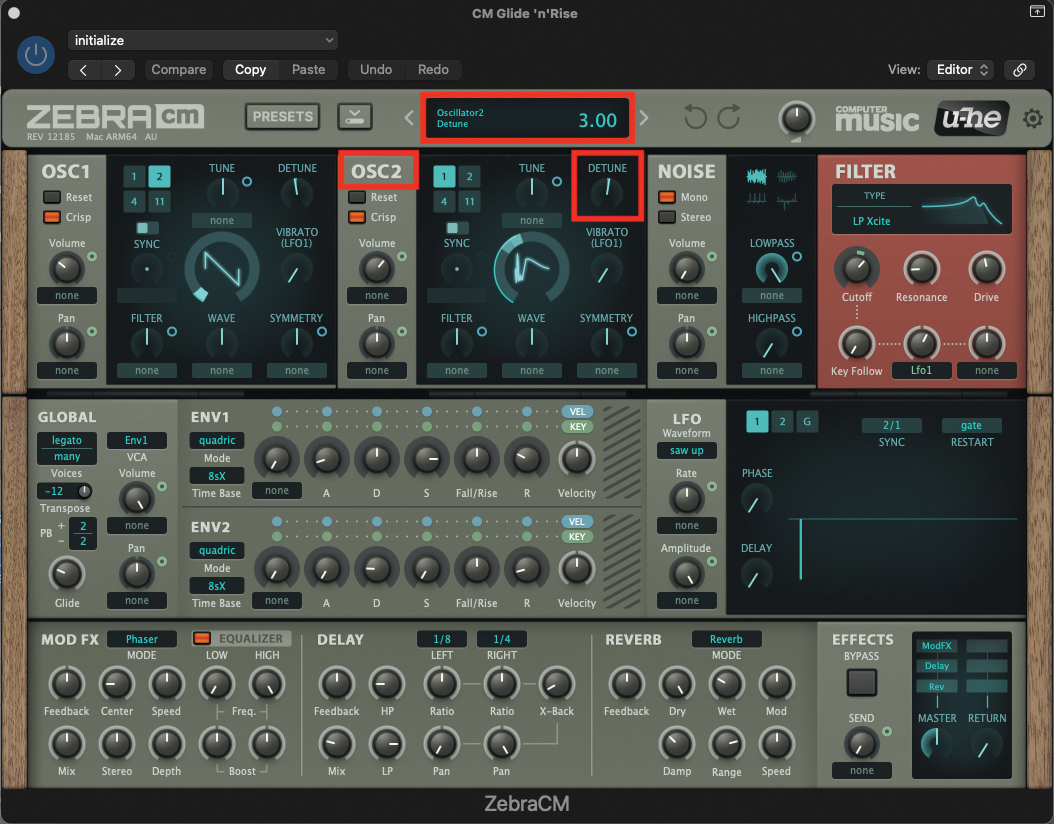
To help thicken the overall texture of the oscillators, adjust the OSC2 detune pot to a value of +3. This will counterbalance the negative detune value that we applied to OSC1.
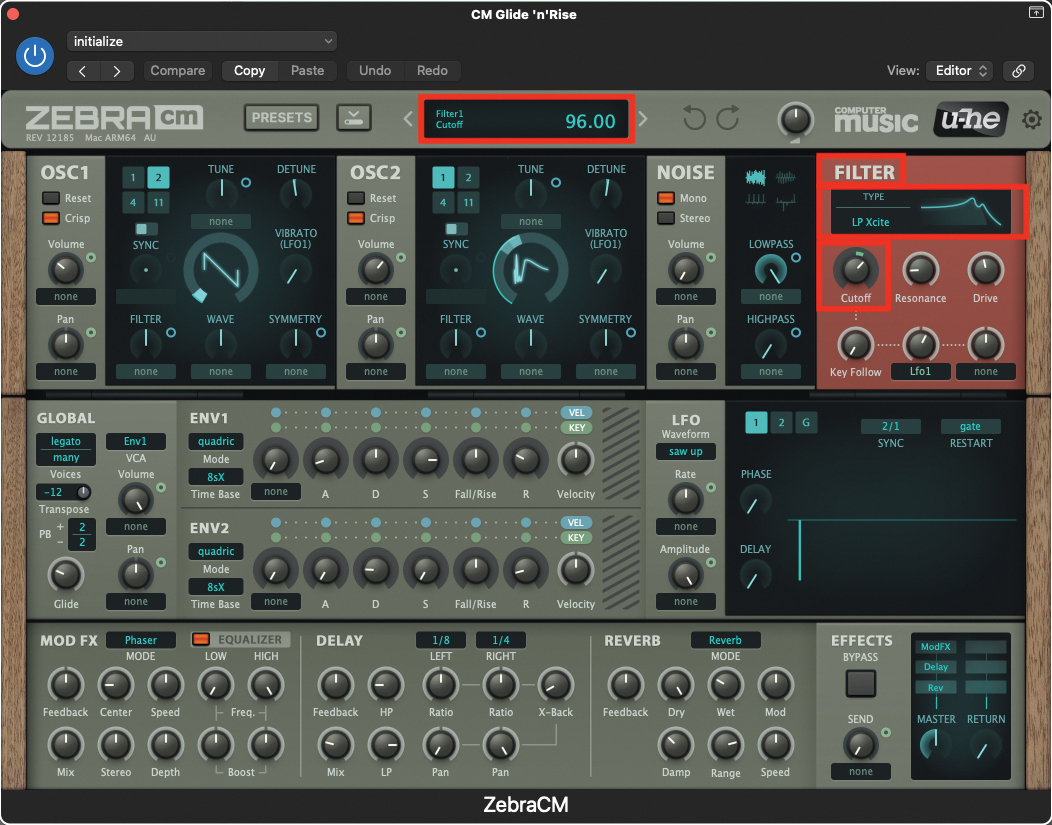
We can now start to shape our patch using the filter. Select the LP Xcite filter from the drop-down menu. This is a relatively modern sounding filter, which is perfect for our contemporary patch. Adjust the Cutoff pot to a value of 96.
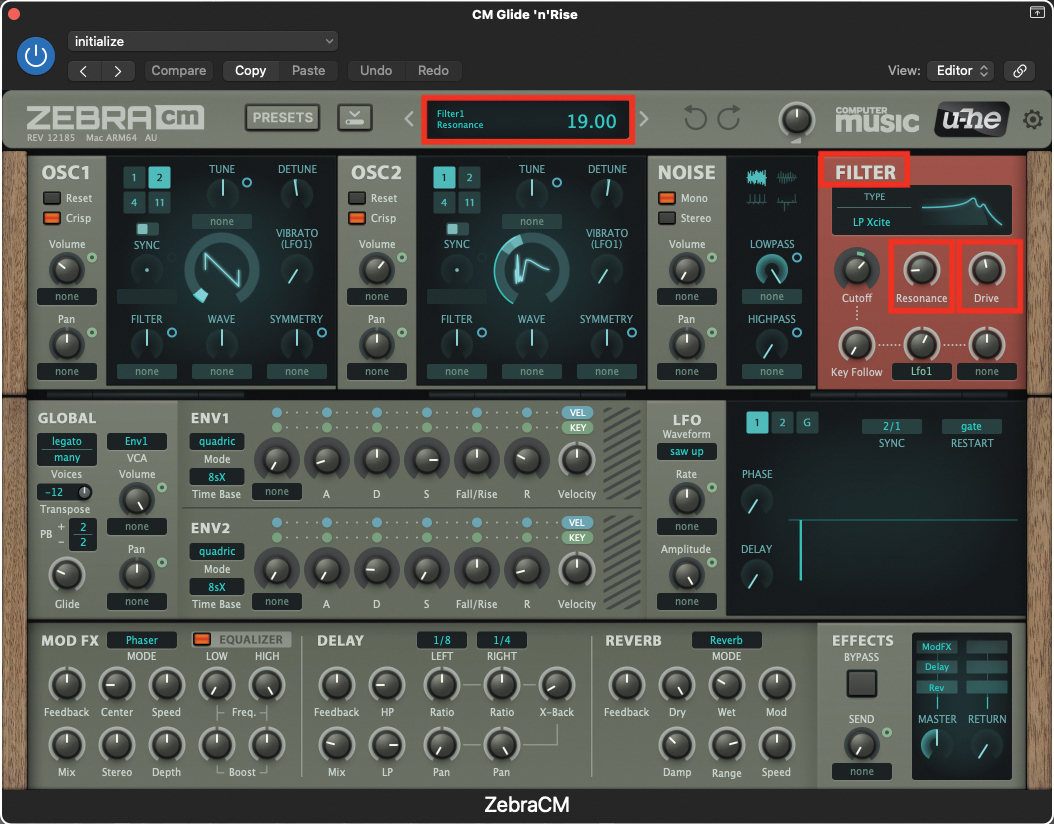
We also want to introduce some resonance to the filter; increase the Resonance pot to a value of 19. To further increase the middle register of our patch, we can add some filter distortion, by increasing the Drive pot to a value of 46.
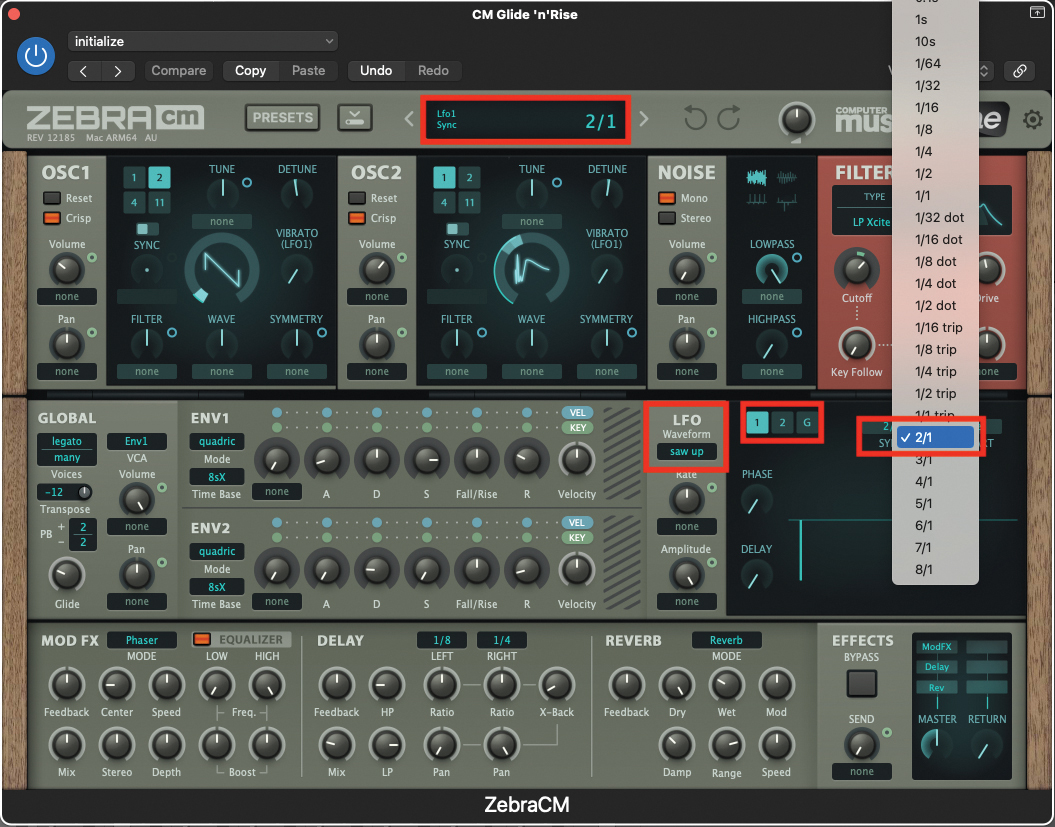
We are going to use LFO1 to supply some movement in the direction of the filter cutoff. Make sure that LFO1 is highlighted in turquoise, then select Saw Up from the LFO Waveform drop-down. Then, from the Sync drop-down menu, select a value of 2/1. This means our selected saw ramp will cycle every two bars, in step with our DAW.
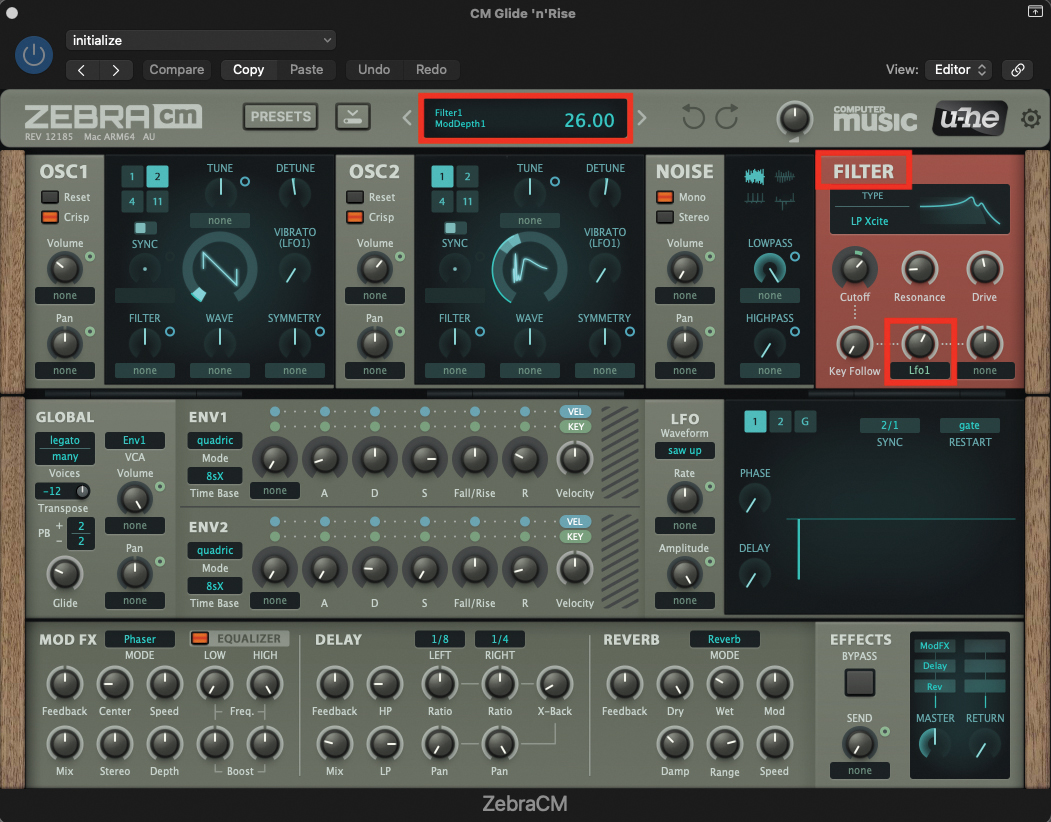
Now we have to indicate how much of LFO1 we want to control our filter cutoff. Revisit the filter section and locate the user-assignable pot, located in the middle at the bottom of the filter section. Select LFO1 from the drop-down menu below the pot. Then set the pot to a value of 26.
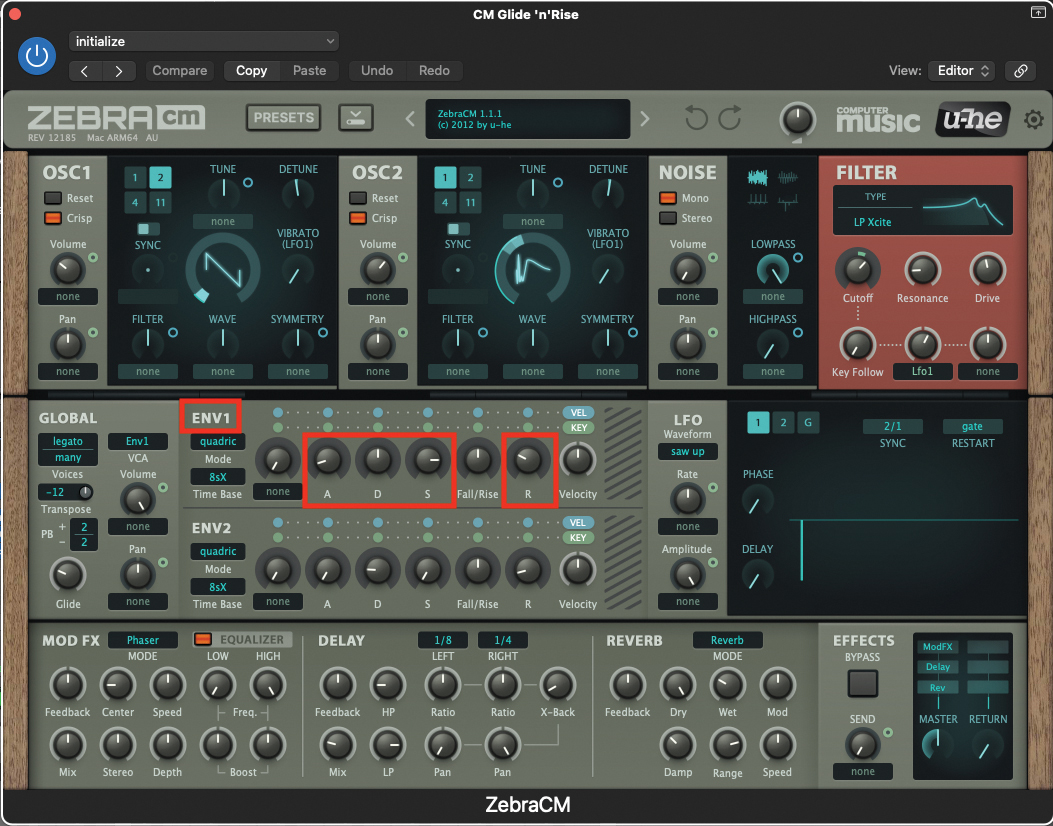
We only require the use of ENV1 for this patch, as we only need to control the amplitude or volume of our sound. Set the Attack pot to a value of 14, Decay to 50, the Sustain to 80, and finally the Release to 29. This will provide a smooth fade-in at the beginning of each note, and a similarly calm fade-out on the back end of each phrase.
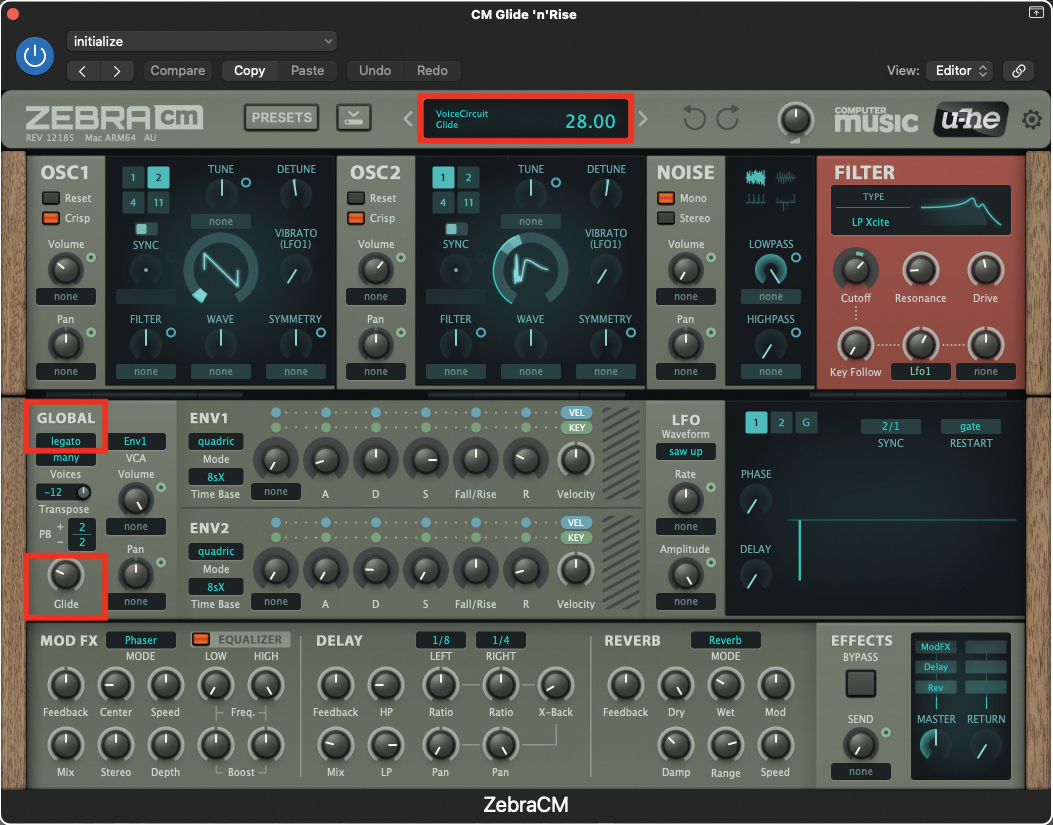
We’ve taken care of the ‘rise’ part of our patch, we now need to engineer the ‘glide’. Locate the Global section, and change Poly to Legato using the drop-down menu. This means the ZebraCM will play monophonically, but importantly, smoothly between each note. We emphasise this by adjusting the Glide pot to 28. Your patch is ready!
Pro tip
When using patches that take advantage of a legato mode, it is important to understand the best way to approach playing and programming. Legato is an Italian musical term which indicates playing smoothly, without a gap between each note.
This is an important concept within this environment, as the glide effect won’t initiate successfully, unless a note is entirely adjacent to the next. As the patch is also monophonic, a second note will play and replace a preceding note. This can be a difficult thing to execute live, but it can be an easy and effective procedure to program within a DAW.
A good route to success could be to play the phrase you want and then visit an appropriate editor within your DAW, and ensure that all of the notes overlap. This should create the perfect legato phrase while fully engaging the glide feature, sometimes described as glissando or portamento.
In a commercial setting you can further enhance your sequence by adding some form of pumping compressor, either using the traditional method of a sidechained compressor, or one of the latest generation of shaping plugins, such as OneKnob Pumper by Waves, or ShaperBox 3 from Cableguys.
Recommended listening
1. Jon Hopkins - Singularity
The arpeggiated phrase that repeats throughout the build in Singularity demonstrates our concept beautifully, albeit by relinquishing LFO control of the filter to manual.
2. Kylie Minogue - Padam Padam
The opening phrase of this recent track from Kylie Minogue similarly demonstrates the glide and rise concept, as well as providing an infectious polyphonic hook.
Roland Schmidt is a professional programmer, sound designer and producer, who has worked in collaboration with a number of successful production teams over the last 25 years. He can also be found delivering regular and key-note lectures on the use of hardware/software synthesisers and production, at various higher educational institutions throughout the UK
“A synthesizer that is both easy to use and fun to play whilst maintaining a decent degree of programming depth and flexibility”: PWM Mantis review
“Do you dare to ditch those ‘normal’ beats in favour of hands-on tweaking and extreme sounds? Of course, you do”: Sonicware CyDrums review


