How to design a gated synth sequence
Adding motion to a characterful synth pad can completely revitalise your track. We take two LFOs and get modulating
As any regular to our synth tutorials will know, ZebraCM (available free with every issue of Computer Music Magazine) is no slouch in the sonics department, despite being a relative freebie.
One of its biggest strengths lies in its chameleon-like flexibility, seemingly able to glide from the most basic subtractive patch, to some seriously capable modulation duties.
This is where we’re taking our Zebra today, with the use of two LFOs, to apply different forms of modulation to different aspects of the patch. Firstly, we’ll use the LFO in its User waveform mode, which allows us to generate modulating sequences, up to 32 steps in length. While not unique to ZebraCM, it’s not a function you find on many softsynths, even paid-for ones.
Secondly, we’ll exaggerate each modulating step, by introducing gating to the amplifier section, creating a form of gated synth effect. Arguably, the front-end of our patch is relatively basic, being reliant on a single oscillator and low-pass filter, but it proves the point that modulation can completely transform the most basic construct, from simple to complex.
The net result is a patch that might normally be created using effects plugins, but we’re applying these intrinsic elements at source, avoiding the need to spend money. That’s got to be a good thing?
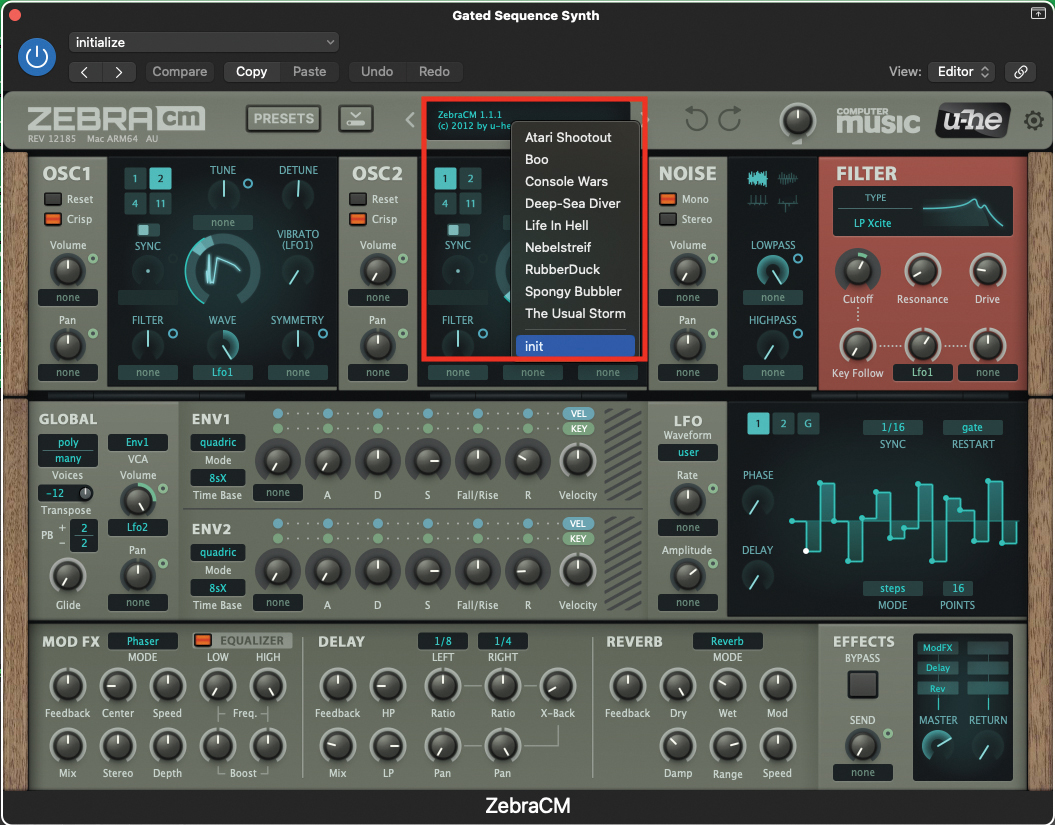
Let’s begin by initialising a patch on the ZebraCM. Open up your DAW and load up the plugin. Once the plugin window is open, move to the central display at the top of the window, click to reveal the drop-down menu, and select ‘init’ from the bottom. This will initialise the patch.
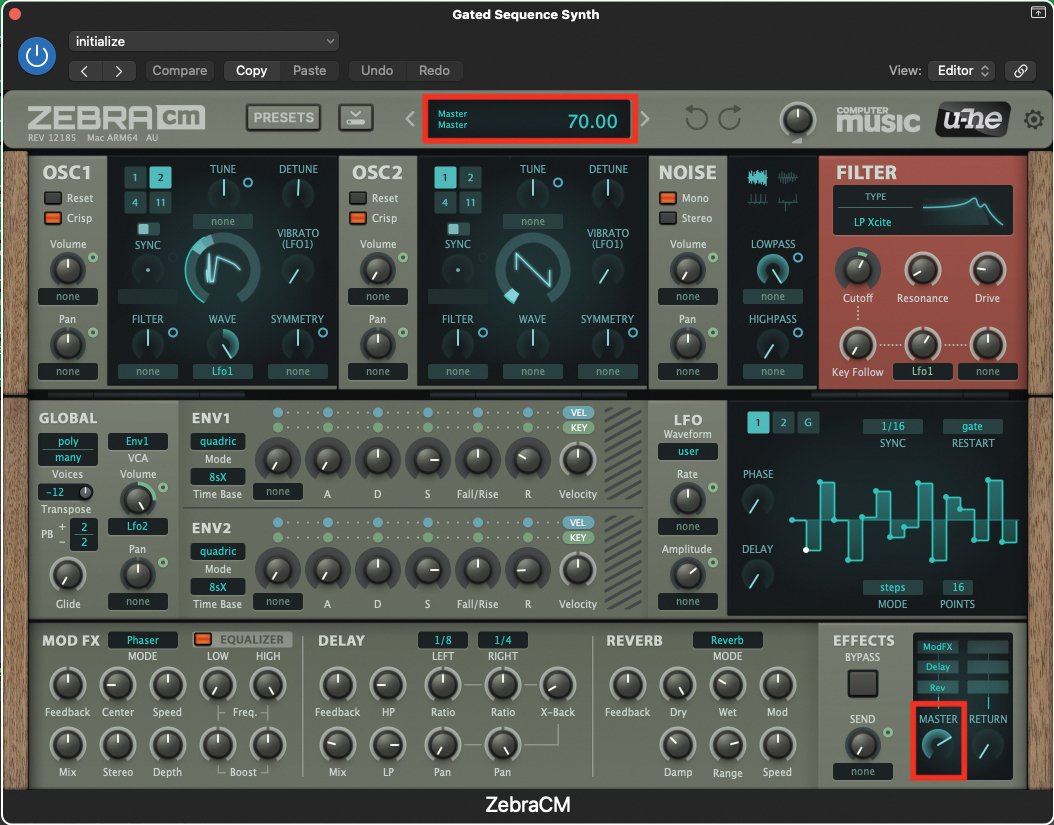
This patch is going to be a relatively loud one, so now would be a great time to reduce your master volume to a level of 70. Just as a reminder, every time you tweak a pot or setting on the plugin, you will see an accurate value/numeric in the upper display.
Want all the hottest music and gear news, reviews, deals, features and more, direct to your inbox? Sign up here.
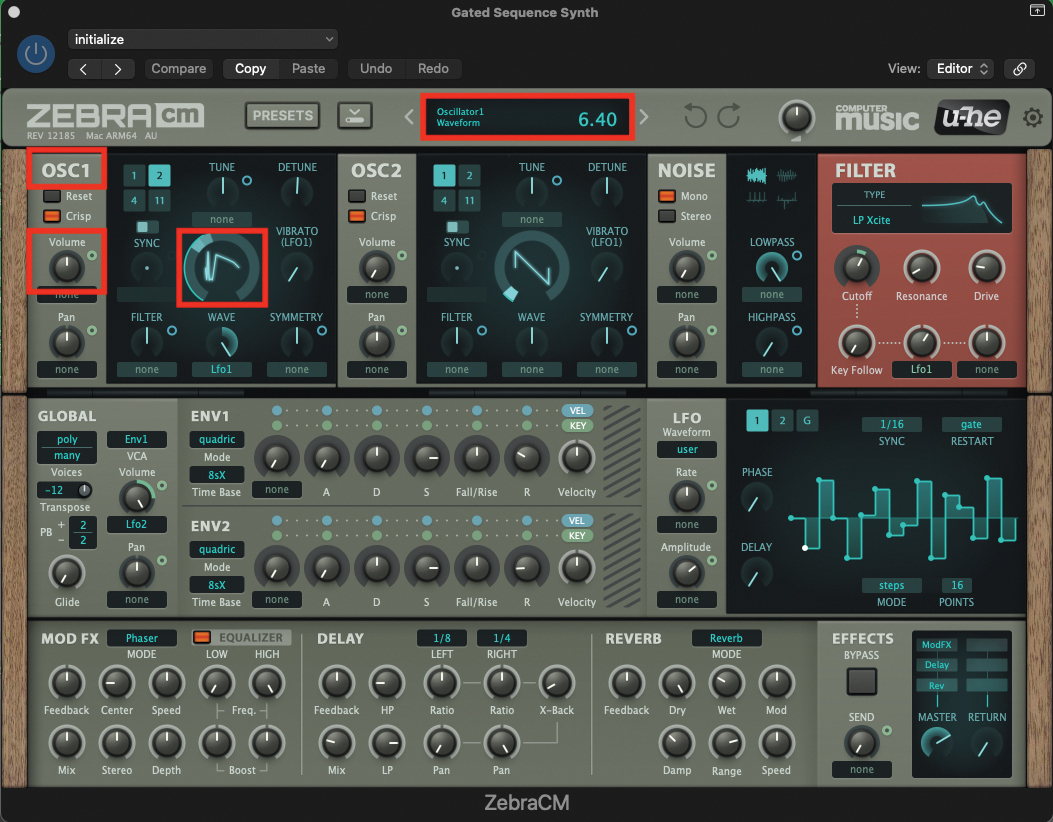
We’ll begin creating our sound with OSC1; click and hold on the waveform display, and drag up to a value of 6.40. Don’t be too concerned about the sound of this particular wave at this stage, as we’ll be modulating it in a couple of steps’ time. By default, the volume of OSC1 should be set to a value of 100, which we can leave in place.
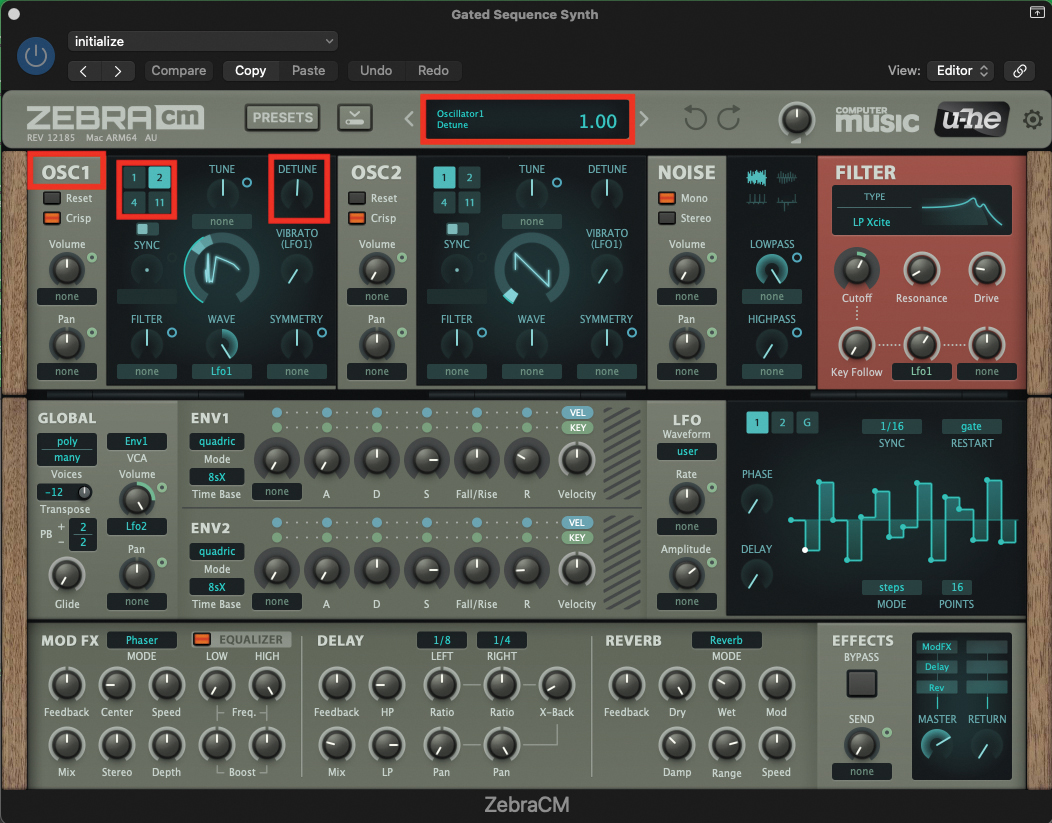
We’ll only use one oscillator for this patch, but we can thicken the texture by applying a second aliased waveform. Select the number two, so that it becomes highlighted in turquoise, then move across to the detune pot, and increase the value to 1. This will thicken the texture, and prevent phasing between the aliased waveforms.
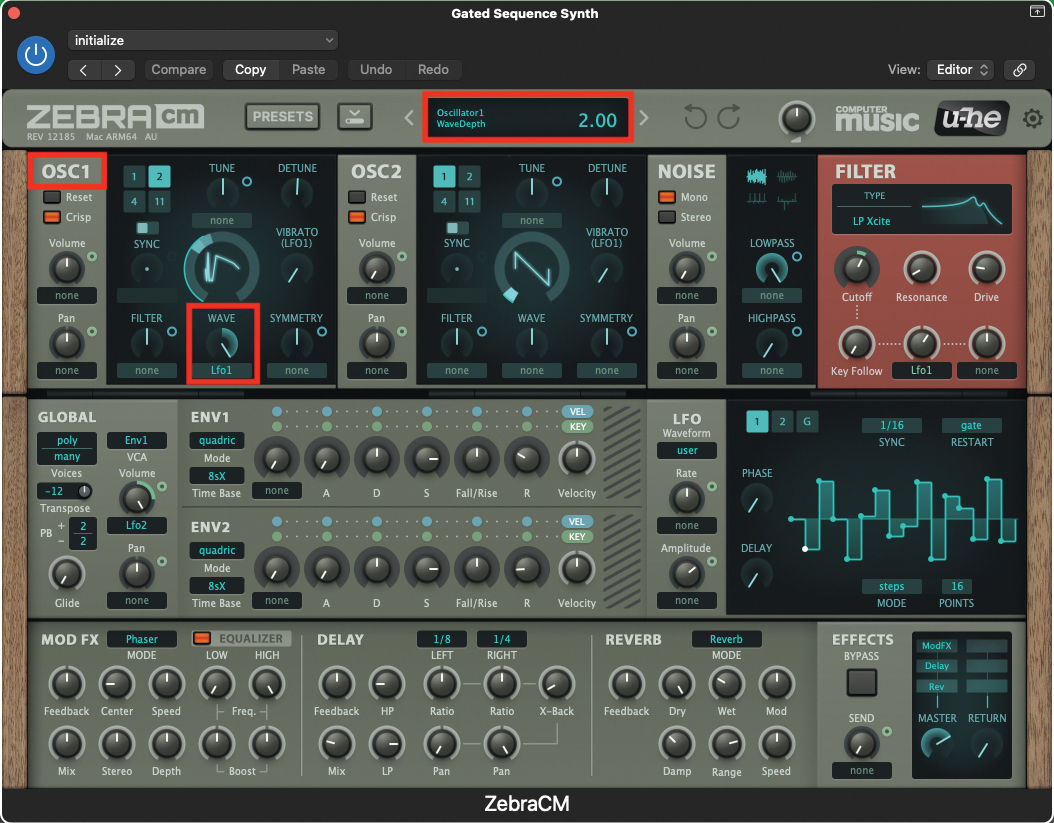
To modulate the waveform, we need to assign the user-assignable pot, located directly below the waveform display. Under the wave pot there is a drop-down menu; click and select LFO1. Then set the pot to a value of 2. This means that the incoming signal from LFO1 will now alter the selected waveform, as dictated by the LFO’s wave.
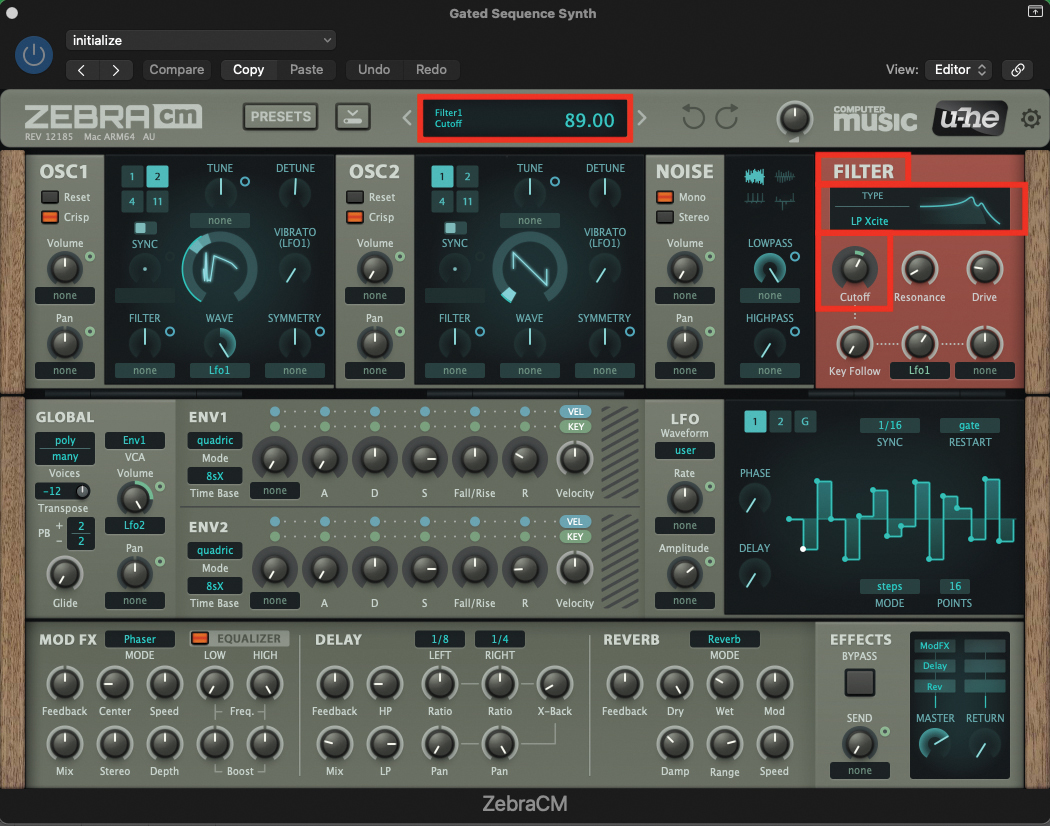
Having laid the groundwork at the oscillator level, it’s now time to move across to the filter section. From the filter-type drop-down menu, select LP Xcite, which, as the name suggests, is a form of low-pass filter, but one with upper-harmonic exaggeration, for additional colour. Now set the Cutoff pot to a value of 89.
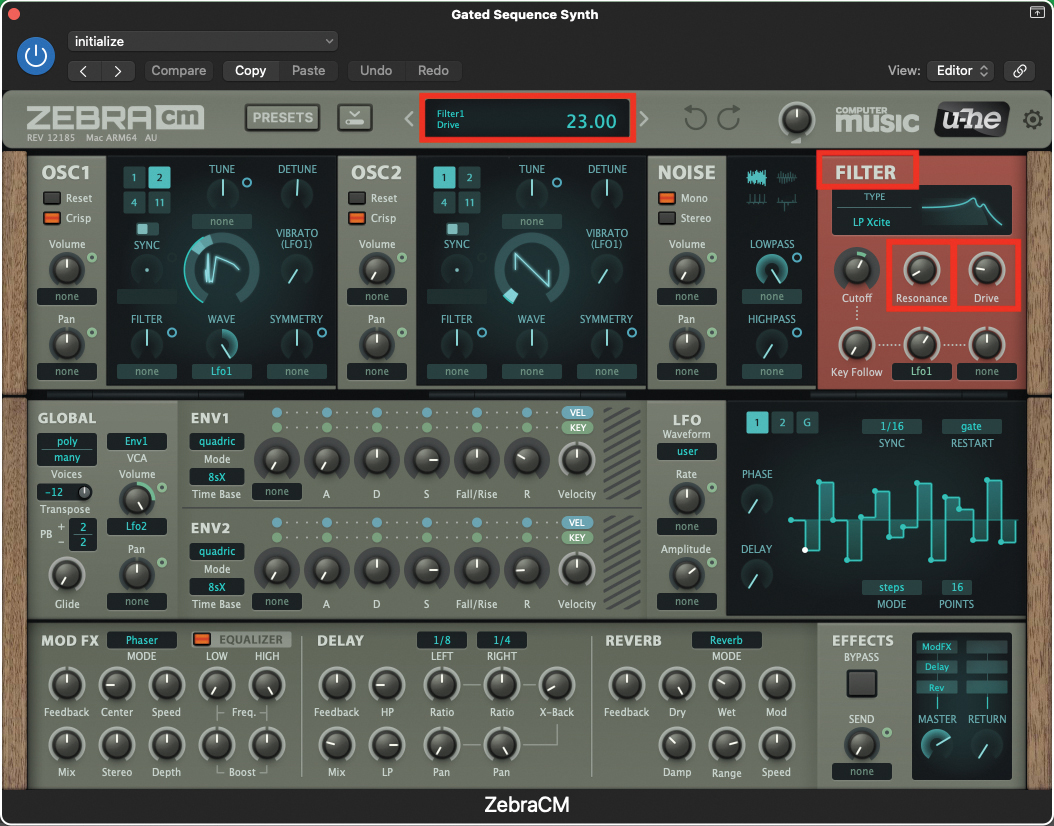
To further enhance the colour generated by the filter, set the Resonance pot to a value of 10, and increase the Drive pot to a value of 23. The Drive will add a small degree of distortion, which will have the effect of warming up the overall sound of the patch.
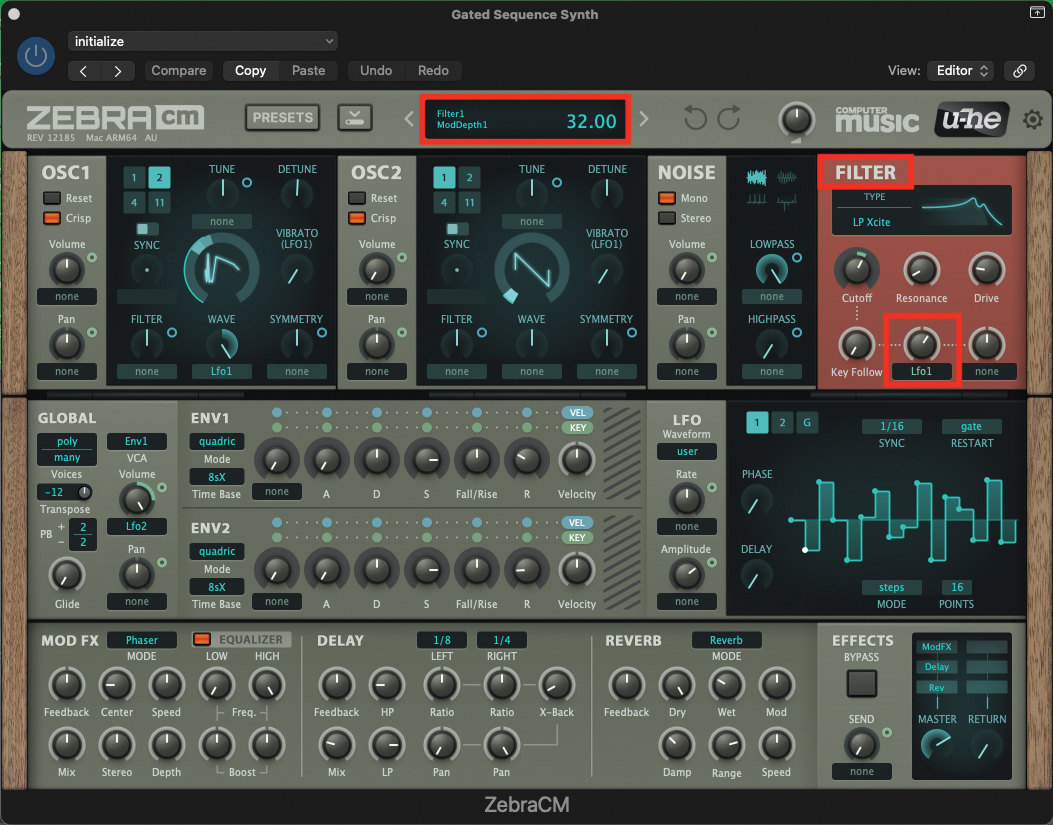
We’re also going to be modulating the filter, from the source of one of our LFOs. Locate the User-assignable pot, on the bottom row of the pots within the filter section, and select LFO1 from the drop-down, underneath the pot. Next, increase the pot to a value of 32. This will then allow LFO1 to modulate the cutoff frequency of the filter.
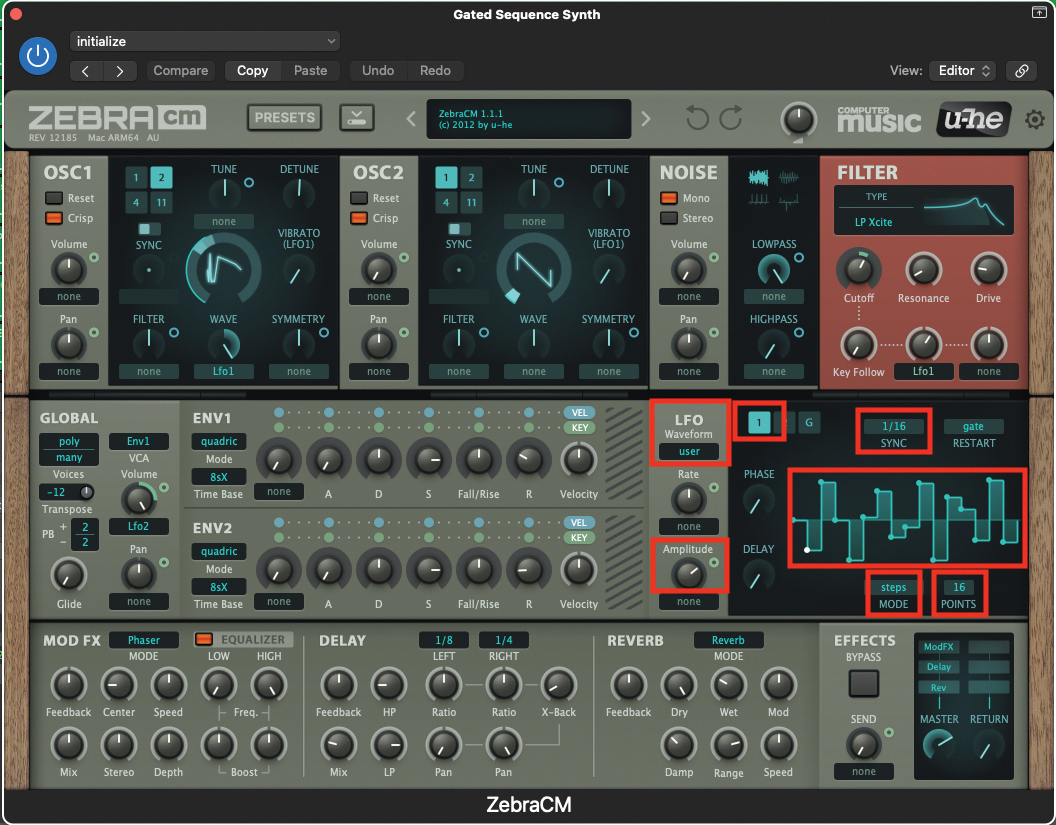
In the LFO section, check that ‘1’ is highlighted in blue, then select User from the LFO Waveform menu. Select Steps from the Mode drop-down and assign 16 points, before creating an LFO wave-shape in the display area. Try a wave pattern that increases/decreases per step. Set Sync drop-down to 1/16, then set the Amplitude pot to a value of 67.
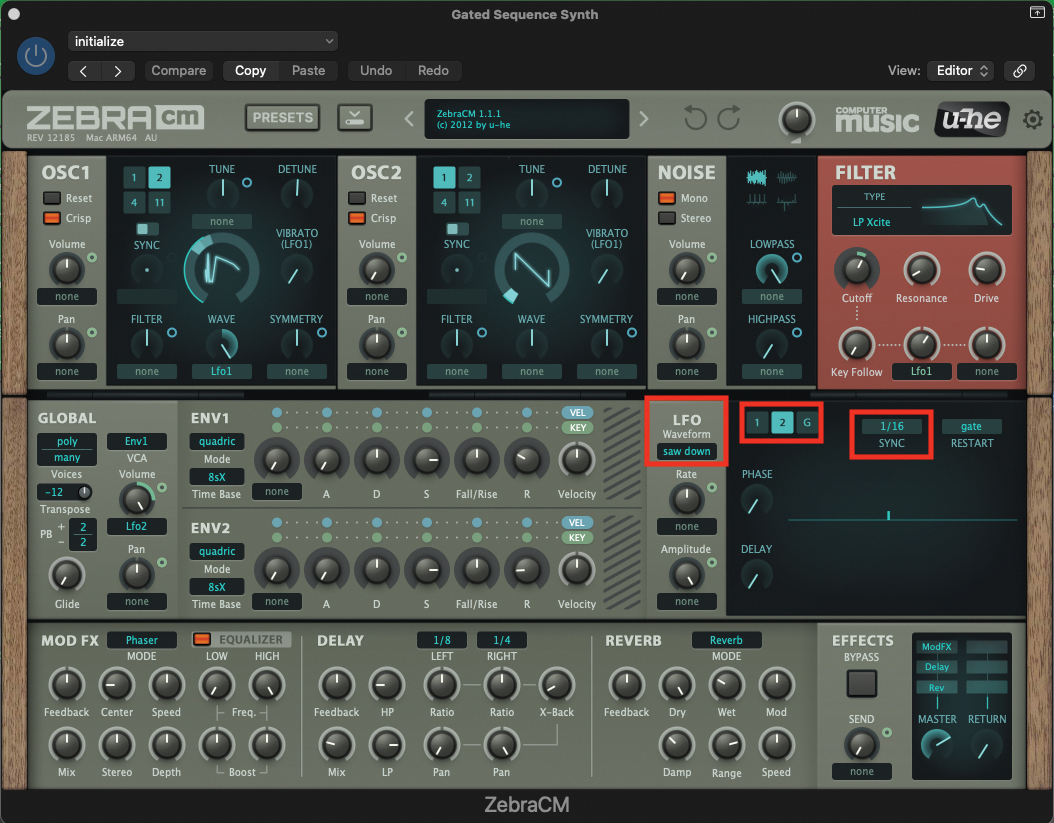
Keeping within the LFO section, select LFO2, by ensuring that the ‘2’ is highlighted in turquoise. Select Saw Down from the LFO Waveform drop-down menu, and make sure that the Sync setting is set to 1/16th note.
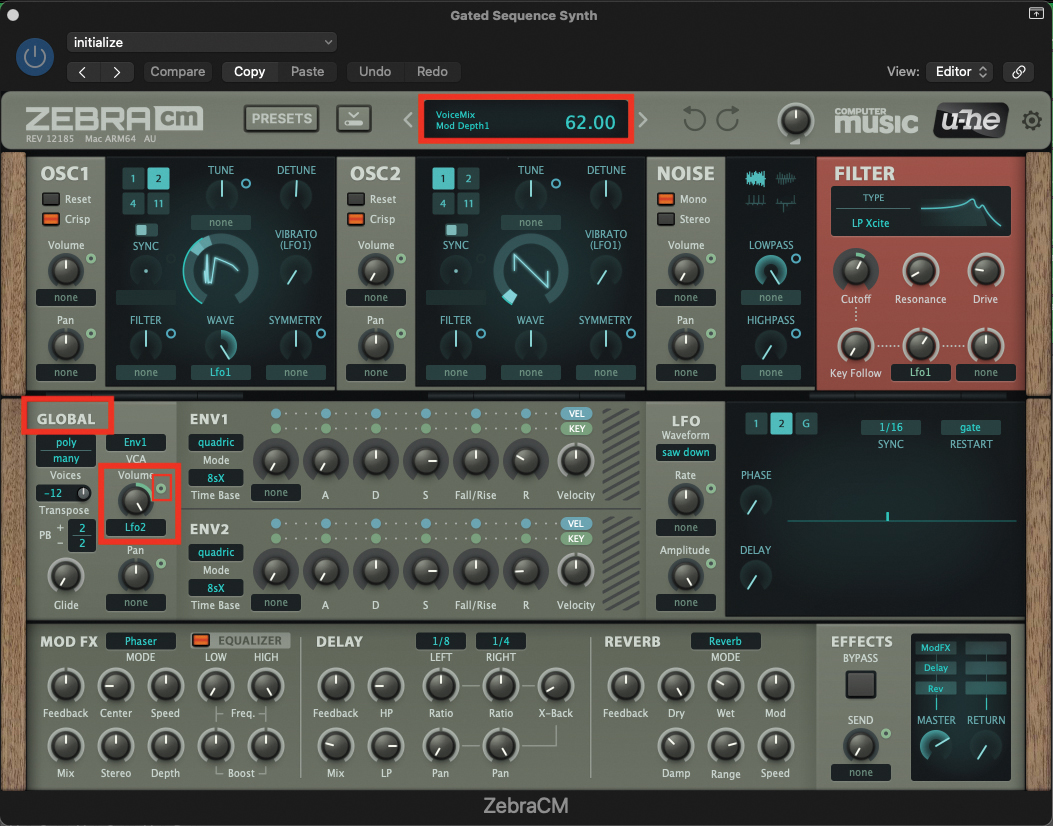
Move across to the Global section, which is located on the far left of the plugin window. Locate the Volume pot and assign it to LFO2 from the drop-down. Then set the pot to 100. We can also apply a modulation amount, by clicking and dragging on the small blue circle, located to the right of the pot. Set this modulation to a value of 62.
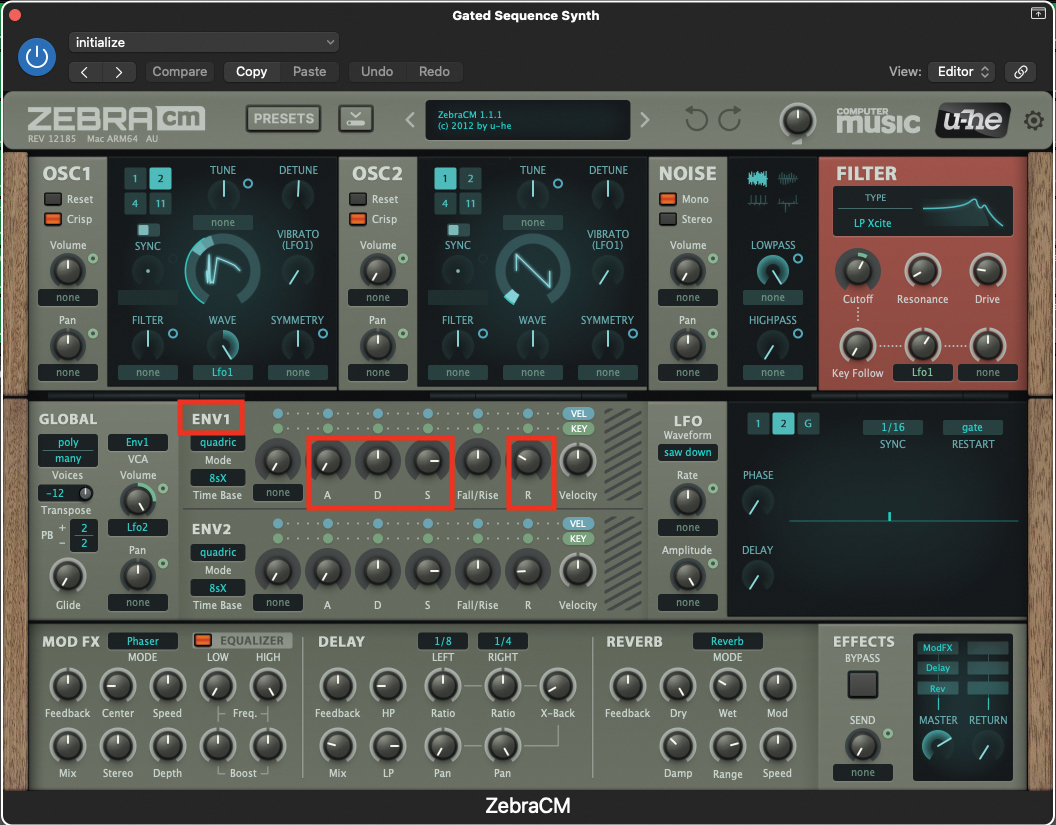
Finally, we only require the use of ENV1 for this patch, as we only need to control the amplitude, or volume of our sound. Set the Attack pot to 0, Decay to 50, the Sustain to 80, and finally the Release to 30. That should conclude our patch.
Pro tip
While the waveform from the first oscillator is providing the foundation for this patch, interest is generated at the LFO modulation level. We’ve engineered this patch to sync with your DAW at the note value of a 16th note. It’d be easy to adapt this, to a note value of your choice, that might be more suitable for your production.
It’s also important to consider playing around with the User waveform, which you have generated on LFO1. You can change the number of steps, from a couple, all the way up to 32. Combine this with the relatively large number of steps with your chosen note value, and you can create some very complex, evolving cycles, which will sound incredibly interesting in a production.
By a similar token, LFO2 is merely providing a gating effect, by following the shape of a downward saw ramp, extending in the direction of the Zebra’s main output. In this context, this creates the classic 16th note gate, but you can change the note value at the LFO level of LFO2, to create a less frantic rhythmic repetition.
The bottom line is, this patch is reliant on the two LFOs to do the heavy lifting, and altering the settings may increase their potency within your production.
Recommended listening
1. Lusine - Transonic
Lusine uses a very similar gating and modulation technique, which can be heard throughout the construction of his track Transonic.
2. Röyksopp - Eple
This classic track from Röyksopp uses string-machine gating and phasing, which is a more simplistic and static version of our Zebra patch, but nonetheless highly effective.
Roland Schmidt is a professional programmer, sound designer and producer, who has worked in collaboration with a number of successful production teams over the last 25 years. He can also be found delivering regular and key-note lectures on the use of hardware/software synthesisers and production, at various higher educational institutions throughout the UK
