How to use FM synthesis to design sounds you'll actually use in your music: "Shift your thinking from a subtractive mindset to an FM one and its potential for unique sound design will open up"
We demystify the process of using FM synthesis to create impactful and original sounds to use in your productions
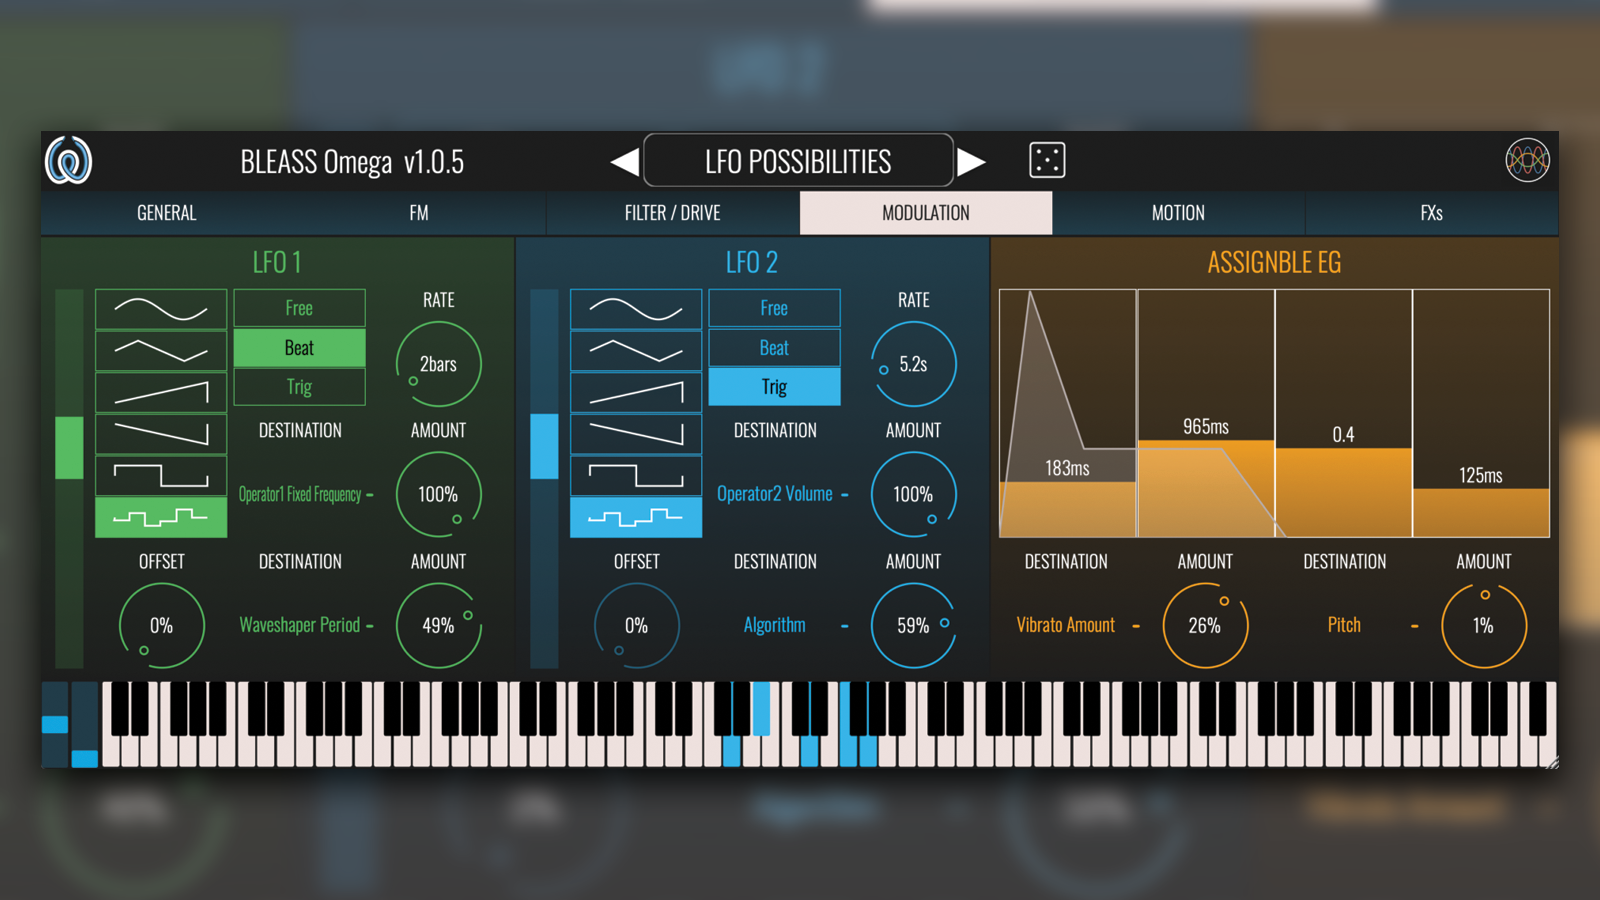
Subtractive synthesis won the War of the Synthesis Technologies that raged during the 80s. It didn't look that way at the time, mind you, with so many established analogue synth manufacturers going to the wall in the face of the Yamaha DX7's FM synthesis onslaught.
But look at things today and you'll see the vast majority of synthesisers out there are based on subtractive techniques, and the most sought-after instruments on the used market are the classic analogue beasts of old. Full-blooded FM synthesis lives on in only a comparative handful of instruments, its deep sound design potential too often overlooked.
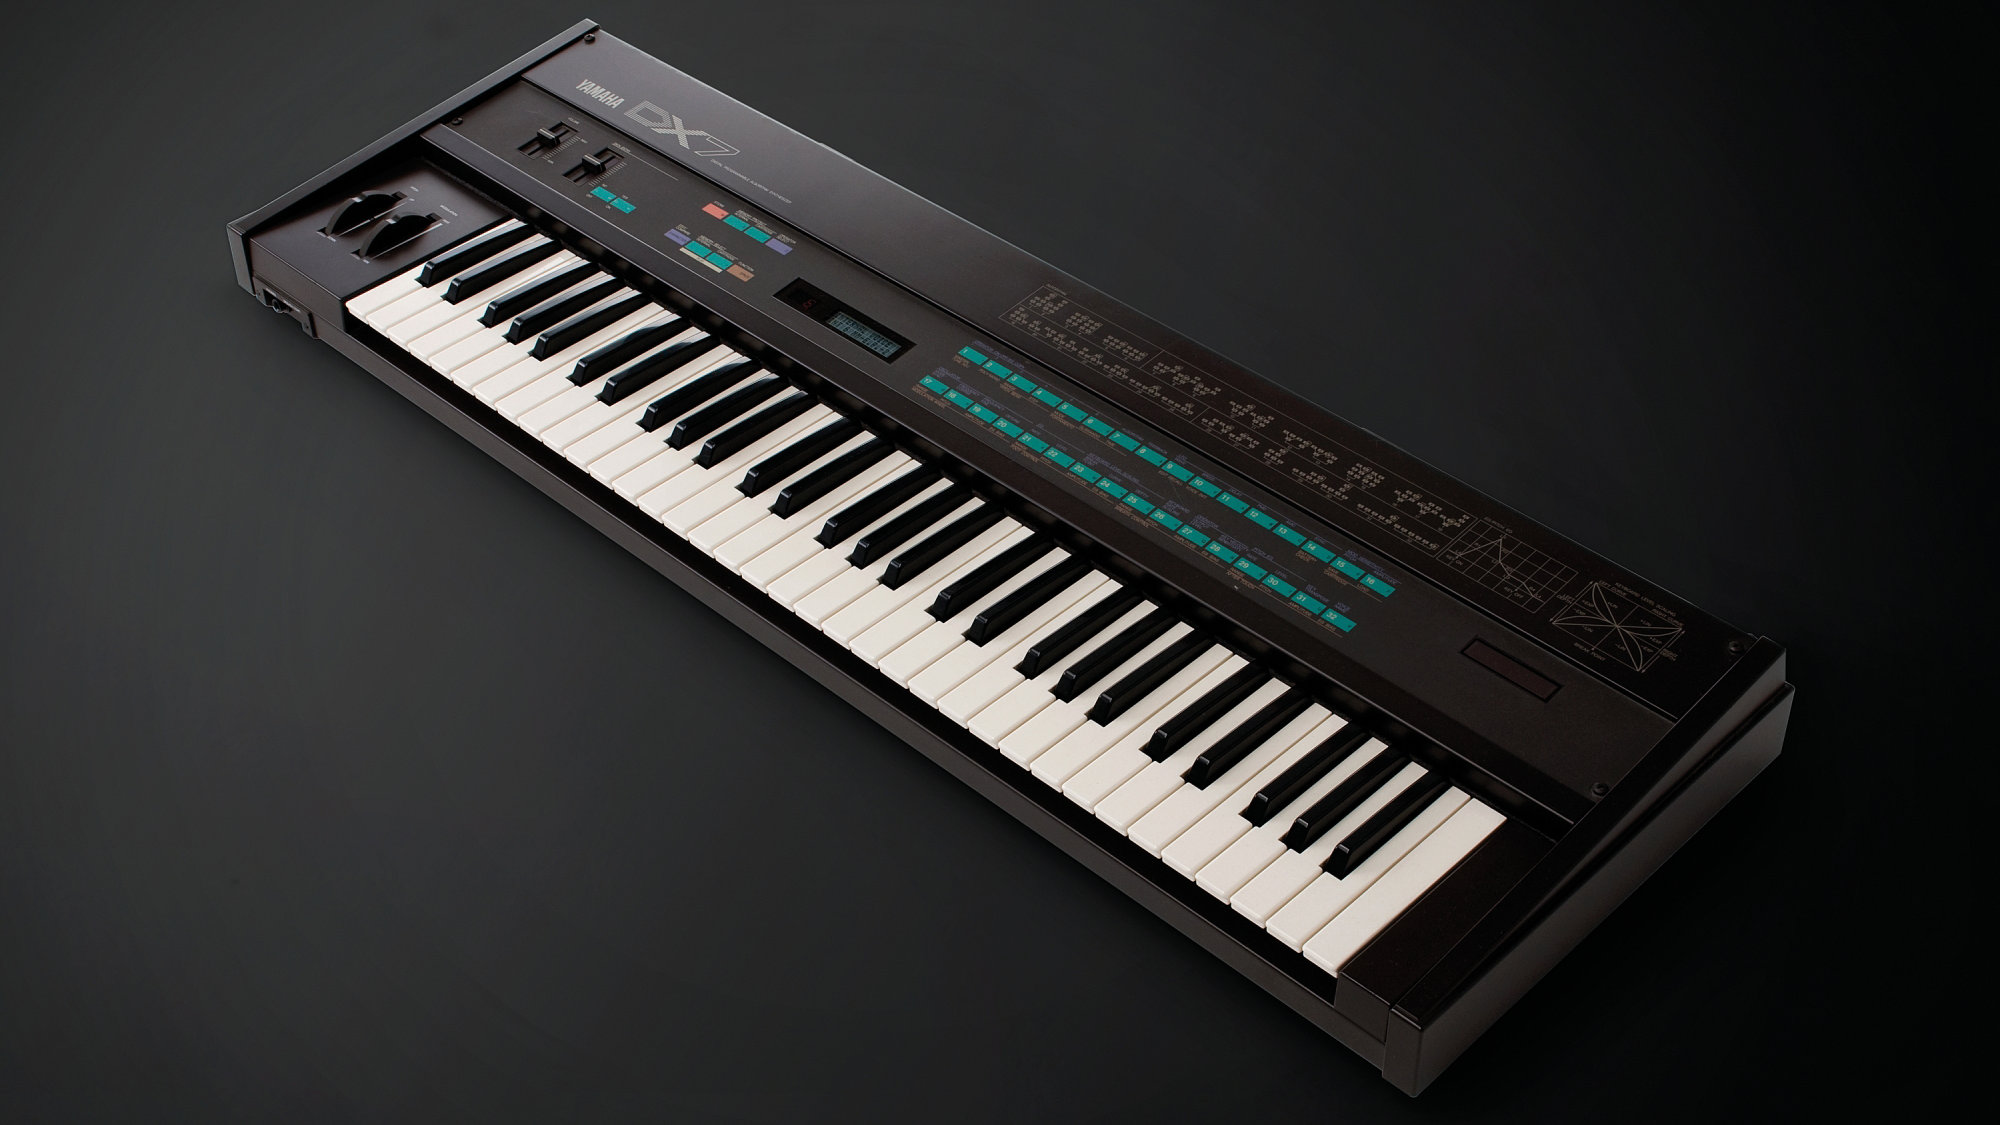
Why, 40 years on, the Yamaha DX7 was the most important release in synth history
So how did frequency modulation synthesis win the battle but lose the war? The short answer is complexity, or more accurately the perception of complexity. You see, the DX7 and its descendants were – and are – pigs to program, the tiny screens and flimsy buttons being no substitute for a nice bank of intuitive knobs and faders. This awkward implementation quickly became synonymous with FM synthesis as a whole but, as is readily proven by modern software implementations, this reputation is somewhat unfair.
Granted, FM is nothing like as intuitive and instinctual as subtractive synthesis, and randomly twiddling the settings tends to result in little more than a digital trouser-cough. The trick is to shift your thinking from a subtractive mindset to an FM one – do this and FM's full potential for unique and expressive sound design opens up before you.
Demystifying FM
There are many articles and tutorials that delve into the theory underpinning FM synthesis, and that describe in great detail the various elements of a typical FM synthesiser. What many such treatises fail to do, however, is explain how to actually apply this theoretical knowledge when settling down to a bit of FM sound design.
What follows, then, are three practical lessons that show you /how/ to program FM synthesisers. We will be using all of the associated technical terms, and have described these briefly in a glossary section, but if you're wanting the complete technical lowdown look elsewhere. All we are interested in here is demystifying the process of using FM synthesis to create impactful and original sounds to use in your productions.
Which FM synth to choose
Though there are many great FM synth plugins on the market, we'll be using BLEASS Omega in the following examples. This is an ideal instrument for learning about FM synthesis thanks to its clear layout and visualisations, but the methods and techniques we're discussing are generic and will translate to any FM synth, so feel free to use your preferred option (although be aware sonic results may vary slightly).
Want all the hottest music and gear news, reviews, deals, features and more, direct to your inbox? Sign up here.
If, however, you would like to get your hands on BLEASS Omega, the first 100 Music Radar readers who head over to BLEASS' website and use the coupon code FMRADAR will pay only €49 for the plugin instead of the regular price of €69. (Offer limited to first 100 applicants and valid until 18th March 2024).
Tone and timbre
A subtractive synth oscillator produces waveforms that contain many harmonics, and that therefore sound timbrally bright and rich. We then reduce – or subtract – harmonics to achieve a desired result, hence the name “subtractive synthesis”.
In contrast, a classic FM operator produces only sine waves, which are pure tones containing no harmonics and therefore no timbral complexity, so our job as FM sound designers is to add harmonics rather than take them away. This is done by modulating the frequency of one operator with the output of another. The timbre of the resulting waveform is determined by two key factors:
- The ratio between the frequency of an operator and the frequency of the operator that's modulating it;
- How strongly the modulator is impacting on the operator being modulated; in other words, the volume level of the modulator.
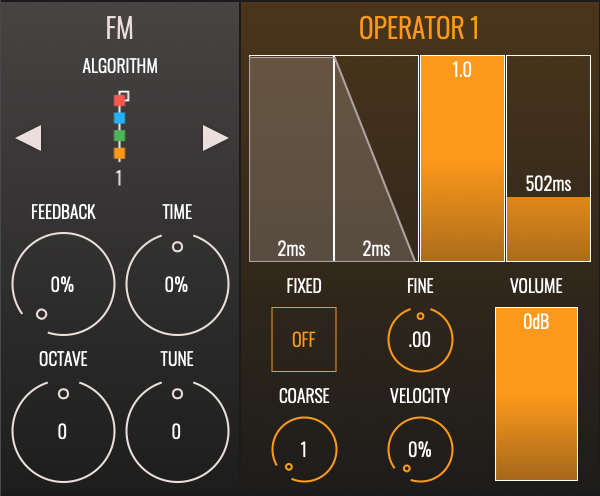
Create a new initialised patch and select an algorithm that has a single carrier and all modulators stacked sequentially above it. Generally speaking, we will want the carrier's frequency to match the played note's fundamental frequency, so set its frequency ratio (labelled as “Coarse” and “Fine” in BLEASS Omega) to 1.
Set the carrier's level to maximum and create a basic on/off gate for its envelope. Set the level of all remaining operators to zero, and disable any filters, effects or parameter modulations your synth may be applying.
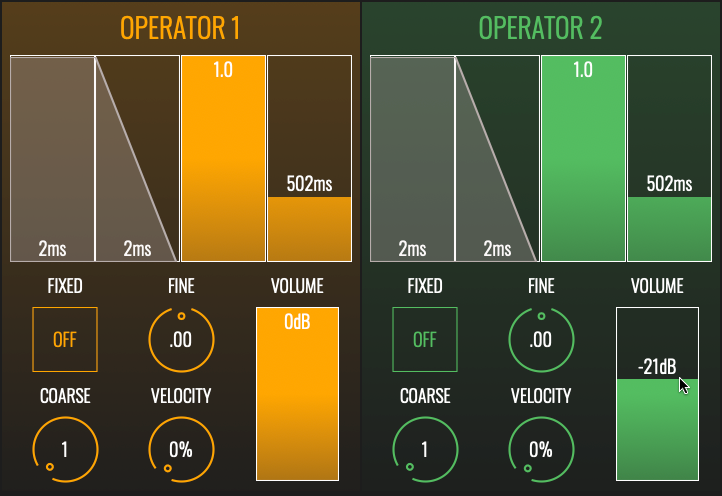
Move to the operator that is directly modulating the carrier (Operator 2 in our images). Duplicate the ratio and envelope settings used for the carrier. Play a note and slowly increase the level of this second operator. Notice that the sound brightens as harmonics are added, and that the brightening becomes intense – even harsh – when you increase the modulator's level beyond a certain point.
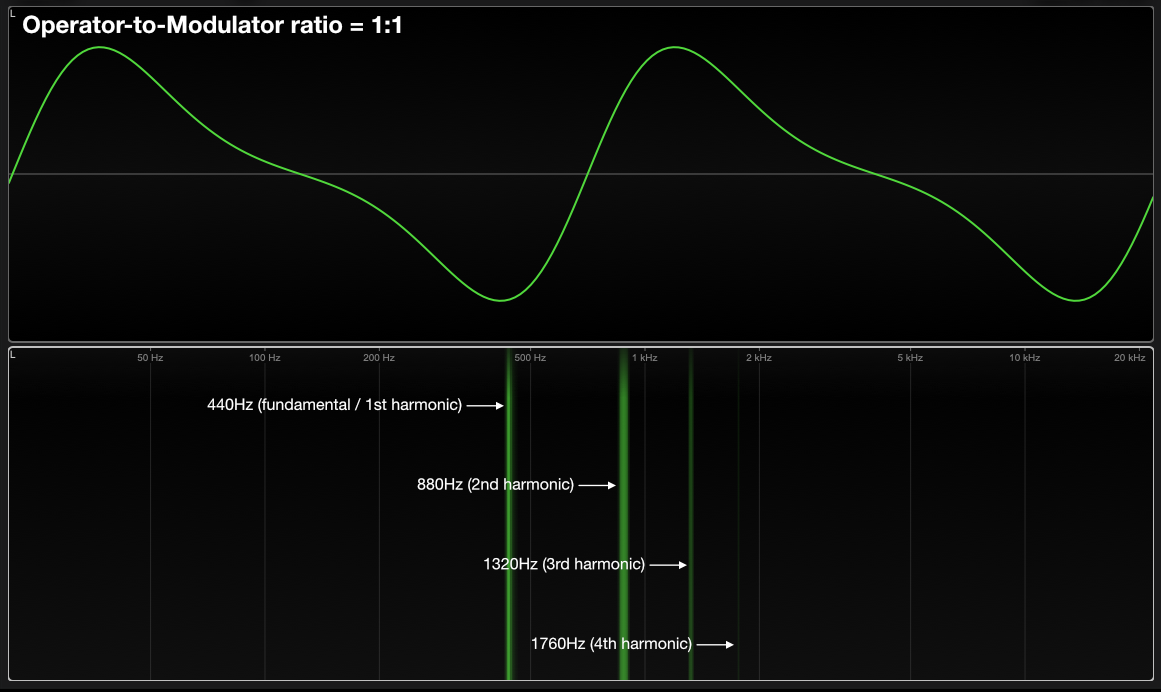
Currently we have an operator-to-modulator (O:M) ratio of 1:1, which causes both even- and odd-numbered harmonics to be introduced. This is the basis of a sawtooth wave and so, when the modulator's level is set just right, the resulting sound is somewhat sawtooth-like (albeit a soft, filtered sawtooth).
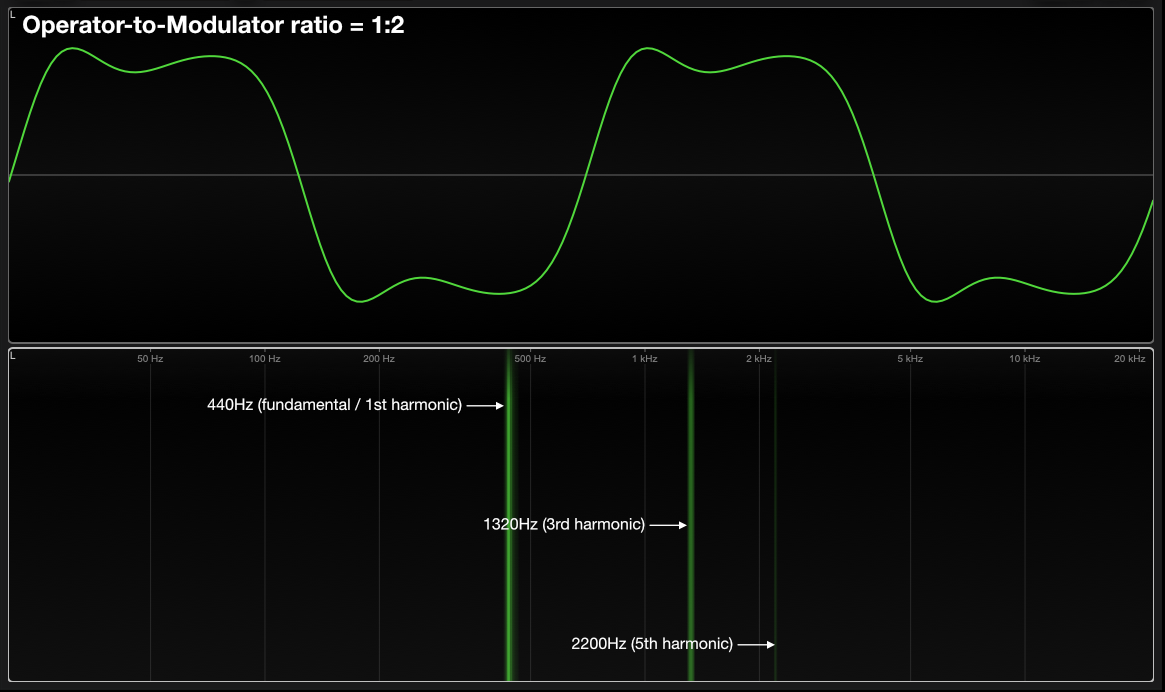
An O:M ratio of 1:2 results in only odd-numbered harmonics being produced, which is the recipe for a square wave. To hear this, switch the modulator's (operator 2's) frequency ratio to 2 and adjust its level until you hear the characteristic woody tone of a square wave.
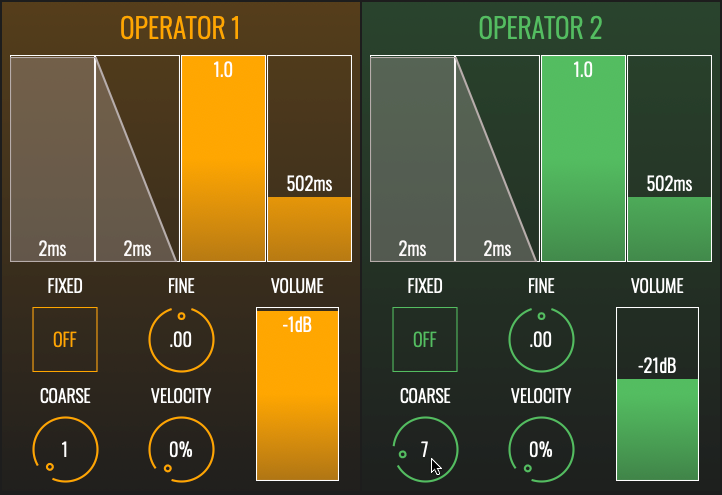
Experiment with other integer (I.E. whole number) frequency ratios and levels for the modulator, noting how this impacts on the timbre being produced. An integer ratio will always produce harmonics that fall within the natural harmonic series of the fundamental frequency, and so will always produce tonal, harmonious sounds.
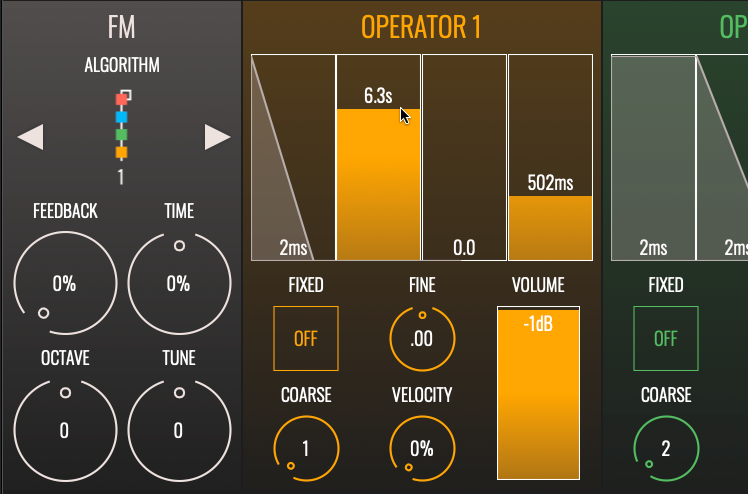
Static sounds are boring, so let's bring the operator envelopes into play. A carrier's envelope is akin to a subtractive synth's amp envelope, shaping the volume of the sound over time. Create a piano-like envelope for your carrier, with instant attack and a long 6+ second decay to a 0% sustain level.
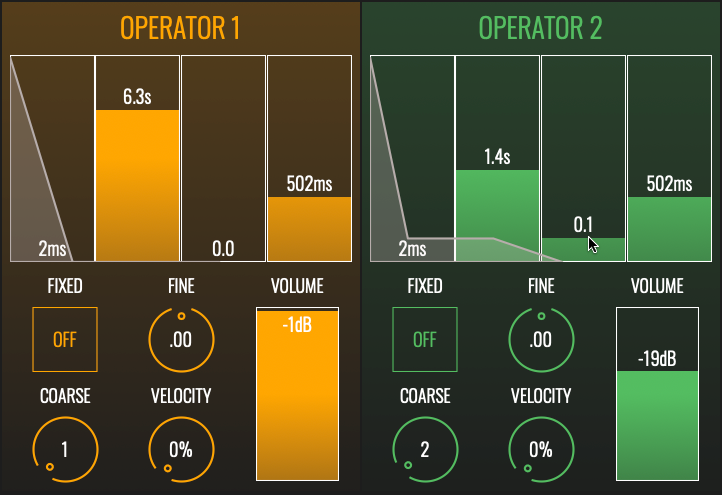
Many acoustic sounds become duller as their sound decays. A modulator's envelope can mimic this, much as a filter envelope mimics this in a subtractive synth. Dial in a modulator envelope that has instant attack and a 1.5 second decay to a 10% sustain level. Twiddle the modulator level until you get just the right shift in brightness across the length of a held note.
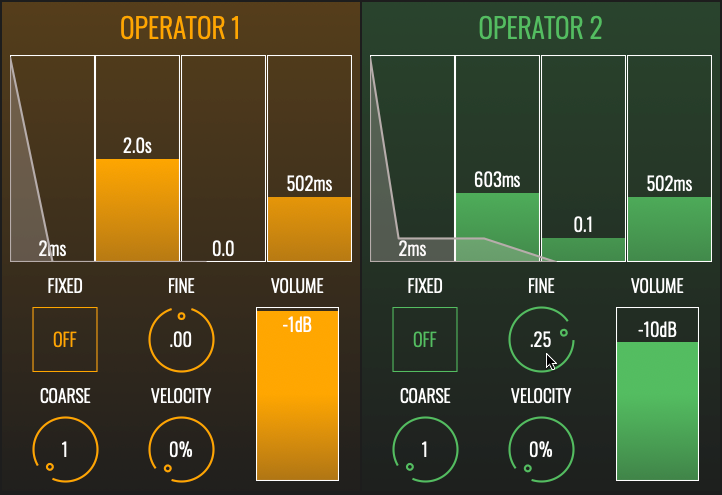
FM is famed for its ability to create metallic and atonal sounds – the secret to this lies in using non-integer frequency ratios so that the resulting harmonics do not fall within the natural harmonic series. Reduce the decay times of both operators then dial in a modulator ratio of 1.25 (in BLEASS Omega use the "Fine" parameter for fractional ratios). Adjust the modulator's level until you get a distinctly bell-like sound that softens and quietens over time.
Stacks, algorithms and layers
As we have just seen, arranging two operators as carrier and modulator gives us access to many different timbres. This arrangement of operators is known as an "FM stack". You can have as many modulators in a stack as the synth can provide, but typically an FM stack consists of just two or three operators – I.E. one carrier and one or two modulators – as this is all we need to create a vast range of different timbres.
Many algorithms include more than one carrier. When you see this, think of each carrier and its connected modulators as a standalone FM stack that will contribute its own sonic elements to the overall sound. In this way you can create layered and evolving sounds.
You can have as many modulators in a stack as the synth can provide, but typically an FM stack consists of just two or three operators
Keep in mind that the number of stacks – and therefore sound layers – you can create is limited by the number of operators provided by the synth. Implementations whose operators can produce waveforms other than sine waves can help increase the number of available stacks because you can often use fewer operators to achieve a result that would require more sine wave-only operators. Nevertheless, we're keeping things simple by sticking with four sine wave operators in the following walkthrough...
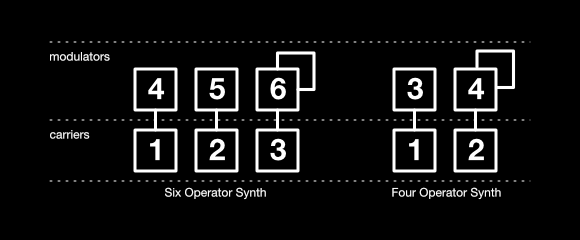
Create a new initialised patch and turn down/disable all but the first operator. Select an algorithm that provides two operators per stack, as shown in the illustration. Note that the last operator in any algorithm will typically feature a feedback loop – that is, the operator can generate its own harmonics by modulating itself. We'll say more on this in a moment, but for now just be aware of it.
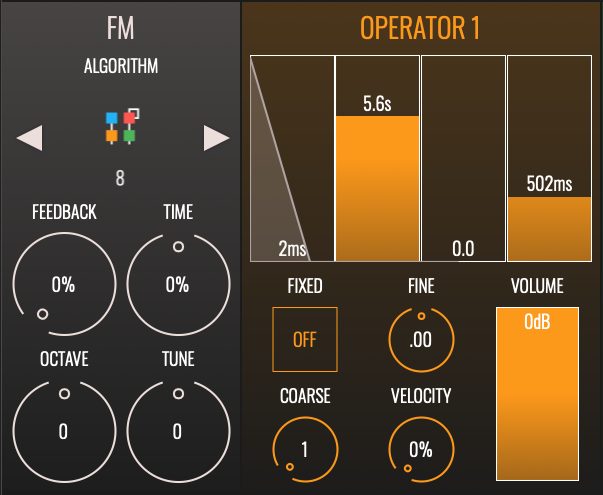
Create a piano- or guitar-like envelope for your first stack's carrier, with instant attack and a long decay to silence. Be sure to set a short but not instantaneous release time too – around half a second should do it. Set the carrier's frequency ratio to 1.
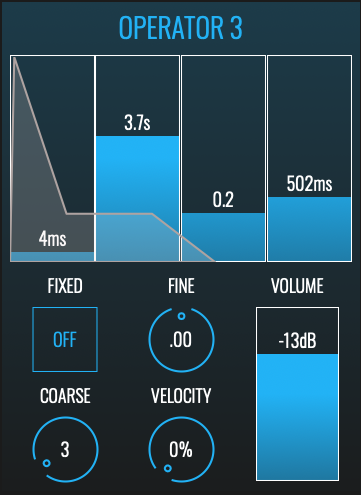
Move to the first stack's modulator and set an integer frequency ratio – we've used a ratio of 3 which gives a somewhat guitar-like tone. Adjust the modulator's level and configure its envelope so that the brightness of the stack fades more quickly than its volume: I.E. instant attack, a decay time shorter than the carrier's decay time, a non-zero sustain level, and a release time that matches the carrier's.
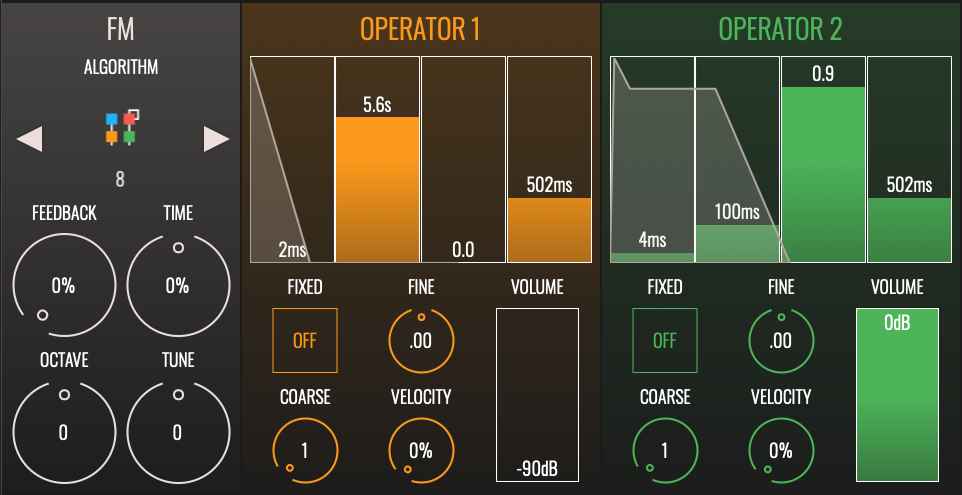
Many acoustic instruments are more timbrally complex during their attack phase than during their decay/sustain phase, so let's synthesise an attack transient using another stack. Turn down or disable the first stack's carrier so that you can focus on the second stack, and enable / turn up that second stack's carrier. Be sure to use a stack in which the modulator includes a feedback loop.
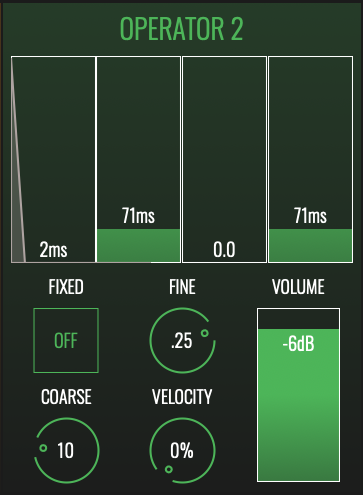
In the second stack's carrier, create a short, snappy envelope with instant attack, a fast decay to silence, and a release time that's similar to the decay time. We want a metallic and somewhat atonal sound; using a non-integer frequency ratio will help acheive this, as will weighing the O:M ratio in favour of O (that is, setting the operator's frequency ratio to be greater than the modulator's), so set the carrier's ratio to 10.25 (or thereabouts).
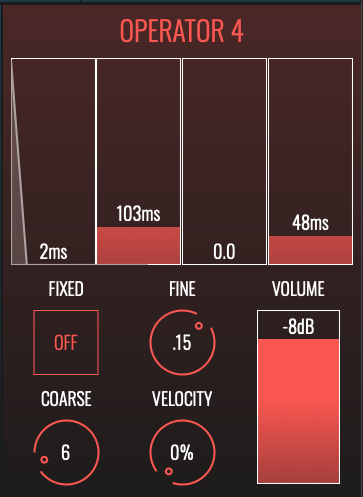
Move to the second stack's modulator, turn up its level, and create a similar envelope to the one you just created for the carrier. Play with the frequency ratio, keeping it below the ratio of the carrier, whilst listening for a tone you like. We have settled for a value of 6.15.
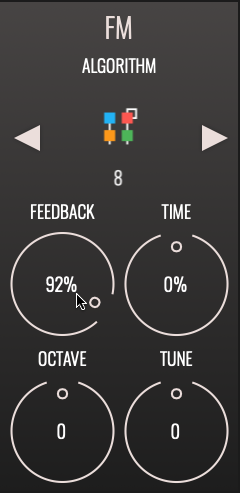
The attack sound is still quite pitched, which can be nice but let's make it a bit dirtier and noisier. Synths with six operators can do this by adding another modulator to the stack, but another option is to use feedback (this is why we are using the stack that includes the last operator and its feedback loop!). Turn up the feedback until you arrive at a sound that you like.
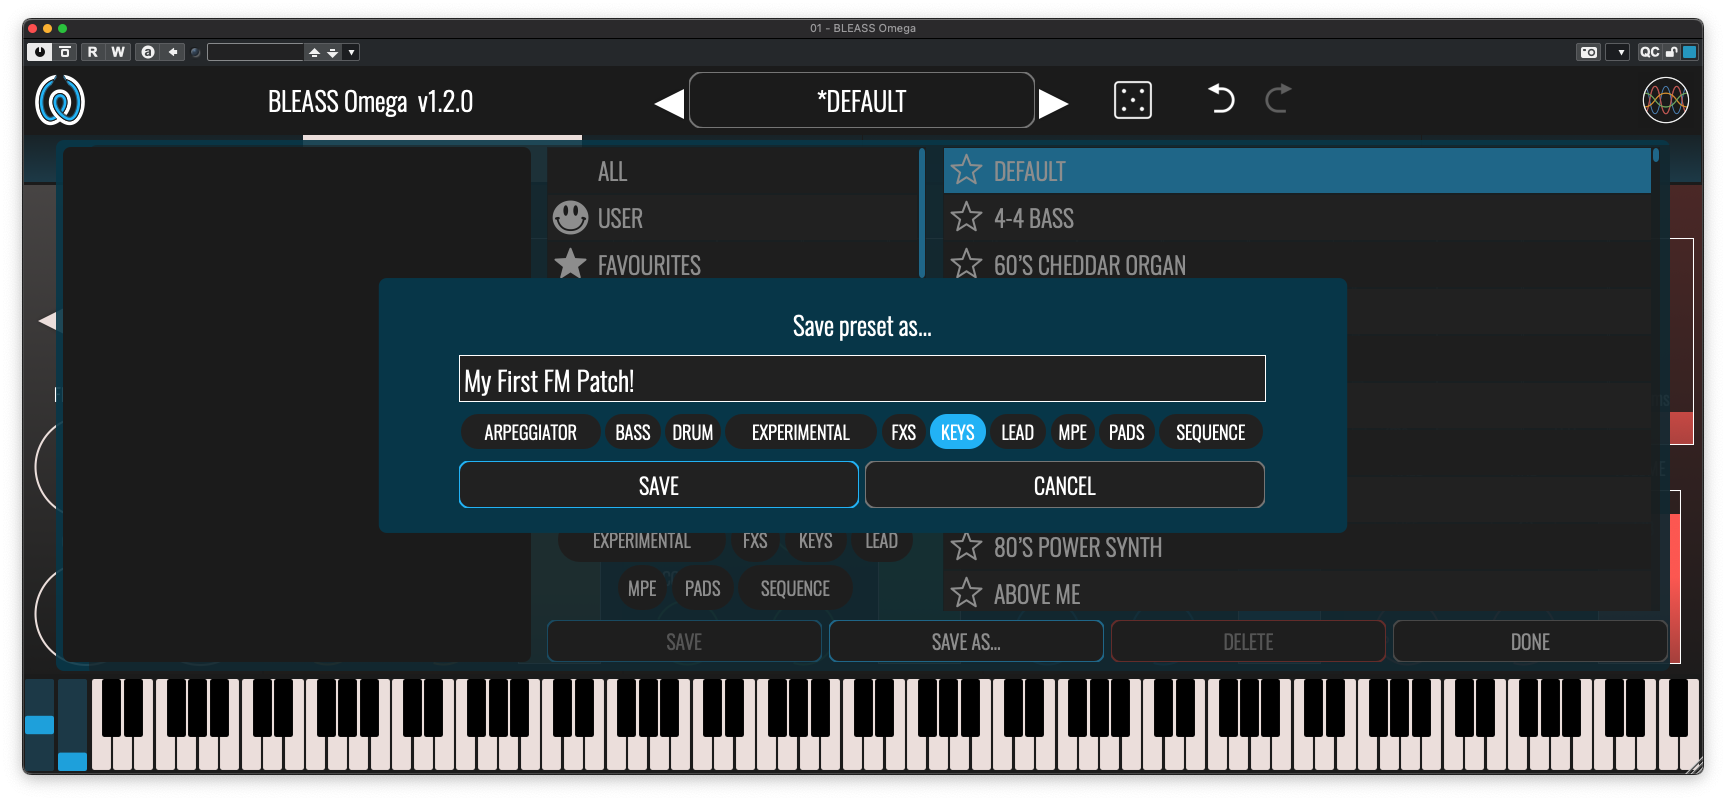
Enable and turn up the first stack's carrier, then spend some time balancing this level against the level of the second stack. Feel free to tweak the frequency ratios, envelopes and levels to hone-in on just the right sound. Don't forget to save your patch when done.
Adding expression and variation
All being well, the FM patch you have just created will sound decent, but it will be very flat and monotonous because it does not respond in any way to performance nuances such as key velocity and pressure.
The good news is that sonic expressiveness is one of FM synthesis' most powerful features, as it can produce significant-yet-progressive timbral and dynamic changes in response to a performer's inputs.
Modulation of parameter values is a feature FM shares with subtractive synthesis, with much the same tools on offer: LFOs, auxiliary envelopes, realtime controllers and so-on. These can all be mapped to the synth’s parameters in a familiar way.
Let's use some of these techniques to make our newly-minted FM patch sound more expressive and interesting.
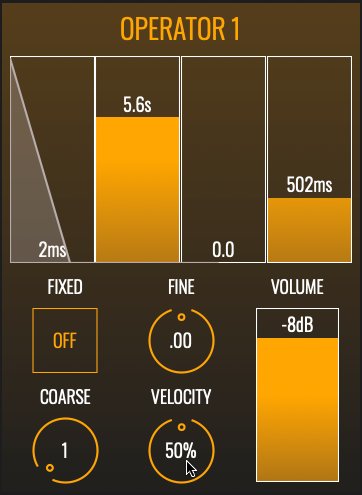
The most basic type of expression is varying the volume in response to how hard a key is played, so let's set this up for our FM patch. Remember that, in FM, it is the carriers that are heard, and so it is the carriers that will need to respond to key velocity in order to get this change in volume. Go to your first stack's carrier and set a velocity value of around 50%.
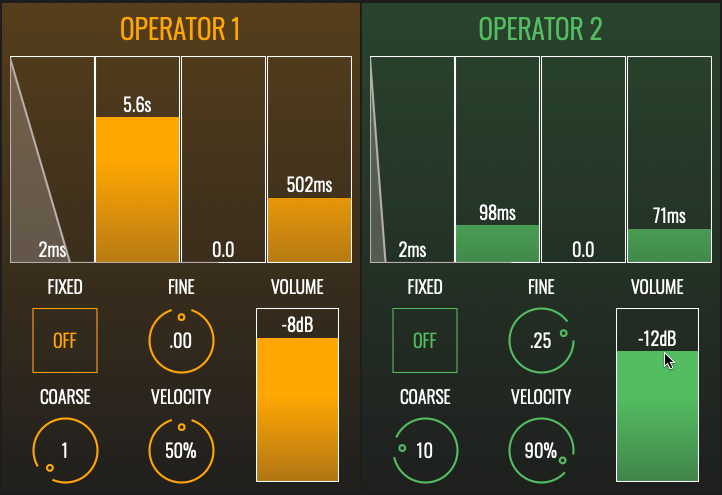
Making the attack transient more sensitive to velocity than the sustained portion of our sound will add to the dynamism and impact of hard-played notes. Go to your second stack's carrier and crank its velocity sensitivity to around 90%, then adjust its level to rebalance it with the sustained portion of your sound.
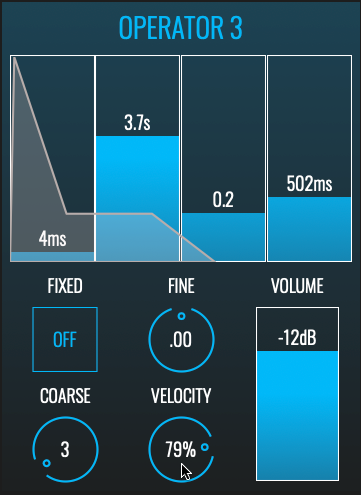
An instrument's timbre can also be affected by playing velocity. In FM, this means controlling modulator level via key velocity. Go to the modulator for the sustained portion of your sound and set a velocity value that gives a good range of brightness between soft and hard playing. You may also need to tweak the operator's level to get the desired result.
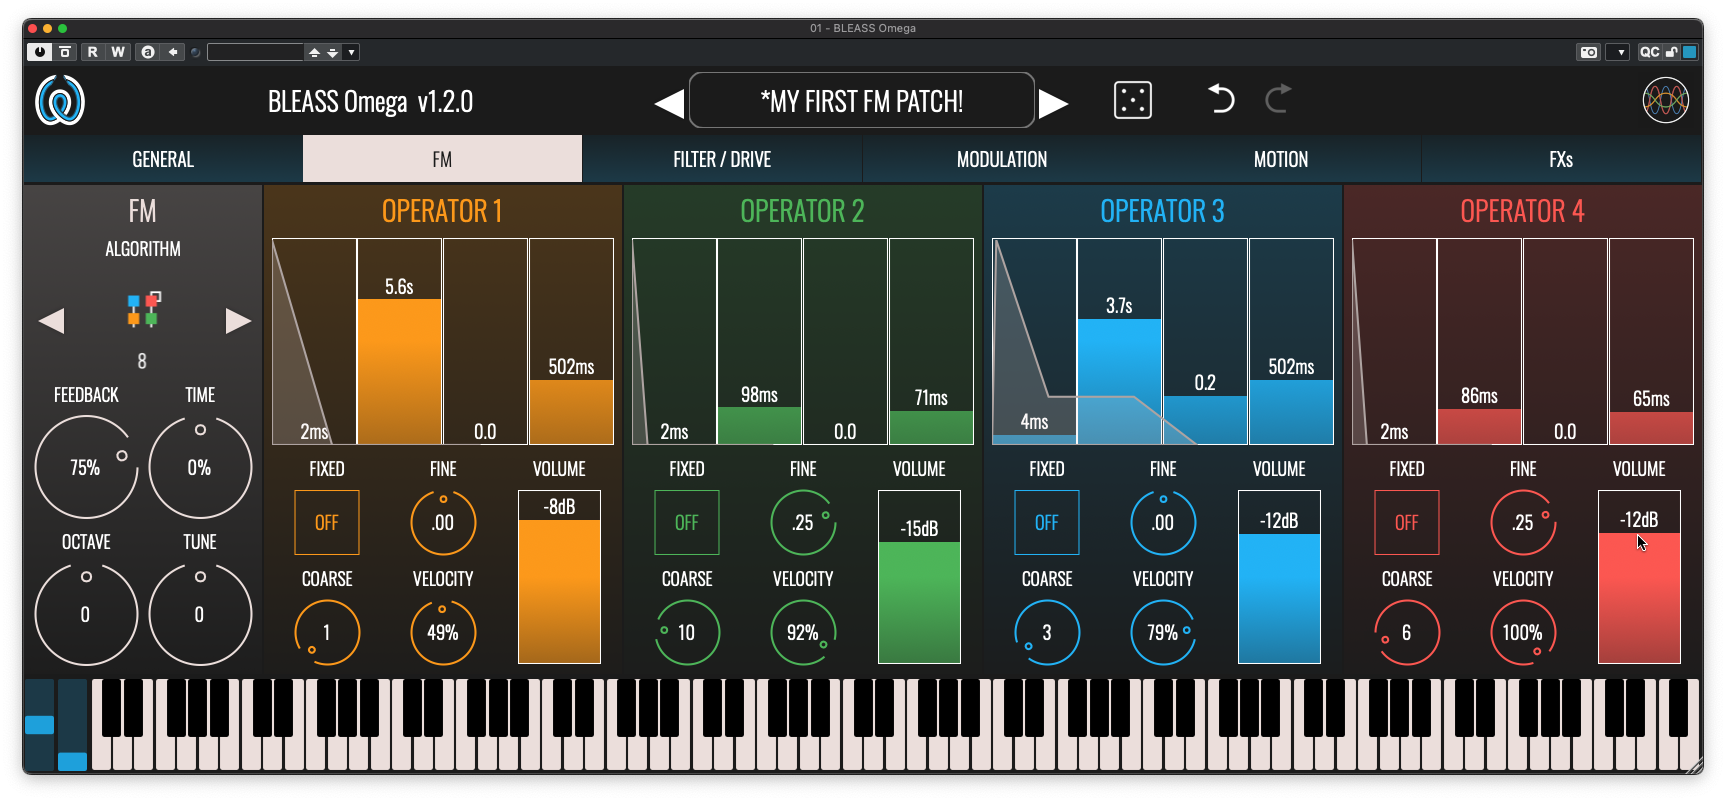
Finally for velocity control, let's make the transient harsher at higher velocities. You should by now realise that this will be done via the transient stack's modulator, so go ahead and make the changes. Keep in mind that this modulator is using feedback, so key velocity will have an even bigger impact on the timbre. Again, take some time to rebalance all of the elements of the sound to give just the right amount of expressive velocity control.
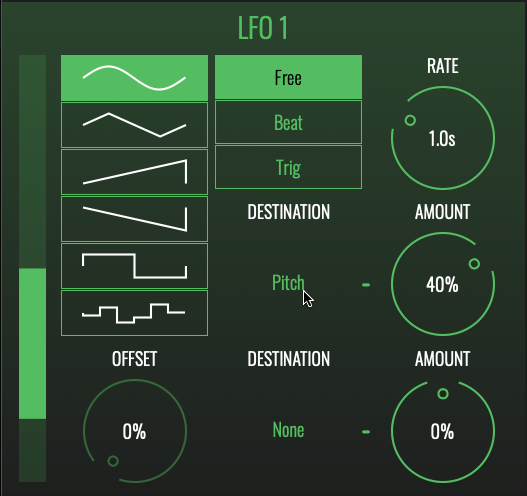
Pitch variations are commonly used in expressive playing, whether controlled in realtime via pitch bend, mod wheel and other realtime controllers, or automatically via LFOs, envelopes, etc. In FM, though, the effect of such pitch variations depends on what you vary the pitch of.
For classic vibrato and pitch bend effects, then, you have to modulate the fundamental frequency (I.E. the frequency of the note being played), because all frequency ratio calculations are based on the fundamental, therefore all operators will maintain the same O:M ratio. Try this now by routing an LFO to the synth's master pitch parameter.
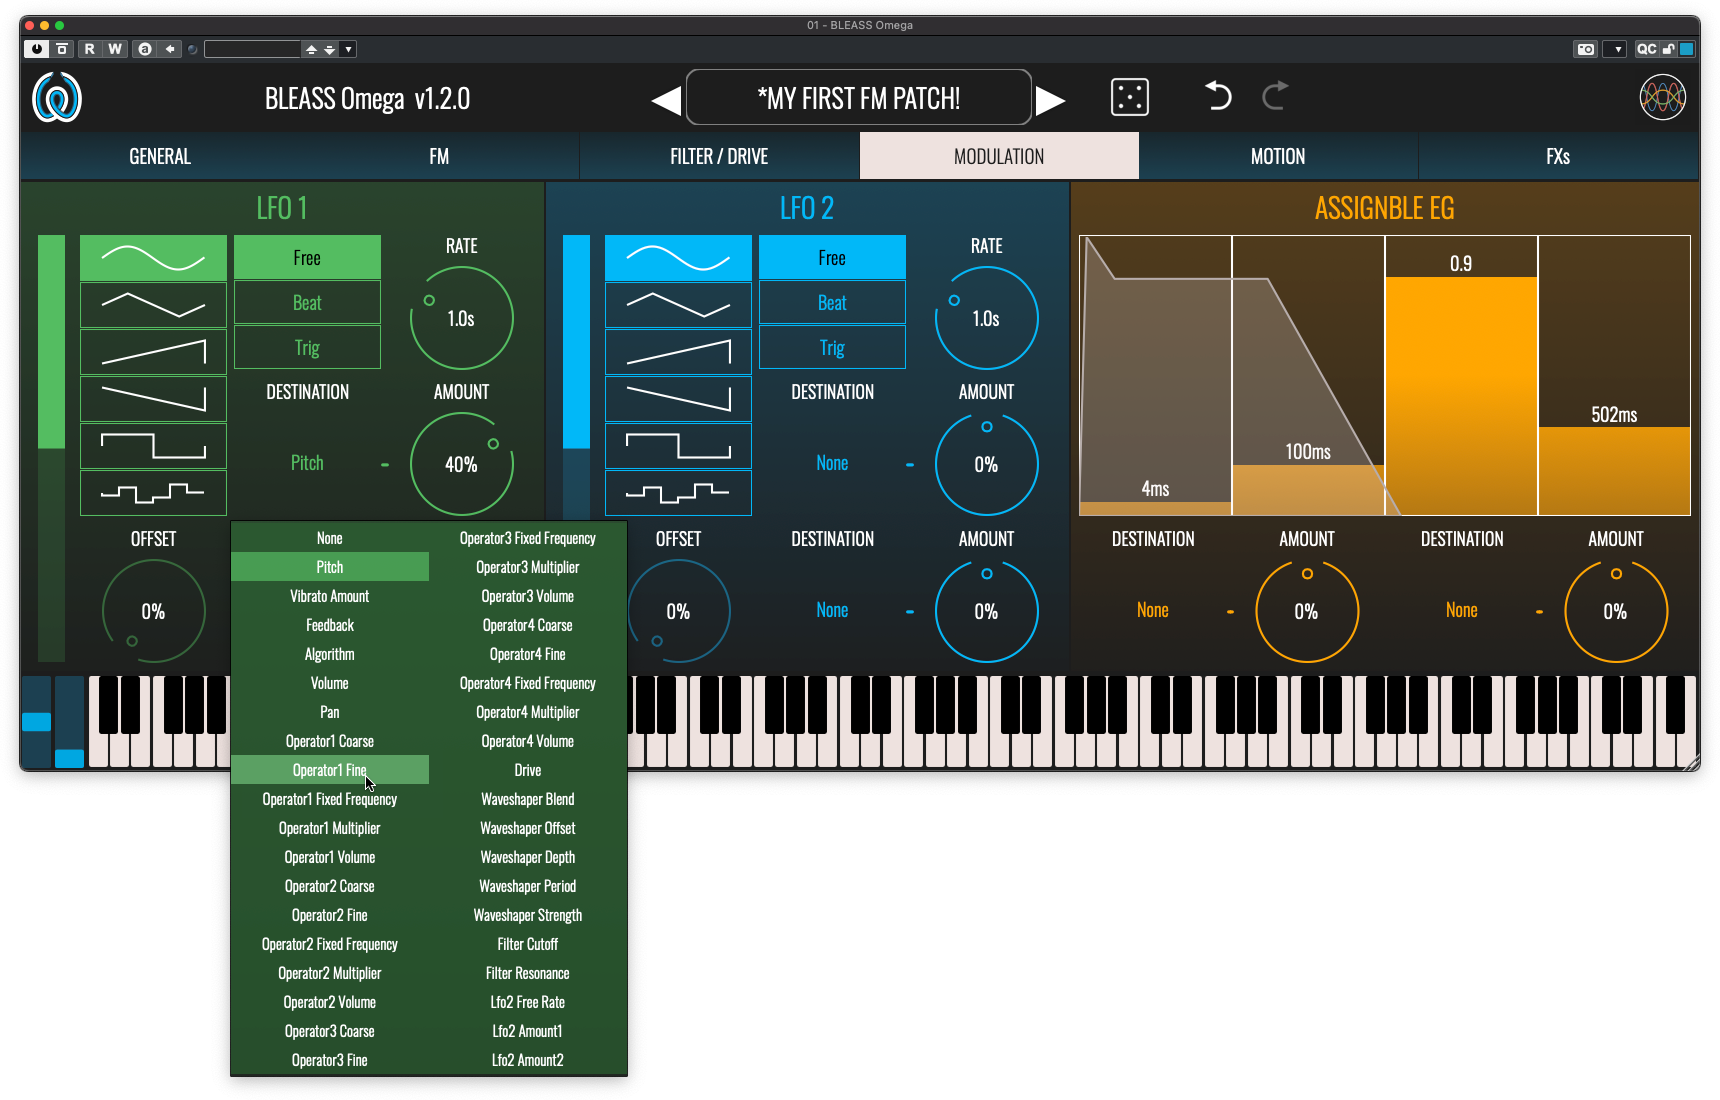
Let's contrast this with what happens when routing the same LFO to an individual operator's pitch. Change the LFO's routing so that it is targeting the fine tuning of your first stack's carrier. This is often labelled as frequency offset. With this done, you should hear that there are now significant timbral changes happening in response to the LFO, and the pitch vibrato effect is largely lost.
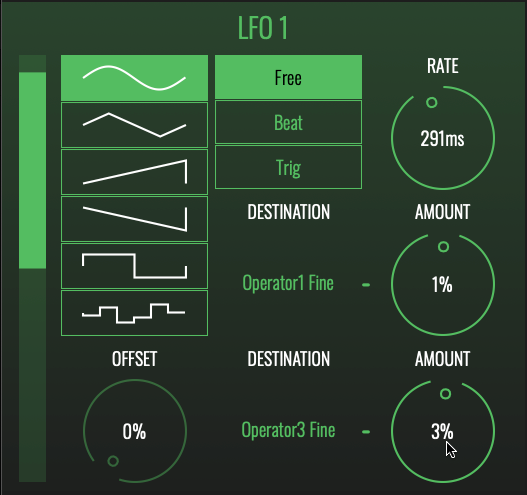
Now add another routing from the LFO to the fine tuning of your first stack's modulator. Adjust the LFO amount being sent to both operators to achieve a pleasing effect, but send a slightly stronger LFO signal to the modulator than to the carrier – this adds an interesting but subtle timbral variation to the vibrato. Notice that you now have vibrato on the sustain portion of the sound but the transient layer maintains a stable pitch.
Finally, let's repurpose the mod wheel to use it as a means of controlling the prominence of our patch's attack transient. This is simply a case of mapping the mod wheel to the volume level of your transient stack's carrier, but gives fantastic performance control over the overall prominence and impact of the sound.
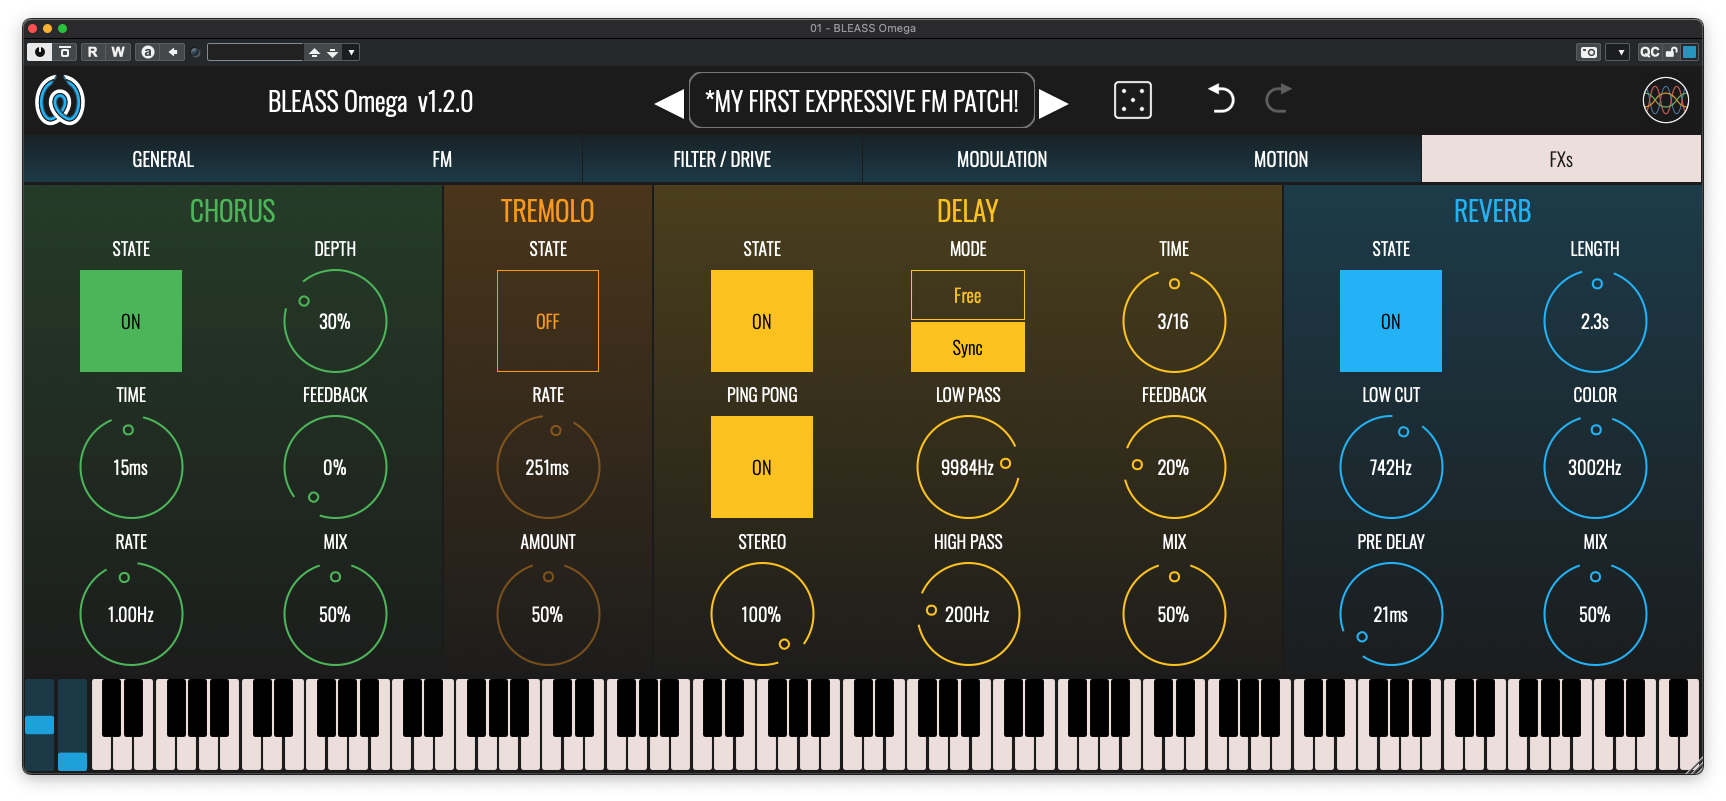
Don't forget that most synth sounds will sound dull and lifeless without some effects on them, so add a bit of of delay, maybe some chorus, and get that 'verb switched on!
If you've been following along then you should now feel that you have scaled that first difficult hump in the FM learning curve. There's a lot more to learn and discover, of course, but now that you know how to switch your brain into FM mode you are fully kitted-out to explore the deep and awesome word of FM synthesis!
FM glossary
- Algorithm - Defines the way in which operators are interconnected. By convention, algorithm diagrams show carriers as the bottom layer of the structure with connected modulators extending above the carrier(s).
- Carrier - An operator that occupies the last position in an algorithm and whose output is directly audible.
- Feedback - Typically, the final (I.E. highest numbered) operator in an FM algorithm can be fed back on itself, thereby introducing new harmonics into that operator's output.
- Fixed frequency - An operator running in fixed frequency mode will produce the same frequency no matter what note is being played.
- FM matrix - Rather than use algorithms, Native Instruments FM8 provides a flexible FM matrix. This allows the definition of complex interrelationships between operators, with operators able to act simultaneously as both carrier and modulator, and feedback loops that encompass multiple operators.
- Frequency ratio - The ratio between the fundamental frequency of the played note and the frequency of an operator.
- Modulator - An operator that connects to another operator, modulating the frequency of that operator. Modulators produce no directly audible output.
- O:M ratio - The ratio between an operator's frequency and the frequency of a modulator connected to it. For example if the operator's frequency ratio is 2, and the modulator's ratio is 3, the O:M ratio will be 2:3.
- Operator - The basic building block of FM synthesis. Consists of an oscillator, an amp, and an envelope generator that controls the amp. The oscillator in a traditional FM operator generates only sine waves, but many implementations allow a range of different waveforms to be generated.

