Spice up your mix with these creative filtering techniques: "Filters are one of the most powerful mixing tools we have"
Creative filtering can both elevate and finesse your mix. Let’s check out some of the best ways to apply it
Mixing is a combination of technical and creative decisions, and some of these decisions such as creative filtering can have a big impact on both the clarity and impact of your mix.
Filters are one of the most powerful mixing tools we have, and none more so than when we’re using them to create tailored or section-specific effects. What’s more, with effects ranging from small snippets of a telephone voice to full on filter sections and beyond, you’ll find creative filtering can be both bold and subtle, and is regularly used across many different music genres.
In the analogue domain, different filter circuits are an important part of synth design, and you’ll find plenty of corresponding software filter emulations, if that’s the sound you’re after. That said, when it comes to mixing there are many flexible EQ plugins capable of delivering all manner of clean precise filter effects that can be further brought to life using their own integrated modulation or simply using regular parameter automation. So, often we don’t need to use a specific filter plugin as the EQ filters are good enough.
In this mix masterclass, we’ll look at a bunch of creative filtering techniques, showing you how to set them up and where to use them. We’ll also delve into those classic filter designs and see what makes them desirable. Right then, let’s get to it.
Creative filtering techniques
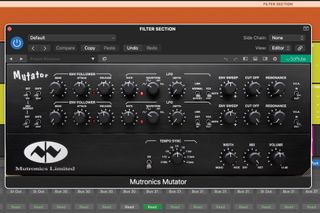
The classic filtering technique is the low-pass filter with gradually rising cutoff. It’s great for the drop sections and lets us build tension into the section after. You can do this with a flexible EQ, but as its centre stage, it’s also a good chance to use a specific resonant filter design (here we’re using the Mutator emulation from Softube).
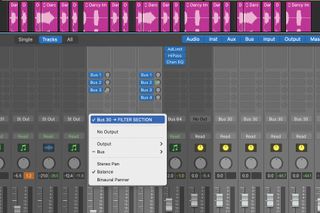
This technique has the most impact when you filter lots of your mix components collectively, and though you can use it across the whole mix if you like, it often works best when a few key elements remain unfiltered. To get started, set up a submix bus with the filter inserted, and route the required elements ready for filtering.
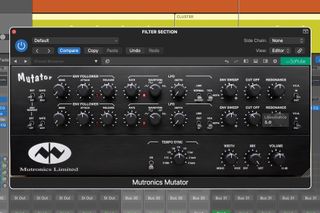
Fine-tuning the effect requires selecting the best filter slope if this is an option (18dB/octave or 24dB/octave are good choices), and also setting the resonance (or emphasis) to taste. The resonance lets us adjust how aggressive the sweep sounds, and this is key to getting that classic sweeping filter effect. We’ve set ours at a midpoint.
Get the MusicRadar Newsletter
Want all the hottest music and gear news, reviews, deals, features and more, direct to your inbox? Sign up here.
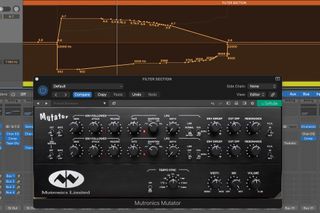
Manually sweep the filter through the track section you want to process. You’ll find the filter sweep will not be linear and there are key frequency regions you focus on. Use automation to fine tune both cutoff and resonance. Here you can see we’ve boosted our resonance for lower frequencies then reduced it for higher frequencies.
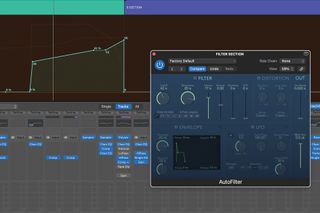
We can use a very similar technique with a resonant high-pass filter. However, sections with long rising high-pass filter cutoffs work less well in a mix context. More impactful is a short rise (one bar works well) combined with an audible resonance setting. Here you can see the cutoff start and end frequencies target a specific range.
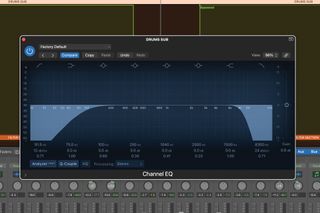
Our next technique uses high and low-pass filters to create a narrow or band-pass effect. This can be used for a telephone vocal effect or more general band-pass-style outcomes, and it works on both single instruments and sub mixes. Whatever the target, try processing a short section to create a temporary impactful spot effect.
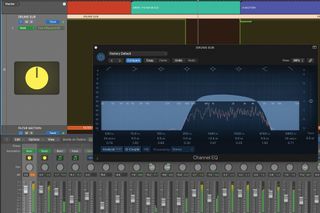
In context we use the technique to add a 4-bar band-pass section to the beats. By grouping the beats into a submix, we’ve set up a fresh EQ plugin solely for the task, and we can then use automation to bypass it when not in use. To get the precise sound, we’ve adjusted the filters and used a peak boost at about 1.5 kHz.
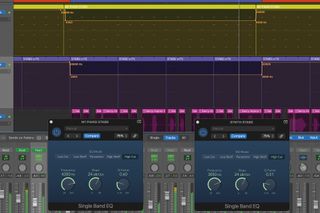
We can also use low and high-pass filters to create space in specific parts of a mix. In this case we don’t want any obvious resonance, so keep that value low. Here we’re using low-pass filters to curtail high frequencies (cutoffs are 3 kHz and upwards) in some of the verse section synths and pianos. This creates more space for the vocals.
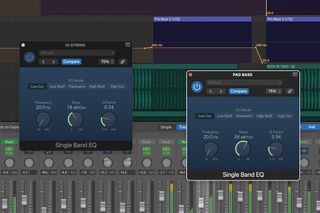
Meanwhile, for high-pass we’re using a couple of high-pass filters on the intro to the track. One starts at 3.5 kHz stepping down to 1.1 kHz and is filtering the string sound to make it really thin. The other is initially set to 285 Hz and is filtering the bass pad part, helping us introduce the bass pad gradually.
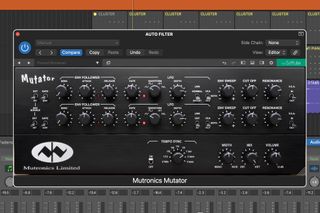
It may not be your first choice mixing tool, but the autofilter offers another filter-based flavour and we have one particular effect that works very well in a mix context either as an insert or send effect. Based on a classic Mutator effect this stereo panning filter works so that the filter cutoff rises on one side as it falls on the other side.
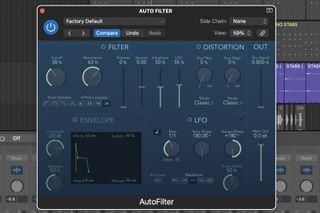
There are various ways to achieve this and if you truly want that classic smooth vibe, grabbing Softube’s excellent Mutator emulation would be the simplest. However, with an LFO-controlled stereo filter plugin, as long as you can set a 180 degree stereo phase offset for the LFO, as we have done here, you should be good to go.
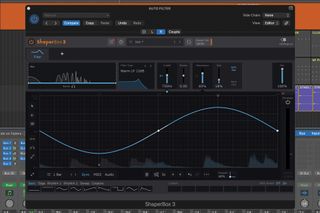
Another approach is to use a flexible filter in a dual mono configuration. Here we’re using the Filter module in Cableguys ShaperBox 3 and with the LFO offset by 180 degrees on one side we’ve created the same effect. Finally, whichever plugin you use, set the timing to taste. Half bar or one bar are good starting points.
Classic filters
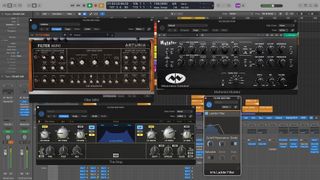
Audio resonant filter design has an interesting history, associated with some big names. Tangentially, what’s interesting is that each of the popular designs does sound different and this is clear when you wind up the resonance and sweep the cut-off frequency.
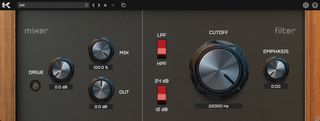
If creating a rising low-pass filter effect across major elements of the mix, say, we can try different filter types to get a sound that suits. How do they differ? The daddy is the Moog low-pass filter. The hardware uses a transistor ladder design and offers a smooth sound, ideal for big filter sections. Plugin examples include Kazrog Synth Warmer and Arturia Filter Mini. Sticking with smooth filter sounds, examples can be found in Korg’s Polysix, Sequential Circuits Prophet-5 and Mutronics’ Mutator.
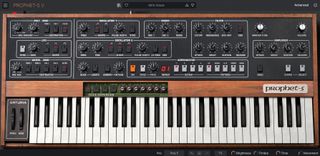
Softube’s Mutator plugin is a great option for a smooth filter rise. For edge, the classic Roland TB-303 diode ladder filter leads the way and you’ll find a diode option in Kilohearts Ladder Filter. Meanwhile the characterful Korg MS-20 serial high and low-pass filters are found in Arturia’s Filter MS-20 plugin or Cytomic’s The Drop.

Jon is a London based platinum award winning mixer, producer, composer and club remixer with a diverse CV that spans dance, pop, rock and music for media. He’s also a long term contributor to MusicRadar's music technology tutorials and reviews. Whether working alone or collaborating he usually handles final mixdowns, so you’ll also find MusicRadar peppered with his handy mixing tips.
Most Popular


