9 ways to get more space into your mix
Add air and clarity to your productions

There are many elements that come together in a great contemporary mix, and space is without doubt one of the most important.
What do we mean by 'space'? In the simplest terms, it's clearance between musical parts in terms of frequency ranges and dynamics, as established using EQ, panning, sidechain compression and other basic production processes.
Without sufficient clearance and space, kick drums and basses can all too easily collide, to the detriment of the low end; vocals and synths end up fighting for dominance; and the mix in general becomes flabby, unfocused and messy.
With this collection of tips, we'll give you nine proven starting points on which to base your mix-thinning workflow.
1. Don't go too low
Are you a skilled piano player? Good - keep practising! But be careful that you don’t automatically double the bass notes you play down the octave. Sometimes that extra bass weight can be great, but sometimes it unnecessarily adds mix clutter.
2. The power of EQ
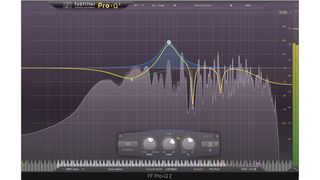
EQ is a crucial weapon in the fight against ‘mix bloat’, enabling you to make both ‘general’ and ‘surgical’ choices about which frequencies to enhance or cut.
It’s easy to fall into the trap of seeing each frequency band as a chance to add more power, and you’ll probably remember those early EQ mistakes where, suddenly, you’ve boosted every band to make everything louder.
Get the MusicRadar Newsletter
Want all the hottest music and gear news, reviews, deals, features and more, direct to your inbox? Sign up here.
As a mix takes shape, however, weeding out unneeded frequencies is essential. The best way to do it is to seek out frequency overlaps and scoop out those bands from ‘less important’ sounds. For example, are the lowest notes of your pad interfering with the bass?
The bassline is probably more important than those low pad notes, so use an EQ to lessen their volume. Equally, are higher notes fighting the vocal? If so, you know what to do.
3. Don't mix on heaphones
Panning can feel unrealistically extreme on headphones, and they don't always give the realistic information required to make good decisions as to what’s over-complicating a mix.
Monitor through speakers by default and switch to headphones only for 'zooming in' on detail and stereo specifics.
4. Build mix space
Fire up an empty project and the mix fader for the first instrument or audio track will be set to 0dB by default. Add a part to this track, then set up another for accompaniment and you may well find that your output channel is already overloading from the weight of both sounds playing together.
Get into the habit of adding a Gain control on each fader, to attenuate the volume of each channel. Or turn the volume of the first track down by 6-8dB before you even play a note. To match its volume, you’ll find yourself doing the same to all subsequent tracks, preparing for an easier mix later.
5. Panning for gold
Tweak auto-panners to have sounds jump from right to left and back again, missing out the middle ground. Even sounds that momentarily pass through the middle can add unneeded ‘central mix’ distraction.
6. Focus on the middle ground
Most sounds sourced from software instruments will be panned centrally, with an even spread of content assigned to the two speakers. If you’re trying to focus the listener to mix elements that are supposed to be centrally placed, adding more instruments to this middle ground can often make things difficult. The pan dial is there for a reason and offers an immediate opportunity to move things to the sides, getting them out of the way.
Try to think of sounds in your mixes in pairs - particularly if you’ve got two pad-like harmonic elements, or twin high percussion lines - panning one to the right and the other to the left.
7. Use sidechain compression
If your track features multiple instruments around the same frequency range, the listener can find it difficult to tell what you want them to hear at any particular point. If this happens and volume balancing doesn’t fix the problem, it can help to set up a compressor on ‘the less important’ track and use the first part as a trigger to duck it a little.
This technique can be used across the frequency range, not just on bass sounds. Use your vocal to sidechain compress your pads, or one top-end percussion element to duck another, carving out extra clarity.
8. Lowering inflation
Don't be in any hurry to add an ‘inflating’ chain of plugins to your output channel. If you’re looking for mix space, you can kill any hope of that - easily - right here. Wait until the mix is done!
9. Use high-pass filters on the mix
If you’re setting up a chain of effects on your output channel to control or maximise the final level, including a compressor, be aware that low frequency content and compression don’t always make the best of friends.
Kick drums and punchy basslines can cause mix bus compressors to duck wildly, sucking energy out of higher frequency content. To combat this, place an EQ at the top of your output chain and roll out frequencies below 50Hz or so with a high-pass filter set to a 6dB or 12dB slope. The mix could well sound less cluttered and more punchy as a result.
Future Music is the number one magazine for today's producers. Packed with technique and technology we'll help you make great new music. All-access artist interviews, in-depth gear reviews, essential production tutorials and much more. Every marvellous monthly edition features reliable reviews of the latest and greatest hardware and software technology and techniques, unparalleled advice, in-depth interviews, sensational free samples and so much more to improve the experience and outcome of your music-making.

"If I wasn't recording albums every month, multiple albums, and I wasn't playing on everyone's songs, I wouldn't need any of this”: Travis Barker reveals his production tricks and gear in a new studio tour

“My management and agent have always tried to cover my back on the road”: Neil Young just axed premium gig tickets following advice from The Cure’s Robert Smith


