8 tips to improve your mastering
An octet of bite-sized tips to help you get that perfect final master

Mastering might have a reputation as something of a dark art, but with today's amazing plugin effects putting pro-quality mastering EQ, dynamics and reverb processing in the hands of every computer-based producer, there's never been a better time to give it a go.
1. Nail your gain structure
Getting the gain structure right is absolutely essential when mastering. There's no point investing in great monitors, awesome plugins and an expensive audio interface if your audio gets distorted at the final hurdle.
Luckily, getting this right isn't rocket science and even novice mastering engineers should be able to get their heads around it. The key is to check the signal level at every input and output stage every time you add a plugin, then check the level going into the entire chain at the end.
Follow this simple process, add headroom all the way, and a great sounding master is well within your grasp.
2. Performing parallel compression
There are a few ways you can create parallel compression effects in your masters. The easiest is to find a plug-in that has a built-in mix control, so you can mix in a small amount of wet signal without any complex routing.
These plug-ins are few and far between though. A simple send/return routing is probably your best friend here. Start off as if you were setting up a mix reverb return.
Once you have this in place, simply place your compressor (or any other processor) on the return channel. Now send your full master to this return. You should then be able to mix in your compression effect to taste.
Get the MusicRadar Newsletter
Want all the hottest music and gear news, reviews, deals, features and more, direct to your inbox? Sign up here.
3. Run your project at the highest resolution possible
If your mix was recorded at 24-bit, stay at that resolution until the master is completed. This gives you more headroom and ensures greater clarity throughout the process.
4. Cascading compressors
'Cascading compressors' is just a fancy phrase to describe chaining more than one compressor. Place a compressor at the start of the mastering chain, apply EQ, enhancement and any other processes you like, then add another compressor.
The second compressor not only shares the load but can go some way to controlling any wayward transients introduced by the other effects.
Using different flavours and types of EQ will also add contrast to the final sound. You can inject different tones and reduce dynamic range more efficiently.
5. Don't over-process the mix
Compressing the hell out of a drum group or vocal chain may sound good moving towards the end of your mix but, unless it is intrinsic to the final sound, try to go easy.
6. Use reverb to open the soundstage
Numerous plug-ins promise to open up the stereo image in a master without colouring the sound, but the results are often disappointing.
Using reverb instead might sound a little strange but it's actually a tried and tested mastering technique that can work well in the right scenario.
Choose the best reverb you can lay your hands on - iZotope's Ozone has a great mastering grade reverb included and is the perfect place to start.
The choice of algorithm and room size really depend on the program material, but a good rule of thumb is to start small and increase the intensity until you hit the sweet spot.
7. Don't use too many plugins or over-process your master
Don't make the mistake of piling on plugins that aren't really required, just because you think you should - not every mix needs master compression, for example.
And if you get even the vaguest impression that your master sounds over-processed when you listen back to it the next day, you're probably right and should return to the project to dial some or all effects back a bit - or a lot!

8. And finally... Dithering
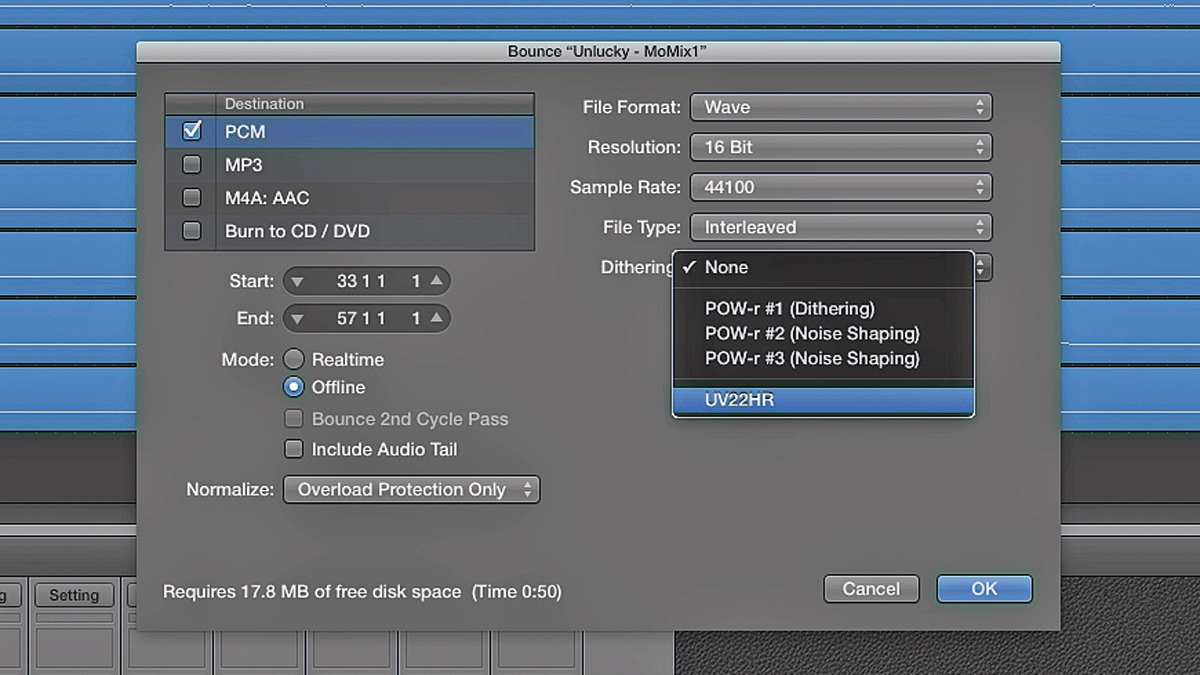
When your chain is built and you have hit that final brickwall limiter, you might think you are done - but there are a few things left to consider. Dithering and editing are important and, although they rarely affect the sound of the master you have worked so hard on, you should spend a little time to get this stage right.
Dithering is a process that is used when moving to a lower bit depth. For example, if your current mastering project is running at 24-bit and you want to end up at 16-bit, dithering is needed. This process uses some pretty smart algorithms, some of which inject tiny pieces of noise into the gaps created by the loss of resolution.
The end result is technically imperceptible and when a decent algorithm is used this is literally the case. The important thing here is that dithering is only ever performed once in the whole mastering process, preferably at the very end.
Future Music is the number one magazine for today's producers. Packed with technique and technology we'll help you make great new music. All-access artist interviews, in-depth gear reviews, essential production tutorials and much more. Every marvellous monthly edition features reliable reviews of the latest and greatest hardware and software technology and techniques, unparalleled advice, in-depth interviews, sensational free samples and so much more to improve the experience and outcome of your music-making.
“From a music production perspective, I really like a lot of what Equinox is capable of – it’s a shame it's priced for the post-production market”: iZotope Equinox review
"This is the amp that defined what electric guitar sounds like": Universal Audio releases its UAFX Woodrow '55 pedal as a plugin, putting an "American classic" in your DAW


