6 ways to get more out of Cubase 9
There's a lot of new stuff to get your head around in Steinberg's reinvigorated DAW. Get a head start with our tips
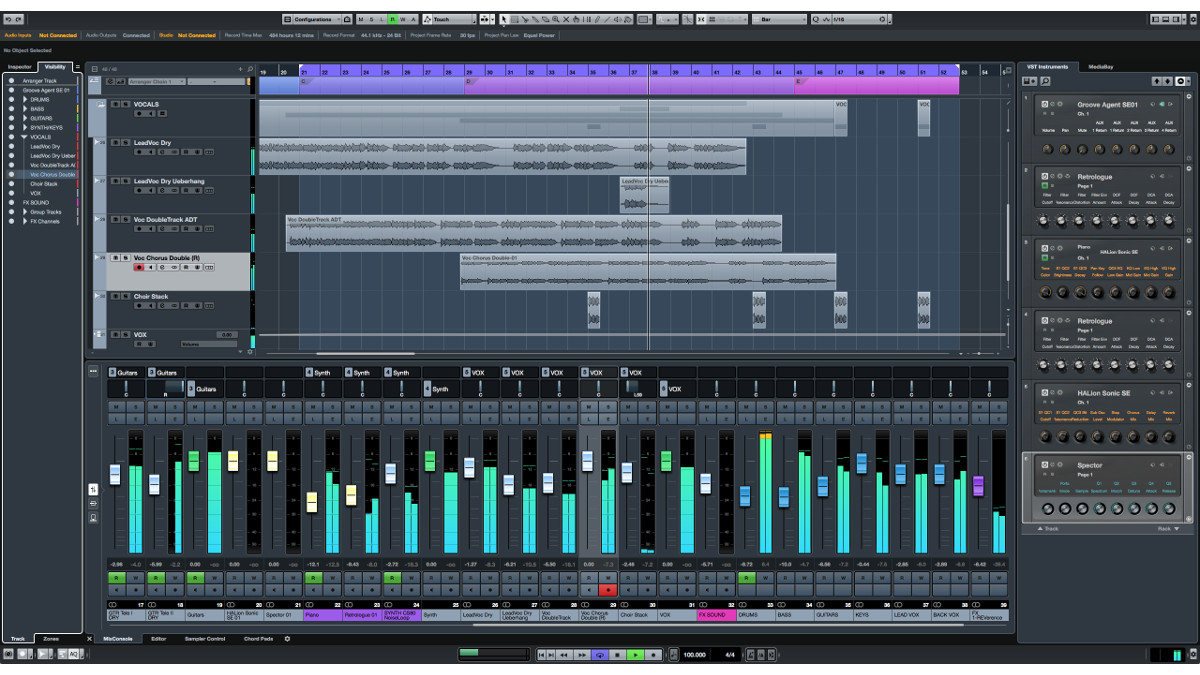
Annual updates are a given for some DAWs, and as such it can be difficult to get too revved up about yet another list of minor additions and bug fixes. However, Steinberg’s recent evolution of Cubase brings some surprising new features and functionality that are actually worth getting excited about.
With these six tips, we hope to not only put some of Cubase 9's tastiest new treats in front of you for purely educational purposes, but also fire up your creativity and get you inspired to actually use them.
For a shedload of feature-specific Cubase 9 walkthroughs, grab the April edition of Computer Music.
1. Choose your view
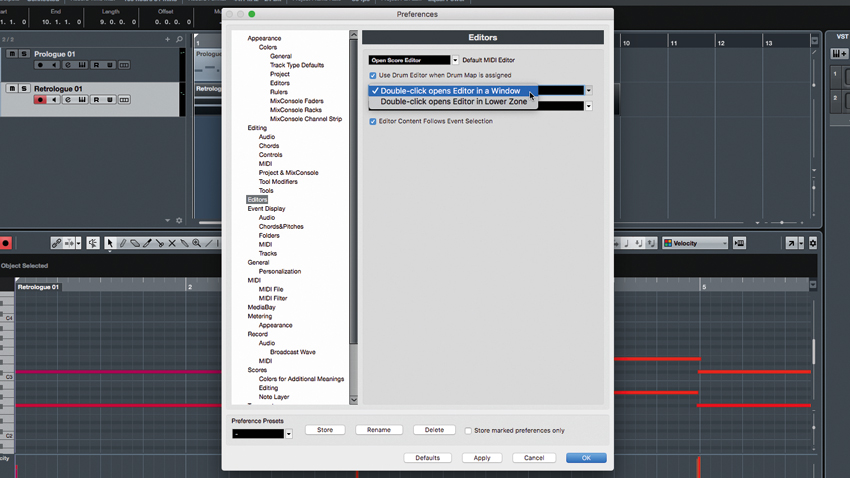
By default, double-clicking on any clip - MIDI or audio - in Cubase 9 results in that clip being displayed in the associated Editor in the Lower Zone. In previous versions, double-clicking a clip resulted in the associated Editor opening in a floating Window. If you prefer the older method, you can go to Preferences, select Editors, then choose Double-click opens Editor in a Window.
While in the Editors Preferences, you can also tell Cubase what your preferred default MIDI Editor should be by selecting from a dropdown menu. Open Key Editor is the factory default selection, but you can also choose Open Score Editor, Open List Editor, Open Drum Editor or Open In-Place Editor.
2. Sampler Track synthesis
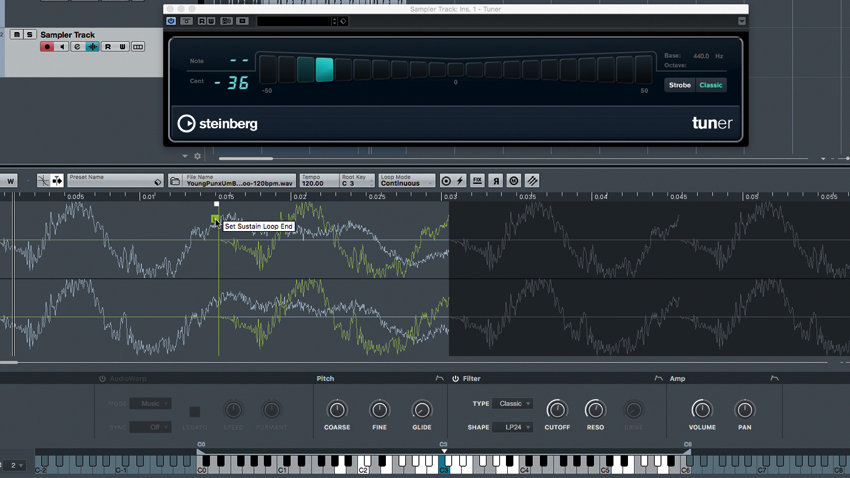
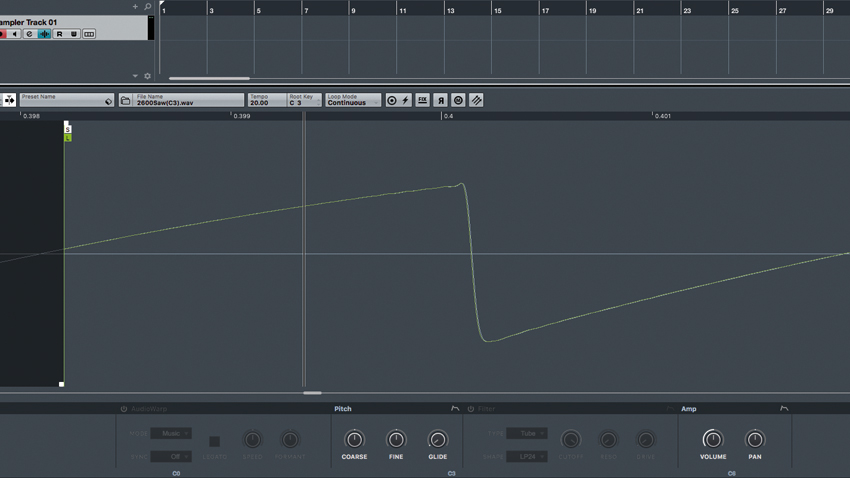
Cubase’s Sampler Track enables samples to be looped, and those loops to be played back in a number of ways, with user control over loop start and end points. Significantly, those loop points can be set to very, very short spans, giving us the ability to loop a single frequency cycle of a sample.
Using this technique, we can loop individual cycles of raw synthesis waveforms such as square, saw or triangle waves - or even load in waves from hardware or software synths. By treating them with the Sampler Track’s filter, amp and envelopes, you’ll transform the Sampler Track into a capable virtual analogue synthesiser.
Get the MusicRadar Newsletter
Want all the hottest music and gear news, reviews, deals, features and more, direct to your inbox? Sign up here.
3. Custom tool sets
One of Cubase 9’s most obvious changes is the built-in Transport at the bottom of the GUI, taking the place of the option floating Transport - which you can still call up if you prefer to use it.
Like the old floating Transport, the built-in Transport is fully customisable, allowing you to show or hide things like the Performance Meter, Click options/setup, Punch Points, and more. This customisation extends to the toolbars for the Lower Zone Editor windows as well.
4. Keeping score: sharps ’n’ flats
With the recent arrival of Dorico, Steinberg’s full-blown scoring software, it would be fair to expect that the it and Cubase will one day be able to integrate… at least in some way.
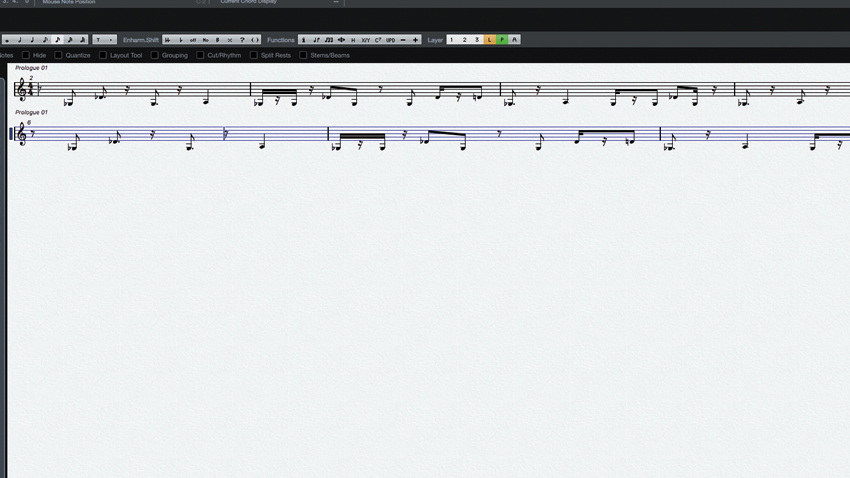
Could it be coincidence that Cubase’s own in-built score editor has seen a few tweaks for the version 9 update? Additions include the ability to display note values as both sharps and flats.
5. Zoom sync
Various windows in Cubase allow for independent scrolling and zoom during playback. For instance, you might keep your Project view zoomed out for a complete overview, while the Editor opened in the Lower Zone might be zoomed in close for a detailed view of audio waveforms or MIDI data.
The behaviour of these different views can be synchronised by clicking the Chain Link button in the upper left of the Editor, ensuring that one follows the other.
6. Sampler Track synthesis II
Because we can loop such short periods in the Sampler Control Editor, any sound can be played in a pitched, musical fashion using the Sampler Track. Even drum sounds can become tonal, pitched instruments, accomplished by bringing the loop points very close together.
You can open Cubase’s Tuner plugin in a Sampler Track Audio Insert and watch it as you adjust the loop points until you’re bang on pitch. You might have to adjust the root key or tweak the Pitch parameters in the Sampler Control Editor to nail it down.
Computer Music magazine is the world’s best selling publication dedicated solely to making great music with your Mac or PC computer. Each issue it brings its lucky readers the best in cutting-edge tutorials, need-to-know, expert software reviews and even all the tools you actually need to make great music today, courtesy of our legendary CM Plugin Suite.


