Songwriting basics: how to turn a 4-bar loop into a complete track
Sick of being stuck in the same old cycle? Here’s how to break out of it...
How often have you sat down at your studio desk to start a new track, come up with a great 4 or 8-bar loop and then… got completely stuck as to where to go next?
It’s easy to get lost in the groove, as your initial idea cycles round endlessly
It happens a lot more often than you’d think, with that initial burst of creativity lasting only for as long as it takes you to complete one short section of your song.
It’s easy to get so lost in the groove, as your initial idea cycles round endlessly, that your brain then flat-out refuses to entertain the concept that it might turn into anything else!
We thought we’d turn the spotlight on this common issue, hopefully giving you a few useful tools to get things moving again next time you find yourself casting around for ideas to finish your track.
In our previous tutorial, we looked at ideas for coming up with melodies over a particular set of chords, winding up with three or four different ideas that might potentially work for separate song sections.
To follow on, therefore, we’re going to demonstrate a few methods whereby these disparate melody ideas can be arranged into a full song, giving you the impetus you need to actually finish the track off properly.
So let’s dive in and see if we can come to some sort of arrangement!
Get the MusicRadar Newsletter
Want all the hottest music and gear news, reviews, deals, features and more, direct to your inbox? Sign up here.
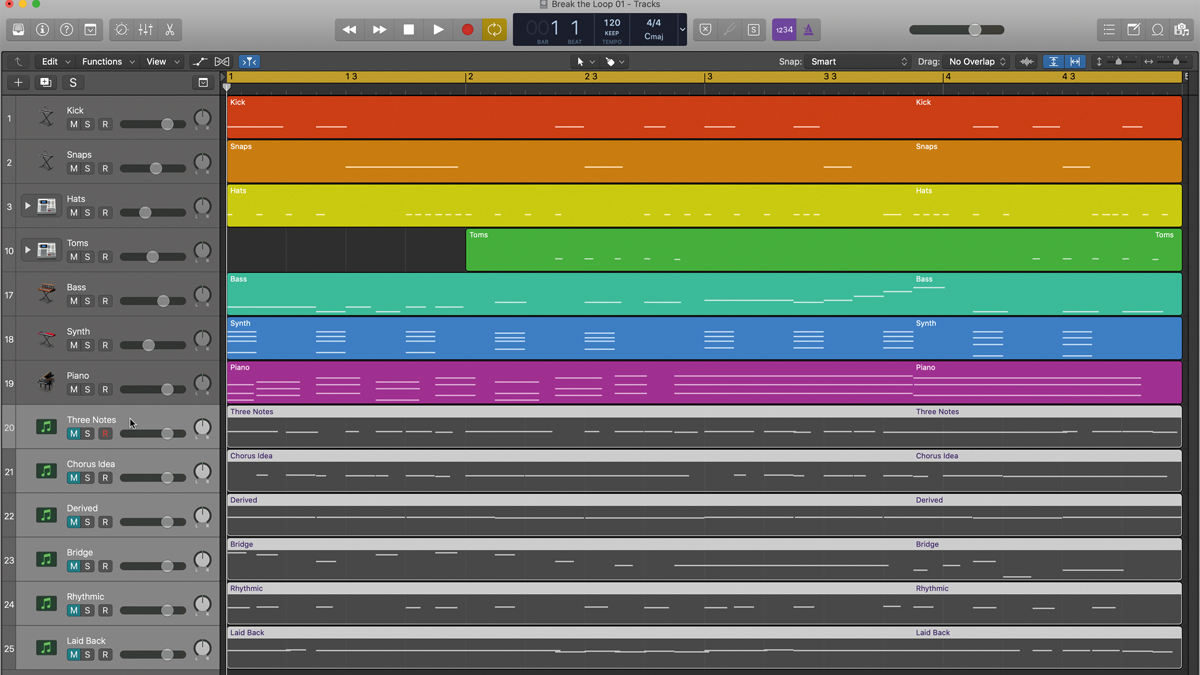
Step 1: At the end of last month’s tutorial, we finished up with a four-bar loop containing drums, bass, synth and piano, plus several different melody ideas that we picked out with a piano sound. Each melody has its own track at the bottom of the screen, and these are all muted for the time being, leaving just the backing track.
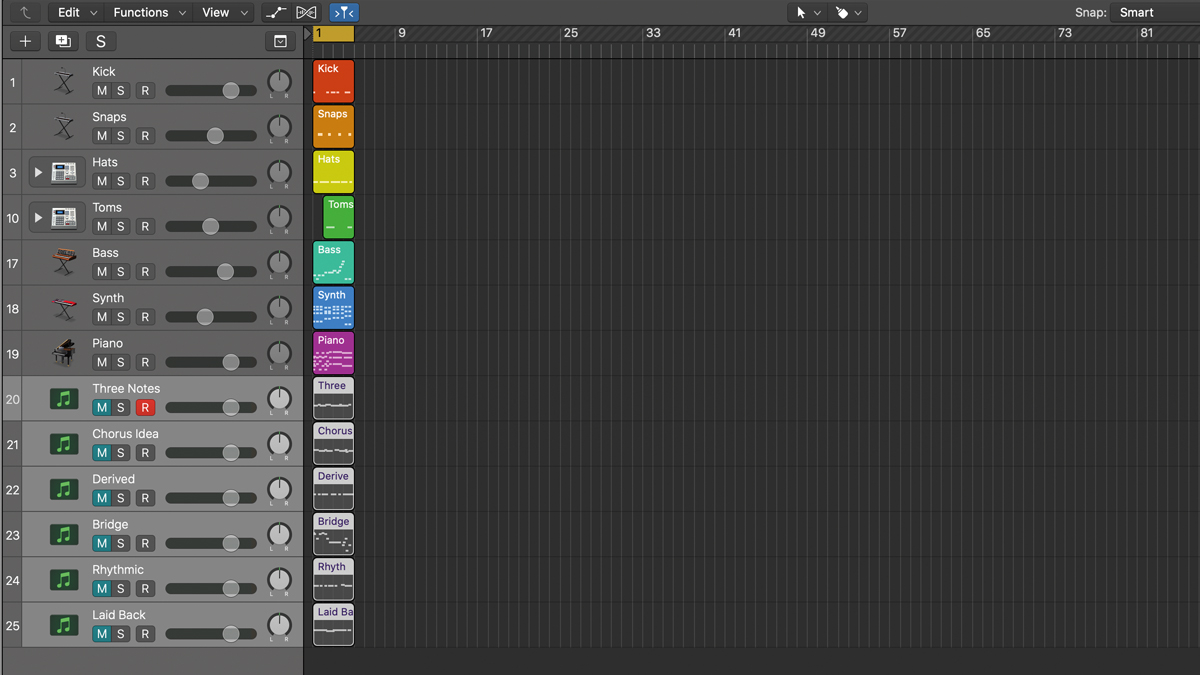
Step 2: It may sound obvious, but if you’ve been working on your looped section for a while, the chances are that it’s filling your screen, so the first thing to do is zoom out. This will refresh your perspective and let you look at your project as a whole, rather than just those few bars.
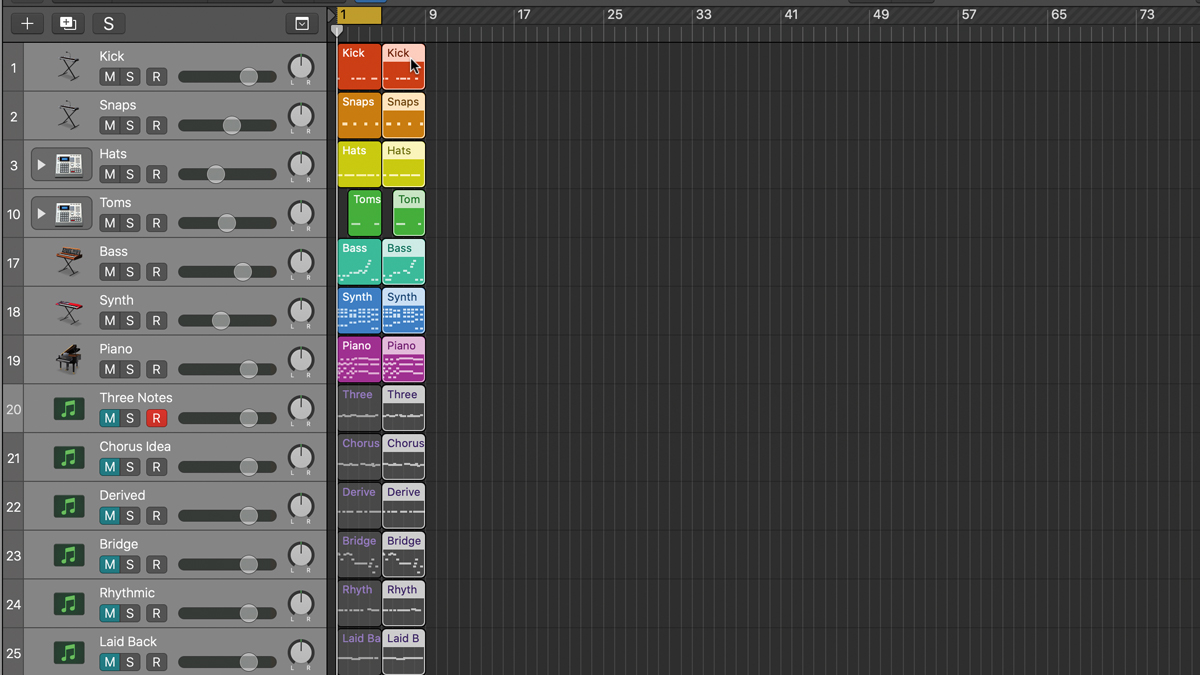
Step 3: Next step is to double the looped section, including the muted melody regions, out to eight bars in length. There are a few ways to achieve this, either with your DAW’s repeat/duplicate commands, by copying and pasting, or by Option (Alt)-dragging the parts into their new positions to copy them.
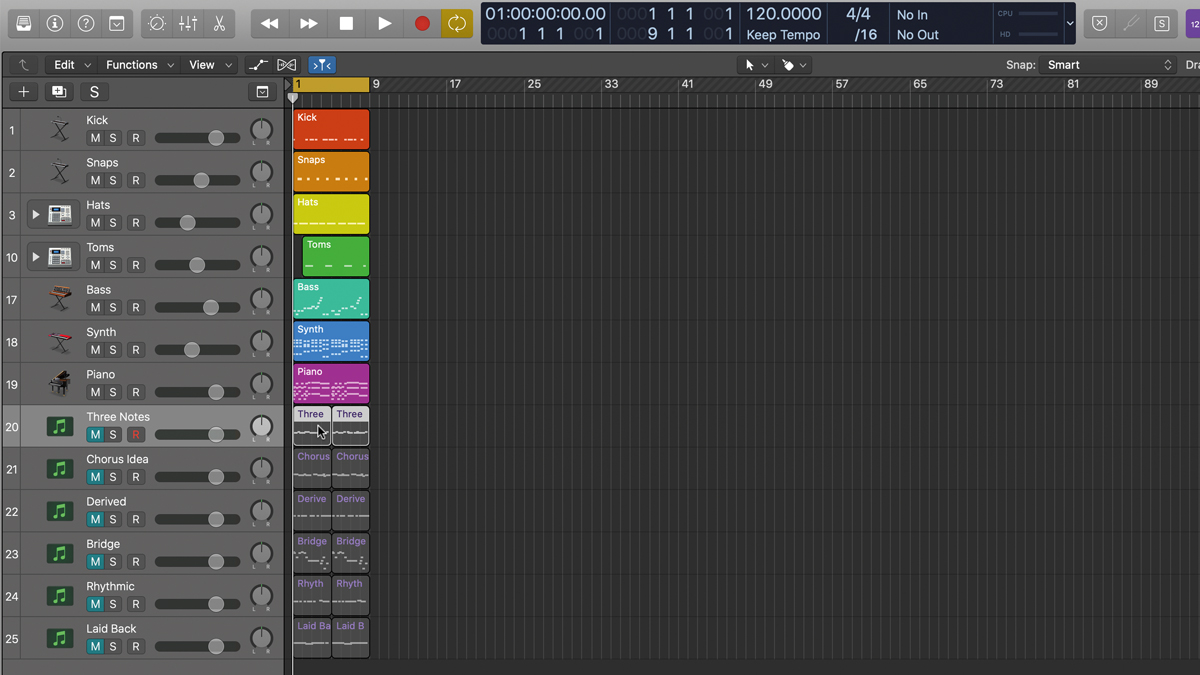
Step 4: Use your DAW’s join/glue tool to join the four-bar sections together into eight-bar chunks. This is because with your song fully zoomed out, eight-bar regions are much easier to work with and look less confusing than loads of tiny four-bar regions scattered about.
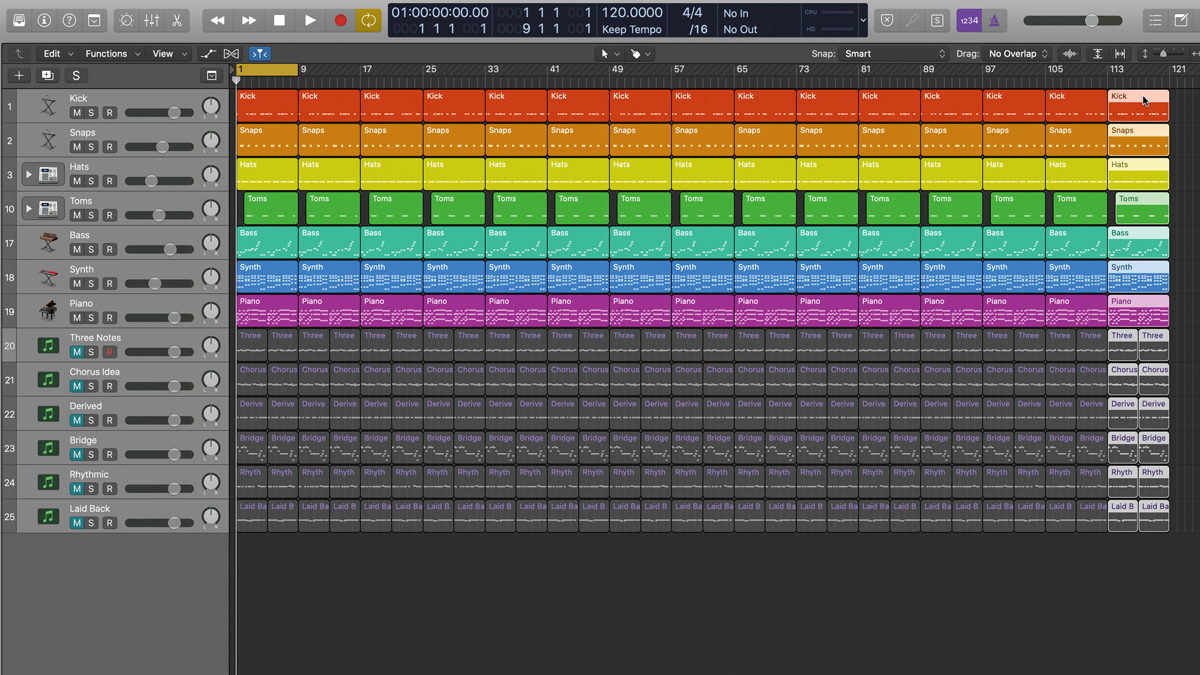
Step 5: Here, we’ve repeated the section out again to a length of four minutes – about average for the kind of pop song we’re looking to create. At our tempo of 120bpm, this creates a 120-bar sonic block of stone that you can chip away at like a sculptor, muting or deleting regions until your song takes on a bit more of a discernible shape.
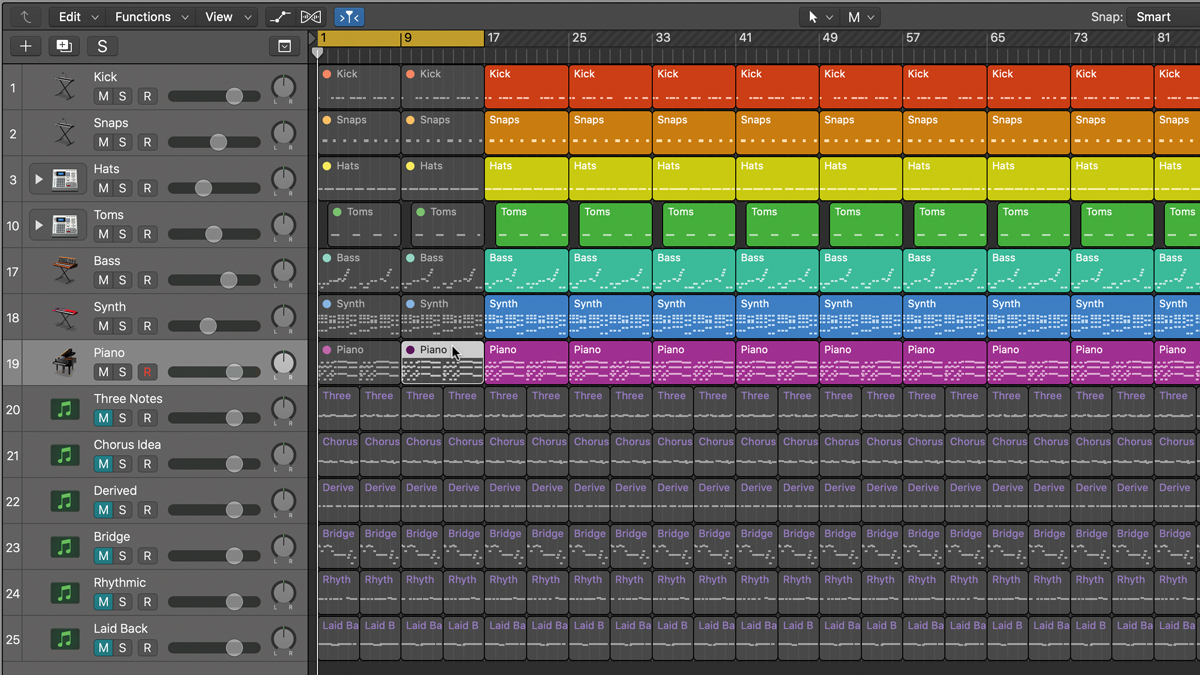
Step 6: Now we can start defining our song sections, where they’ll be placed and how long they’ll last for. Let’s say that we want an eight-bar intro section to kick off our song. Get your DAW’s mute tool ready - we’re going to be needing it! Use it to mute all the regions in the first 16 bars.
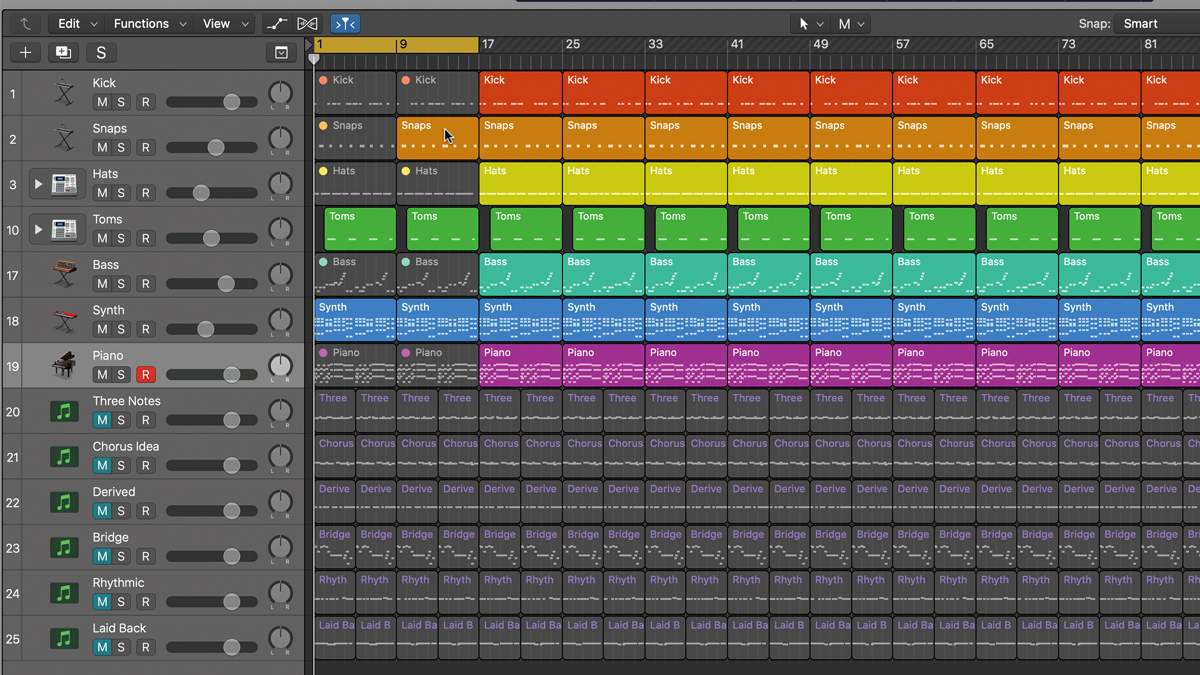
Step 7: Unmute parts one at a time with the first eight bars looping until you hit upon a part (or combination of parts) that sounds good on its own - we reckon the synth and the toms work well together to begin with. For the second eight bars, we add the kick and the fingersnaps to create a verse section.
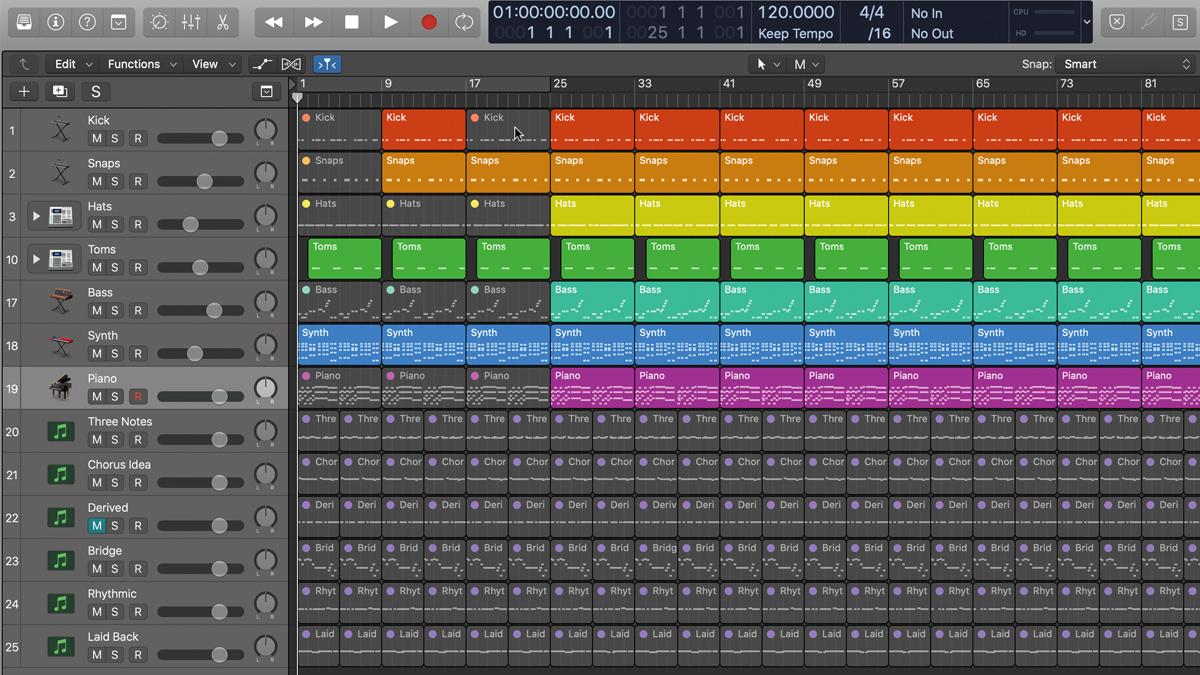
Step 8: The link section between the verse and chorus is known either as the bridge or the pre-chorus, depending on which part of the world you’re from. To give the chorus plenty of impact when it starts to come in, we’ll strip this part back to the synth, toms and snaps by removing the kick.
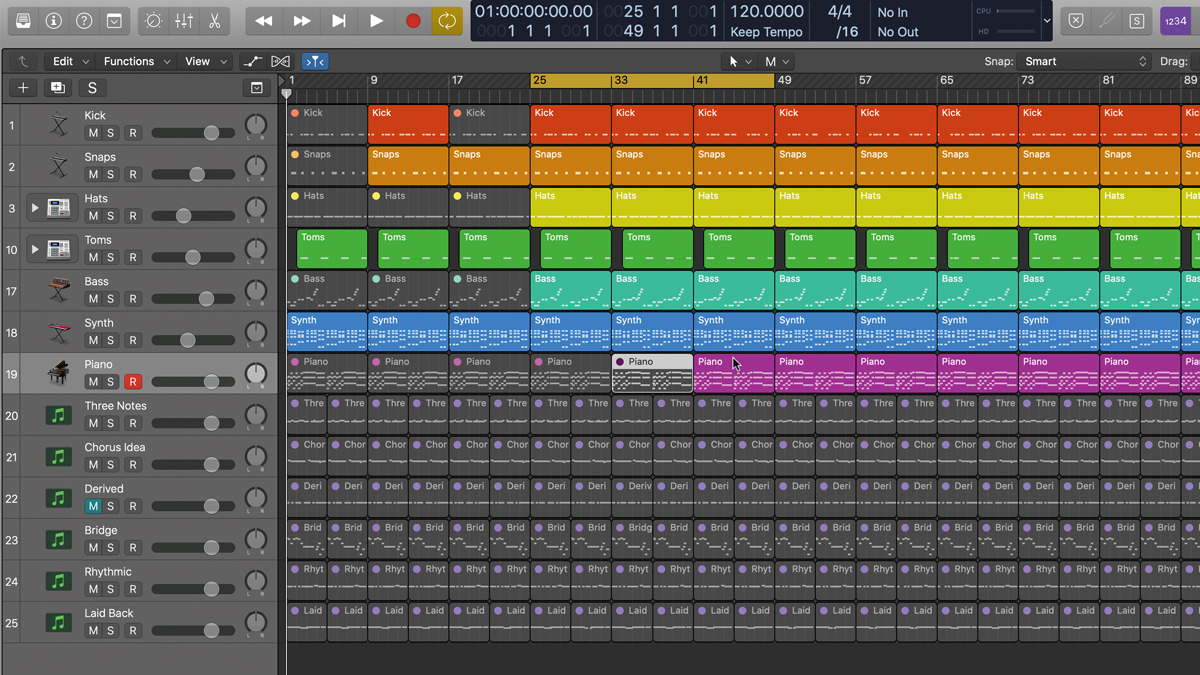
Step 9: For the chorus or (‘drop’) section, we’re going all-in with the kick, snare, hats, bass and synth, with the piano part introduced in the tag section that comes after the chorus. So we construct a 16-bar chorus section that includes all the elements we need, and add the piano part in for eight bars afterwards to make the tag.
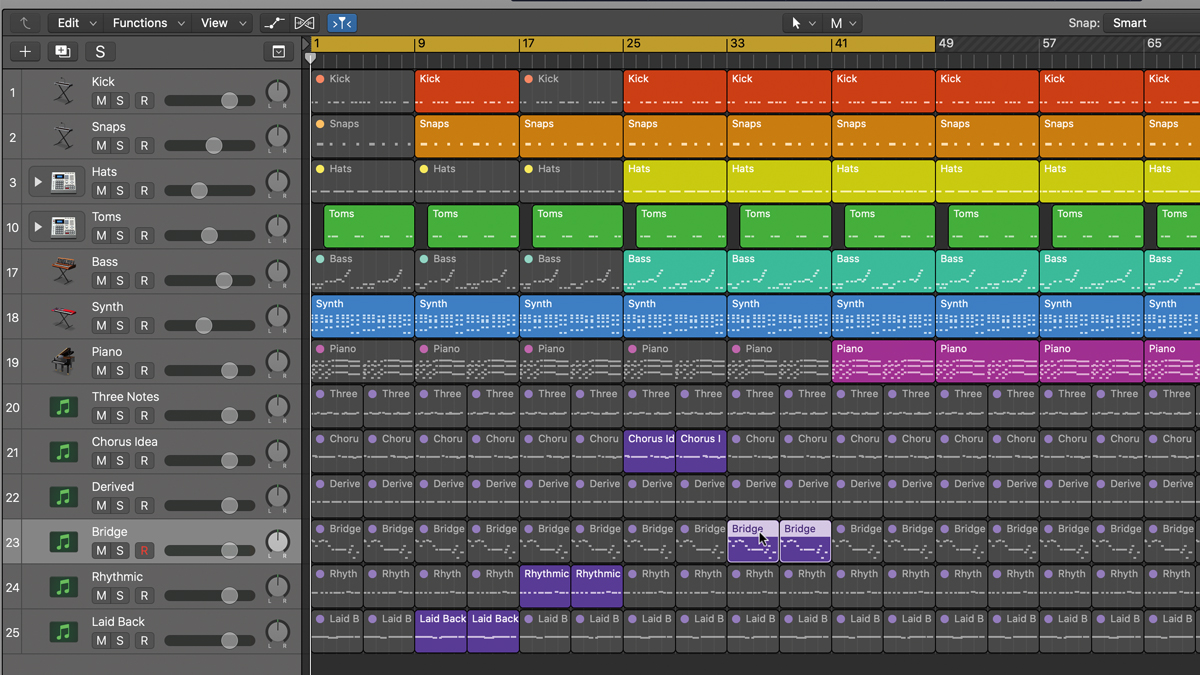
Step 10: Time to make some choices from our muted melody tracks. For each song section up to this point, audition melodies one at a time until you find one that suits that part of the song, then move onto the next section, building up until the end of the tag. You should end up with something that flows nicely throughout.
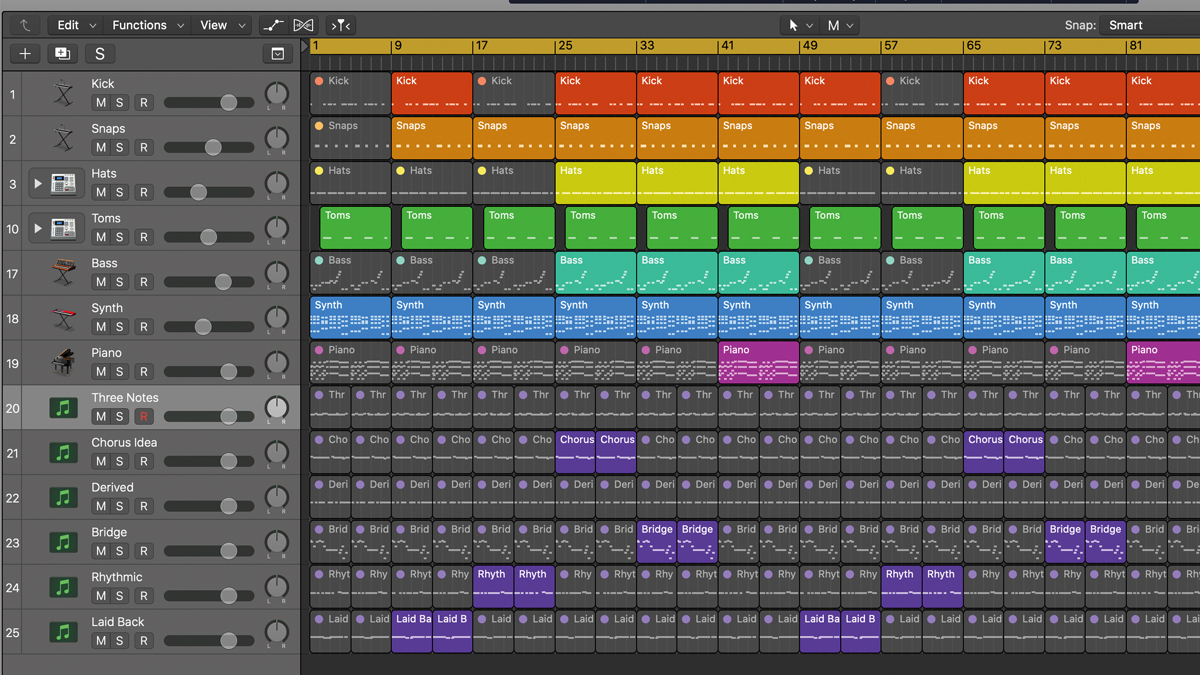
Step 11: After the tag, chip away more parts for a duplicate of the whole verse, bridge and chorus sections. Most songs usually have some sort of breakdown or change after chorus 2, known either as the middle-8 or bridge. We’ll make ours an eight-bar section of kick, fingersnaps and synth, with a so-far unused melody idea.
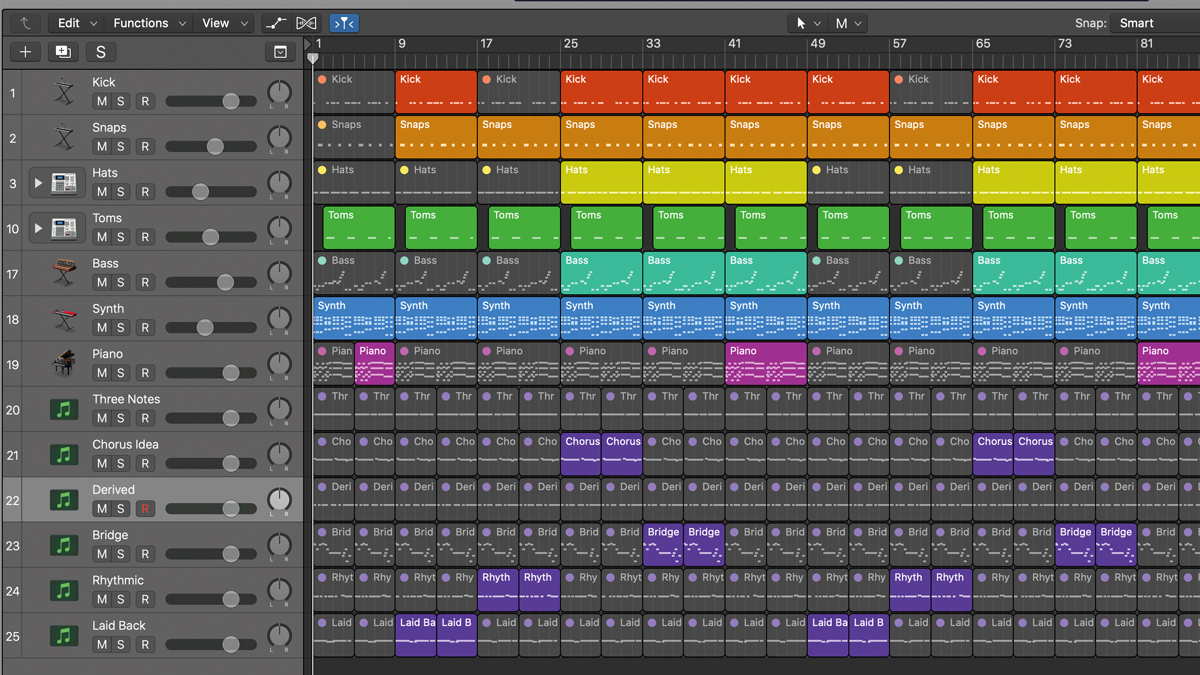
Step 12: Following our middle-8, we’ll use a couple of repeats of the 16-bar chorus part again to make an outro. We have a spare melody part left over that we’ve not used – one we derived from the upper notes of the synth chords last month – so we give this a new sound to make an extra synth part just for the outro…
Pro tips
Use an arrange track
Try making use of any nonlinear compositional tools your DAW might have. If you’re an Ableton Live user, for instance, you can fill a session with clips in Session view, trigger them in a sequence and record a live performance straight into Arrangement view - great for spontaneous arrangements that can be tweaked after the event.
Cubase and Logic Pro X both have special Arrangement tracks to swap sections around and experiment with, while Reason has the Blocks system. These all allow you to build song sections on the timeline, then specify a non-linear order in which they’re played back as a song sequence - such as intro, chorus, verse, verse, pre-chorus, chorus, intro, for instance. This way, you can try out virtual arrangements, without any copying, pasting or shuffling around, before committing to a final version.
Fine tuning
Once you’ve emerged out of that eight-bar tunnel vision and got a more structured framework to build on, you can really focus in on the details of your arrangement by adding breakdowns, transitions, builds, drops and random one-bar drop-outs.
With your melody, go beyond the scale tones and chuck in a chromatic note - one that’s not in the scale -here and there. For variety, make the chords in the verse and chorus parts slightly different, or use a separate sound for each part. Make a breakdown. Swap whole sections around. Randomly remove some - or even all - of the drums in a section. Add a rap verse. The more you add to the arrangement, the more inspired you’ll be to finish it.
Once you’ve broken free of that eight-bar loop and have a screenful of song, the only limit now is your imagination. Go for it!
Computer Music magazine is the world’s best selling publication dedicated solely to making great music with your Mac or PC computer. Each issue it brings its lucky readers the best in cutting-edge tutorials, need-to-know, expert software reviews and even all the tools you actually need to make great music today, courtesy of our legendary CM Plugin Suite.
Who Wants To Live Forever? The composer still creating music from beyond the grave
“How daring to have a long intro before he’s even singing. It’s like psychedelic Mozart”: With The Rose Of Laura Nyro, Elton John and Brandi Carlile are paying tribute to both a 'forgotten' songwriter and the lost art of the long song intro


