20 bangin' drum and percussion production tips
The beat won't fail you now
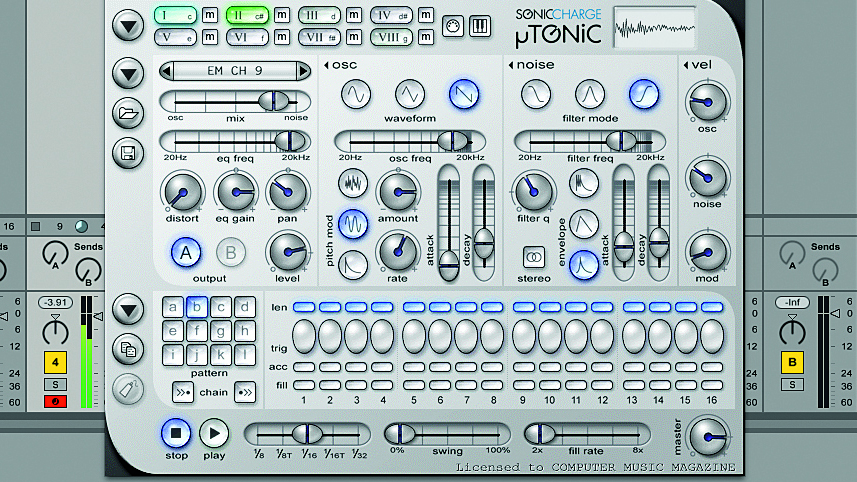
1. Synthesize your sounds
While there are endless drum samples out there, why not take total control and make your own using synths?
Any analogue or FM synth can be used to make amazing electronic percussion tones, but the likes of Sonic Charge Microtonic, Max For Live, Sugar Bytes’ DrumComputer and NI’s Maschine 2 drum synths feature focussed parameter sets designed with the creation of powerful drum sounds in mind. Every producer should own at least one dedicated drum synth.
2. Record live
While step sequencing or manual programming of drums is a route to accuracy, it’s much more fun - not to mention creatively more rewarding - to play them in live.
OK, so you’re not a drummer, and you don’t have any drum pads… No problem! Your MIDI keyboard can be used in lieu of pads, and by slowing the tempo of your track right down and recording in cycle/overdub mode, you can give yourself plenty of time and opportunity to hit the right notes.
3. Paranormal activity
Ghost notes are the quiet offbeat strokes and embellishments that many drummers play in between the main beats, primarily on the snare drum. They’re among the most important factors to consider in programming realistic acoustic drums, bringing life and syncopation to any groove.
As well as single ghost notes, drags (two or three very quick, light notes in succession) can emphasise the offbeat - just keep it tasteful and don’t go overboard.
4. Borrow the groove
Many DAWs can impose the timing of one audio or MIDI groove onto another, which can serve many creative purposes, and systems like Logic Pro’s Groove Track can match an entire project to the timing of one part. But more generally useful is being able to apply the timing and velocities of, say, a live drum loop to a programmed part, or vice-versa.
Get the MusicRadar Newsletter
Want all the hottest music and gear news, reviews, deals, features and more, direct to your inbox? Sign up here.
5. Shape up
A more creative alternative to transient-shaping plugins is to use the pitch and filter envelopes of a sampler to shape the bodies and tails of hits independently. The trick is to set the attack time to let as much of the transient through as you need before the pitch/filter adjustment kicks in. Or conversely, set the attack and sustain to zero and then adjust the decay time to process only the attack.
6. Find your length
Whether using a sampler or a synth for drum sounds, if you have the relevant mode active (it’ll be called Gate or similar), adjusting the lengths of MIDI notes - and thus the sounds triggered - can have a radical effect on a groove. Try using a MIDI modifying plugin such as Live’s Note Length to adjust notes in real time.
7. Explore effects
While, for many tracks, realism is often desired, people have been applying out-there effects to acoustic drums since time immemorial. Whether you’re after a dab of psychedelic phasing or something more overt, there’s no sound or character that can’t be had using DAW-bundled or third-party plugins.
If your processing is making the volume erratic, just throw a limiter onto the end of the chain.
8. Add feel with filters
To jazz up a lacking percussion part, try applying an LFO- or envelope-controlled filter (low-, high- or band-pass – try them all) to it. We’re not talking anything too drastic – just enough cutoff frequency modulation to impart some movement, variation and bite.
Play around with the LFO waveshape and depth, being sensitive to the timing and feel of the part.
9. Create your own kits
The great thing about drum tracks is that – being essentially non-pitched – it’s easy to add to your regular kick, snare and hi-hat sounds with… well, anything! So, plug in a mic, grab some pots and pans from the kitchen, take to the streets with a field recorder and go nuts. With the right editing, processing and programming, you can create truly unique end results.
10. Rudimental
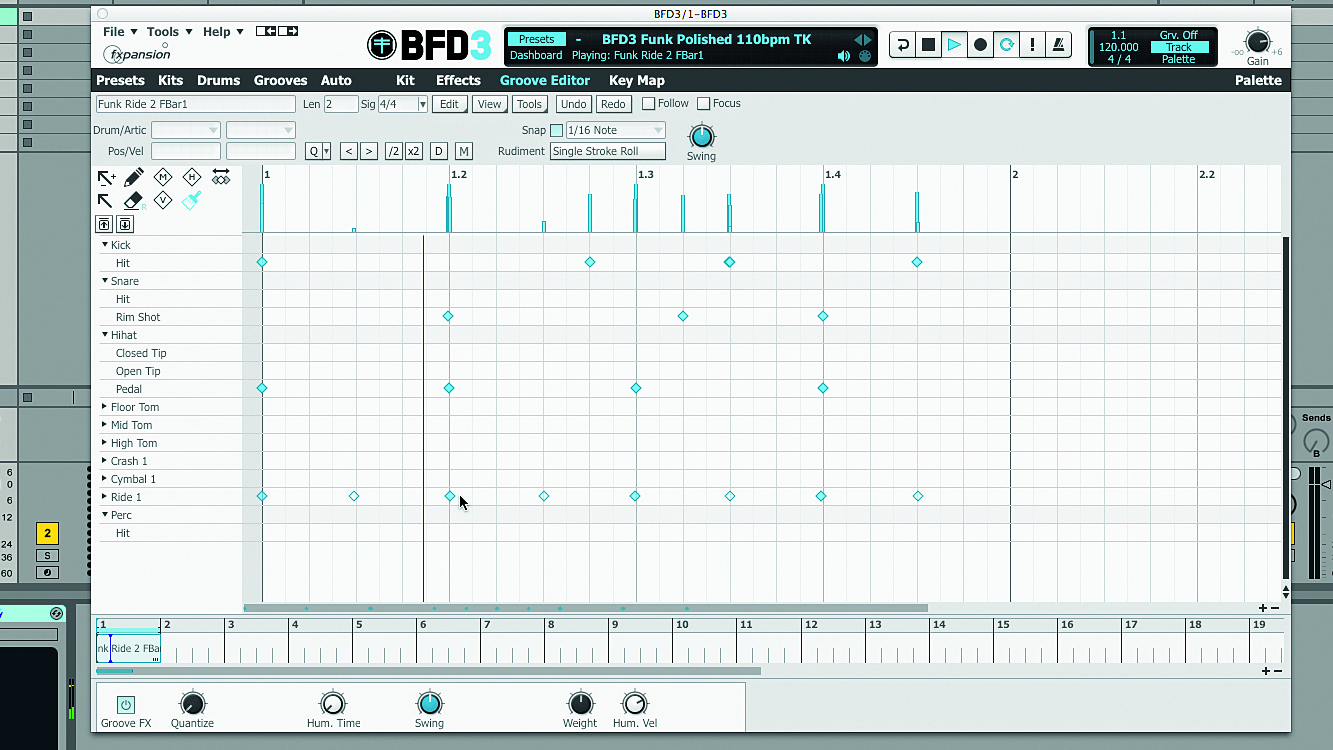
Drum rudiments are a long-established repertoire of 40 sticking/pedalling techniques that skilled drummers will practice and employ much like a pianist practices and employs scales. Here are some examples...
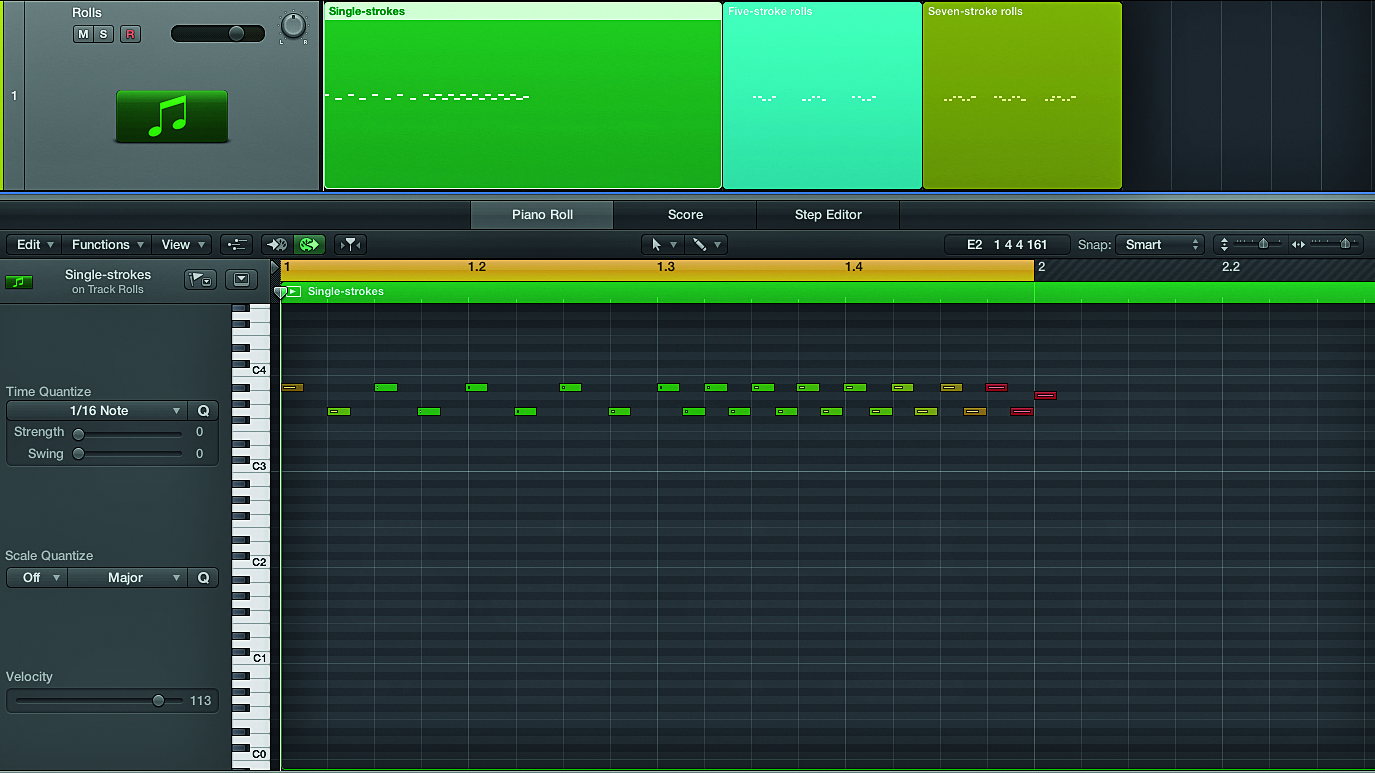
Step 1: Knowing rudiments isn’t essential to programming effective drum patterns, but it’s certainly important if you want yours to sound realistic. Perhaps the best known of rudiments is the drum roll, but there are actually several types of roll, as shown here.
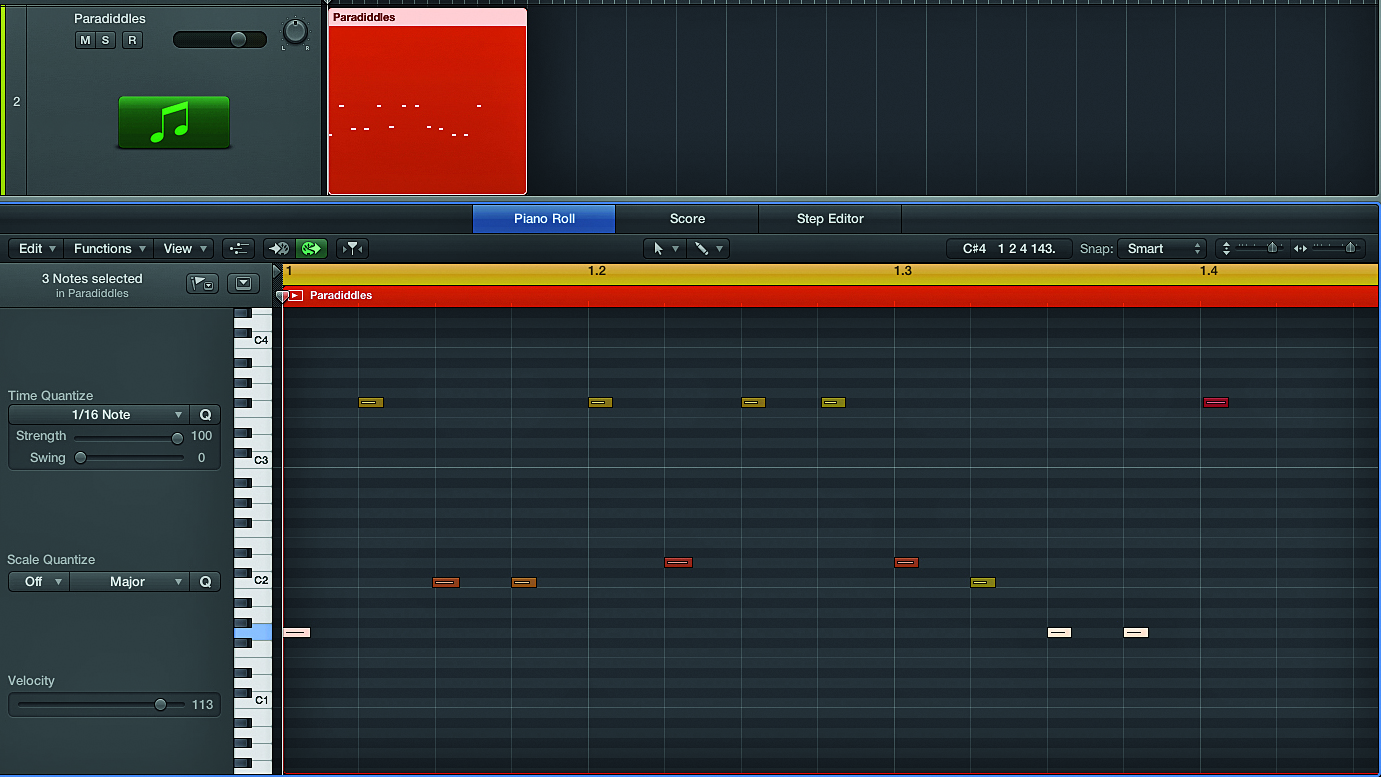
Step 2: Paradiddle patterns work particularly well for playing fills around the drum kit. A single paradiddle is LRLLRLRR, while a double paradiddle is LRLRLLRLRLRR. By stringing such patterns together in combinations, truly pyrotechnic fills and solos can be constructed.
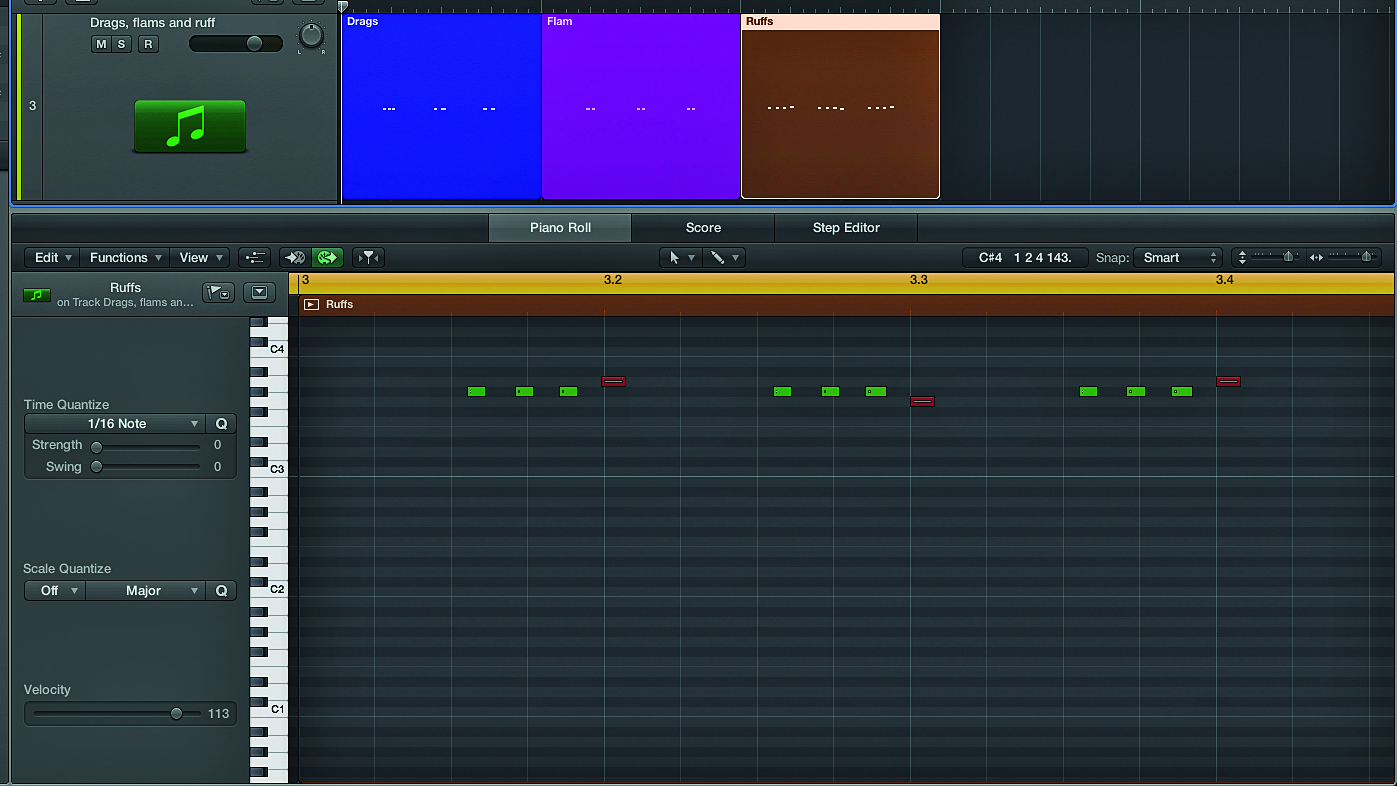
Step 3: Drags, flams and ruffs (the last a member of the roll family) are probably the most frequently played of the rudiments, used almost unconsciously by the skilled drummer. Learn the basic variations of these rudiments and your drum parts will thank you for it.
11. Push and pull
You can apply a laid-back feel or a sense of urgency to a drum groove by pushing or pulling the beat – particularly the backbeat snare.
By moving the snare hits on beats 2 and 4 forward in time, we can pull the beat back for a funky, lazy feel. By pushing them backward, we make the beat sound more frantic as the backbeat lands slightly earlier.
Stick to tiny distances from the quantise grid, mind – too much and your drum part will start to fall apart.
12. Only human
Most DAWs offer ‘random quantise’ functions in the shape of a Humanise parameter that can be applied to MIDI. This can be incredibly useful for bringing life and authenticity to programmed grooves – particularly those triggering virtual acoustic drum kits.
The biggest benefits are to parts where multiple drums/cymbals are struck at once, and on fast rolls. But don’t overdo it, or your part might sound more ropey than realistic.
13. Layer to dream
For big electronic drum sounds, layering complementary (or not!) elements of multiple sounds into one can deliver better results than a single synth or sample alone.
EQ and filtering will be your main tools for carving space between sounds, but using the attack of one sound to lead into the tail of another also works well.
14. Colossal velocity
Velocity is oft-overlooked in drum programming, yet it can make a huge difference, particularly with a sampler that supports velocity modulation of pitch, filter cutoff, etc. Even just lowering the velocities of less important notes can make beats more dynamic, human and interesting.
15. Think like a drummer
To create realistic virtual drum kit performances, you need to think like a drummer.
A drummer, possessing – at most – two hands and two feet, can only hit a certain combination of kit pieces at the same time. No matter how much you like the sound of a snare, two toms and a ride struck at the same time, such acrobatics are impossible in the real world.
Think about a real drum kit and even ‘air drum’ parts as you program them.
16. Play with time
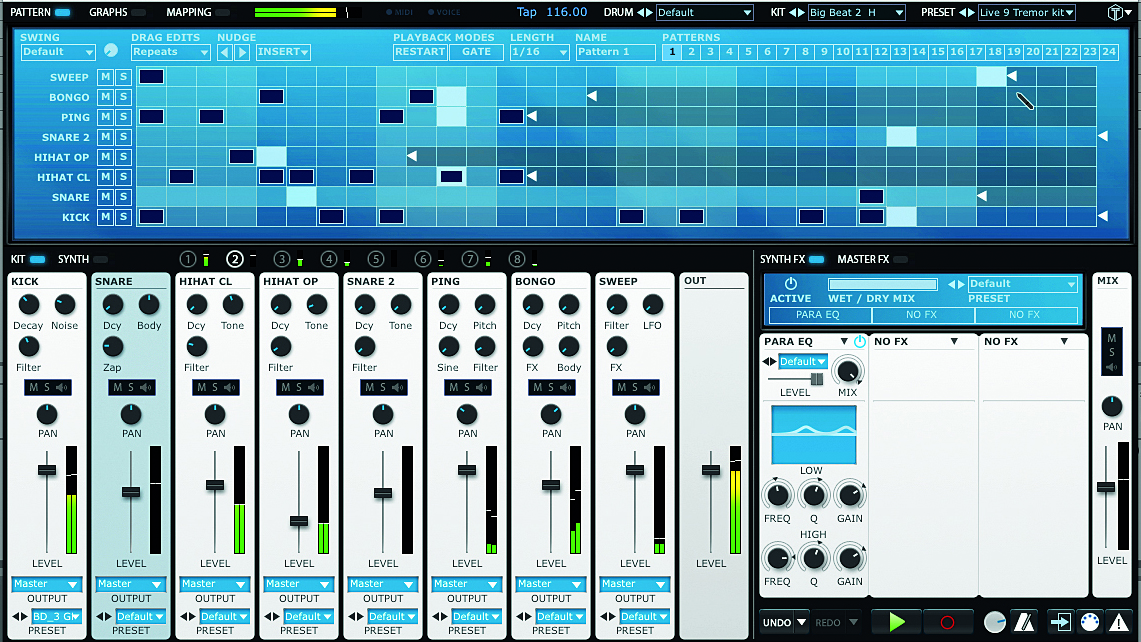
Layering rhythms of different lengths can throw up all sorts of interesting results. Have your hi-hat loop running over 13 16th-notes, say, while your kick drum runs the usual 16 and your snare hits on every 7th beat.
FXpansion’s classic Tremor drum machine is great for this, enabling you to set different lengths for each sequencer track.
17. Stay off grid
Quantise is such a life-saving function that many producers reach for that Q key without even thinking about it. But why not get a bit wonky with your beats and just leave those notes where they land upon recording?
If your drum part’s only one or two bars long anyway, the overall loop will keep the listener anchored on the downbeat (which you should probably always quantise).
18. One at a time
If your drum track is sounding cluttered, try thinning it out using the technique known as ‘linear drumming’. This just means removing hits from your part so that there’s only ever one playing at any time. The kit element most affected by this process will be the hi-hats or ride, since they normally play constantly on top of the kick and snare.
The result should be greater separation between elements and a generally cleaner, punchier sound.
19. Put the gun down
lf there’s one thing guaranteed to reveal your hastily programmed acoustic drum track for the sham that it is, it’s the machine gun effect. This is where all of the snare and/or hi-hat hits sound exactly the same due to either laziness on the part of the programmer or a lacking sound source.
Do everything you can to avoid it – many drum samplers do this automatically, but if yours doesn’t, get busy with velocity, filter cutoff and alternating ‘round robin’ samples.
20. Me and my shadow
Add a subtle layer of extra funk to your drum part by sitting it on top of a ‘groove shadow’.
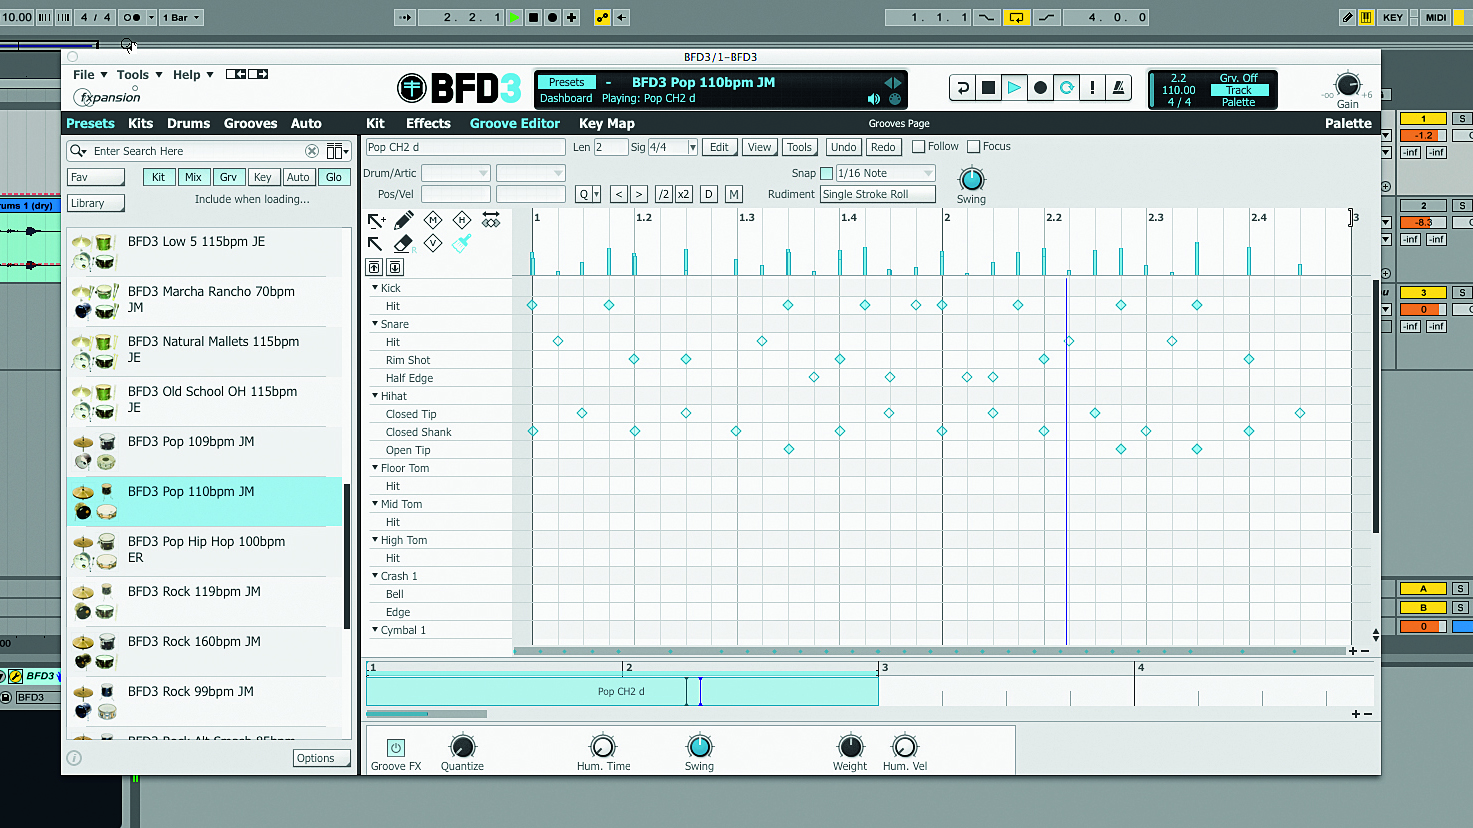
Step 1: A ‘groove shadow’ is simply the wet, effected channel from another drum part. Rhythmically, it can be the same as, similar to or totally disparate from the original loop. Here we have a dry drum loop to which we want to add some character.
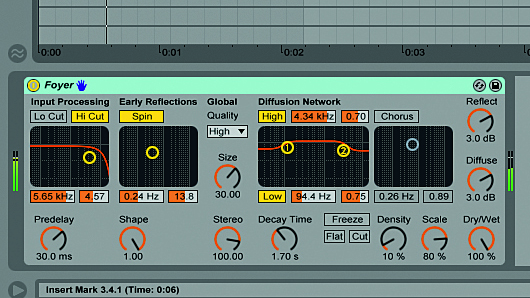
Step 2: We start by loading up another loop in our DAW and inserting a reverb plugin set to 100% wet. If you bounce this audio as its own track, you can start to build your own library of shadow loops for later usage, and you can more easily mess with the audio part.
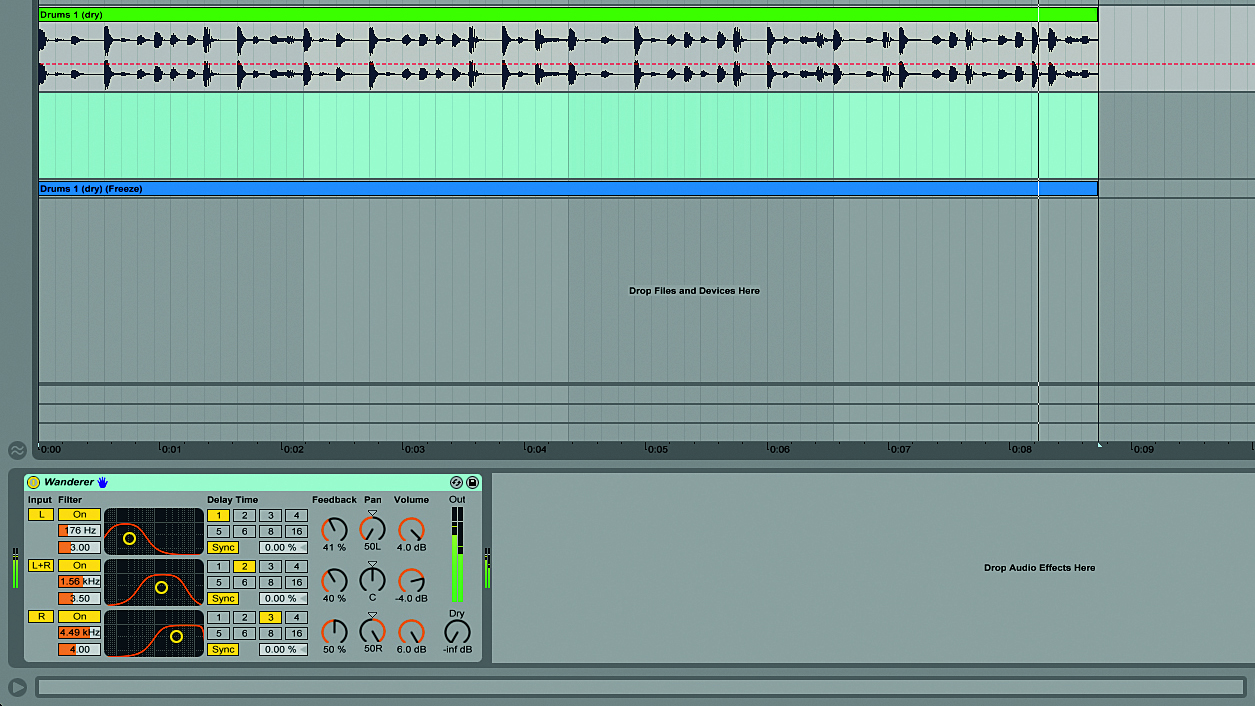
Step 3: By underlaying our loop with this reverb ‘shadow’, the groove takes on a whole new character. By processing the reverb further – a gate, perhaps? – we can tailor it to our needs. Try everything from reversing the shadow to replacing the reverb with a delay plugin.
Computer Music magazine is the world’s best selling publication dedicated solely to making great music with your Mac or PC computer. Each issue it brings its lucky readers the best in cutting-edge tutorials, need-to-know, expert software reviews and even all the tools you actually need to make great music today, courtesy of our legendary CM Plugin Suite.


