How to design a harmonic 10th synth bass sound
Sometimes you want a bass sound that not only occupies the bottom end, but provides some major harmony. We’ve got both for the price of 1!
When early synthesisers started to become an affordable prospect, it didn’t take long to work out that there was limited choice in the market – and they were all monophonic! Polyphonic synthesisers were still some way off, or exceptionally expensive to purchase, so it was left to the synthetic pioneers to create chords using more than one oscillator, using their mono-machines.
This was a charge firmly led by the classic Minimoog. Bedecked with three oscillators, it was possible to create a triad and play it up and down the keyboard. Just listen to Autobahn, by German pioneers Kraftwerk, for one of the first examples of this. But this is still a technique very much in use today; bands such as Hot Chip are well acquainted with the technique, with significant placement in some of their productions.
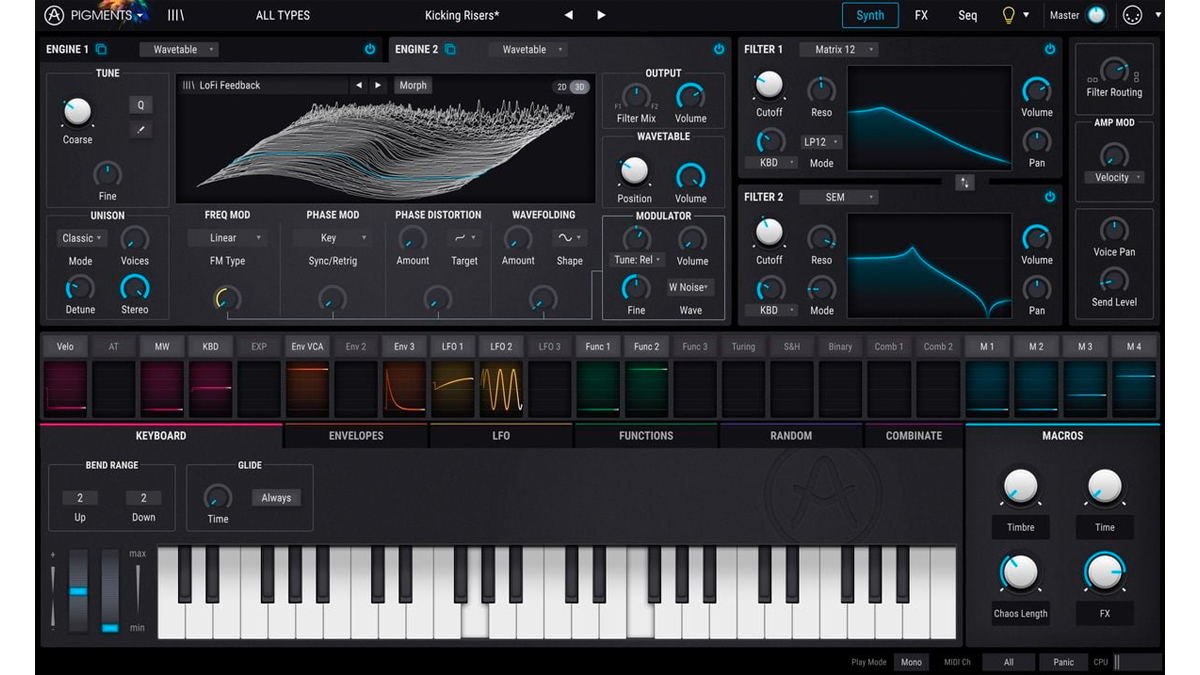
Best synth plugins 2023: Synth VSTs to suit all styles and budgets
Despite the fact that our ZebraCM plugin, free with every issue of Computer Music Magazine, only provides two oscillators, we can easily manufacture a sound which provides similar traits. Part of the reason for this success with only two oscillators, relies on the reproduction of the root and third of a chord, commanding the listener’s brain to fill in the rest of the harmonic content, to make it sound like a complete triad or chord. More with distortion.
We just need a synth with two oscillators and some overdrive. Luckily our u-he Zebra CM plugin fits the bill, but if you don't have it, you'll be able to follow along with almost any other soft synth.
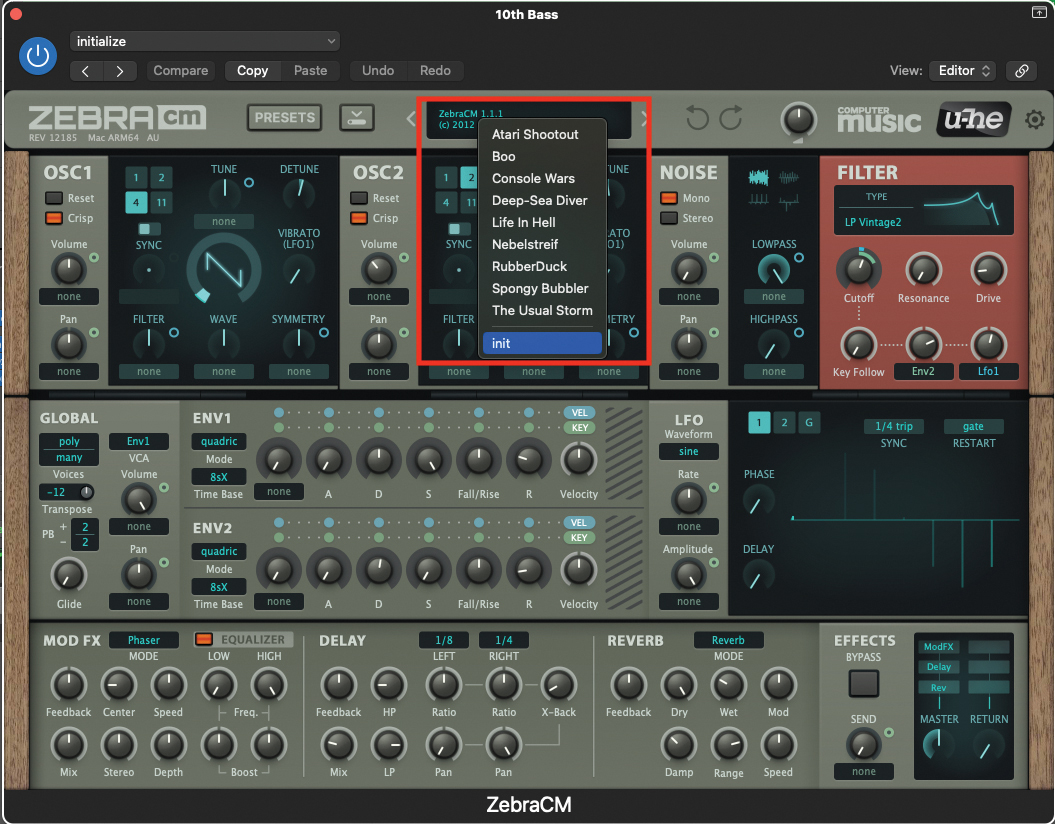
We’ll begin by initialising a patch on the ZebraCM. Open your DAW and load up the ZebraCM plugin. Open the plugin window, move to the central display at the top of the window and click to reveal the drop-down menu. Then select ‘init’ from the bottom, which will initialise the patch.
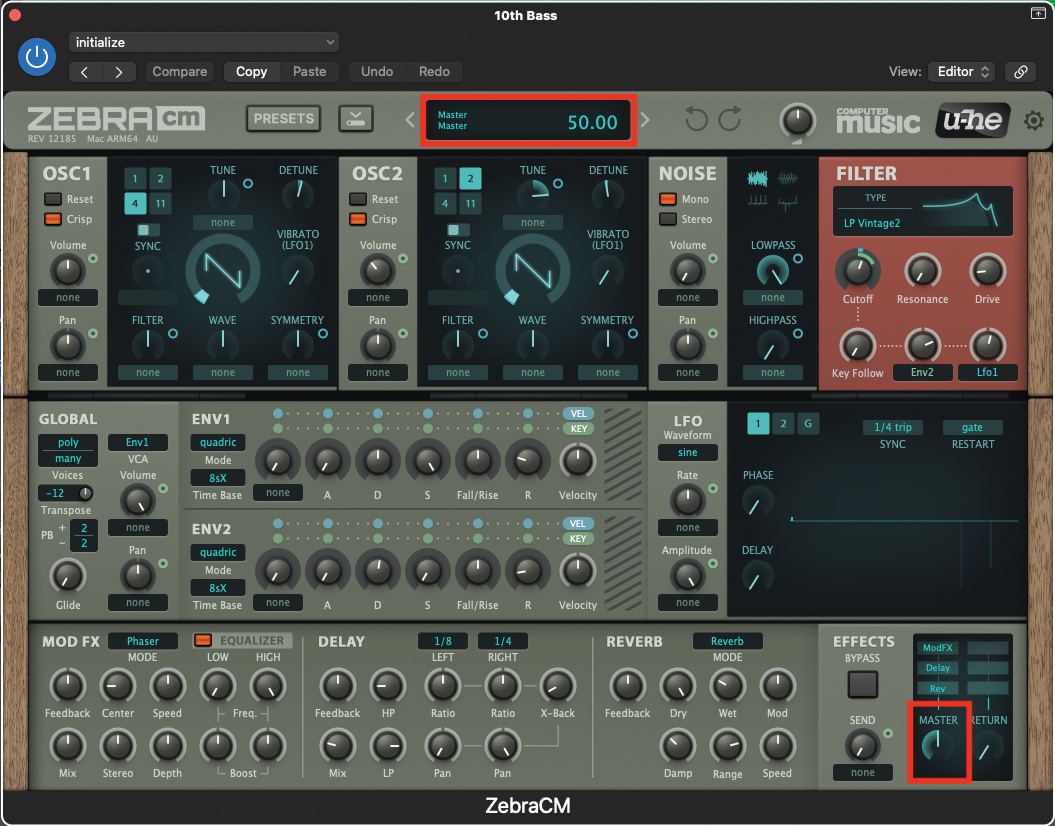
This patch is going to be pretty loud, so take a moment to reduce your master volume on the ZebraCM to a level of 50. A gentle reminder, that every time you tweak a pot or setting on the plugin, you will see an accurate value/numeric in the upper display. We will use this as a point of reference throughout the tutorial.
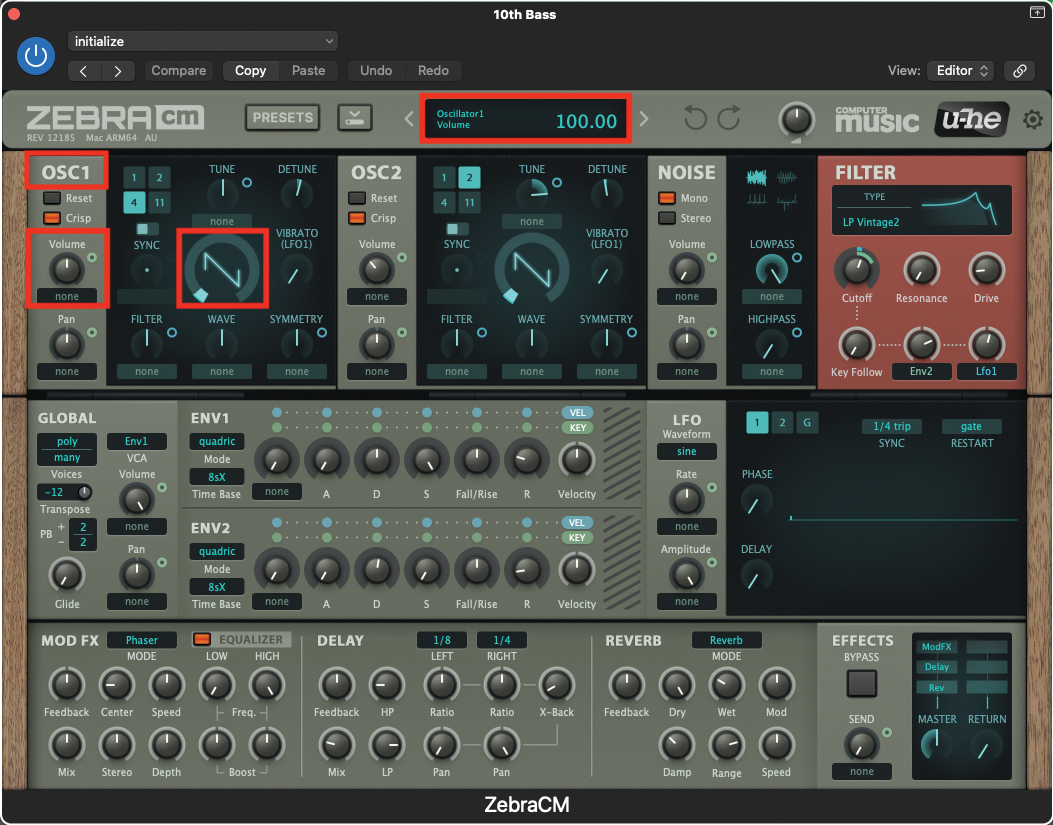
Now we can begin to sculpt our sound; move to the OSC1 section, where we’ll use the default setting of a sawtooth wave, indicated by a value of 1.00 in the upper display. The volume should be set to a default of 100, which is perfect for our requirements.
Want all the hottest music and gear news, reviews, deals, features and more, direct to your inbox? Sign up here.
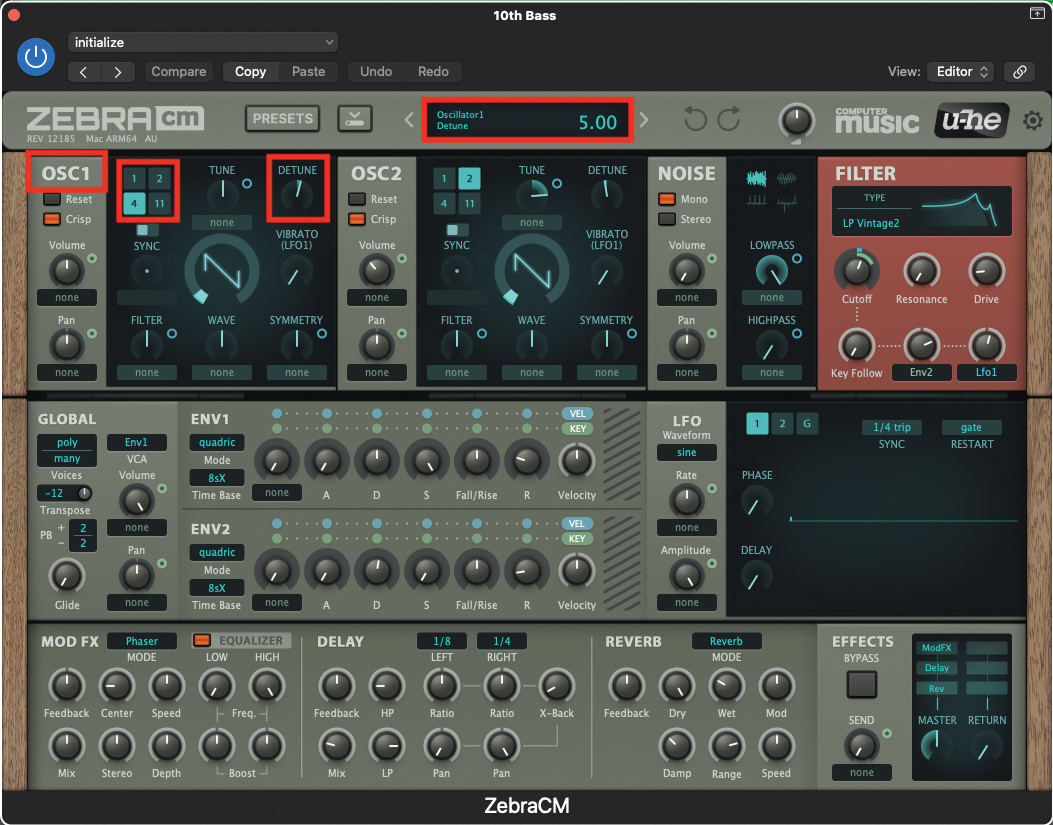
Staying within the OSC1 section, we’re going to thicken the texture of the oscillator by selecting an aliasing value of 4. Click on the numeric so that it’s highlighted in turquoise. We will also detune these waves, by adjusting the Detune pot to a value of 5.
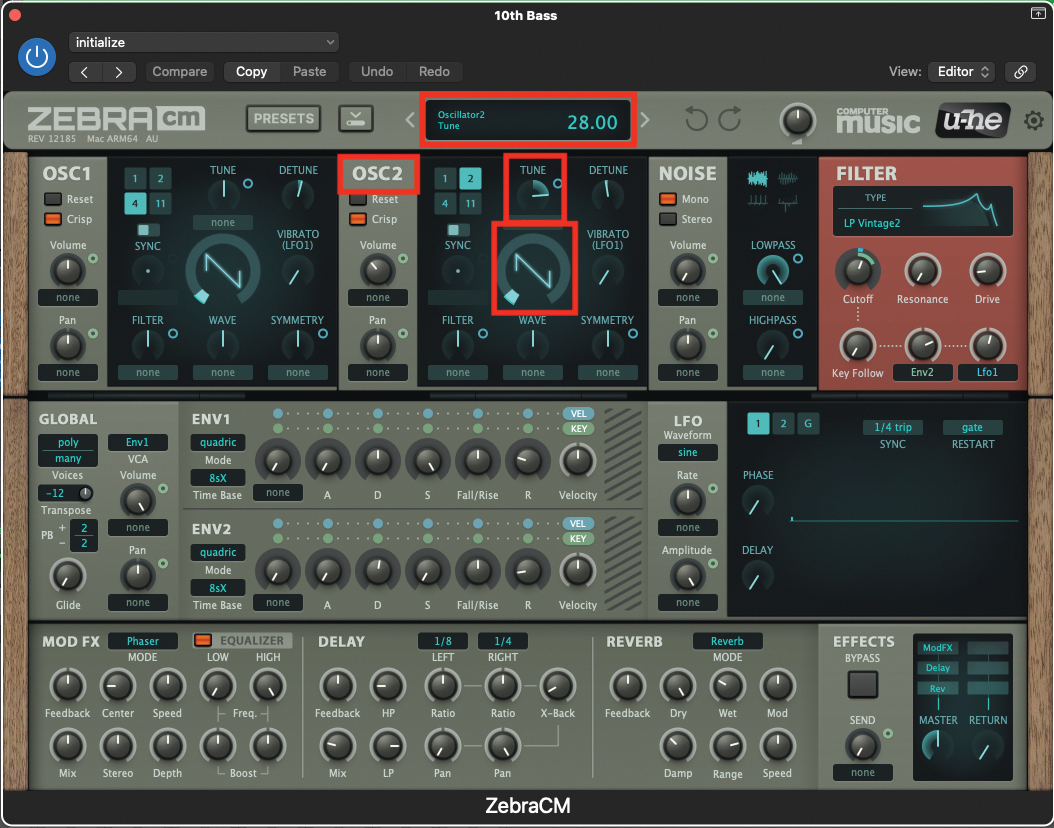
Now we can move along to OSC2; leave the waveform to its default of a sawtooth, but increase the volume to a value of only 73. We also need to adjust the tuning pot, so that it indicates a value of 28. This value relates to semitones, and places OSC2 a major 3rd, two octaves higher than OSC1.
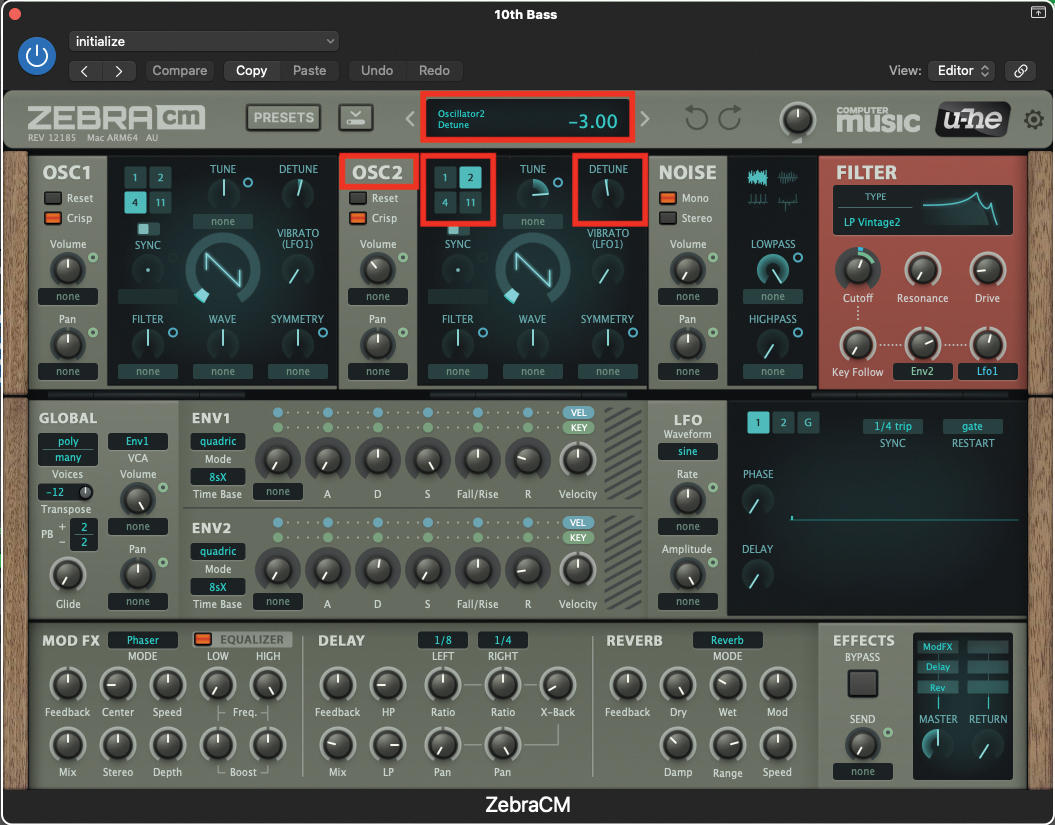
Keeping with OSC2, we can thicken the waveform texture by aliasing to the power of 2. Highlight this in turquoise, with a click. We’ll also apply a little detune here too, by changing the Detune pot to a value of -3. As we only have two aliased waveforms, we do not need to detune to extremes.
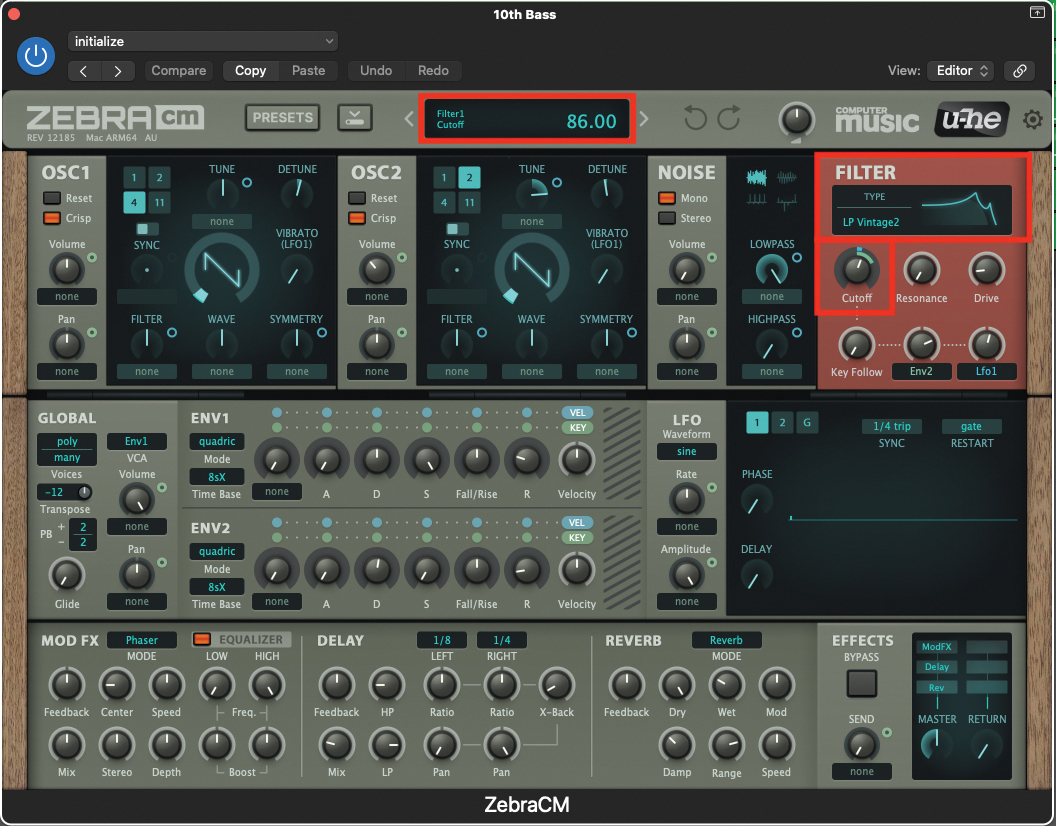
We can now move over to the filter section; click on the Filter display, to reveal the drop-down menu, and select LP Vintage2 from the lower part of the list. Once selected, set the Cutoff pot to a value of 86. The sound will now feel quite dull, at least for the moment.
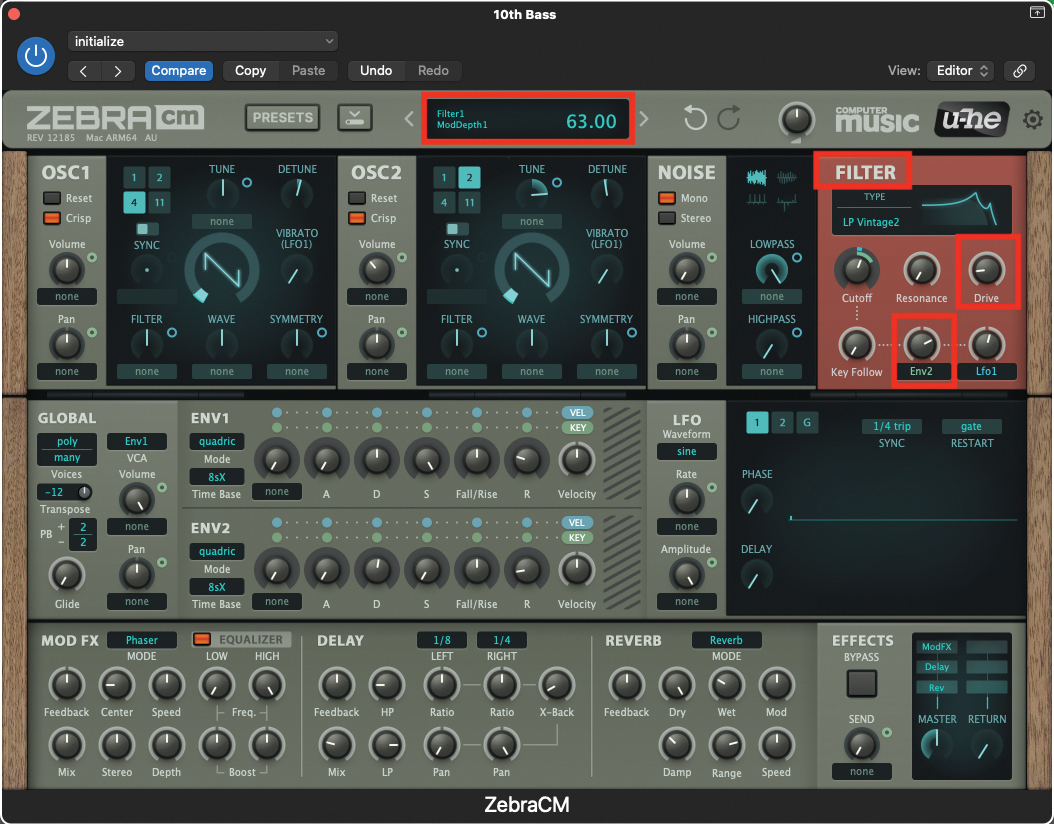
We want to induce some filter overdrive, to add character to our patch. Set the Drive pot to a value of 18. We also want to create some filter-shaped bite at the front of our sound, so increase the default-assigned ENV2 pot, to a value of 63.
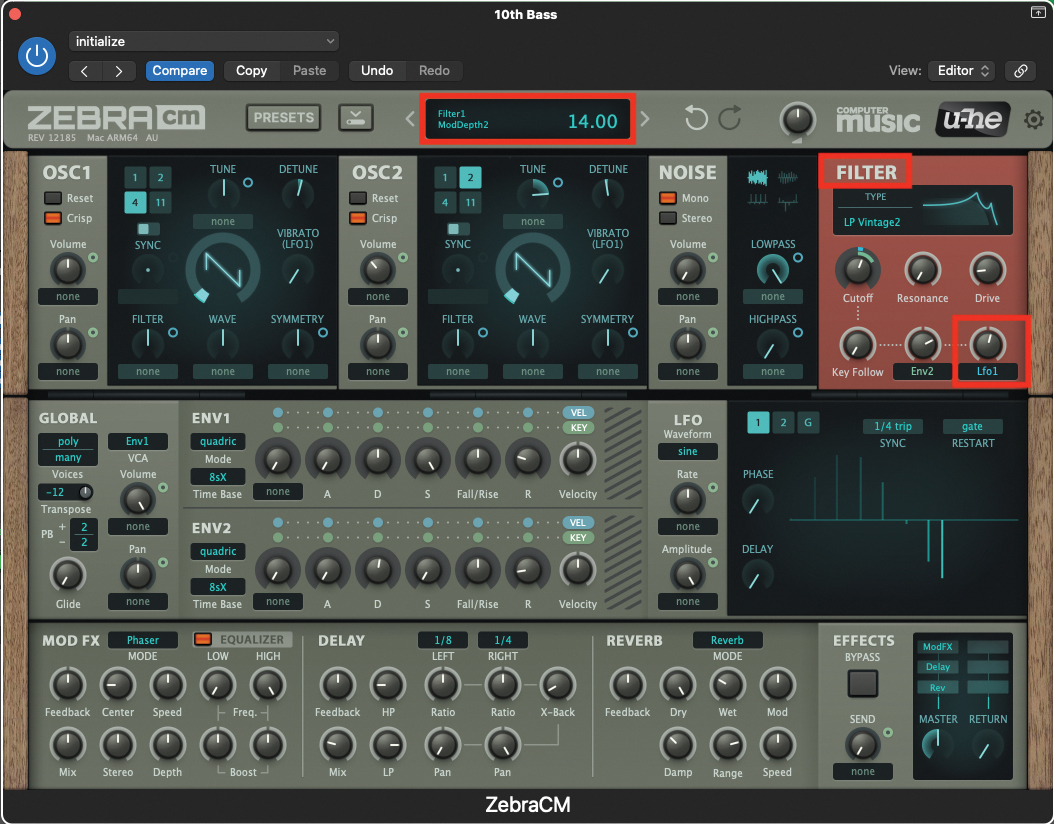
To create some movement in our patch, we’re going to induce some LFO-based filter modulation. Using the second of the user assignable pots, within the Filter section, set it to LFO1 using the drop-down menu located underneath the pot. Then set the pot to a value of 14. This will guide LFO in the direction of the Cutoff pot.
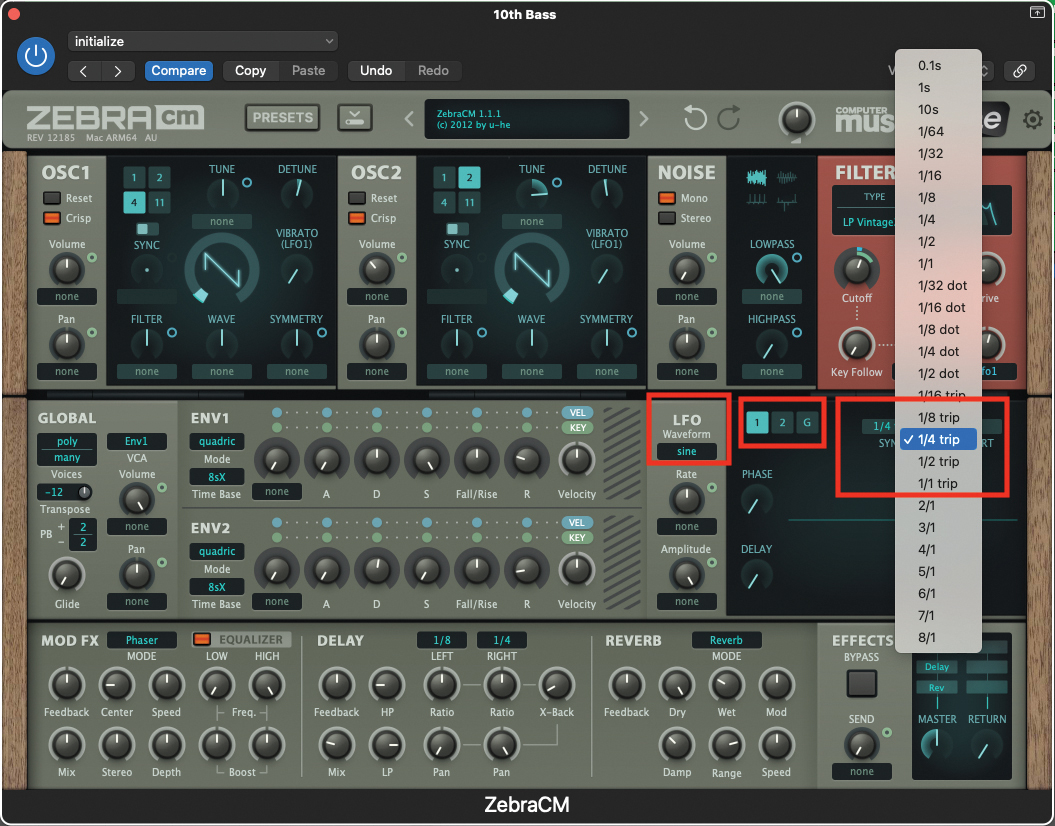
Moving to the LFO section, make sure that you have LFO1 selected, in turquoise. We will leave the waveform set to its default of a Sine wave. Move to the Sync selection box, and select a value of 1/4 trip. This will then synchronise to 1/4 note triplets, with the speed of our DAW.
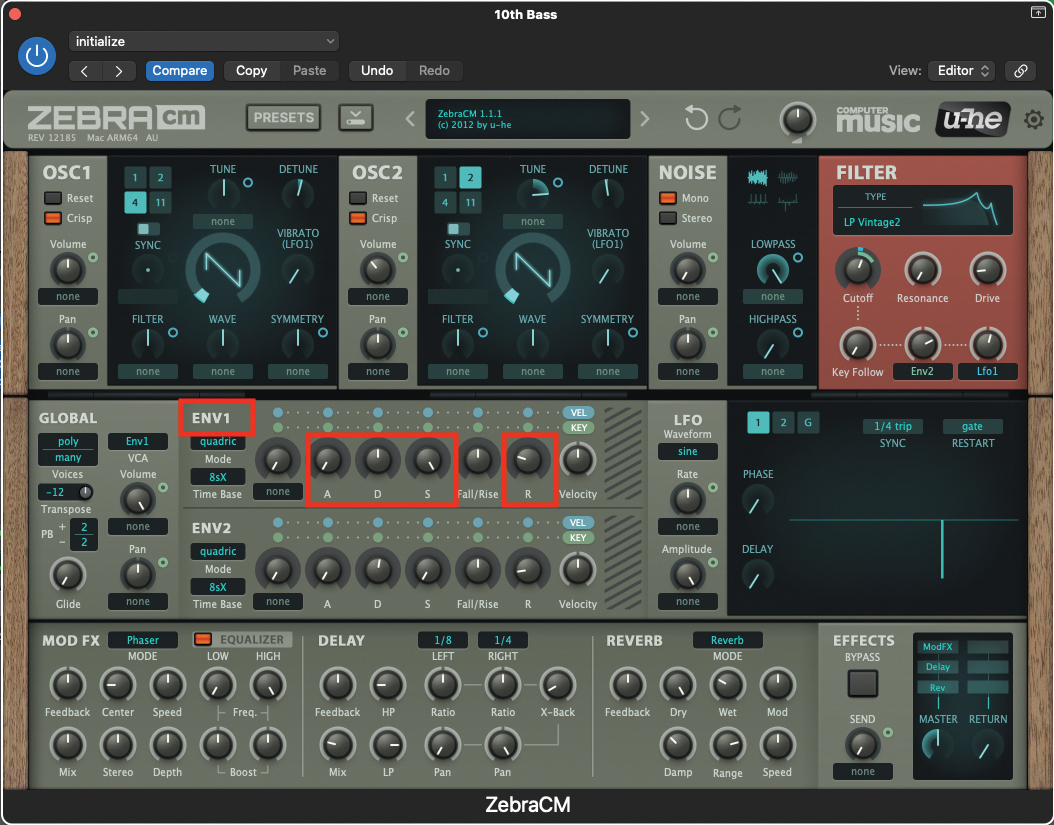
Finally, we need to adjust our two envelopes. Beginning with ENV1, which controls the amplitude or volume of our sound, set the Attack pot to a value of 0, Decay to a value of 50, the Sustain to 100, and the Release to 26. This will provide harsh attack and full sustain for our sound.
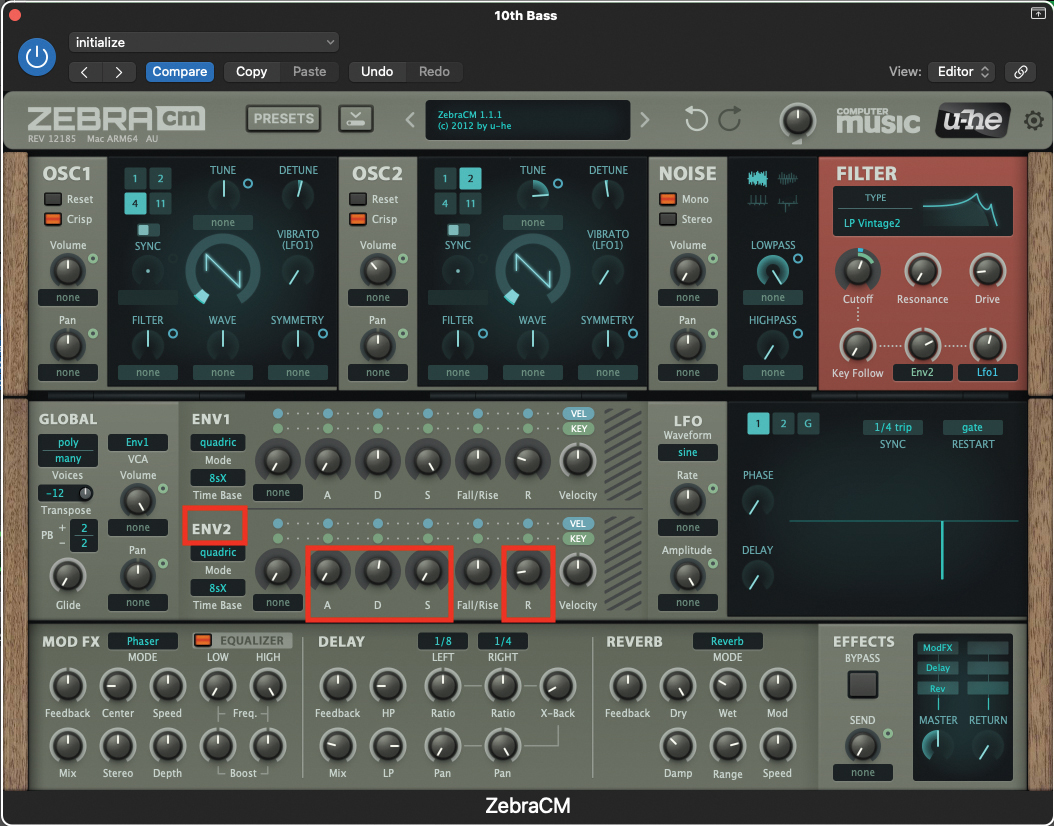
Now, move down to ENV2, which is heading in the direction of the filter cutoff; set the Attack pot to a value of 0, Decay to a value of 53, the Sustain to 0, and finally the Release to 17. Our patch is now complete, but it might be wise to add some compression within your DAW, to solidify that bottom end.
Pro tip
Without wishing to state the obvious, the more notes you have in a chord, and the thicker the sonic texture that a synth creates, the more space it will occupy in your mix. It’s relatively inconceivable that one sound can do all the heavy lifting in an electronic track. It’s a different prospect for acoustic instrumentation, the piano and guitar being good examples where they can orchestrate within a solo performance.
It could be worth exploring the idea of placing a further bass sound underneath our patch to provide a very solid low-end foundation for our track
The patch that we’ve created here does go quite a way to fulfilling the criteria of a bass sound, with harmony above. However, once you place it in your track, you’ll inevitably want to EQ the bottom end, to sit with your kick drum. You’ll be able to remove a considerable amount of harmonic content from this sound, and it will still sound very effective.
As a consequence, it could be worth exploring the idea of placing a further bass sound underneath our patch, such as something which is very heavily filtered, so it acts as a sub-bass, to provide a very solid low-end foundation for our track. It will also be worth considering the rhythmic relationship between our sound, and the kick drum. Placed in the right rhythmic construct, this should be a formidable pairing!
Recommended listening
1. Hot Chip - Huarache Lights
As the track that provided the inspiration for our patch, you can hear the distinctive Minimoog 10th sound running throughout the entire song.
2. Heaven 17 - We Live So Fast
As a differing example, Heaven 17 used a more percussive and lighter 10th patch to run through their song, starting from the second verse on.
Roland Schmidt is a professional programmer, sound designer and producer, who has worked in collaboration with a number of successful production teams over the last 25 years. He can also be found delivering regular and key-note lectures on the use of hardware/software synthesisers and production, at various higher educational institutions throughout the UK
