28 Ableton Live tricks you didn't know


2009 has been another immense year for Ableton. It released Live 8, endorsed its first hardware controllers (Akai's APC40 and Novation's Launchpad) and celebrated its tenth anniversary. More recently, it's conspired with Cycling '74 to release Max for Live.
It's Live itself, though, that still commands most attention, with version 8 bringing a new groove engine, enhanced warping, improved MIDI features, a better workflow and more. It's been available for more than six months now, but we reckon there are still some things you don't know about it. 28 of them, in fact…
• For many more Ableton Live guides go to our massive learning hub: Learn Ableton Live and Ableton Push: music production tips and tutorials
1. Easy automation
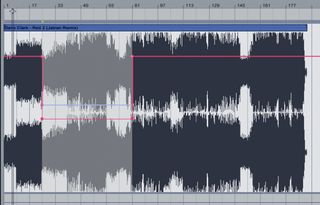
One of the easiest ways to add automation to one small section of a track is to highlight the section to be altered, then grab the automation line and move it. Live will then create two breakpoints in the automation. This is also an easy way to create breakpoints on strict timing points, simply by zooming to the correct grid size.
2. Lock Envelopes
It's very easy to overlook, but if you right-click in an automation lane and select Lock Envelopes, you can move clips (or sections of clips) around the arrangement without it altering the automation. This can be particularly handy when you are creating edits in the tracks of a DJ mix.
3. Freehand drawing
When using the Pencil Tool to draw in automation envelopes in Live, it will snap to the grid values by default. However, holding down Alt as you draw will disable the grid, allowing entirely freehand envelope drawing.
4. Breakpoint overwriting
It's a very simple trick, but when you are dragging automation and you hit a breakpoint, hold down Shift to overwrite the point and carry on past it. Unlike with some programs, however, you will need to Undo the move to get the previous point back.
Get the MusicRadar Newsletter
Want all the hottest music and gear news, reviews, deals, features and more, direct to your inbox? Sign up here.
5. Custom metronome
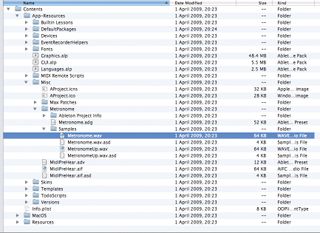
Tired of your metronome? To create a new one, search for metronomeup.wav and metronome.wav on PC, or follow the path Applications/Live 8.X.X OS X/Live/package contents/Contents/App Resources/Misc/ Metronome/Samples if you're using a Mac. Then replace the files with your own. Give them the same names, though.
6. Fast looping
Ever wanted to emulate those DJs who like to play with CDJ looping to get a fast-looping, digital effect? You can achieve something similar in Live by setting the Loop length to 0 0 1 and using the -2 Warp BPM function in the clip - or even scroll the tempo down manually, and back up again.
7. Loop for playback
Whether you're working on the entire arrangement or a section of MIDI, you can easily loop a section for playback. Just select the section to be looped and then press Ctrl/Cmd+L. This will set the loop markers around the selected section and engage the loop function.
8. Quick browsing
Make browsing devices and instruments a whole lot easier by scrolling through them using the Left and Right cursor keys. You can then get a better overview by shrinking or expanding the individual devices in the rack using the + and - keys. On some keyboards you will need to hold down Shift to access the + symbol.
9. Live activation
If you have a Live set with multiple scenes working their way through different tempos and time signatures, you can trigger these changes live with one click simply by inserting the time signature and the tempo (followed by 'BPM') into the name of the scene in question.
10. Auto-hide plug-ins
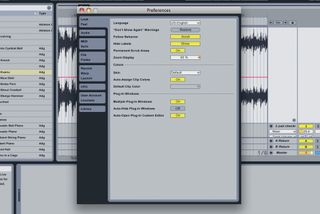
One of the most common complaints people have about Live is that when you change the active channel, any open plug-in GUIs vanish - but it doesn't have to be this way! To prevent this from happening, simply go to Preferences»Look Feel and disable Auto-Hide Plug-In Windows.
11. Unlinking
Many people like to start arranging in the Session view, or prefer to work with longer loops than the original clip might allow. To do this, just open the Envelope view and click Linked to change it to Unlinked. You can now create a clip that plays back for longer than the loop itself.
12. Name game
When naming tracks or scenes, there is no need to keep hitting Ctrl/Cmd+R. Instead, hit the shortcut to go to the first name or value, then hit Tab to go to the next one. If you find you want to scroll back through to a previous name, hold down Shift and press Tab.
13. Fixed grid mode
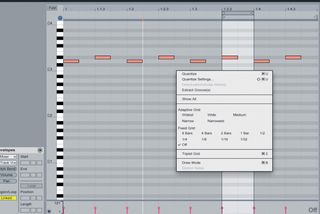
Many users find Live's arrangement habit of adding and removing grid lines as you zoom in and out to be a real pain - it's particularly problematic when creating mix albums or editing large sections of data. To avoid this, select Fixed Grid mode from the View menu.
14. Copying sections
You can create copies of a highlighted section in the Arrange view by pressing Cmd/ Ctrl+D. And if you want to include space in them (say, a one-bar clip followed by a bar of silence), highlight the clip and the space you want after it, then copy them both using the key command.
15. Disable quantise grid
Whether you are editing the arrangement or an individual MIDI clip, sometimes you just don't want things to snap to the grid. Unfortunately, even people who know they have the option can often forget to disable the quantise grid. Switch the grid off and on with Cmd/Ctrl+4.
16. Word perfect
When switching between the different types of clip editing view (Envelopes, Notes), you probably click the little tabs in the bottom left of the Track View screen. You needn't do so - click on the word heading of the two sets of controls instead.
17. Monitor mode
Users who want to make music on the move will be happy to know that you can use the piano roll keyboard in Live to enter notes when you don't have a MIDI keyboard attached. To make use of this function, press the cunningly disguised monitor mode (it's the small button with a picture of headphones that goes blue when pressed).
18. Adjusting channel width
If you want to adjust the width of a number of specific channels at once, highlight multiple channels before adjusting the width and they will all change together. Or, if you want to adjust all of the channels at once (including the master channel), hold down Alt while resizing one of them.
19. Multiple parameter selection
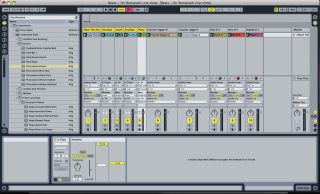
In Live 8, you can adjust multiple parameters at once, so if you want to, for example, lower the levels of every channel simultaneously before resetting them, just highlight all the channels and pull the level down on one. You'll find this works for most other channel parameters too.
20. Exclusive override
Live's default setting only lets you solo and record-activate one track at a time, but there is a setting in the Preferences to disable this. Under Record, disable the Exclusive setting for Arm and Solo. Alternatively, Cmd/Ctrl+click at any point to override this mode setting in Preferences.
21. Fine control
If you want to have fine control over a parameter - say, the volume fader - simply hold down Ctrl/Cmd while dragging the slider. The same method works for things like Pan and Sends too.
22. Grouping instruments
If you find yourself using the same collection of instruments in multiple projects, group the instruments together and save them as their own file. Then, whenever you begin a new project, you can drag and drop the file into your new project and all the channels and settings will be imported.
23. Multiple track rendering
Many people don't realise that you can render multiple tracks at once. When you have selected Export Audio, change the Master setting to All Tracks (you can also select individual channels). This is especially useful when moving to another sequencer or creating remix stems.
24. Caps Lock
One of the most handy features in Live is the ability to map QWERTY keys to functions, but few realise that you can double the number of available letter keys by engaging Caps Lock, as Live recognises capitals and lower case letters as separate keys. You can even attach another keyboard in order to access both simultaneously.
25. Plug list
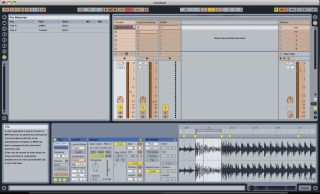
If you are working with a particularly large rack and don't want to keep scrolling through it to get to the plug-in you want to tweak, right-click on the Track View in the bottom left-hand corner to see a list of all of the plug-ins in the rack. Simply select one to jump right to it.
26. Full view
Quite often you'll want to get a look at your entire project in one screen, but it can be a bit awkward to keep scrolling out with the keys or the zoom bar. Instead, head to the Arrangement overview at the top of the display and double-click it - the view will zoom out to display the entire arrangement.
27. Total recall
When you are working in the Arrangement view and have to stop playback to make some edits, you can then make Live restart from the same place you left off by holding down Shift as you restart playback.
28. Cutting time
You can delete a whole section of time in the arrangement in Live. Set up markers around the time you wish to eliminate, then hit Ctrl/Cmd+Shift+Delete. Perfect for shortening your remix or track.
Liked this? Then try:
How to warp a full track in Ableton Live 8
How to make a drum 'n' bass beat in Ableton Live
How to make a 303-style acid bassline in Ableton Live
Sign up for our free weekly newsletter
The free MusicRadar newsletter serves up the week's biggest artist and product news stories alongside exclusive tuition and gear reviews. Sign up here!
Follow MusicRadar on Twitter
Get instant updates and bonus content plus chat with the team. Start here!
