
How to change the pickups on a Gibson ES-335 style guitar
So, maybe you bought yourself an Epiphone Dot. You love the guitar’s feel and it plays brilliantly for the money, but you’re considering upgrading the pickups to improve the amplified sound.
You replaced a pickup in your Mexican Strat last year, which was the first time you’ve tried any guitar mods, and it turned out well - it hasn’t stopped working yet! However, the Dot is a more intimidating beast entirely, with no easy access control plate to get at the wiring.
You’ve chosen your pickups, you have the iron hot - what do you do next?
Every month, Guitarist magazine's Q&A section answers an awful lot of these kind of questions. When it comes to the complicated task of rewiring a Gibson ES-335 style semi or hollowbody guitar, here’s an answer Guitarist made earlier, using a Korean-made Epiphone Casino.
We should probably start by pointing out that this is an immensely fiddly job which you need to chuck a good few hours at if it’s the first time you’ve done it.The easiest solution would be to just have it done professionally, but if you really want to have a go - or indeed repair your semi’s electronics without changing the pickups - here's a step-by-step guide.
Now, this isn’t the only way to do it, but it’s the approach we’d take. Most important: read this all the way through before you even think about starting. And good luck…
First up: the tools you need and the first step
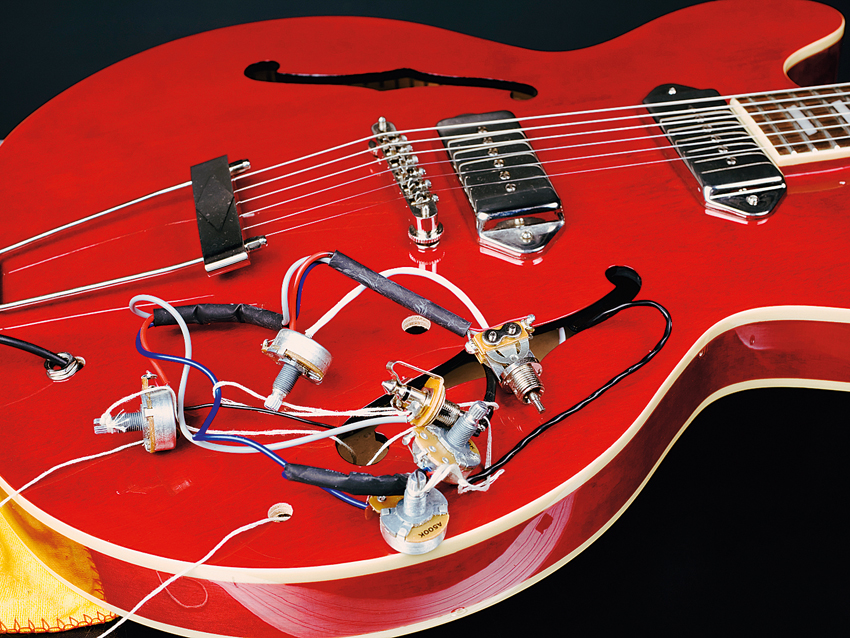
Step 1
What you need
- - Relevant screwdrivers
- - A spanner for the pots’ lock nuts
- - Soldering iron and solder
- - New pickups if you’re changing them
- - New pots, caps and wire if you’re changing them
- - Some fishing line, nylon thread or similar
- - A body-less jack lead (small enough to go through the jack socket hole in the guitar’s top)
- - Relevant wiring diagram (trySeymour Duncan's)
- - An extra pair of hands is always good
Step 1
1. Work in a clear, well-lit area. Put something soft under the guitar body and support the neck so there’s not undue pressure on either neck or headstock. The four pots, switch and jack are all wired together beneath the top, with the pickups attached to the neck and bridge volume controls respectively.
So to rewire the lot, it all has to come out through the lower F-hole, one component by one.
NOTE: If you’re only changing the pickups - not all the wiring - only the two volume pots need to come out!
Next: step 2
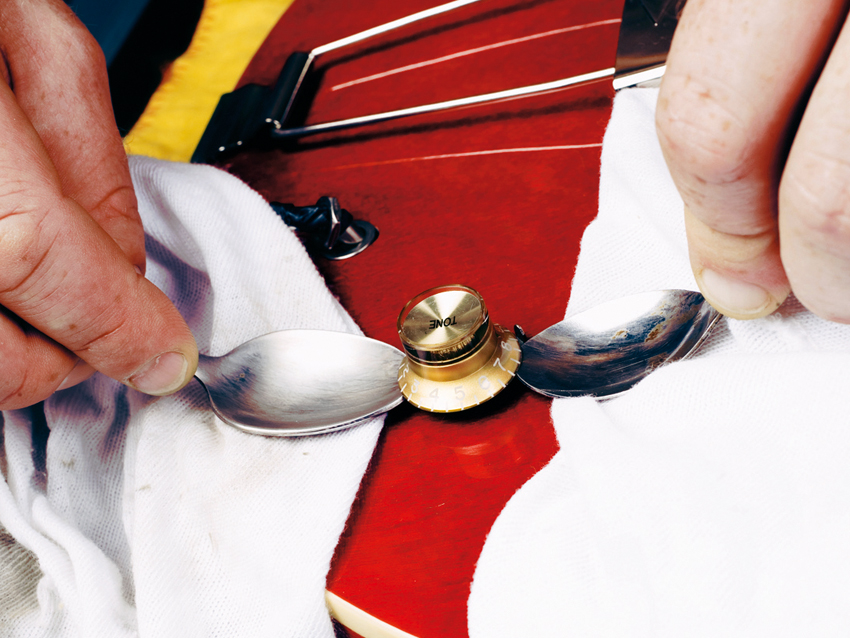
Step 2
2. Remove the relevant control knobs and the selector switch tip if that’s coming out. We favour the fabled ‘two teaspoons’ method for the knobs - one on each side, protecting the guitar top with a soft cloth. Use the spoon as a lever with the bottom of its bowl as a pivot, then apply gentle pressure on both sides to ease the knob off without breaking it.
Next: step 3
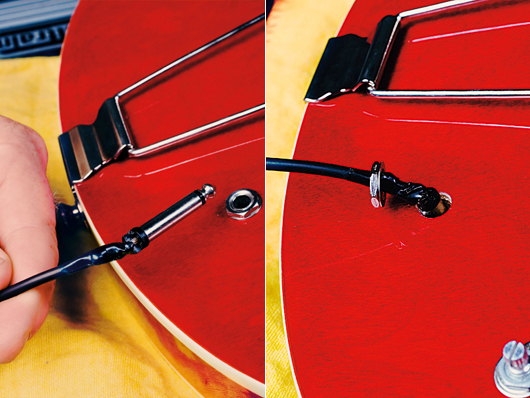
Step 3
3. If you’re taking out the whole harness, a body-less jack lead is a huge help (see left image). Undo the lock nut and let the socket and lead fall into the guitar (see right image). The jack needs to be small enough to pull the lock nut over the end of the lead once you’ve inserted it.
Next: step 4
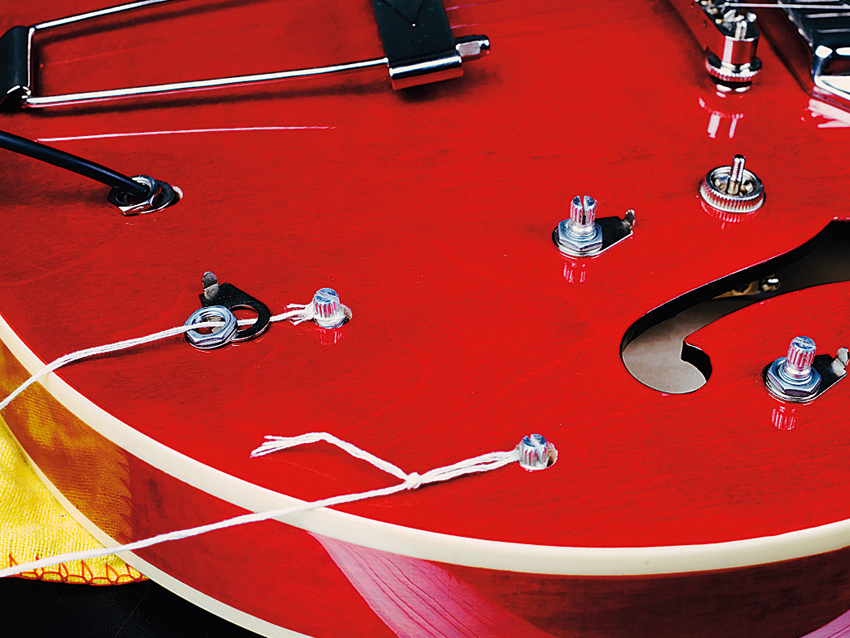
Step 4
4. Now tie a piece of fishing line or nylon thread to the shaft of any pot you can’t reach with your fingers through the f-hole. Make sure you tie the thread on to the pot well and leave plenty of slack. Likewise the switch if you’re removing it.
Next: step 5
Step 5
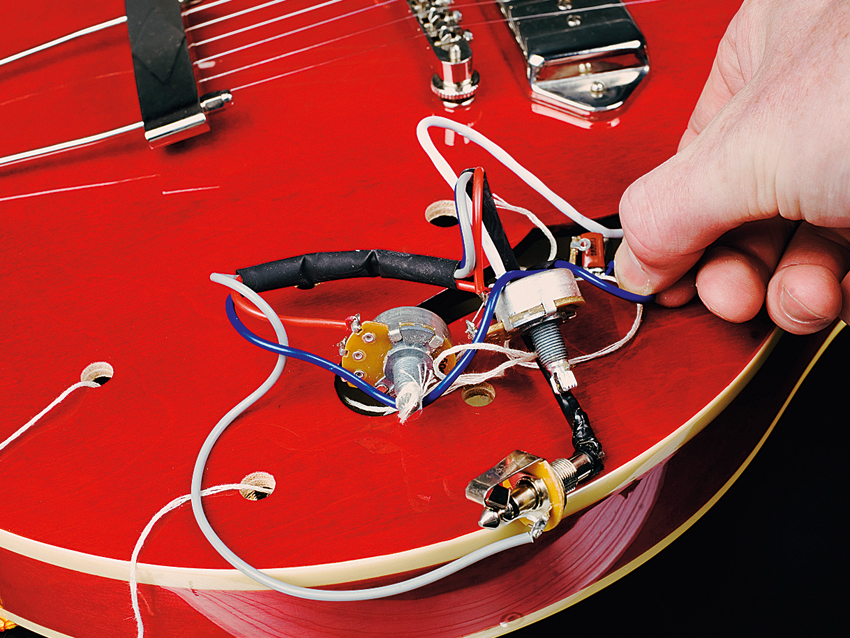
5. With everything tied on, unscrew the relevant pots, switch and jack socket as necessary (and put their lock nuts and washers somewhere safe). Gently pull the relevant components and wiring out through the f-hole - one piece at a time. You might want to put something soft on the top of the guitar, to prevent scratches as you pull it all out.
Make sure your thread stays through the component hole and out through the f-hole. You’re going to need this to reposition the new components once they’re wired-in.
Next: step 6
Step 6
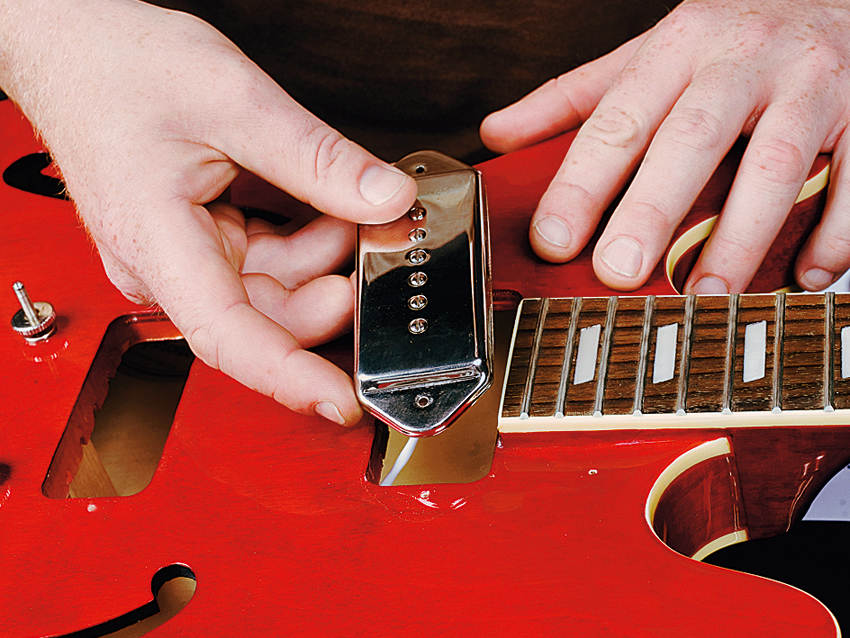
6. Unsolder the old pickups from the volume pots and remove them from the guitar. If you’re changing all the wiring, also unsolder the earth wire that comes from the bridge/tailpiece - it’s likely to be attached to one of the tone pots.
Next: step 7
Step 7
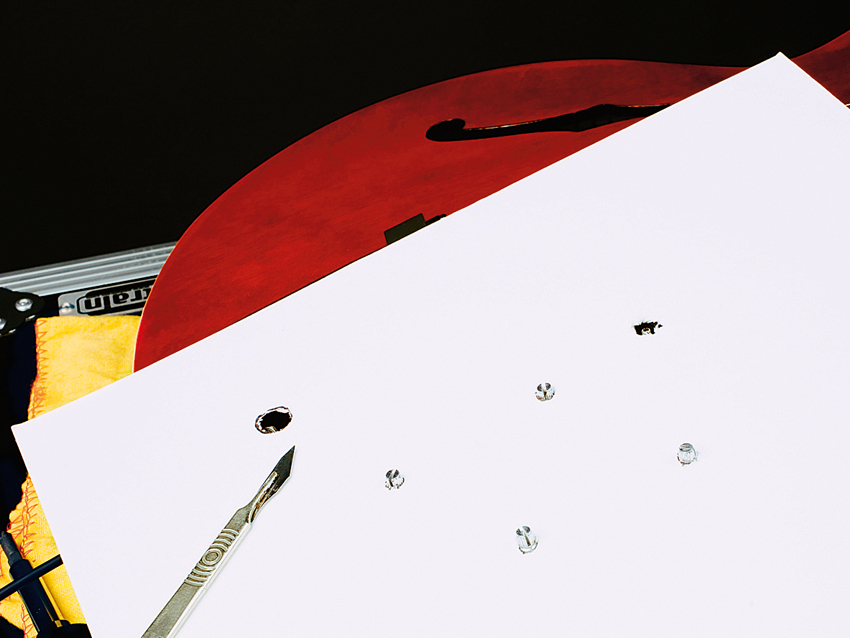
7. Leave the wiring harness together - it should now come away from the guitar completely. If you’re doing a total rewire, we’d recommend putting the removed components onto a cardboard template of the control layout.
This will enable you to measure what length wires you need for the adjoining pieces on the new harness, so that it all fits back without problems.
Next: step 8
Step 8
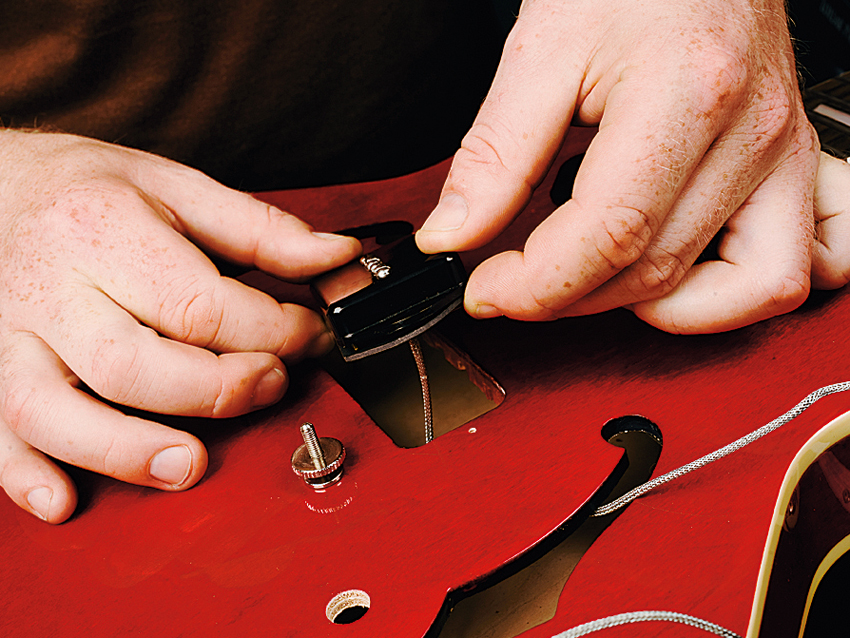
8. Screw your new pickups in place, then thread the hook-up wires down through the guitar and back out through the lower f-hole. Do this now so you don’t end up wiring the pickups outside the guitar body to the new wiring loom!
Next: step 9 and 10
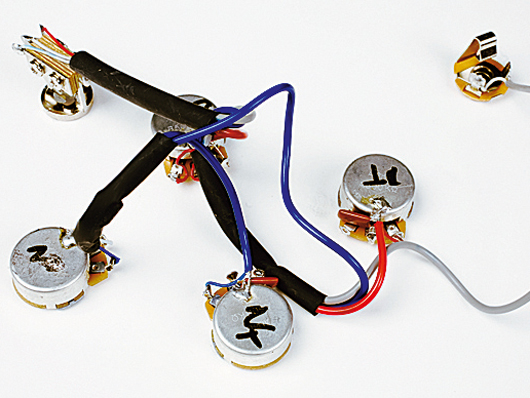
Steps 9 and 10
9. The wiring loom: if you’re using all new components, it doesn’t matter when you do this. We find that a cardboard template of the control layout helps immensely - you’re essentially seeing what the wiring looks like under the top.
So, position all the new components in the appropriate places on your template and then wire them up according to your diagram, minus the pickups at this stage.
10. Once you’re happy with the harness, remove the components from the template, and place the whole lot gently on a cloth on top of the guitar. Now you can wire the pickups on to the volume and tone pots as per your wiring diagram. Don’t forget the earth wire from the bridge/tailpiece!
Now, test everything is working by plugging in and tapping the pickups, manipulating the pots and switches. All working? Good…
Next: step 11 and 12
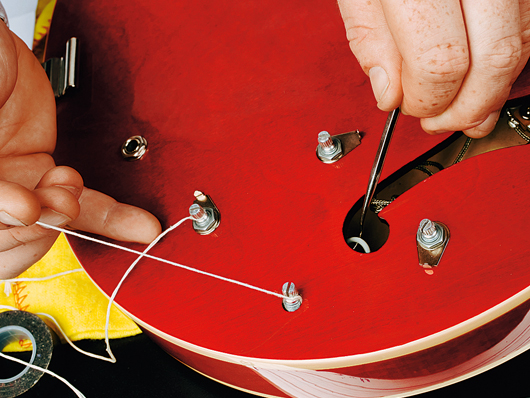
Steps 11 and 12
11. Position the components, roughly as they’re going to be inside the guitar, making sure none of the wiring is tangled or snagged. Then, attach the bits of dangling thread that are coming out through the f-holes to the relevant pot or switch and tie them on tight to enable you to pull them back into position in a minute.
But first, test everything again to be on the safe side.
12. Next we’re going to reverse the process of taking the components out. Starting with the furthest component from the f-hole when positioned, carefully put the wiring loom, one component at a time, back inside the guitar through the f-hole. Gently pull the components towards their relevant locating holes, taking care not to stress any wires.
Then ease the components into position in the guitar and reattach their washers and lock nuts - finger tight at this stage is fine. A hook or a bit of bendy coat hanger can be a big help, as can an extra pair of hands!
Next: step 13, 14 and 15
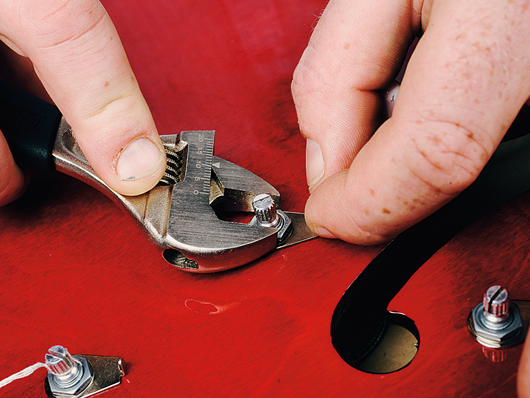
Steps 13, 14 and 15
13. The controls near the f-hole can be relocated using your fingers, as can the switch, depending on its position, of course. With the switch, you need to make sure its orientation is correct before you secure it. Down for the bridge pickup, for example, if that’s your preference (some weirdos like bridge to be up, apparently).
14. All in? Have a cup of tea and enter a calm, pragmatic state of mind. Once you’re there, and not before, it’s time for the final test. Now, if it doesn’t work at this stage, you’ll be pleased you had that cup of tea because it all has to come out again so you can find the problem.
15. With everything tested and working properly, only now should you tighten everything back up, taking care not to twist the pots underneath the guitar as you tighten.
Next: step 16 and the final verdict

Step 16 and the final verdict
16. Simply put your control knobs and switch tip back on the guitar, restring it, and wail!...
Guitarist’s verdict
"To illustrate this Q&A request, we chose to fit Jason Lollar Standard Dog Ear Style P-90s for Casino (£140 for the pair) to a Korean-made Epiphone Casino.
"Why Lollars? Like many pickup choices, it was word-of-mouth recommendation, in this case from members of the Guitarist team who have used Lollars in Teles, SGs and Collings guitars.
"Compared with the standard-issue pickups, they’re more dynamic and just better all over. There was something hard-edged and unresponsive about the guitar before, which meant using the bridge required a dive for the tone pot to reduce the treble.
"With these, the neck sounds classic, open and throaty when driving the amp, the treble seems only slightly louder on single notes - the perfect balance - and usable all the way through the volume and tonal range.
"Blending the two together (and bucking the P-90 hum) opens up an array of different but still rounded, instantly pleasing tones. From reined jazziness to rough-arsed Chuck Berry, to soaring BB, and even for lighter rock, it’s all in there - head and shoulders better."
Next: should I replace my pots and caps?
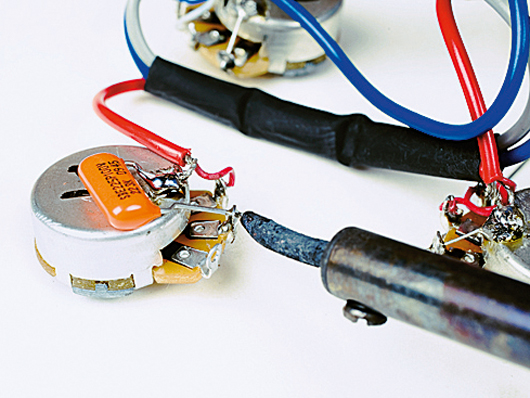
Should I replace my pots and caps?
If you’re putting high-end pickups in a low- to mid-price guitar, we’d also recommend upgrading the pots and tone capacitors. But proceed with caution…
For example, you might want to upgrade your Epiphone Casino with American-made 500k CTS pots. However, the threaded shaft of the US pots is too big to it the Casino’s smaller body ferrules by 0.5mm. Want to drill that guitar? Or buy pots the right size in the first place? Measure before you buy…
Pot values? Generally, humbuckers and P-90s work best with 500k pots; Fender-style singlecoils with 250k. The higher value the pot, the less treble it attenuates and the brighter the guitar sounds, particularly with the volume rolled back.
Cap values? The higher the value, the darker the tone. Our opinion is that Strats work well with 0.047uf caps (vintage spec is 0.1uF but many ind those too woolly), while vintage Les Pauls had .02uF. Experimenting on a thinline semi is a faff - try CTS 500k pots and, if you want to treat yourself, repro Sprague Bumblebee or Black Beauty .02uF caps are a fine indulgence.
For more expert maintenance advice, check out Guitarist magazine's monthly Q&A section and email your own questions to guitarist@futurenet.com
Liked this? Now read: The best electric guitars under £1000
Connect with MusicRadar: via Twitter, Facebook and YouTube
Get MusicRadar straight to your inbox: Sign up for the free weekly newsletter

Guitarist is the longest established UK guitar magazine, offering gear reviews, artist interviews, techniques lessons and loads more, in print, on tablet and on smartphones Digital: http://bit.ly/GuitaristiOS If you love guitars, you'll love Guitarist. Find us in print, on Newsstand for iPad, iPhone and other digital readers
“For players who want more – more pickups, more speed, and more in-your-face Kramer attitude”: Kramer delivers the face-melting shred candy with six refreshed electrics, complete with US-made pickups
“The perfect magnetic combination to unlock the full tonal potential of your P/J Bass”: Fender releases a Tim Shaw-designed Chrome Cobalt pickups for the P/J configured bass guitar in your life


